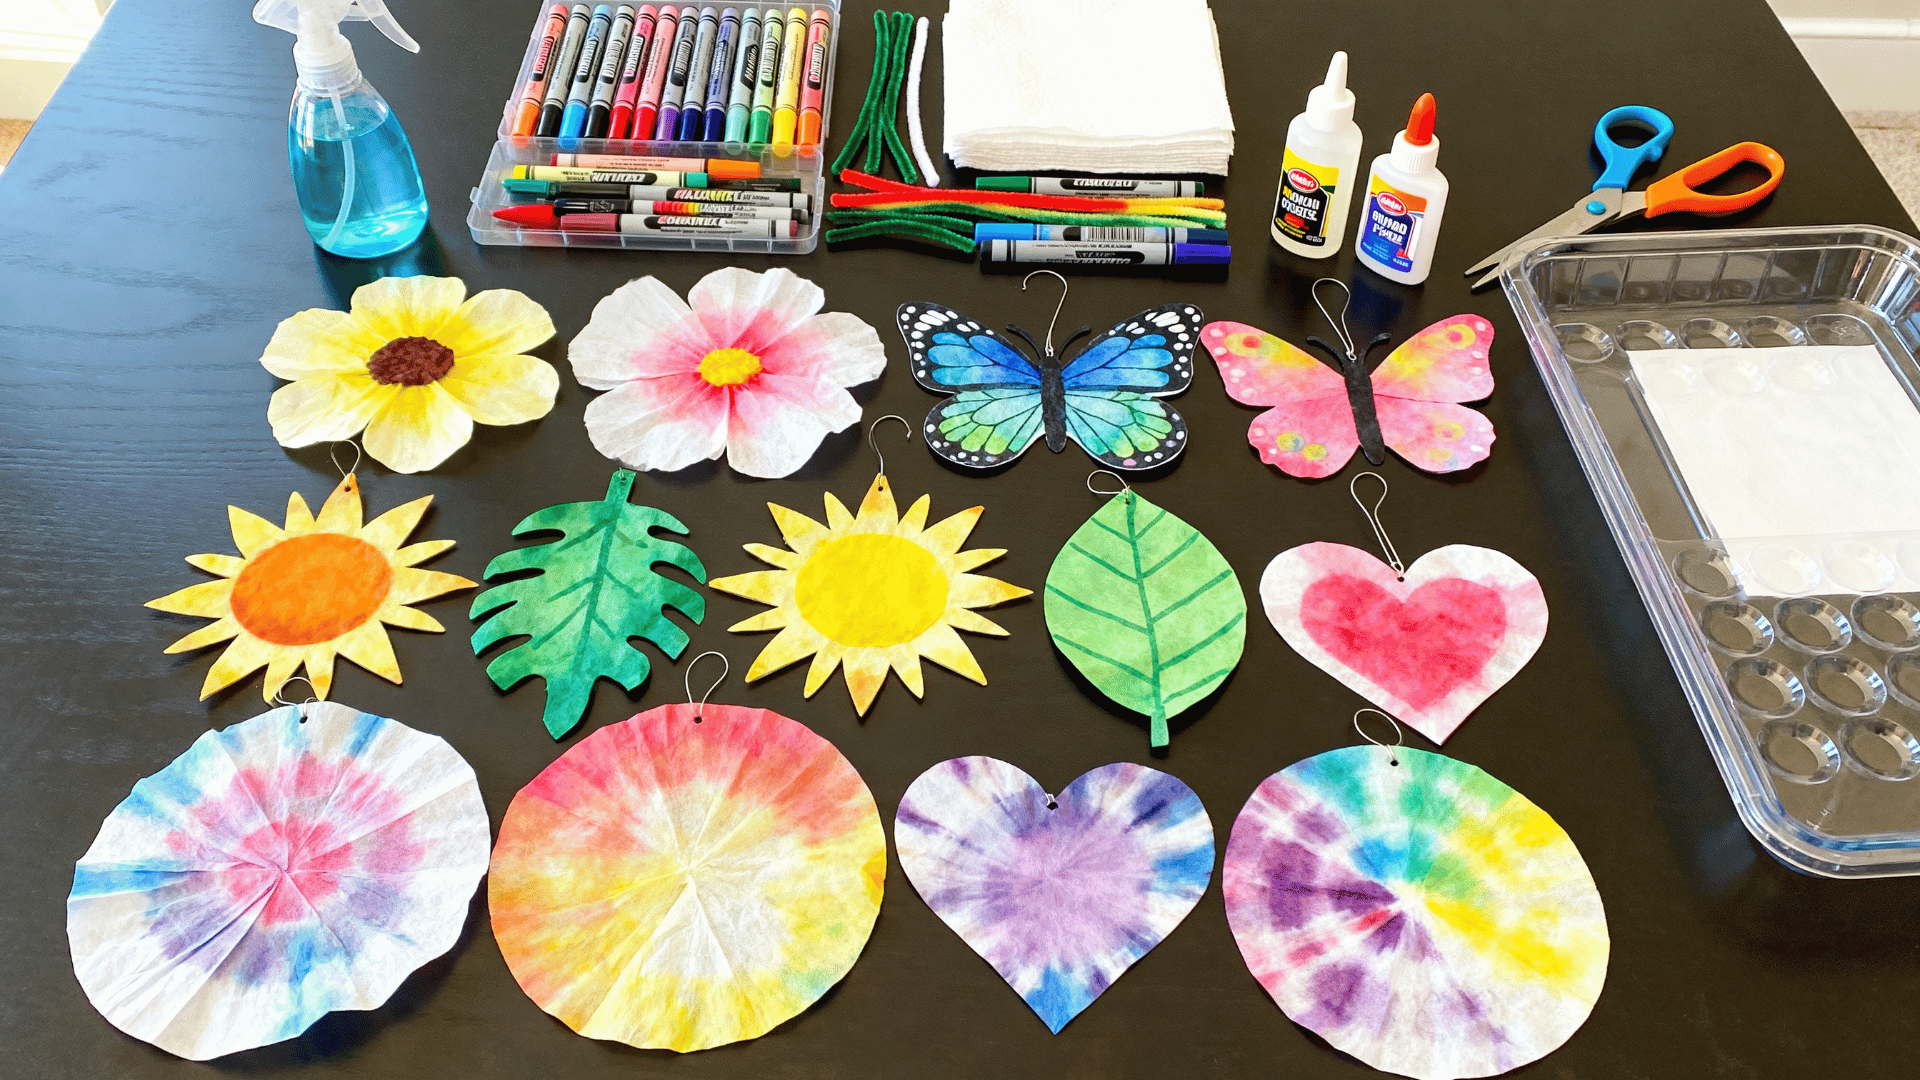
What can a plain coffee filter become with a little color and water? More than you might think.
Coffee filter art is one of those simple craft ideas that feels easy to start but still gives kids a bright, handmade result they can feel proud of.
I have always liked projects that use ordinary supplies in clever ways, and this one fits that perfectly.
It is low-cost, beginner-friendly, and easy to set up at the kitchen table, in a classroom, or during a quiet afternoon craft session without making the process feel messy or hard.
What is Coffee Filter Art?
Coffee filter art is a paper craft that uses coffee filters as the main surface for color, shape, and design. Since the paper is thin and absorbent, it reacts quickly when water comes into contact with marker ink, paint, or dye.
This art form is mostly about the movement of color. Instead of staying in one place, the color spreads through the filter, creating soft edges, blended patches, and light tie-dye patterns.
The finished filter can be kept in its round form or shaped into another craft after it dries. That makes coffee filter art easy for beginners, young kids, school activities, and low-cost creative projects.
Why It Works So Well for Kids
- Builds confidence: Coffee filter art doesn’t require perfect lines or careful drawing, so kids can enjoy the process without worrying about mistakes. Pairing coffee filters with other hands-on kids’ crafts can give children more ways to color, build, glue, and create with simple materials.
- Encourages Hands-On Learning: Kids can see how water changes the color, texture, and pattern of the filter as they work.
- Supports Fine Motor Practice: Coloring, folding, spraying, pinching, cutting, and gluing help strengthen small hand movements.
- Keeps Kids Curious: The final pattern is never fully predictable, which makes the activity feel exciting without being complicated.
- Works at Different Skill Levels: Younger kids can focus on coloring and spraying, while older kids can handle cutting, layering, and display ideas.
- Allows Creative Freedom: Kids can choose their own colors, shapes, and finishes, so every project feels personal.
- Gives Quick Results: Most projects are simple enough for a single craft session, helping kids stay interested from start to finish.
Simple Coffee Filter Art Ideas for Kids
Use these coffee filter art ideas when you need a quick craft at home, at school, for holidays, or in group activities. The list includes a mix of flat designs, shaped crafts, hanging pieces, and simple lesson-friendly projects.
1. Coffee Filter Flowers
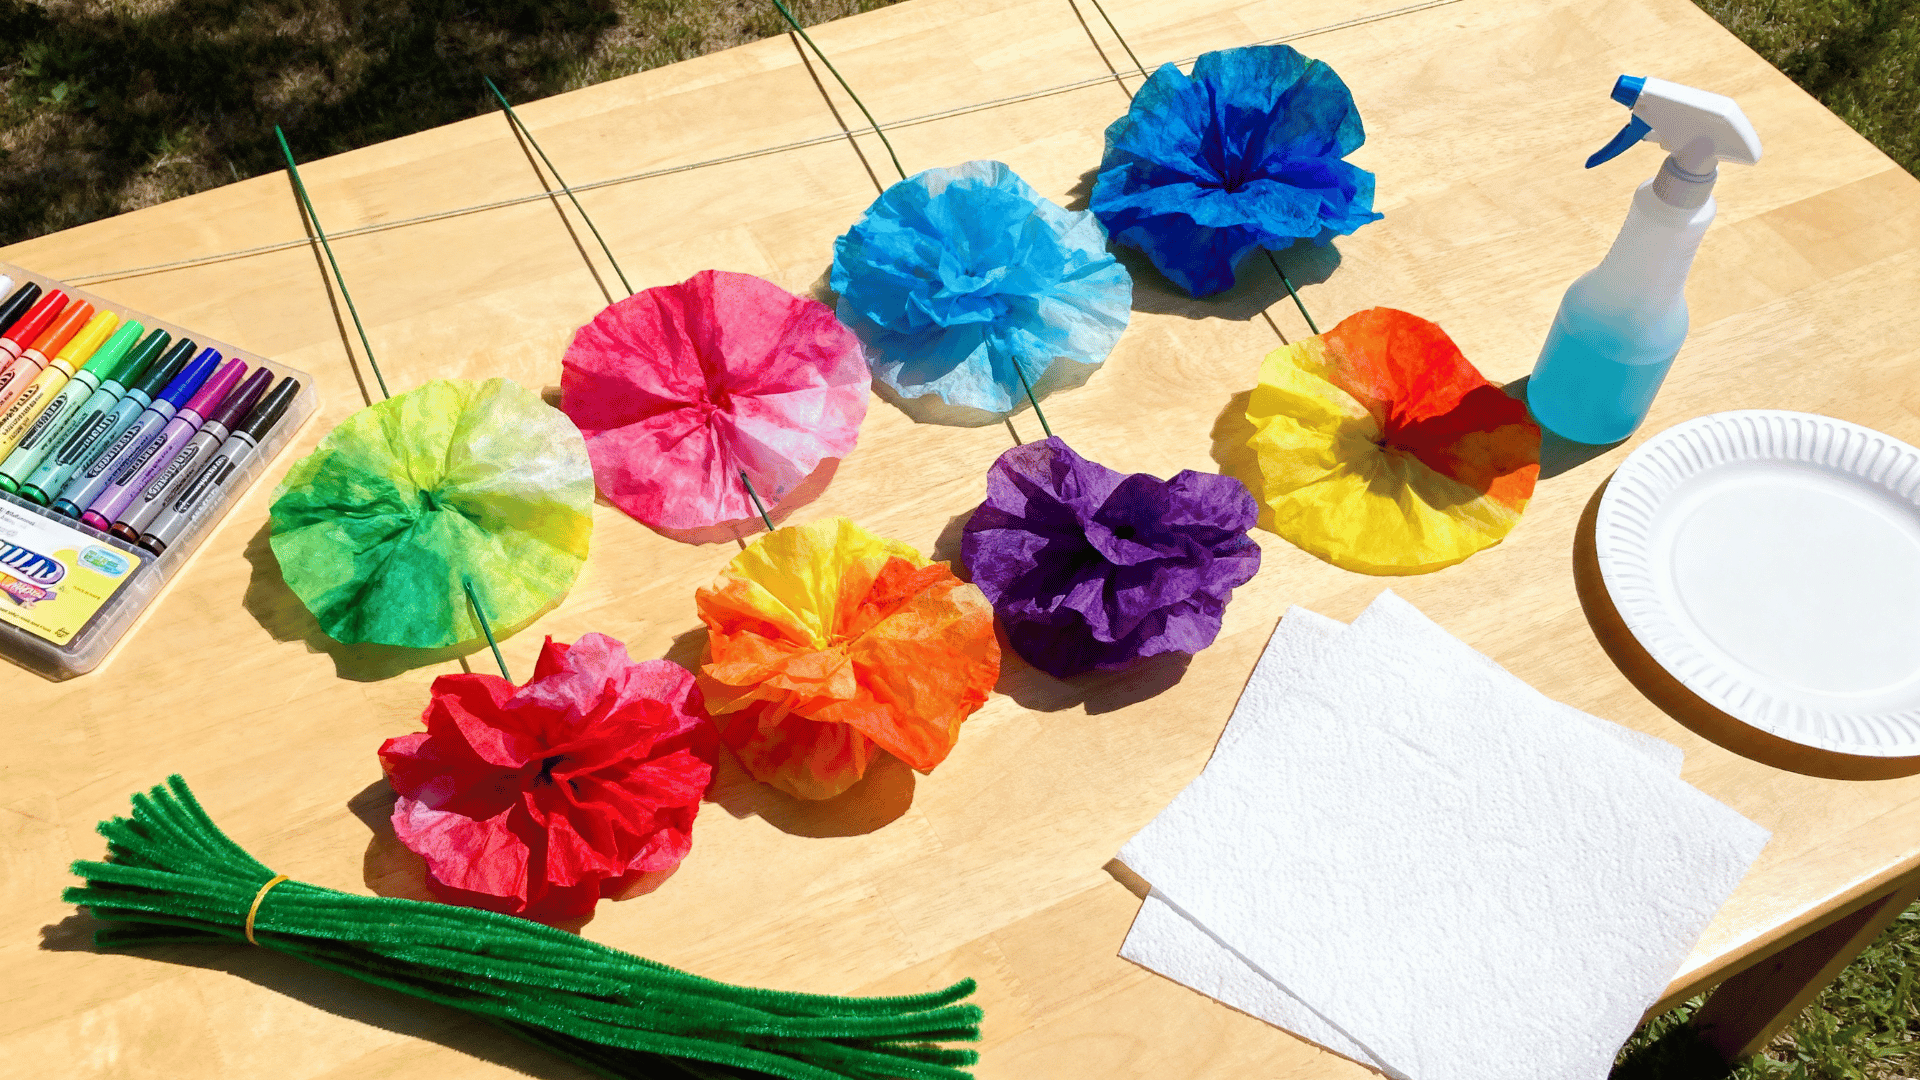
Coffee filter flowers are soft, colorful crafts that work beautifully for spring projects, handmade cards, Mother’s Day gifts, and classroom displays.
This coffee filter art idea works well for kids ages 4 and above because they can color, spray, pinch, and twist the filters into flower shapes with simple adult guidance.
Supplies Required: Coffee filters, washable markers, a spray bottle with water, pipe cleaners, paper towels, a tray or paper plate, and glue, if needed.
Steps to Follow:
- Flatten the coffee filters on a tray or paper plate.
- Color each filter with washable markers.
- Spray lightly with water, then let the filters dry on paper towels.
- Stack 2 or 3 dry filters together.
- Pinch the center from the bottom and wrap it with a pipe cleaner.
- Gently open the filters to shape the flower petals.
My Tip: Use two filters for younger kids, as the flower looks fuller yet is still easy for small hands to shape.
2. Coffee Filter Butterflies
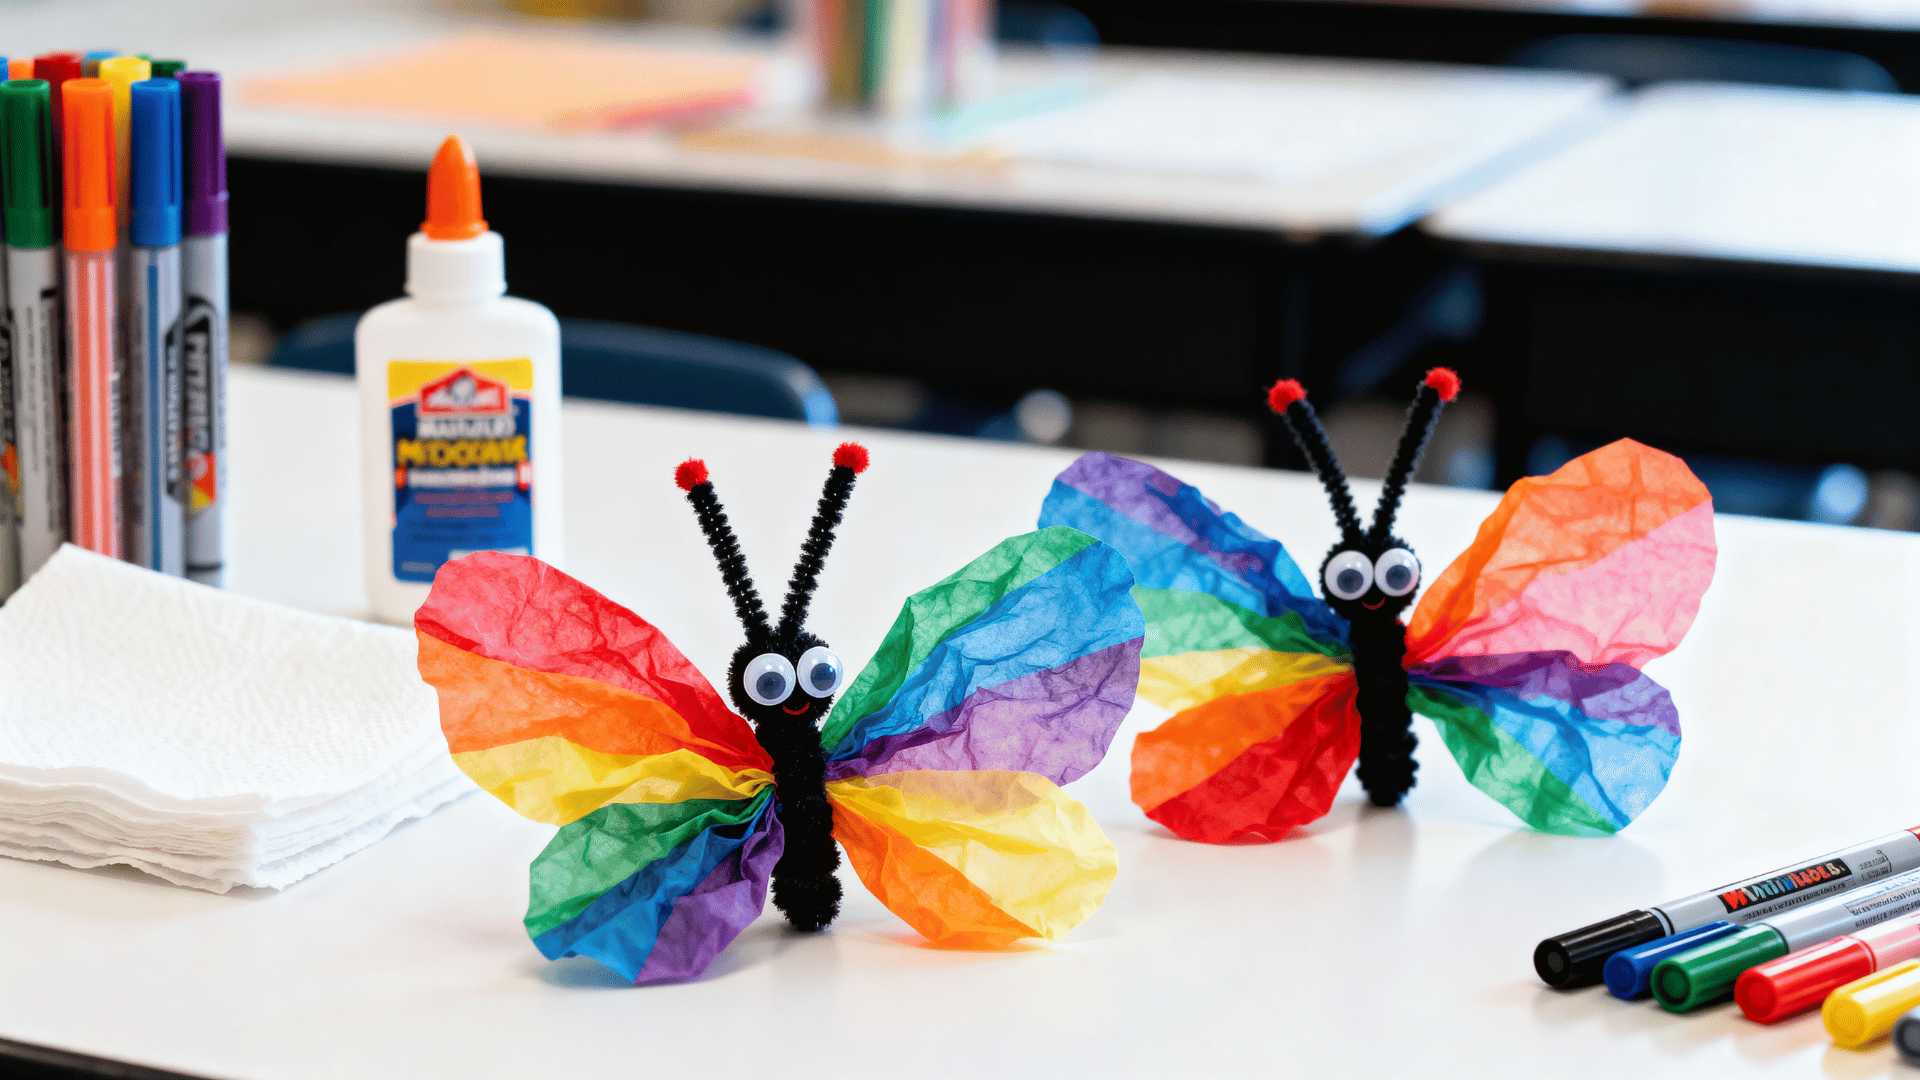
Coffee filter butterflies are cheerful crafts for spring lessons, insect units, classroom boards, or rainy-day activities.
This coffee filter art project works well for kids ages 4 and up because it combines color blending, folding, and easy pipe-cleaner shaping.
Supplies Required: Coffee filters, washable markers, spray bottle with water, pipe cleaners, googly eyes, glue, and paper towels.
Steps to Follow:
- Place one coffee filter flat on a tray.
- Color the filter with marker dots, lines, or patches.
- Spray lightly with water, then let it dry on a paper towel.
- Gather the dry filter through the middle.
- Wrap a pipe cleaner around the center to make the body.
- Twist the top ends into antennae and add googly eyes if needed.
My Tip: Let the filter dry fully before gathering the middle, or the paper may tear.
3. Coffee Filter Suncatchers
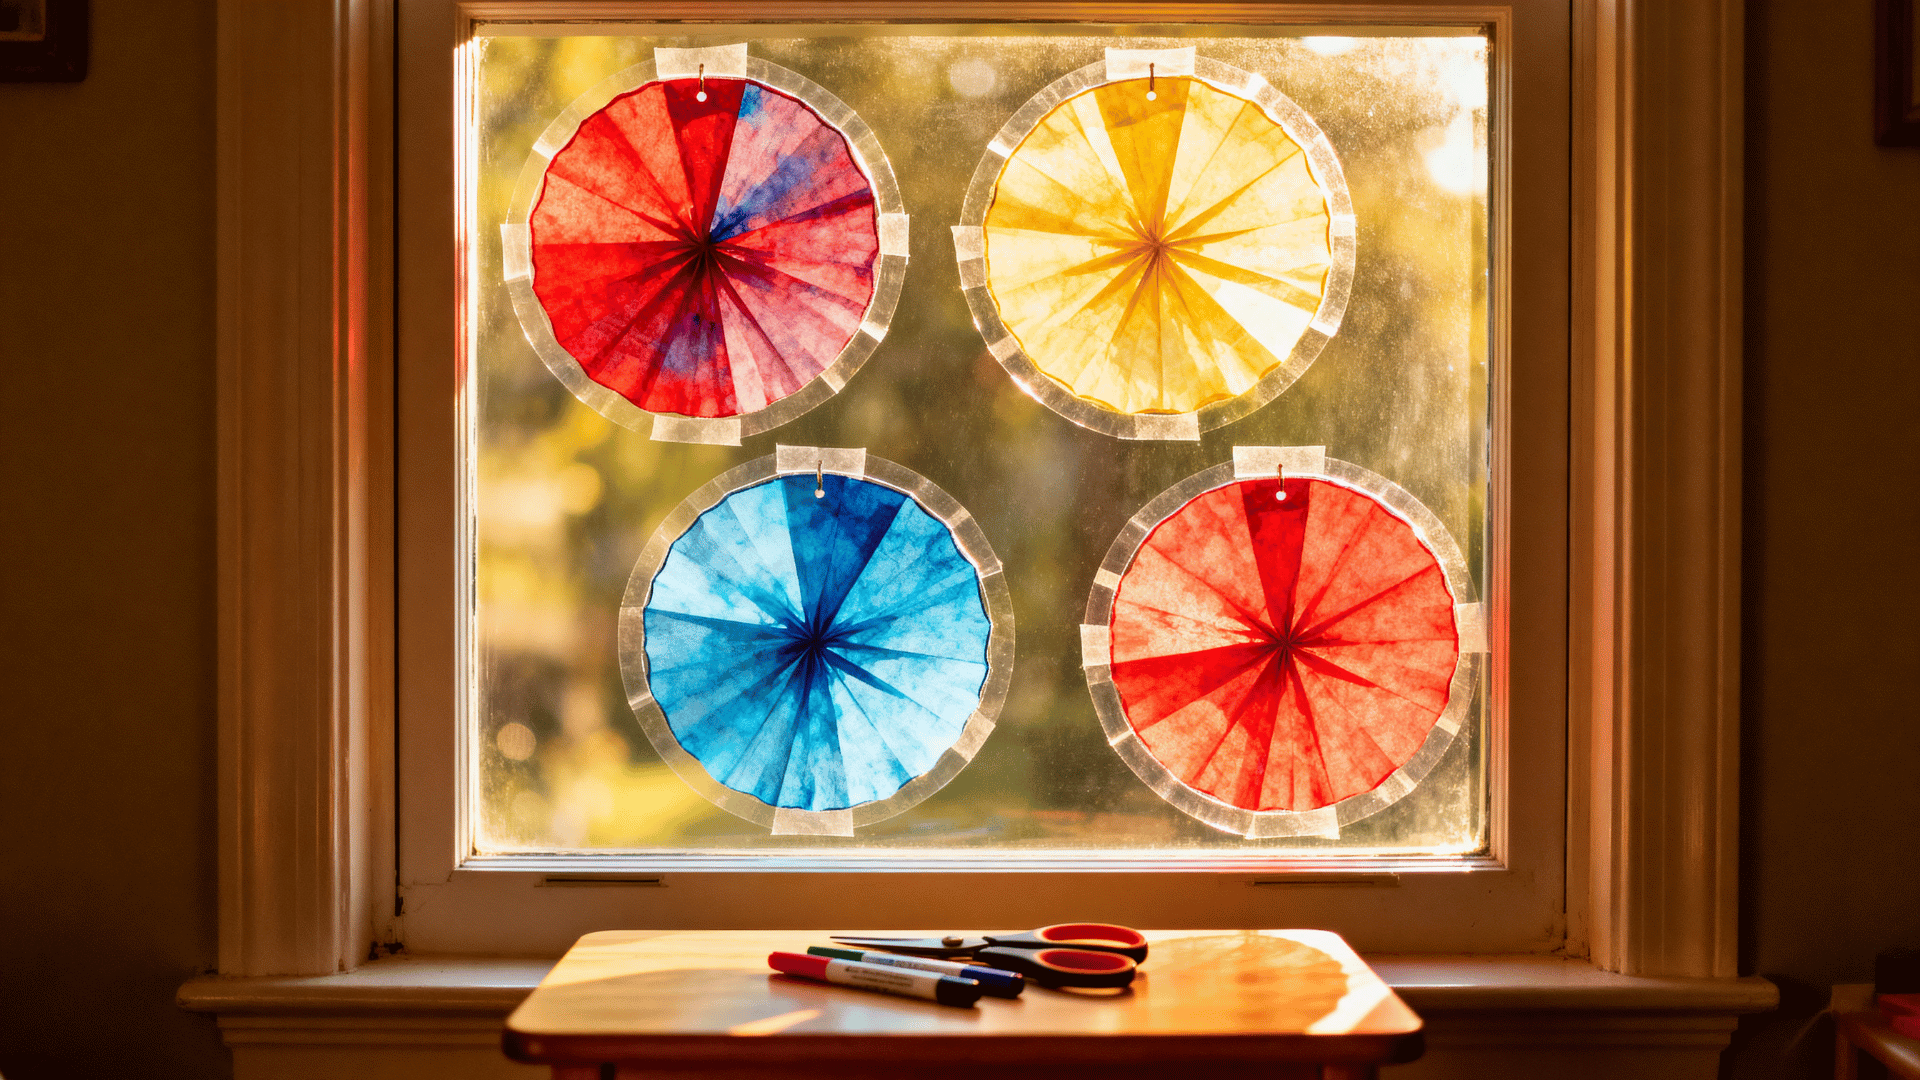
Coffee filter suncatchers are bright window crafts that let light pass through the soft color blends after the filter dries.
This coffee filter art idea works well for kids ages 5 and up, who can make simple window pieces for bedrooms, craft corners, or classroom displays.
Supplies Required: Coffee filters, washable markers or watercolor paint, spray bottle with water, clear contact paper, safety scissors, tape, and paper towels.
Steps to Follow:
- Add color to a flattened coffee filter with markers or watercolor paint.
- Spray lightly with water if using markers, then let the filter dry.
- Place the dry filter between two sheets of clear contact paper.
- Press from the center outward to smooth it.
- Trim around the edges with safety scissors.
- Tape the suncatcher to a sunny window.
My Tip: Press the contact paper slowly so the finished piece looks smooth instead of wrinkled.
4. Coffee Filter Tie-Dye Circles
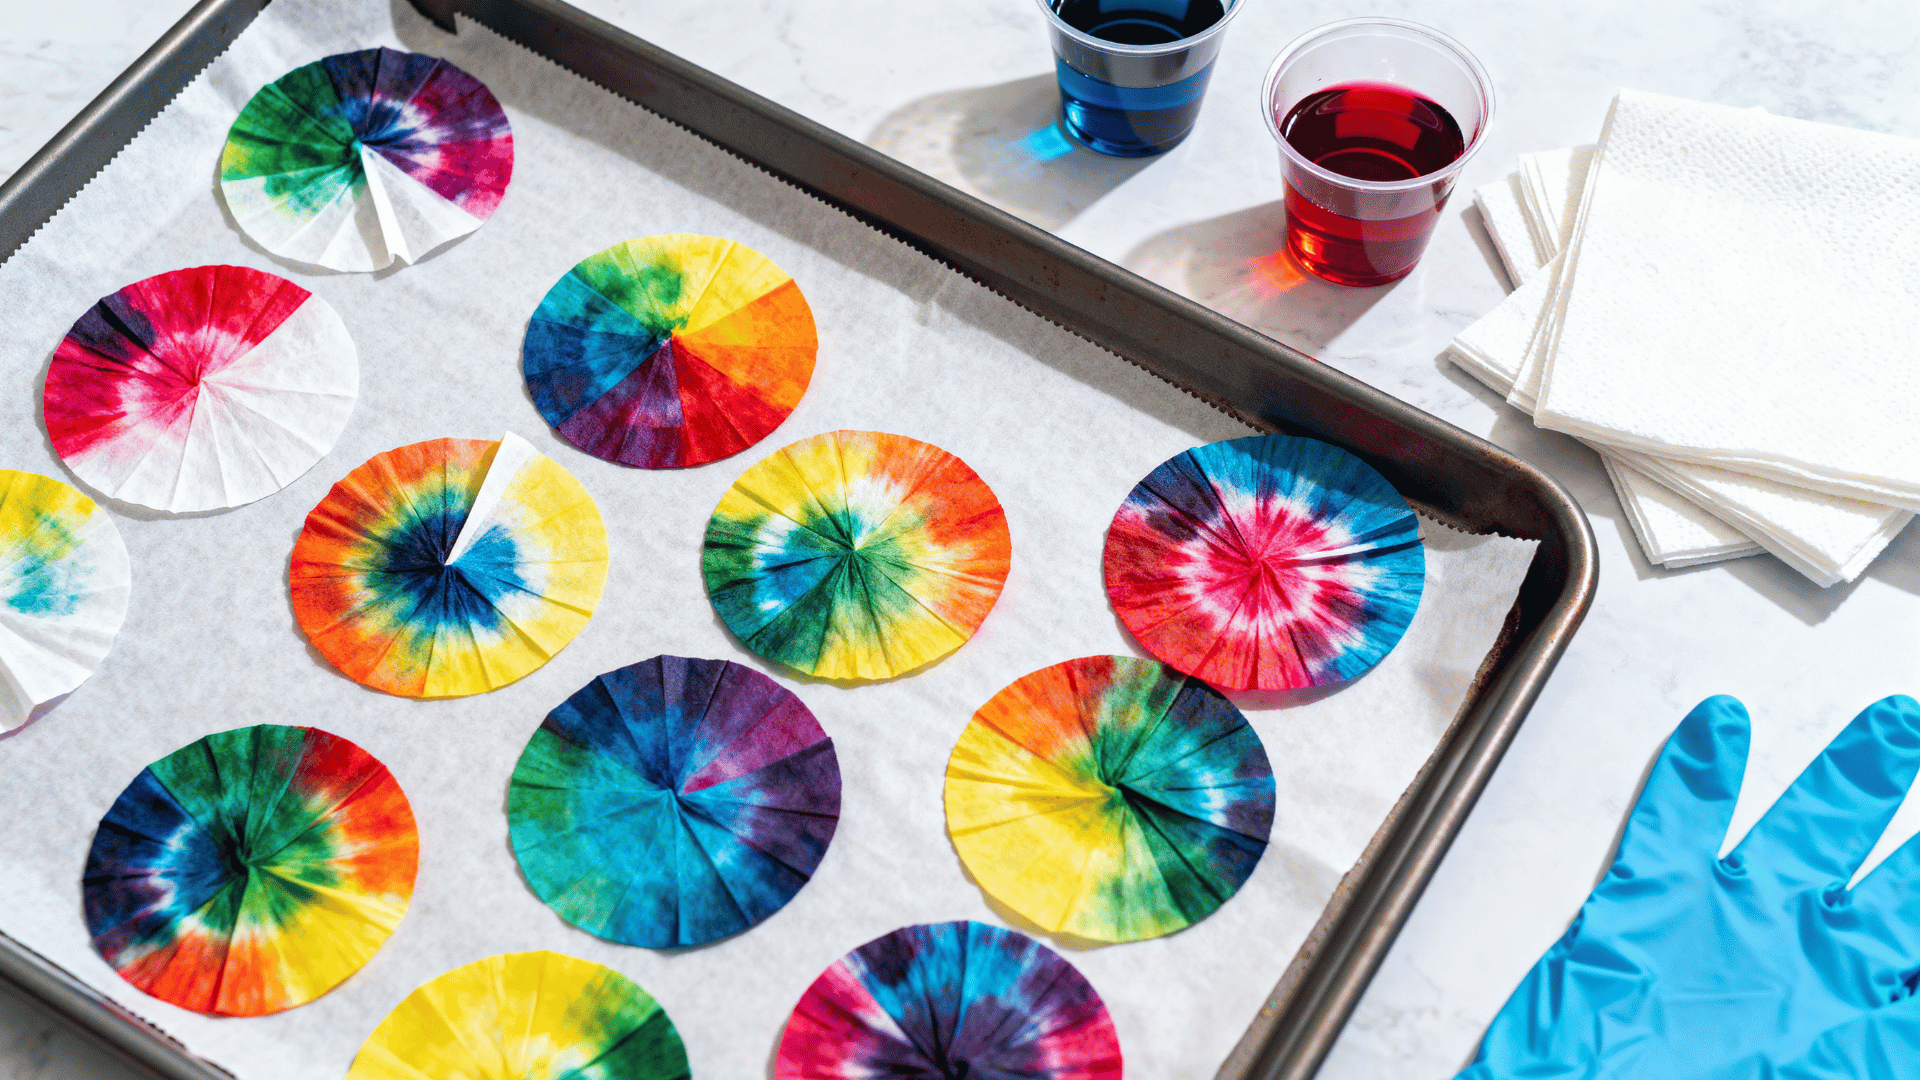
Coffee filter tie-dye circles are fun color-mixing crafts where every finished piece looks a little different.
This coffee filter art project works well for kids ages 5 and above because folding and dipping help them practice patterns, color placement, and careful handling.
Supplies Required: Coffee filters, food coloring or liquid watercolor, small cups, water, paper towels, tray, and gloves if needed.
Steps to Follow:
- Fold one coffee filter in half, then fold it again into a triangle.
- Add food coloring or liquid watercolor to small cups of water.
- Dip different corners of the folded filter into different colors.
- Press the wet filter gently on a paper towel.
- Open the filter carefully so it does not tear.
- Place it flat on a tray to dry.
My Tip: Use shallow cups for dipping so kids do not soak the whole filter too quickly.
5. Coffee Filter Snowflakes
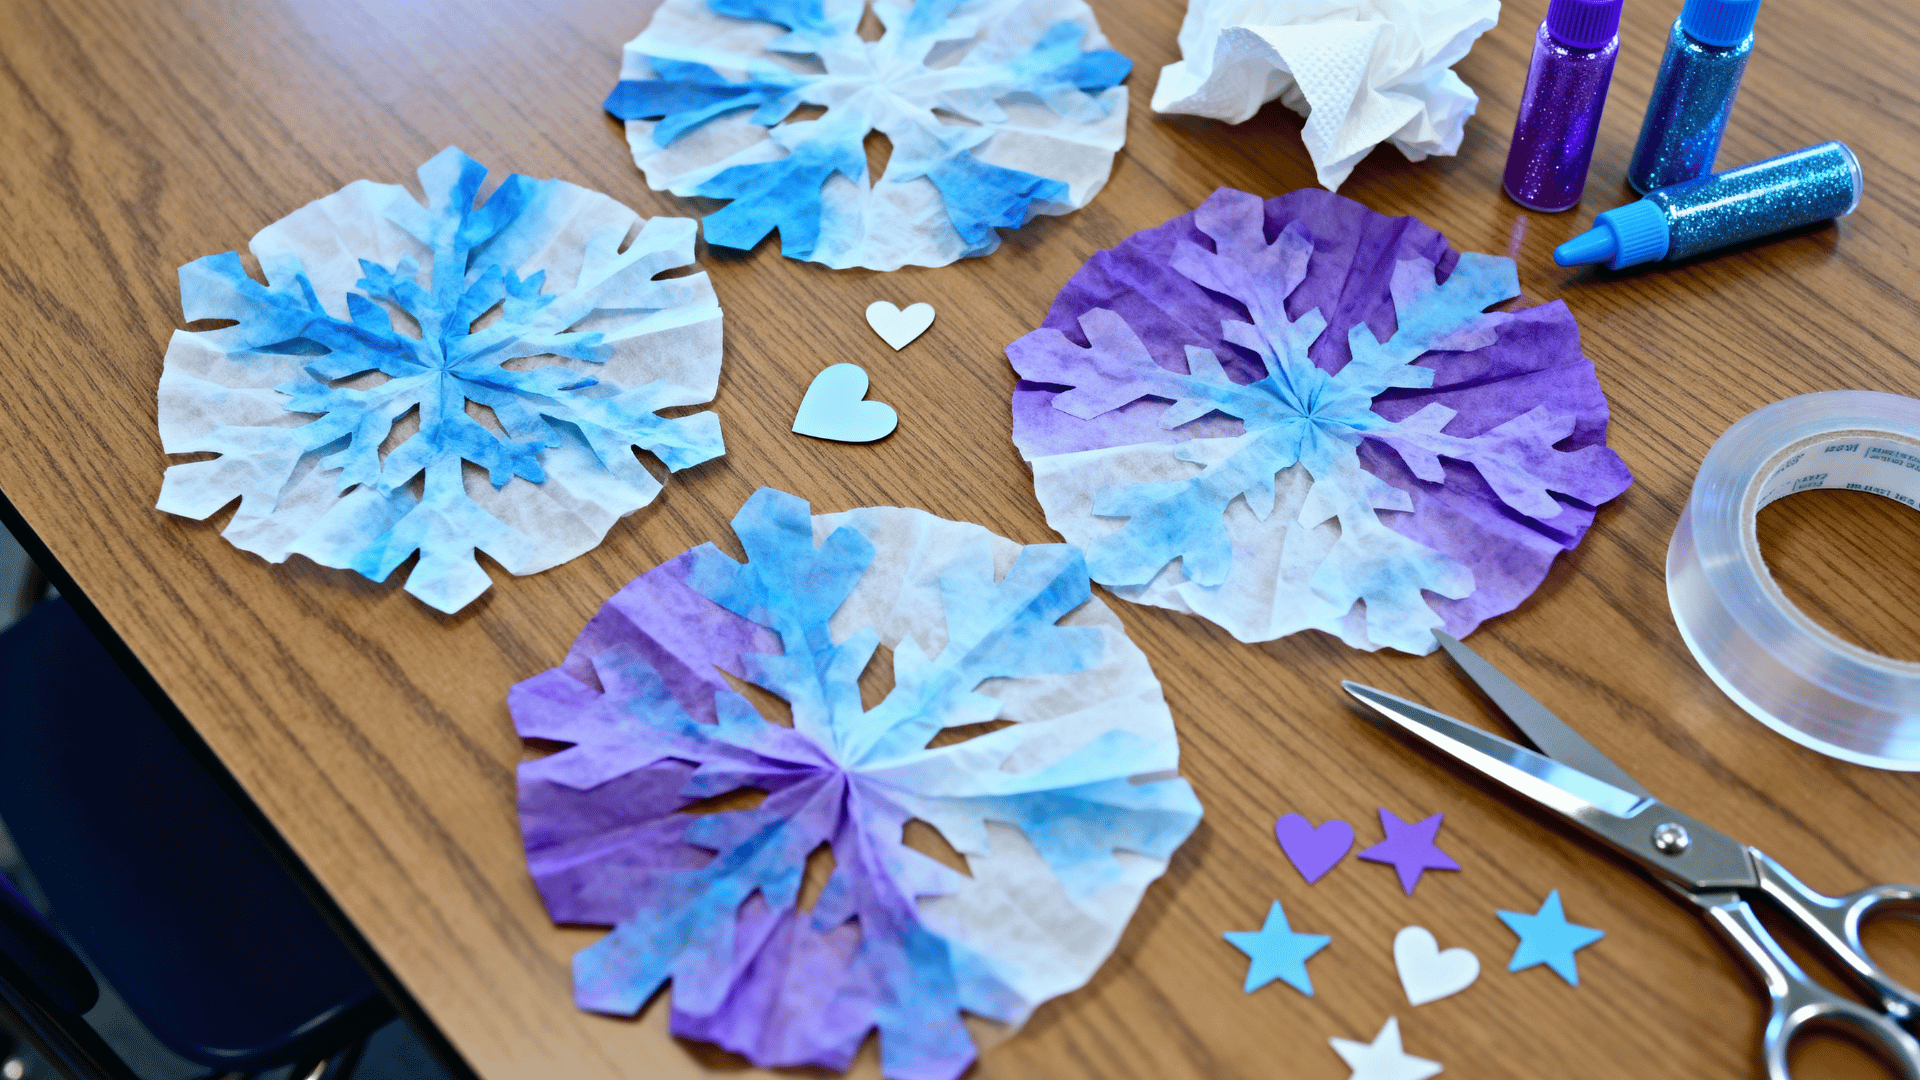
Coffee filter snowflakes are simple winter crafts for windows, classroom walls, bulletin boards, and holiday displays.
This coffee filter art idea works well for kids ages 6 and above because it uses folding, careful cutting, and soft winter colors.
Supplies Required: Coffee filters, safety scissors, blue or purple markers, spray bottle with water, glitter glue, paper towels, and tape.
Steps to Follow:
- Fold one coffee filter in half, then fold it again into a smaller triangle.
- Cut small shapes along the folded edges.
- Open the filter carefully to see the snowflake shape.
- Add blue, purple, or gray marker details.
- Spray lightly with water, then let it dry flat.
- Add glitter glue or tape it to a window if desired.
My Tip: I keep the first snowflake simple because cutting too many shapes can make the thin filter rip.
6. Coffee Filter Planets
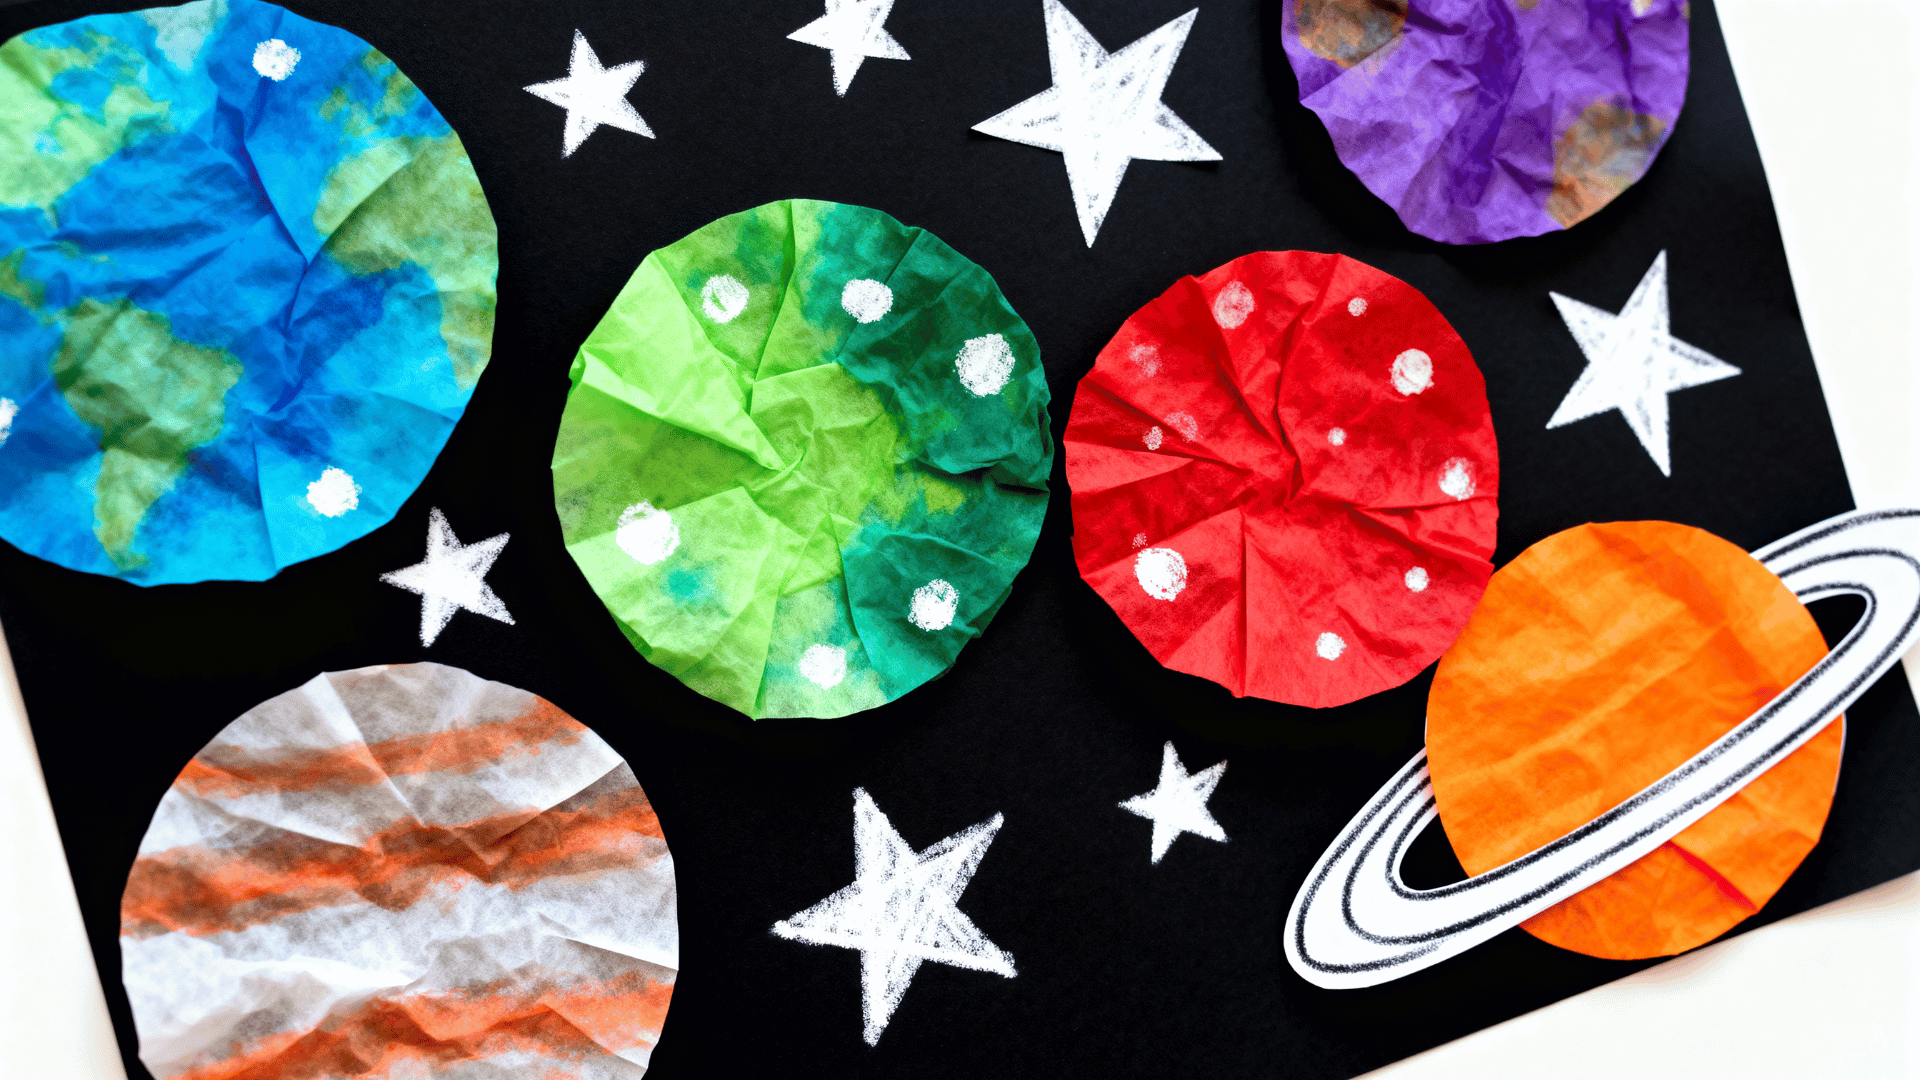
Coffee filter planets are creative crafts for space lessons, solar system projects, or science-themed art time.
This coffee filter art project works well for kids ages 6 and above because they can match colors to real planets or create their own space designs.
Supplies Required: Coffee filters, washable markers or watercolors, black construction paper, white crayon or star stickers, spray bottle with water, glue, and safety scissors.
Steps to Follow:
- Choose a planet to make, such as Earth, Mars, Jupiter, or Saturn.
- Color the coffee filter with the planet’s main colors.
- Spray lightly with water, then let the filter dry.
- Glue the dry filter onto black construction paper.
- Add stars around the planet with a white crayon or stickers.
- Add a paper ring for Saturn or a label for a classroom display.
My Tip: Keep a real planet color chart nearby so kids can connect the craft with a simple science lesson.
7. Coffee Filter Leaves
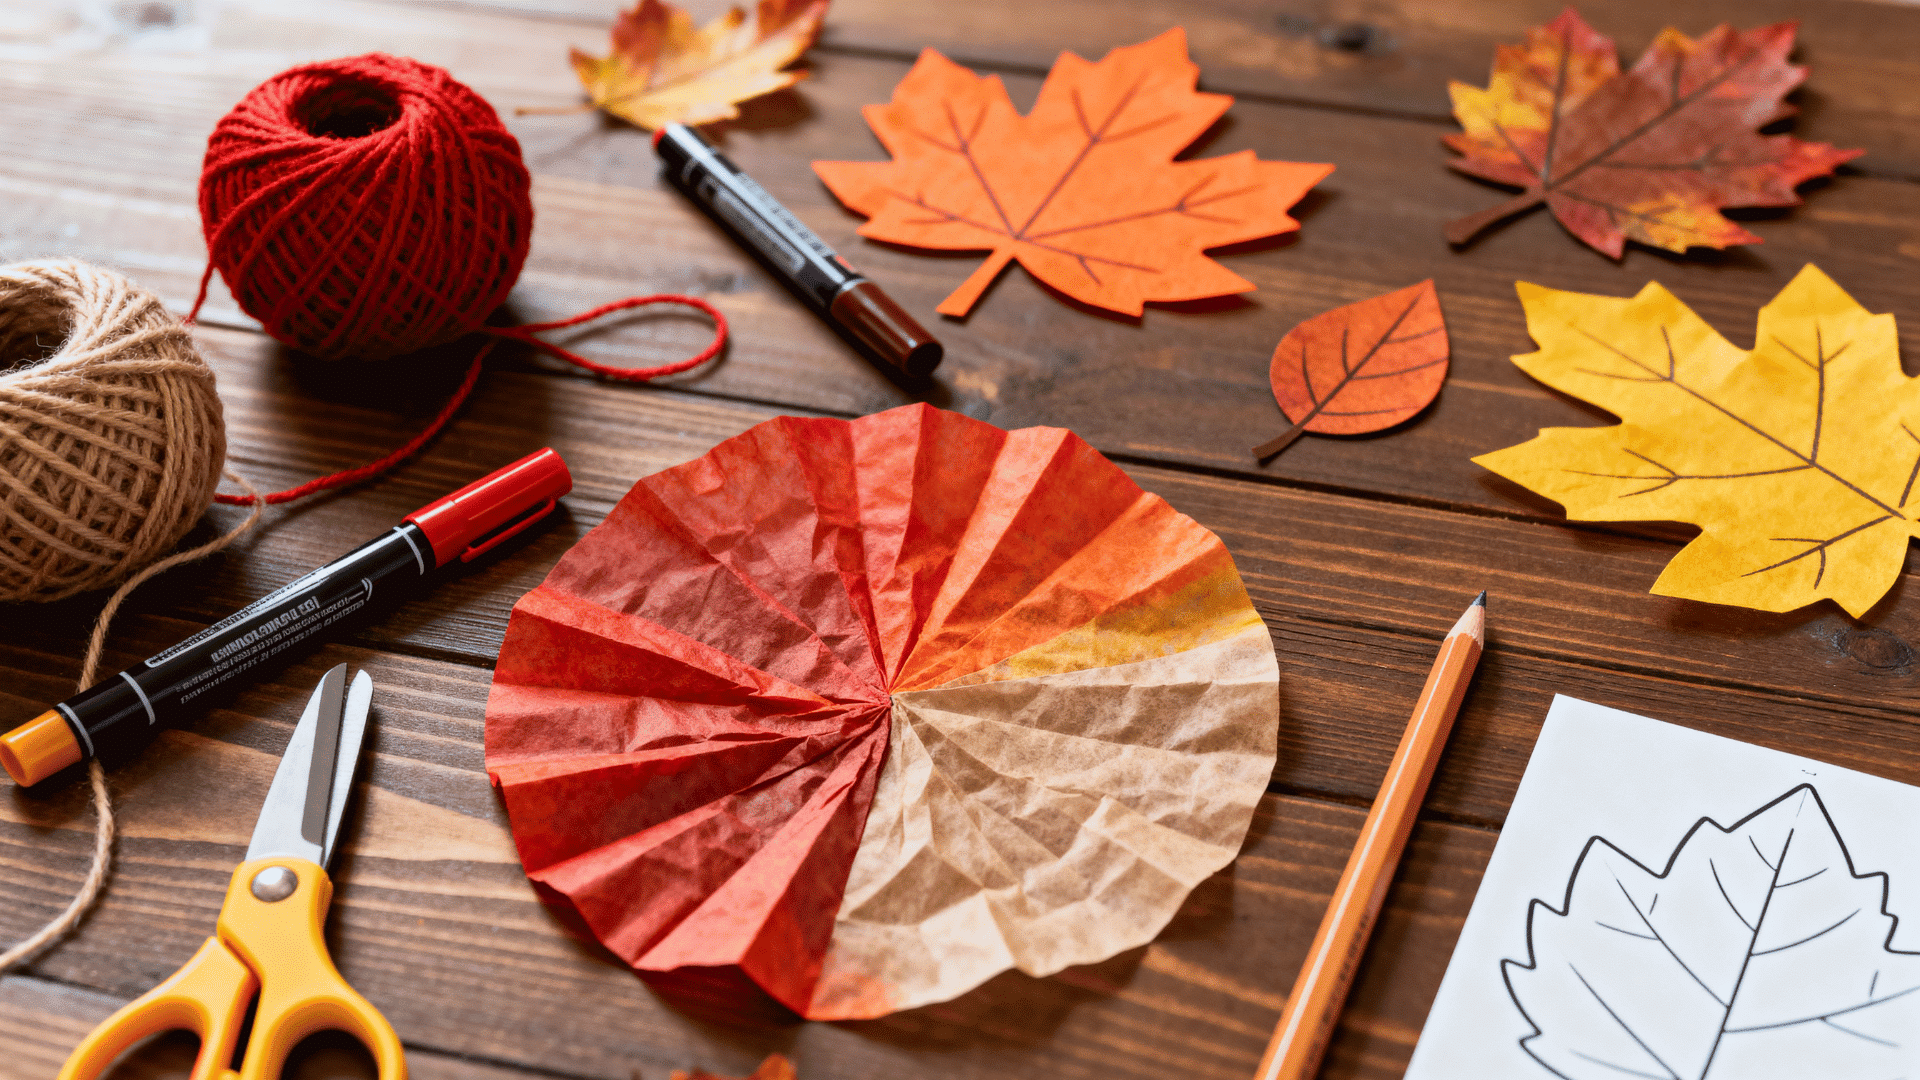
Coffee filter leaves are easy fall crafts for seasonal boards, garlands, table decor, or classroom nature lessons.
This coffee filter art idea works well for kids ages 5 and above because they can use warm colors and cut leaf shapes after the filters dry.
Supplies Required: Coffee filters; red, orange, yellow, and brown markers; a spray bottle with water; a leaf template; a pencil; safety scissors; and yarn, if needed.
Steps to Follow:
- Color a flattened coffee filter with red, orange, yellow, and brown markers.
- Spray lightly with water, then let the filter dry fully.
- Trace a leaf shape onto the dry filter.
- Cut along the pencil line with safety scissors.
- Add vein lines with a marker.
- Tape the leaves to a wall or string them onto yarn.
My Tip: Trace the leaf after the filter dries because wet filters are harder to cut neatly.
8. Coffee Filter Wreath
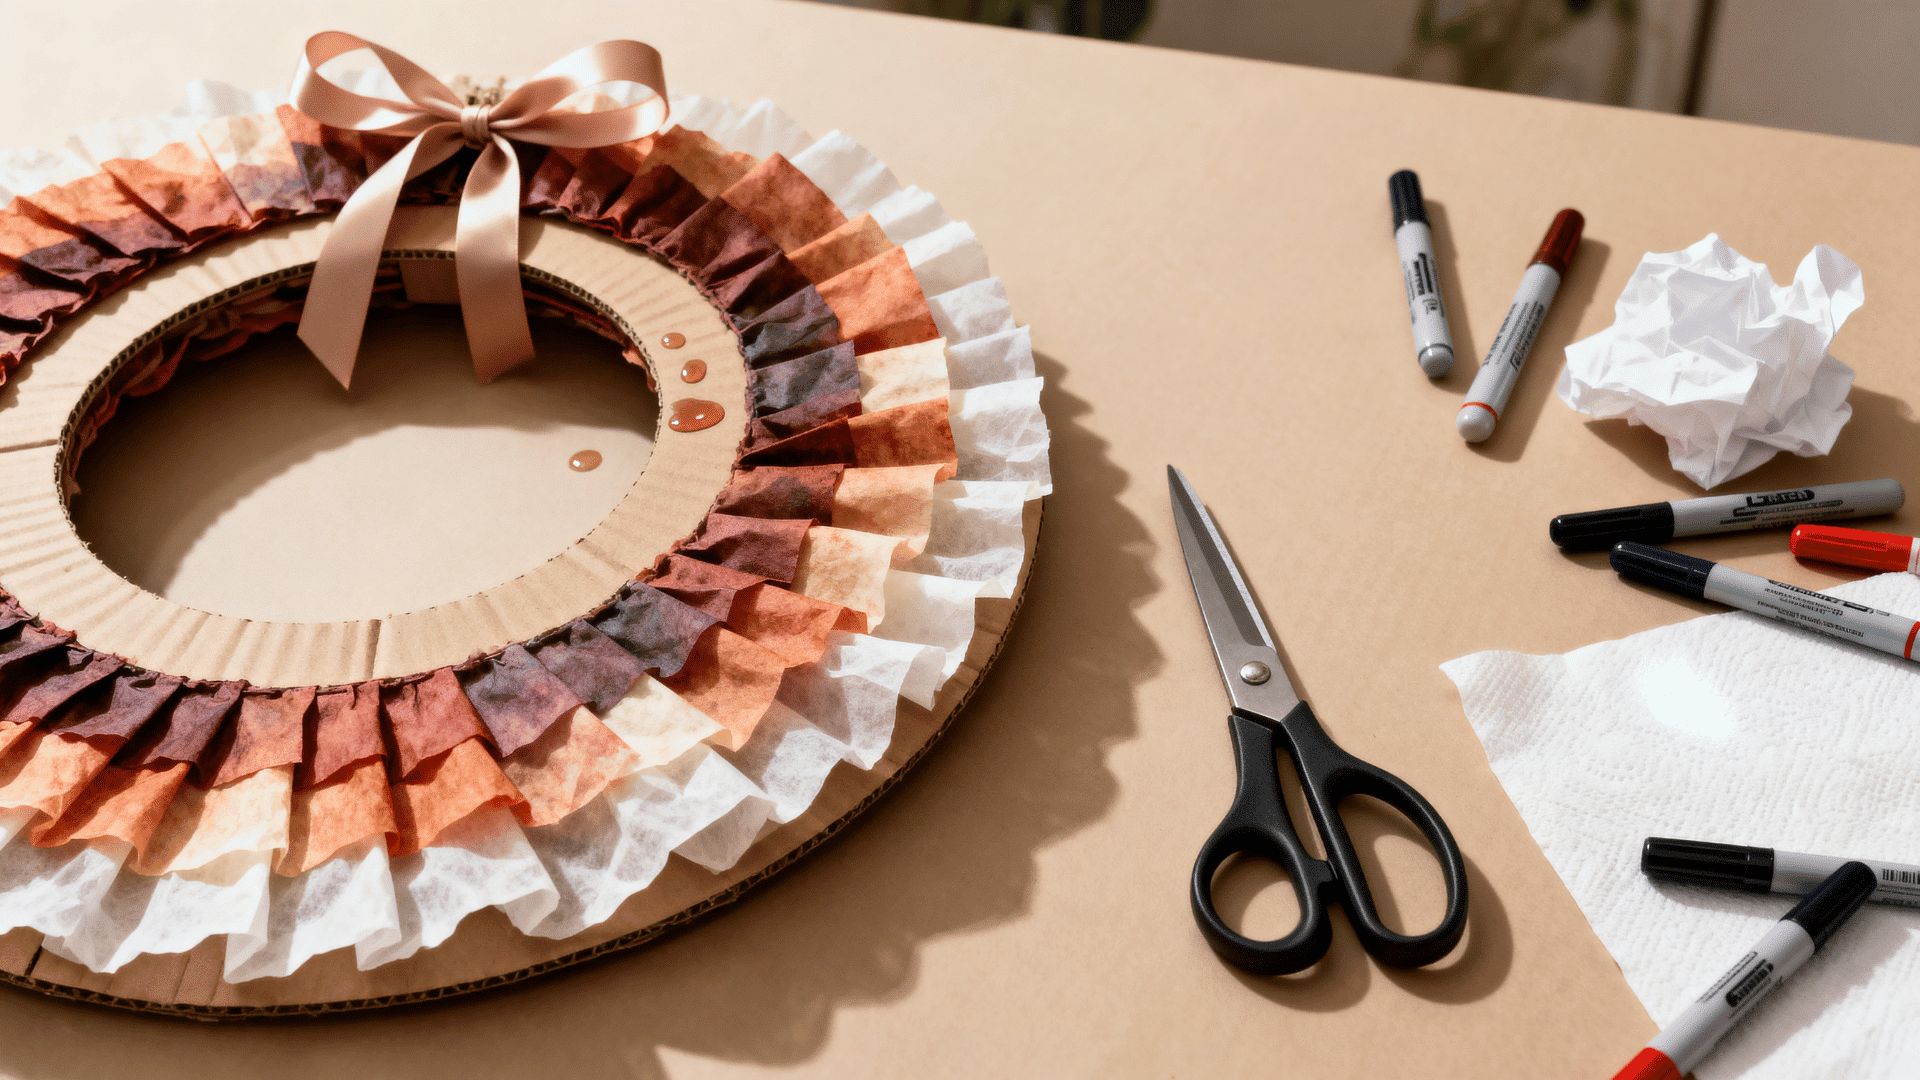
A coffee filter wreath is a soft, layered craft that works for holidays, seasons, classroom doors, or home decor.
This coffee filter art project works well for kids ages 7 and above because it uses repeated folding, gluing, and arranging around a round base.
Supplies Required: Coffee filters, markers, paint or food coloring, cardboard ring, glue, ribbon, paper towels, and safety scissors.
Steps to Follow:
- Cut a large ring shape from cardboard.
- Color the coffee filters with markers, paint, or diluted food coloring.
- Let the filters dry, then fold each one loosely.
- Glue the folded filters around the cardboard ring.
- Overlap the filters until the cardboard is covered.
- Glue a ribbon loop to the back for hanging.
My Tip: Start with filters at four opposite points on the ring, then fill the gaps for a more even wreath.
9. Coffee Filter Jellyfish
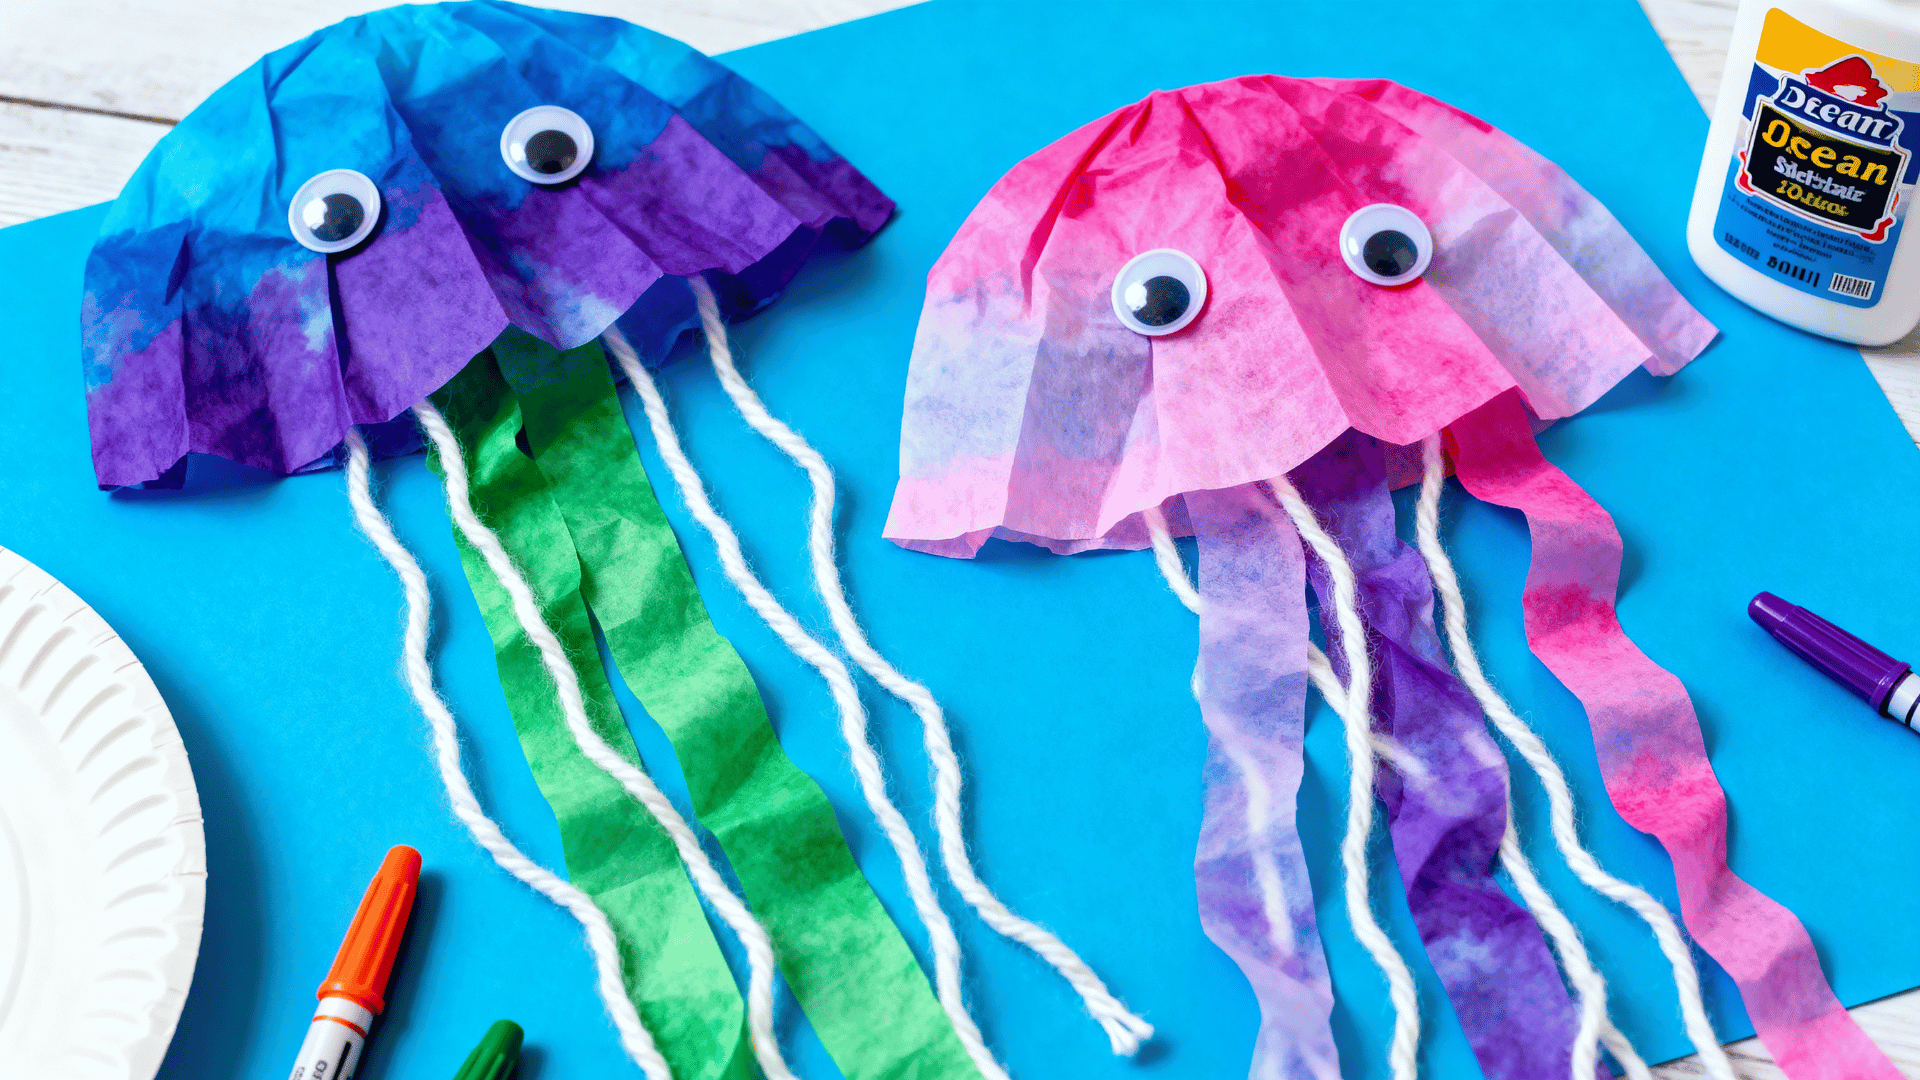
Coffee filter jellyfish are playful ocean crafts for sea life lessons, summer camps, or under-the-sea displays.
This coffee filter art idea works well for kids ages 5 and up because the round filter becomes the jellyfish’s body, and the yarn turns into soft tentacles.
Supplies Required: Coffee filters, washable markers, spray bottle with water, yarn or ribbon, googly eyes, glue, and paper plates.
Steps to Follow:
- Color a coffee filter with blue, purple, pink, or green markers.
- Spray lightly with water, then let it dry.
- Fold the dry filter gently in half.
- Cut yarn or ribbon into short pieces.
- Glue the yarn pieces under the bottom edge.
- Add googly eyes near the front.
My Tip: Use light yarn instead of heavy ribbon if you want the tentacles to hang softly.
10. Coffee Filter Bats
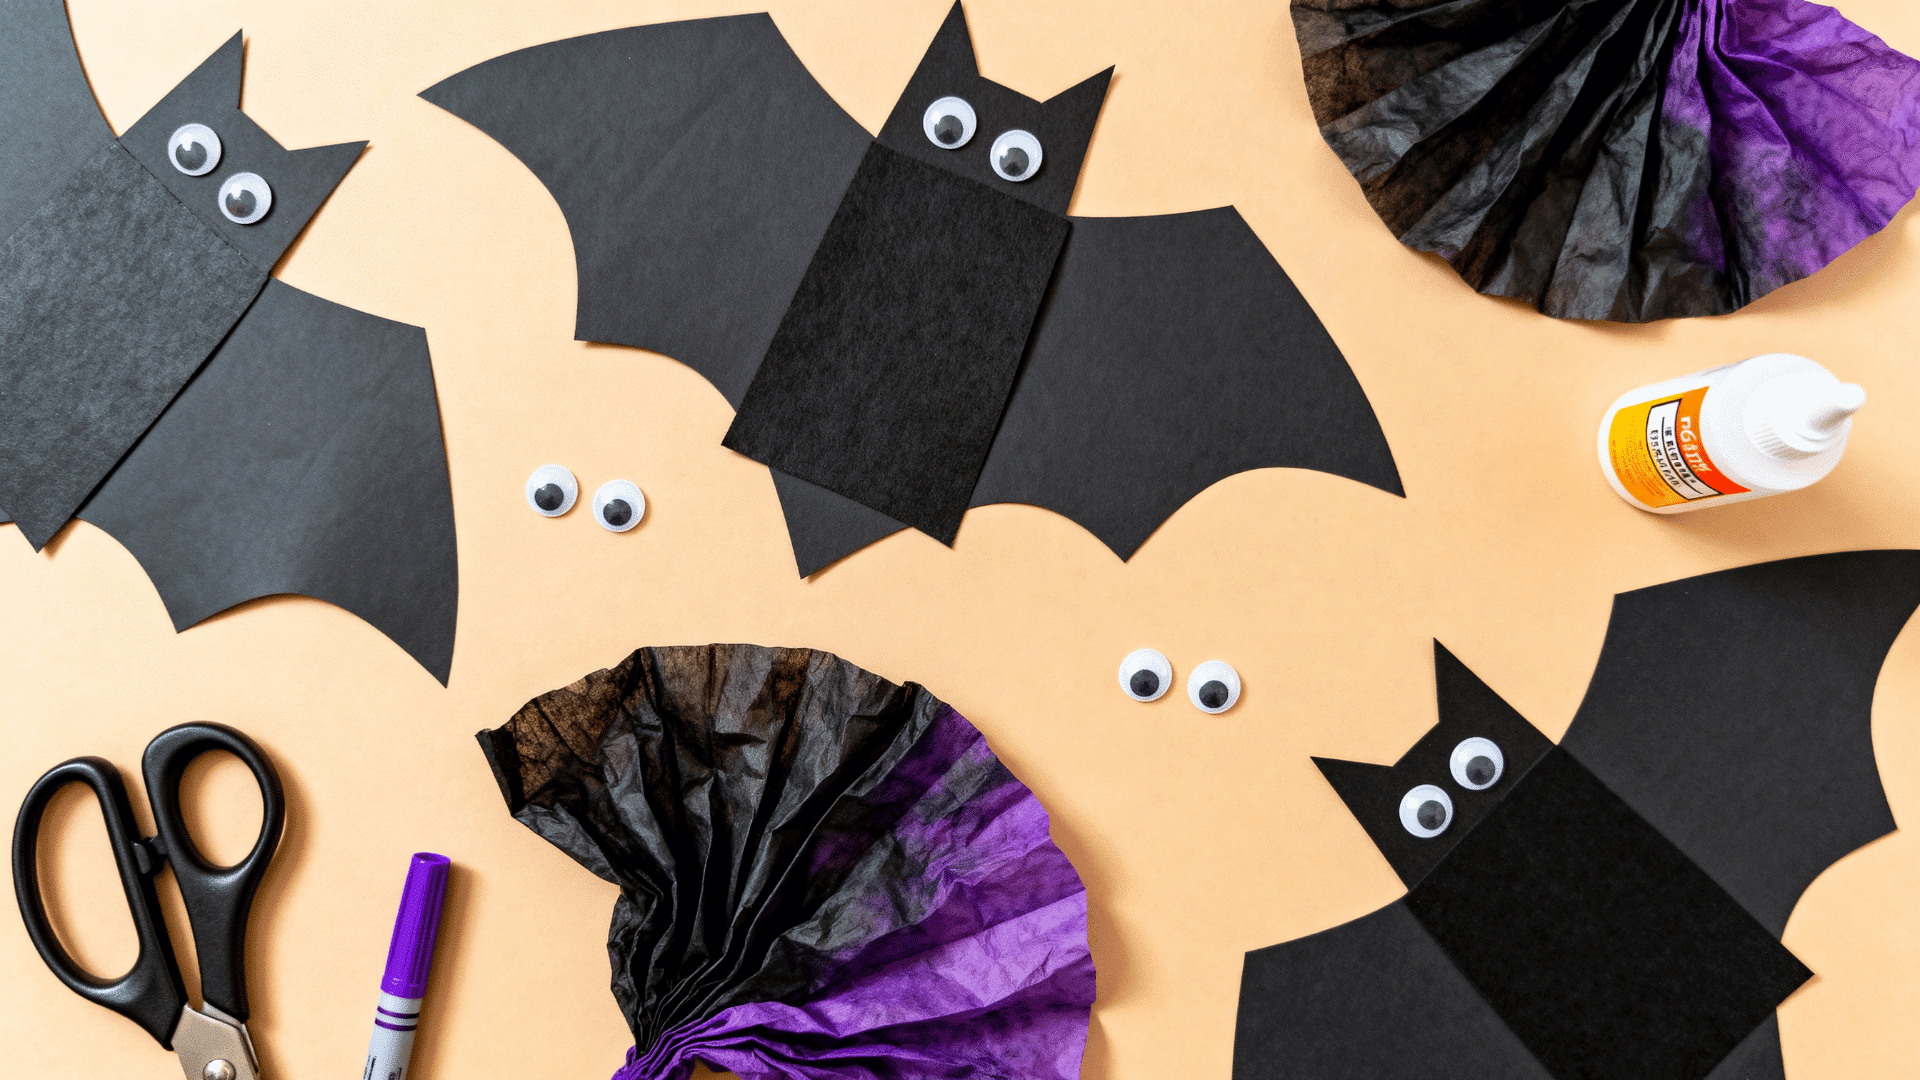
Coffee filter bats are fun Halloween crafts for classroom parties, October bulletin boards, or simple home decorations.
This coffee filter art project works well for kids ages 6 and above because it uses dark colors, folding, cutting, and small paper details.
Supplies Required: Coffee filters, black or purple markers, spray bottle with water, black construction paper, googly eyes, glue, and safety scissors.
Steps to Follow:
- Color one coffee filter with black, gray, or purple markers.
- Spray lightly with water, then let it dry.
- Fold the dry filter in half and cut small curves along the lower edge.
- Cut a bat body and ears from black construction paper.
- Glue the body to the center of the wings.
- Add googly eyes and tape the bat to a wall or window.
My Tip: Keep the bat body small so the coffee filter wings stay the main part of the craft.
11. Coffee Filter Hearts
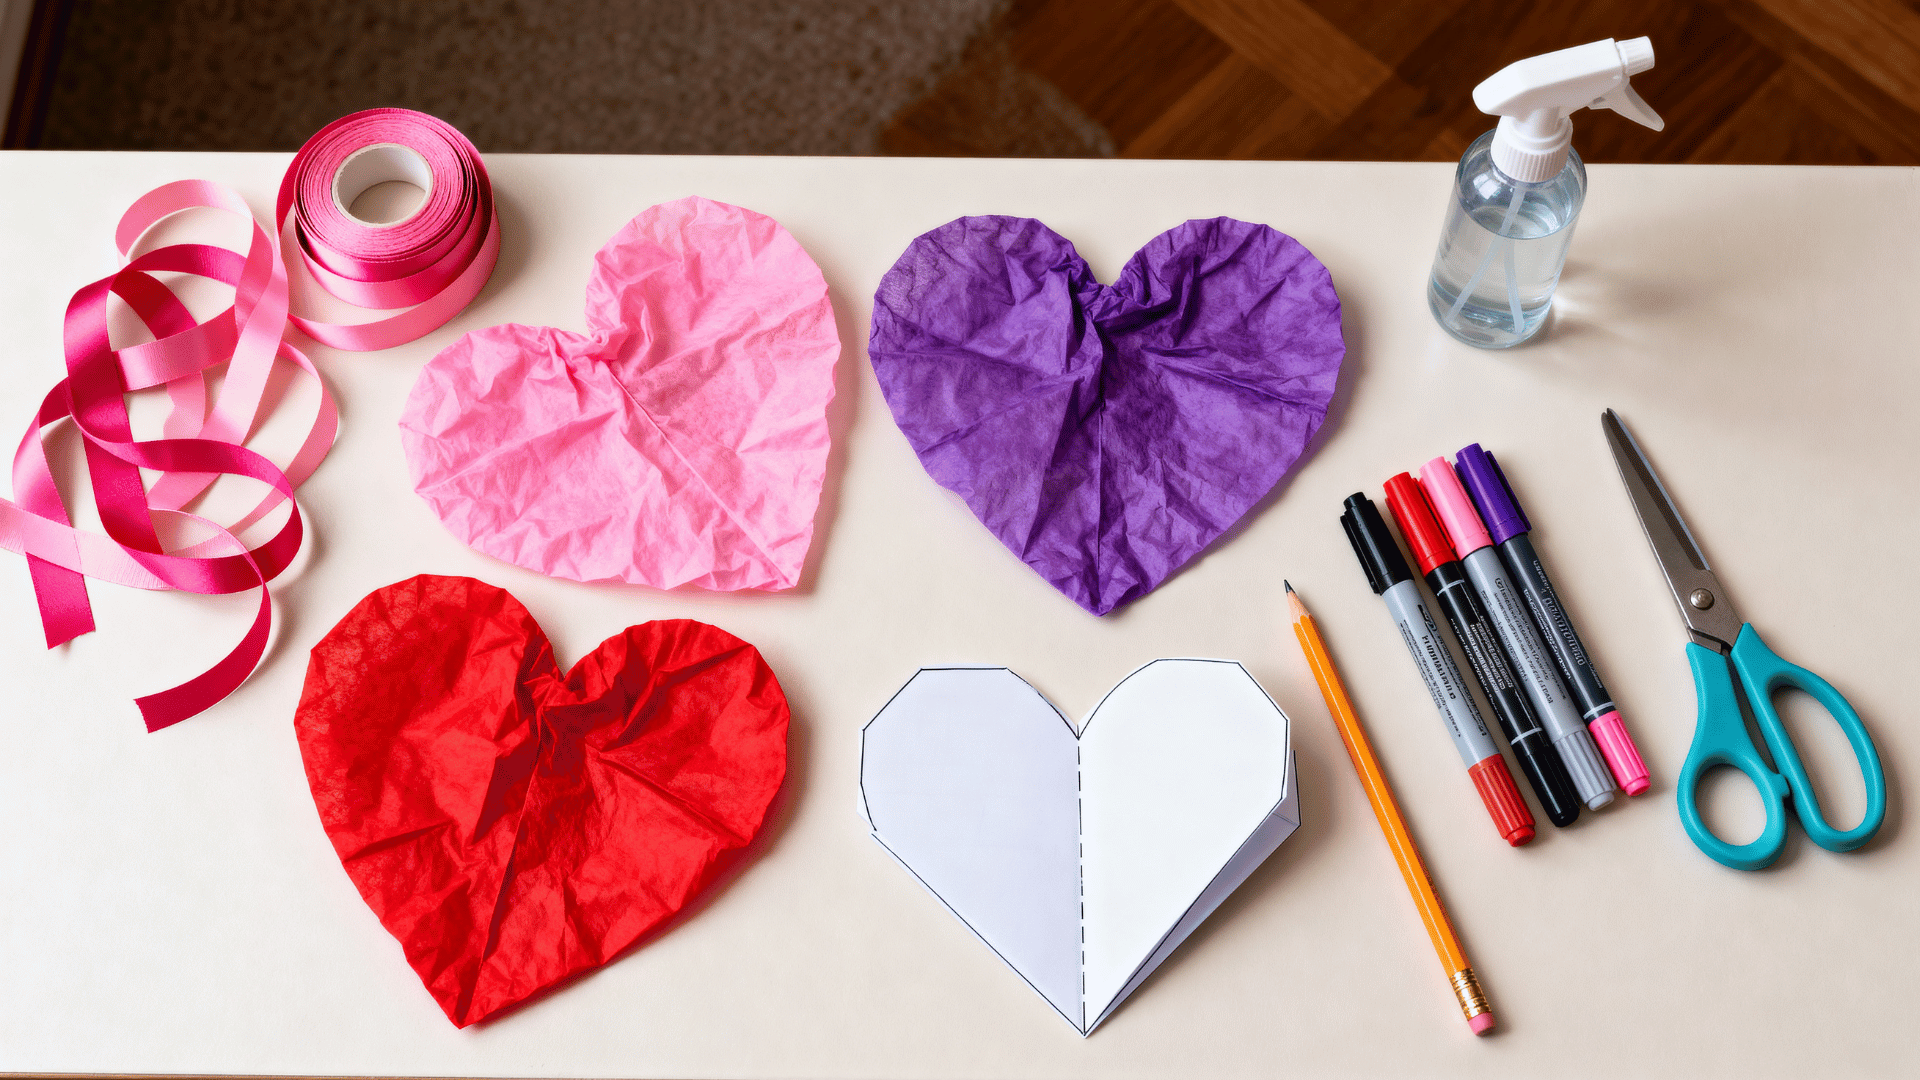
Coffee filter hearts are sweet crafts for Valentine’s Day cards, kindness boards, garlands, or handmade notes.
This coffee filter art project works well for kids ages 5 and up because they can blend pink, red, and purple before cutting out heart shapes.
Supplies Required: Coffee filters; red, pink, and purple markers; a spray bottle of water; a heart template; a pencil; safety scissors; and yarn or ribbon, if needed.
Steps to Follow:
- Color the coffee filter with red, pink, and purple markers.
- Spray lightly with water, then let the filter dry flat.
- Fold the dry filter in half.
- Draw half a heart along the folded edge.
- Cut along the line and open the heart.
- Add a short message or string several hearts into a garland.
My Tip: Fold the filter before tracing the heart so both sides come out even.
12. Coffee Filter Turkeys
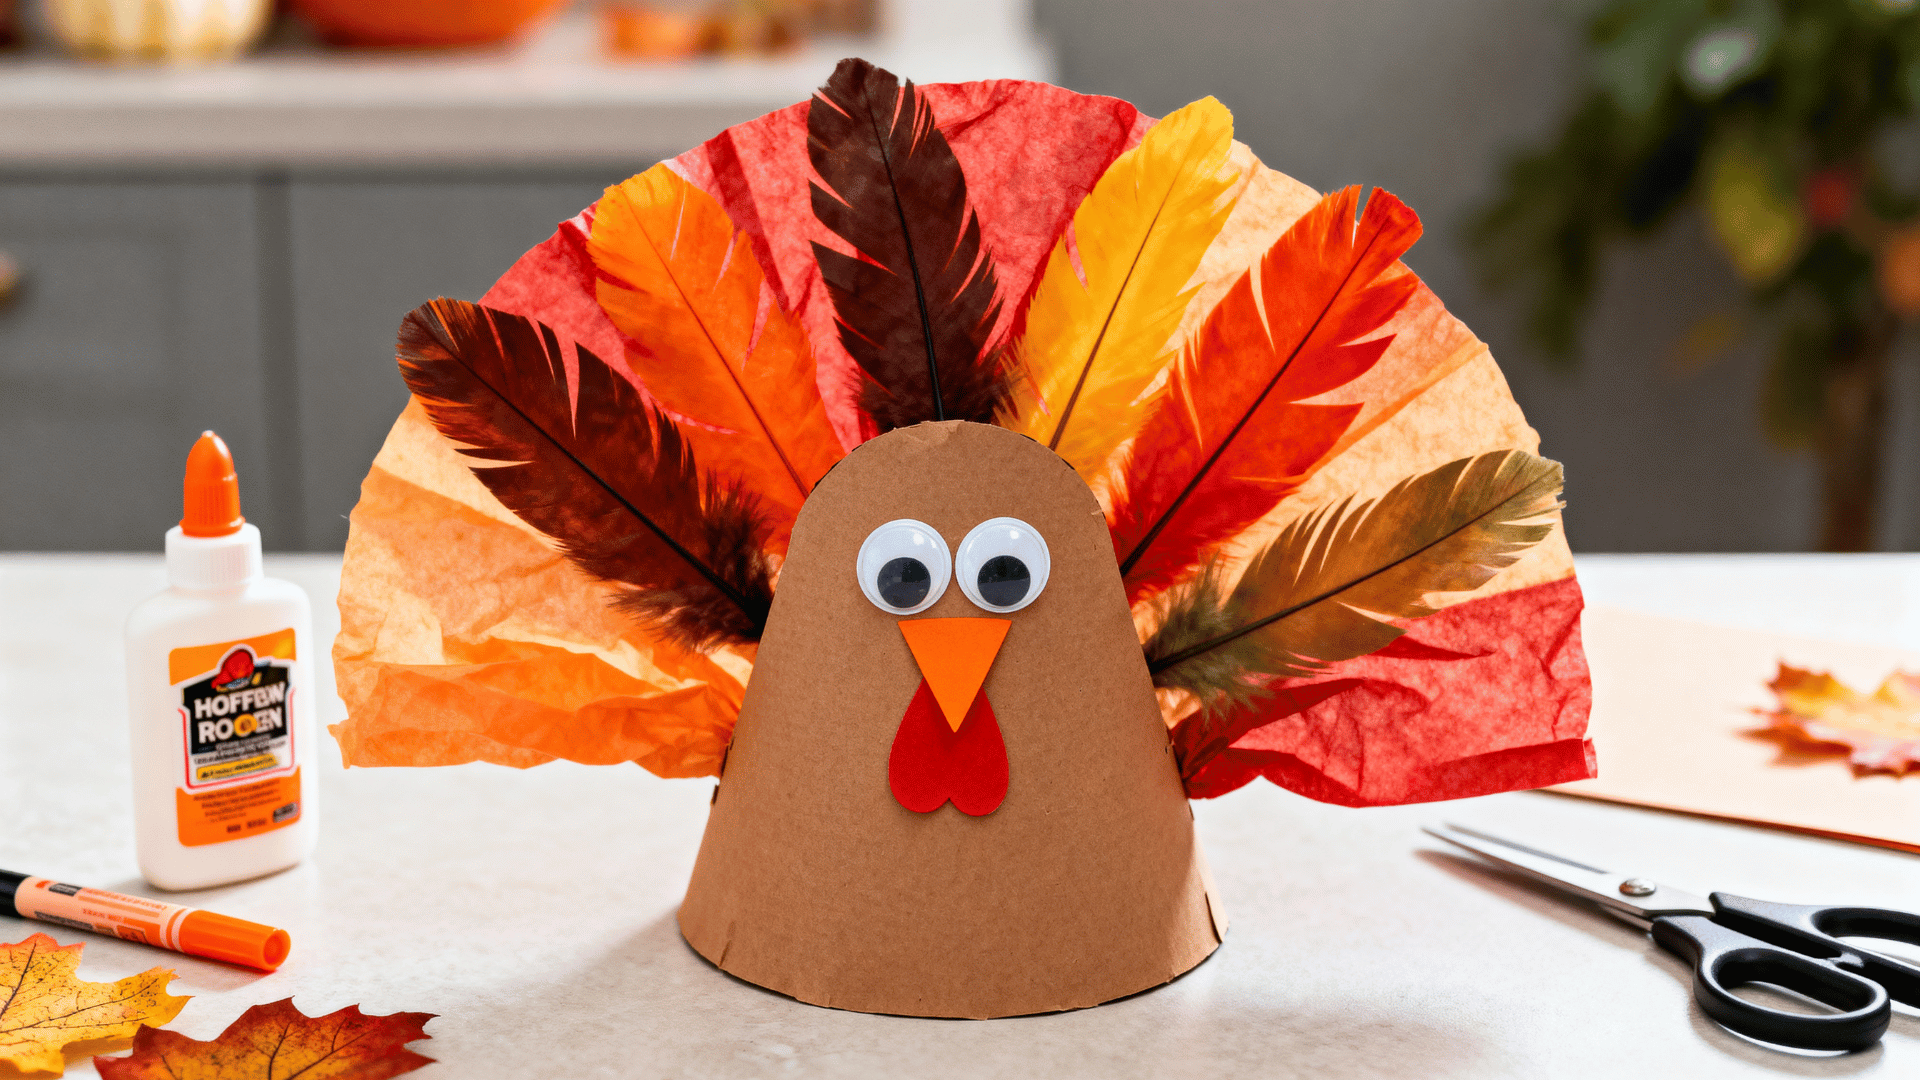
Coffee filter turkeys are classic Thanksgiving crafts for classrooms, family craft tables, and fall activity centers.
This coffee filter art idea works well for kids ages 5 and above because the colorful filter becomes the turkey feathers while paper shapes make the body.
Supplies Required: Coffee filters; brown, orange, red, and yellow markers; a spray bottle of water; brown construction paper; googly eyes; glue; and safety scissors.
Steps to Follow:
- Color the coffee filter with fall marker colors.
- Spray lightly with water, then let it dry.
- Cut the turkey body, beak, and wattle from construction paper.
- Glue the body to the center of the dry filter.
- Add googly eyes, beak, and wattle.
- Draw feet at the bottom if desired.
My Tip: Place the turkey body low on the filter so the bright feather colors show clearly behind it.
13. Coffee Filter Pumpkins
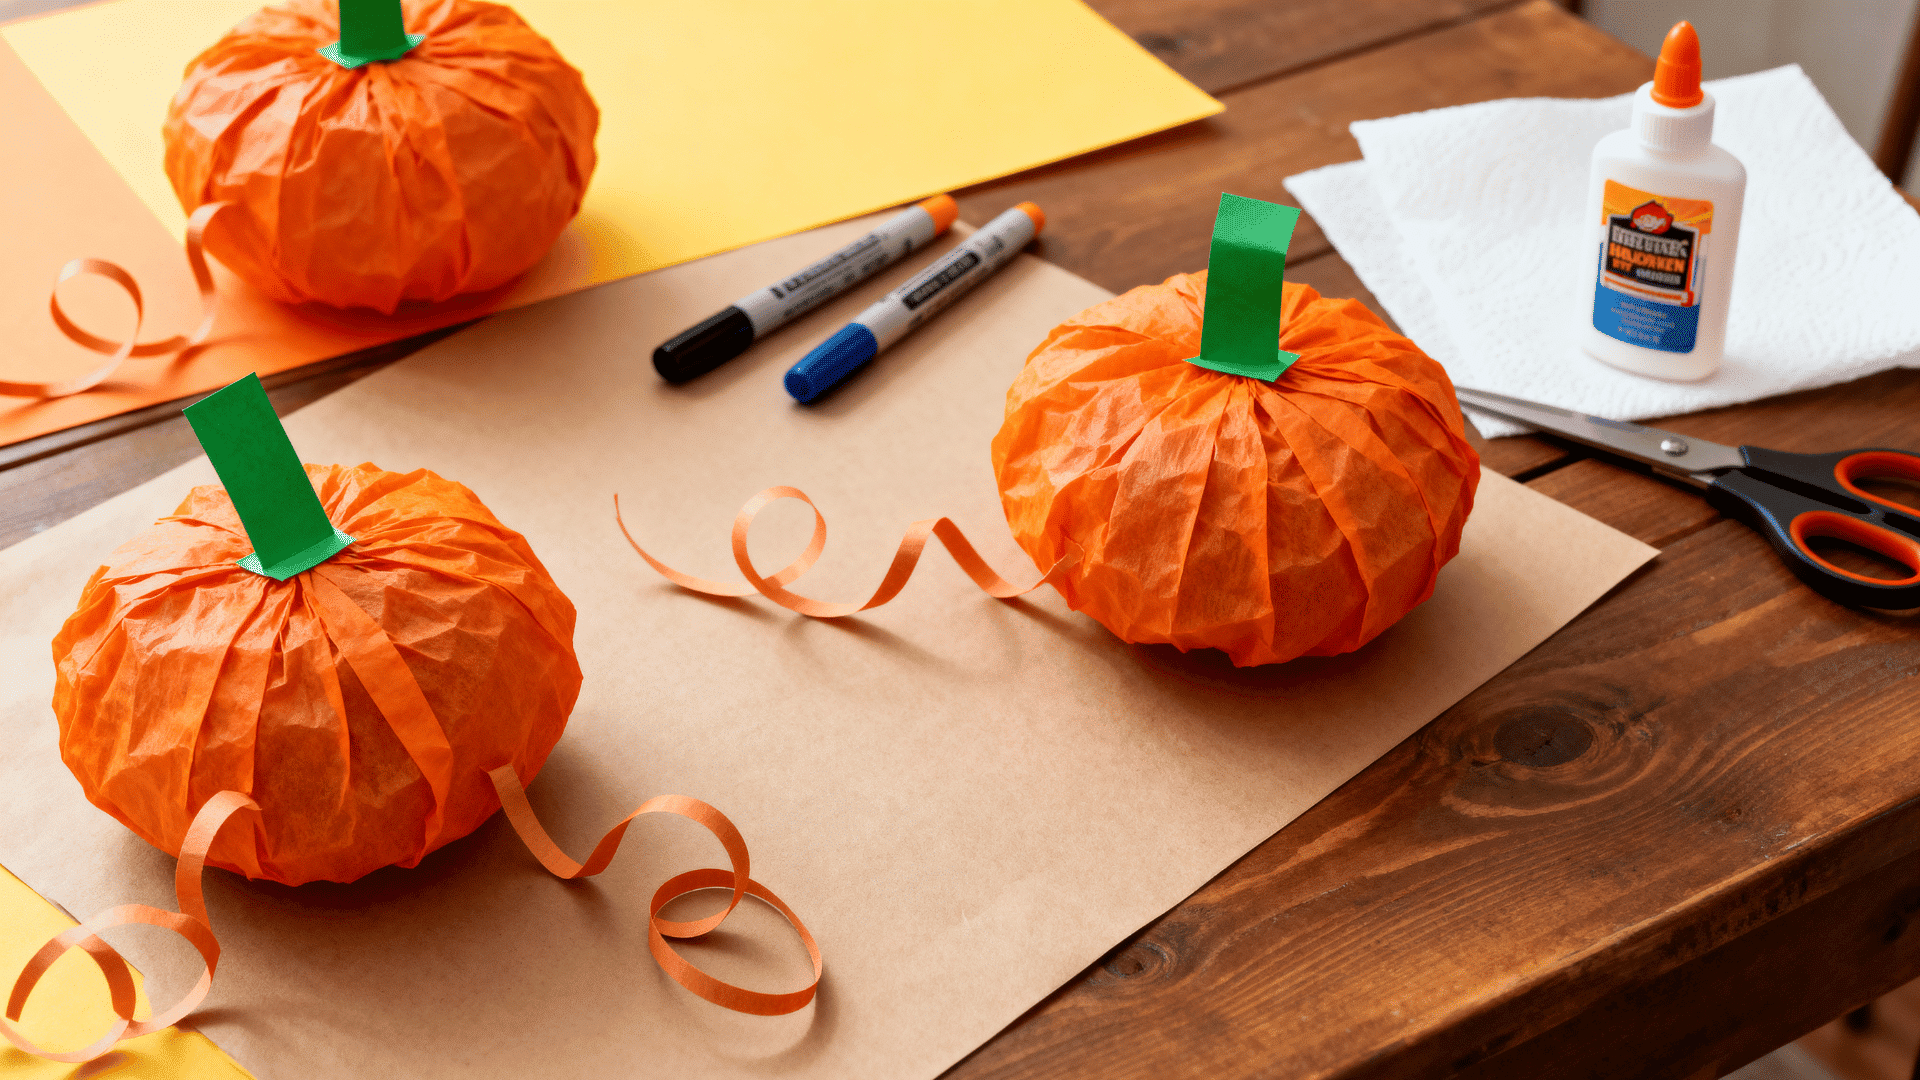
Coffee filter pumpkins are easy fall crafts for October decor, harvest lessons, or simple classroom art time.
This coffee filter art project works well for kids ages 4 and above because they only need warm colors, a round filter, and a small paper stem.
Supplies Required: Coffee filters, orange, yellow, and brown markers, spray bottle with water, green or brown paper, glue, safety scissors, and paper towels.
Steps to Follow:
- Color the coffee filter with orange, yellow, and brown markers.
- Spray lightly with water, then let it dry.
- Cut a small stem from green or brown paper.
- Glue the stem to the top of the dry filter.
- Add a curly paper vine if desired.
- Draw curved pumpkin lines with a brown marker.
My Tip: Add the pumpkin lines after drying so the marker does not blur too much.
14. Coffee Filter Owls
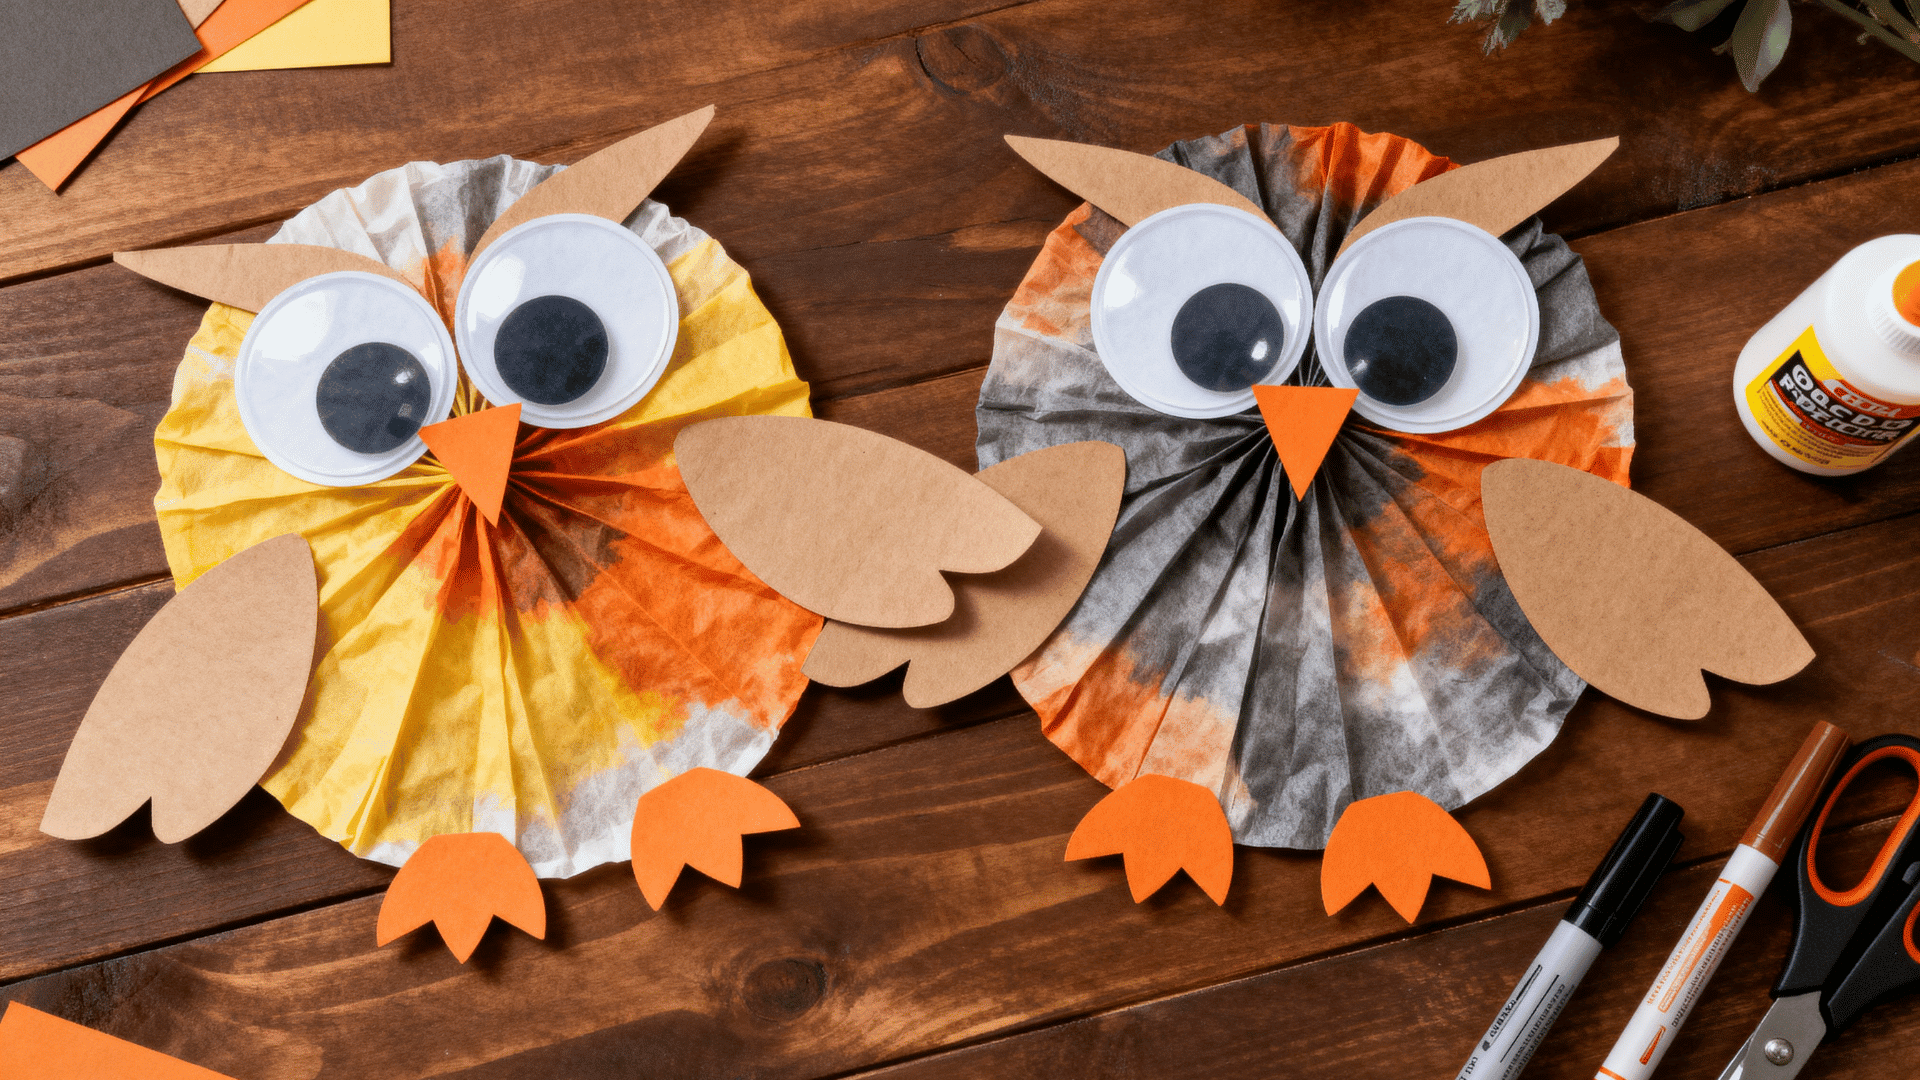
Coffee filter owls are cute craft projects for woodland themes, fall lessons, storybook activities, or classroom displays.
This coffee filter art project works well for kids ages 5 and above because it uses a colored filter for the body and simple paper pieces for wings, eyes, and beak.
Supplies Required: Coffee filters; brown, yellow, orange, or gray markers; a spray bottle with water; construction paper; googly eyes; glue; and safety scissors.
Steps to Follow:
- Color the coffee filter with owl-inspired colors.
- Spray lightly with water, then let it dry.
- Cut wings, a beak, and feet from construction paper.
- Glue the wings to the sides of the dry filter.
- Add googly eyes near the top center.
- Glue the beak and feet in place.
My Tip: Larger googly eyes work well for owls because they make the craft look clear and kid-friendly right away.
15. Coffee Filter Garland
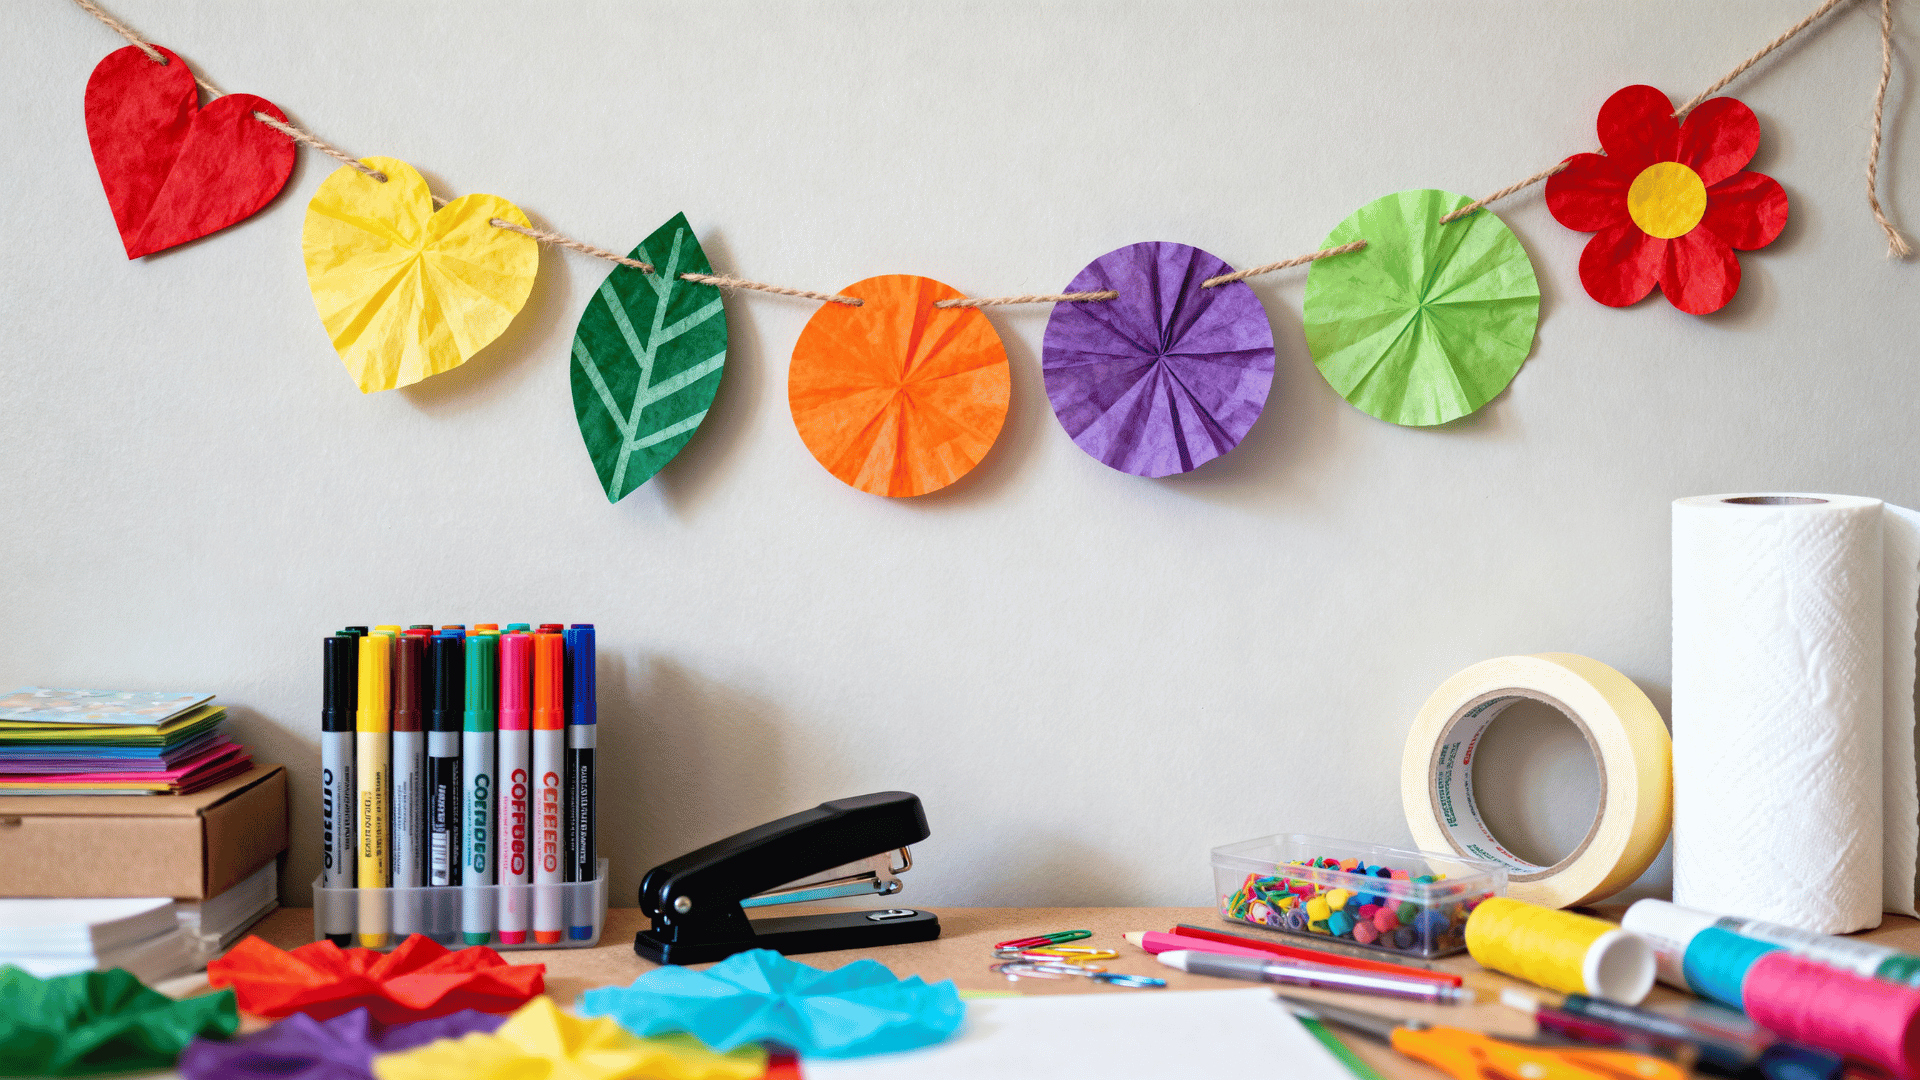
A coffee filter garland is a simple way to turn several finished filters into party decor, classroom trim, or seasonal wall art.
This coffee filter art idea works well for kids ages 6 and above because they can make several filters, choose a theme, and string the pieces together.
Supplies Required: Coffee filters, washable markers or paint, spray bottle with water, yarn or string, hole punch, tape, and paper towels.
Steps to Follow:
- Color several coffee filters with a matching theme, such as rainbow, fall, winter, or spring.
- Spray lightly with water, then let all filters dry.
- Cut the dry filters into circles, hearts, leaves, flowers, or simple shapes.
- Punch one small hole near the top of each piece.
- Thread yarn or string through the holes.
- Tape the ends of the yarn to a wall, shelf, or classroom board.
My Tip: Make one extra filter before stringing the garland so you can fill empty spaces if the layout feels short.
Final Thoughts
Coffee filter art is a practical craft choice when you want something that keeps kids engaged without making the activity feel overplanned.
The best part is that the process stays open: kids can test colors, adjust shapes, and turn one simple method into many finished pieces.
For parents, teachers, and group leaders, that balance matters. It gives children room to make choices while still keeping the setup manageable.
Keep a small stack of filters ready, and you will always have an easy craft option for busy days.
Frequently Asked Questions
Do Coffee Filters Need to Be New for Art Projects?
Yes, use clean, unused coffee filters for art projects. Used filters can tear, smell like coffee, stain unevenly, and may not hold color well.
Can Coffee Filter Art Be Laminated?
Flat coffee filter art can be laminated once it is fully dry. This works well for bookmarks, classroom keepsakes, labels, ornaments, and reusable displays.
What Markers Work Best on Coffee Filters?
Washable broad-tip markers usually work best because they lay down enough color and spread easily with water. Fine-tip markers can work, but the colors may look lighter.
How Do You Keep Coffee Filter Art from Sticking While Drying?
Place wet filters on wax paper, parchment paper, or a plastic tray. Paper towels can work, but very wet filters may stick or pick up texture.