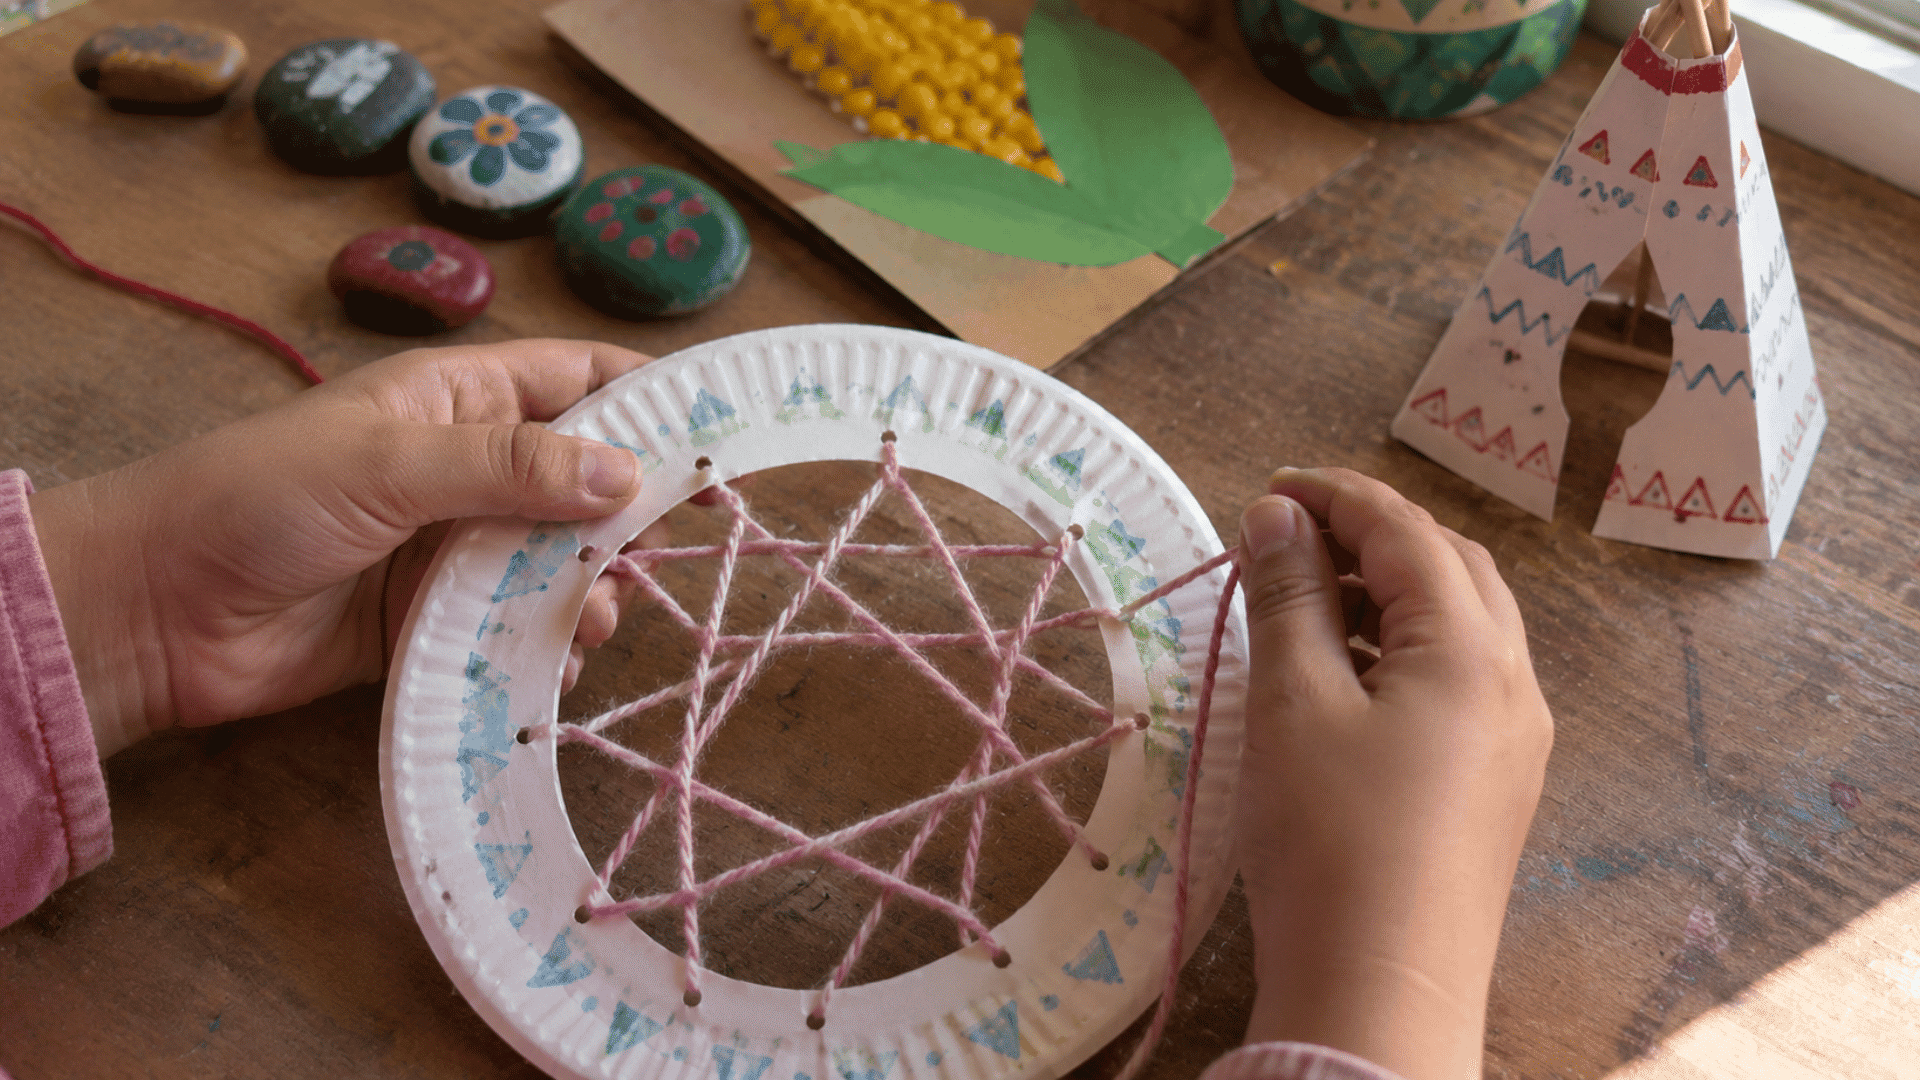
Craft time has a way of bringing everyone together. Add a little cultural learning, and it becomes even more memorable for kids.
Growing up around fabric scraps and handmade projects, I saw how even the simplest activity could spark questions and big ideas. That’s something I’ve always enjoyed about making things by hand.
These Native American-inspired crafts are easy to use at home, in the classroom, or during homeschool lessons. Most use everyday supplies you probably already have.
You’ll find creative projects for different ages, along with activities that encourage children to learn about Native American cultures with curiosity and respect while having fun.
What are Native American Crafts for Kids?
Native American crafts for kids are hands-on projects inspired by the homes, animals, art, and traditions of different Native Nations. They help bring history and culture into creative activities.
Many of these projects can be made with everyday craft supplies. They’re suitable for homes, classrooms, and homeschool lessons.
It’s important to remember that Native American cultures are diverse, and each Nation has its own traditions. These activities are inspired by those cultures and encourage respectful learning.
Native American Craft Ideas for Kids
These Native American-inspired crafts use simple supplies and are easy for children to make. Each activity also offers an opportunity to learn about different Native Nations respectfully.
Choose a project that matches your child’s age and the supplies you have on hand, then enjoy creating together at your own pace.
1. Paper Dreamcatcher Craft
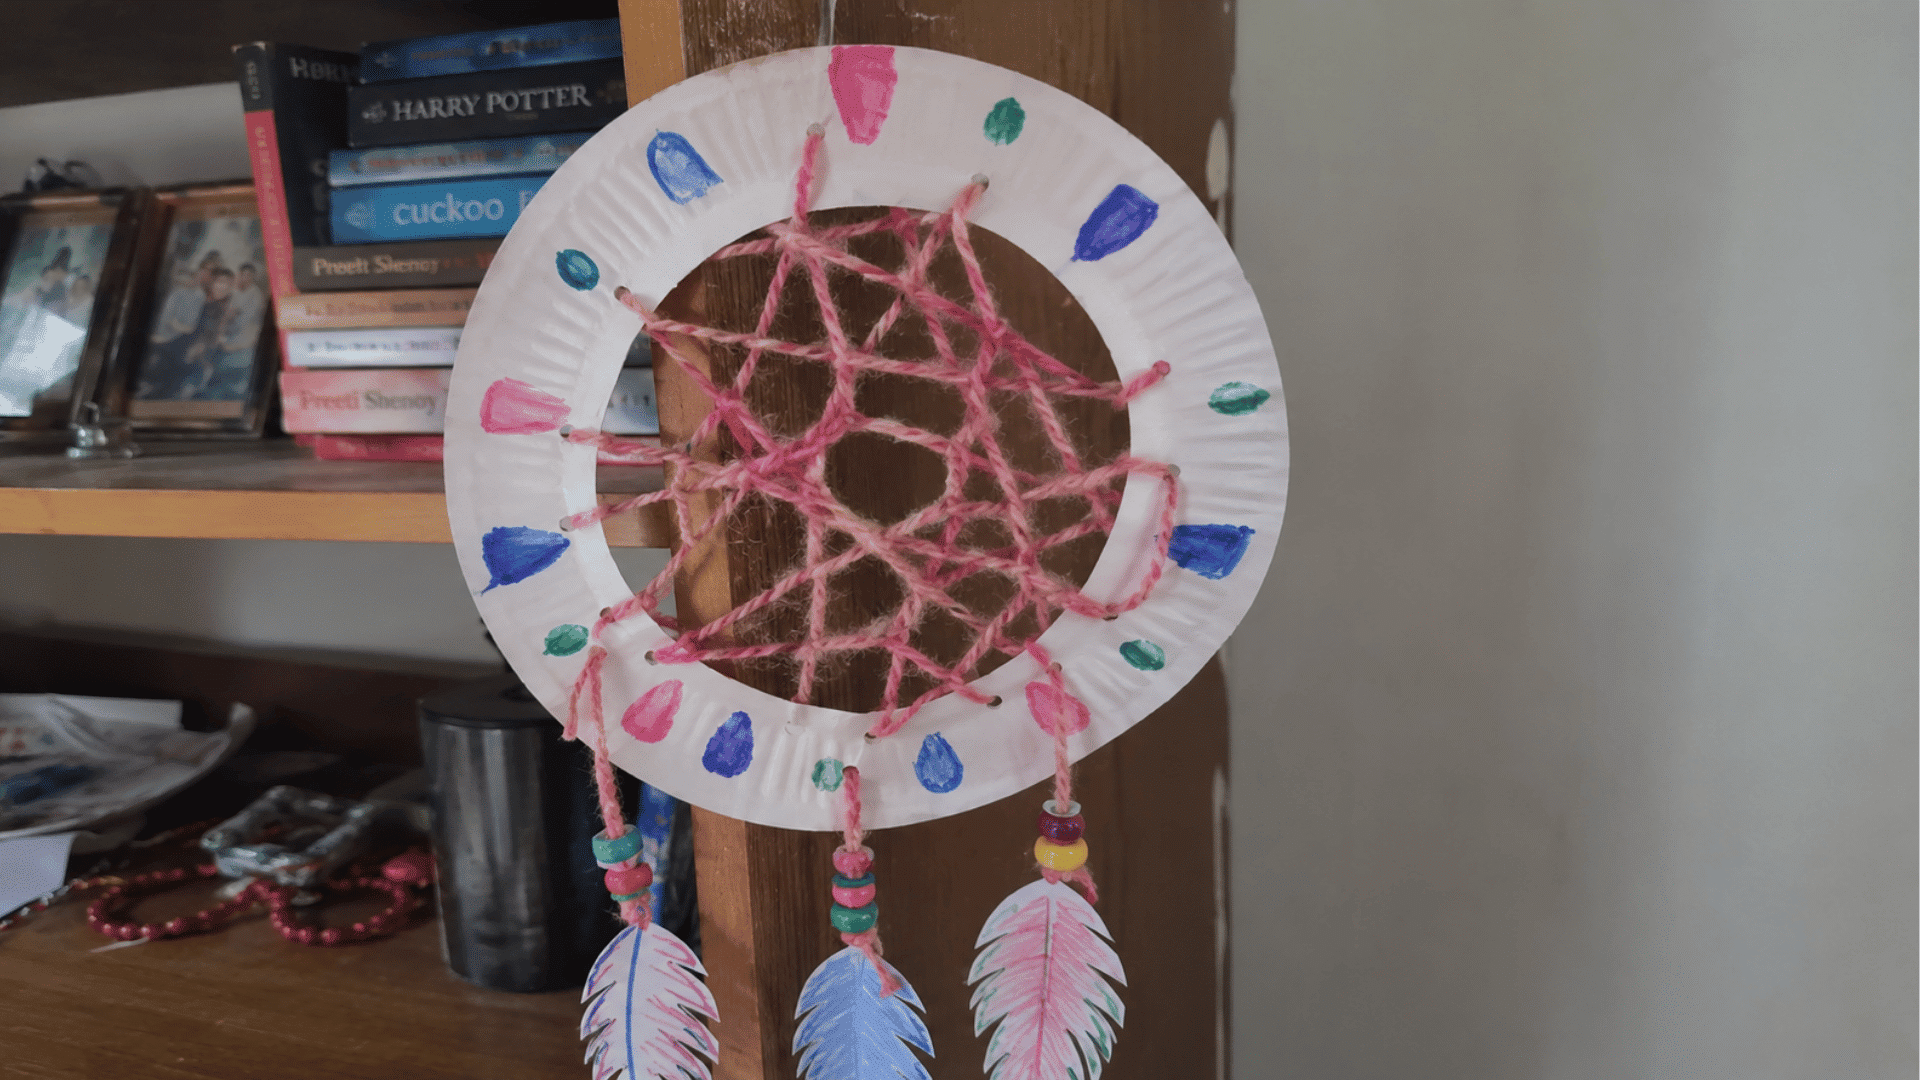
This paper dreamcatcher is a fun way to introduce children to an artistic tradition of the Ojibwe people. It’s best for kids ages 6–10 and helps build fine motor skills through simple weaving.
Items Required: Paper plate, yarn, hole punch, child-safe scissors, paper feathers, pony beads, glue, markers.
How to Make It
- Cut out the center of the paper plate to make a sturdy ring for the craft.
- Punch small holes around the edge and weave yarn through them to create a simple pattern.
- Tie the yarn securely, leaving enough space to add decorations at the bottom.
- Attach paper feathers and a few beads with short pieces of yarn.
- Decorate the outer ring with markers and hang the finished craft for display.
My Tip: Thicker yarn is easier for small hands to weave and is less likely to tangle.
2. Paper Teepee Craft
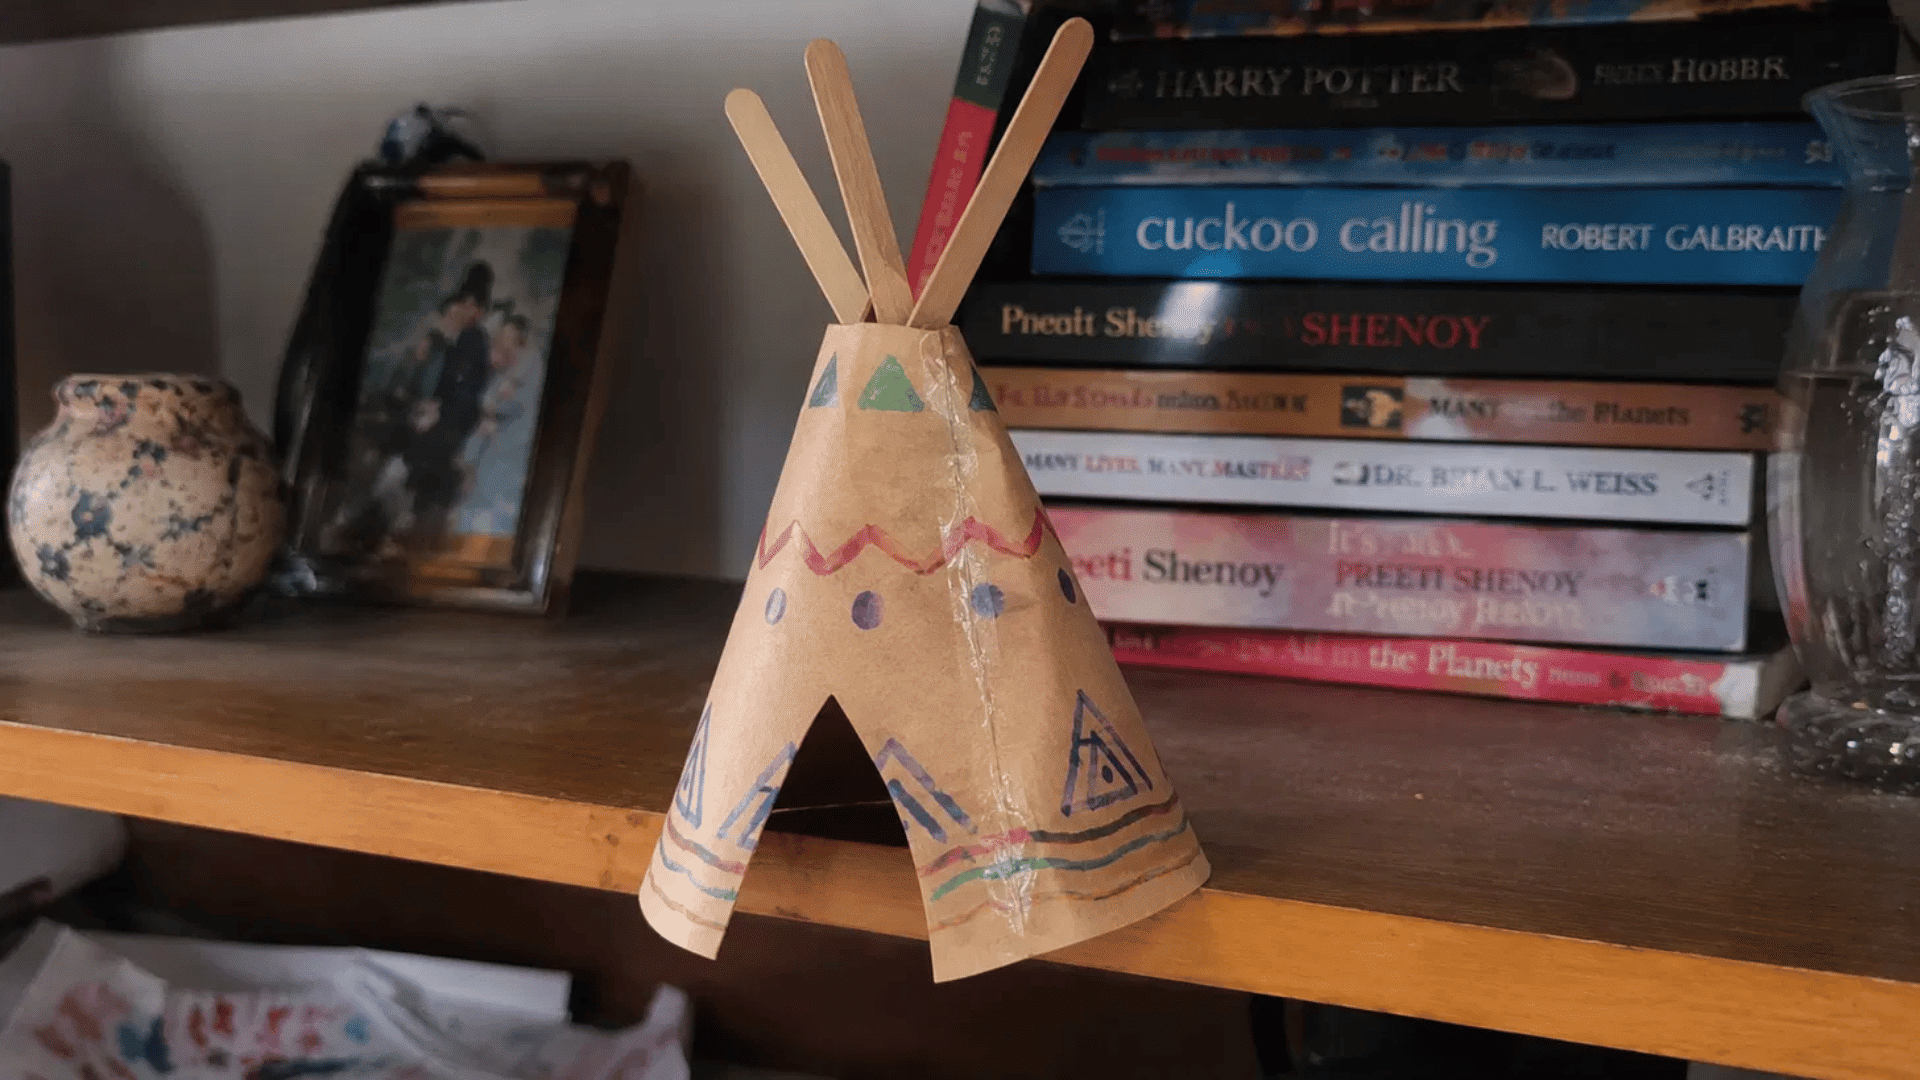
Children can build a paper teepee while learning about one type of home used by some Plains Nations. It’s best for kids ages 5–9 and pairs well with history or social studies lessons.
Items Required: Brown construction paper, craft sticks, child-safe scissors, glue, markers or crayons.
How to Make It
- Roll the construction paper into a cone and glue the edge so it stays in place.
- Slide three craft sticks through the top opening to create the support poles.
- Trim the bottom edge if needed so the teepee stands flat on the table.
- Decorate the outside with simple geometric patterns using markers or crayons.
- Allow the glue to dry before placing the craft on display.
My Tip: Let the glue set for about a minute before decorating to help the teepee keep its shape.
3. Story Stick Craft
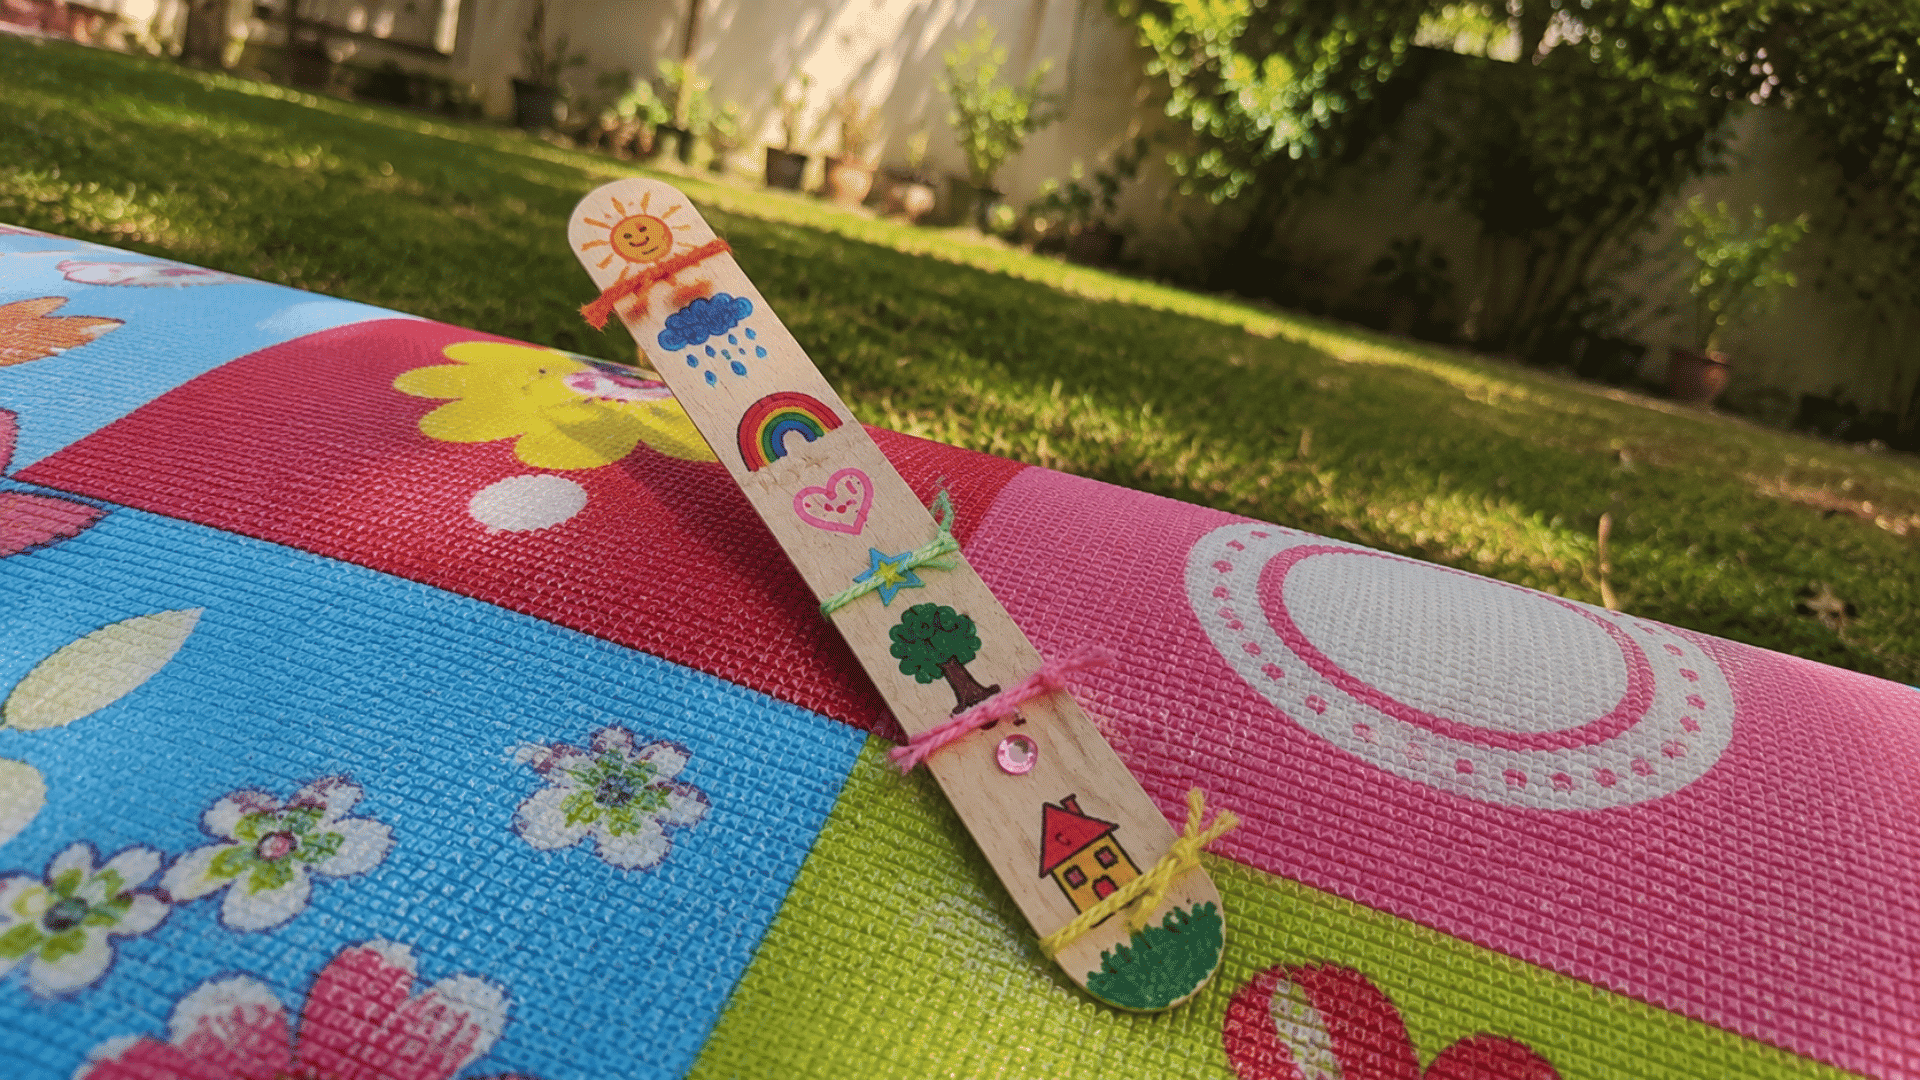
Using drawings and symbols, children can create their own stories and share them with others. This activity is ideal for kids ages 5–10 and supports speaking, listening, and creative thinking.
Items Required: Large craft stick, markers, colored pencils, stickers, yarn, glue.
How to Make It
- Draw a series of simple symbols from the top to the bottom of the craft stick.
- Color each drawing with bright shades that are easy to recognize.
- Add yarn or small stickers to decorate the stick.
- Think of a short story that follows the order of the symbols.
- Share the story with family members or classmates using the stick as a reminder.
My Tip: Let children create their own stories instead of following a script. Their ideas often make the activity more enjoyable.
4. Painted River Stones
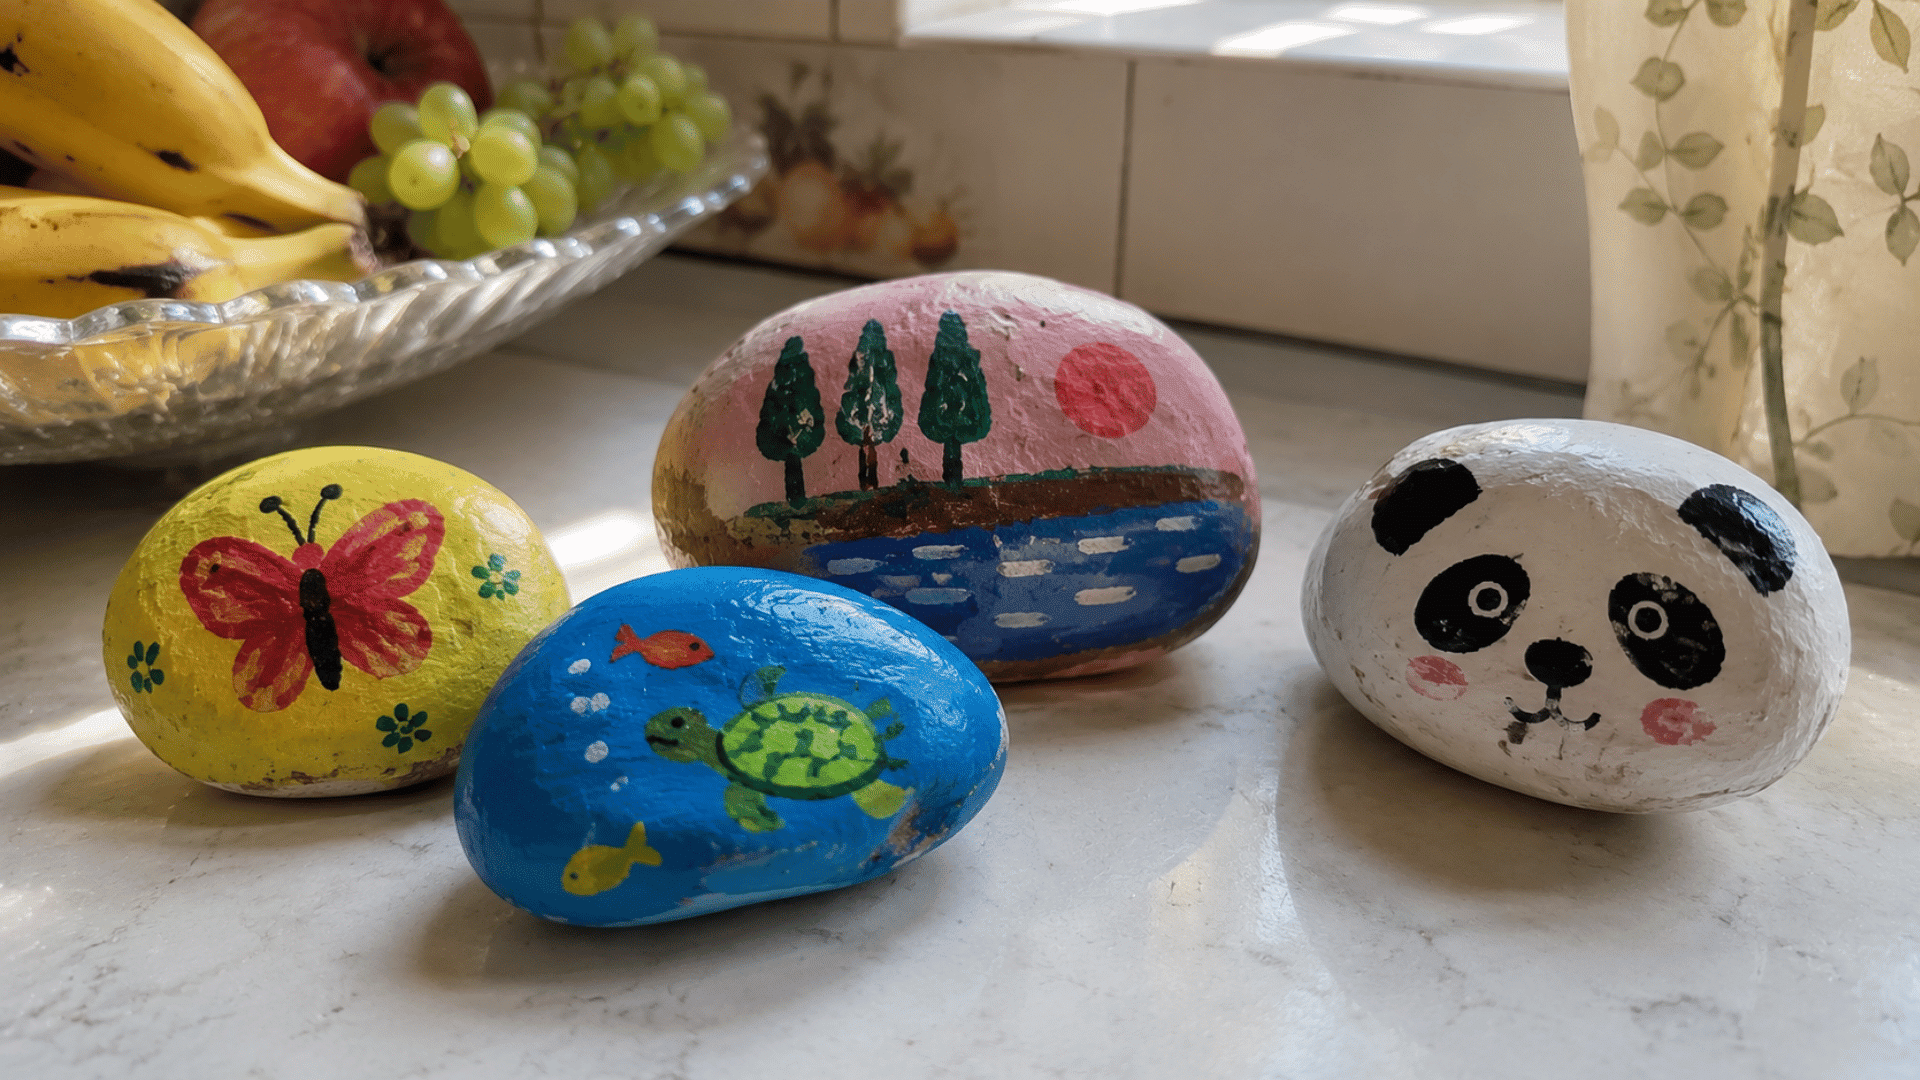
Smooth river stones become colorful works of art with a little paint and imagination. This project suits kids ages 5 and older and works well at home or in the classroom.
Items Required: Smooth river stones, washable or acrylic paint, paintbrushes, a cup of water, paper towels.
How to Make It
- Wash the stones and let them dry completely before painting.
- Paint simple animals, plants, or geometric designs on one side.
- Wait for the paint to dry before adding extra colors or small details.
- Turn the stone over and decorate the other side if you’d like.
- Leave the stones to dry fully before using them for display or storytelling.
My Tip: Allow the first side to dry completely before painting the back to avoid smudges.
5. Paper Totem Pole Learning Craft
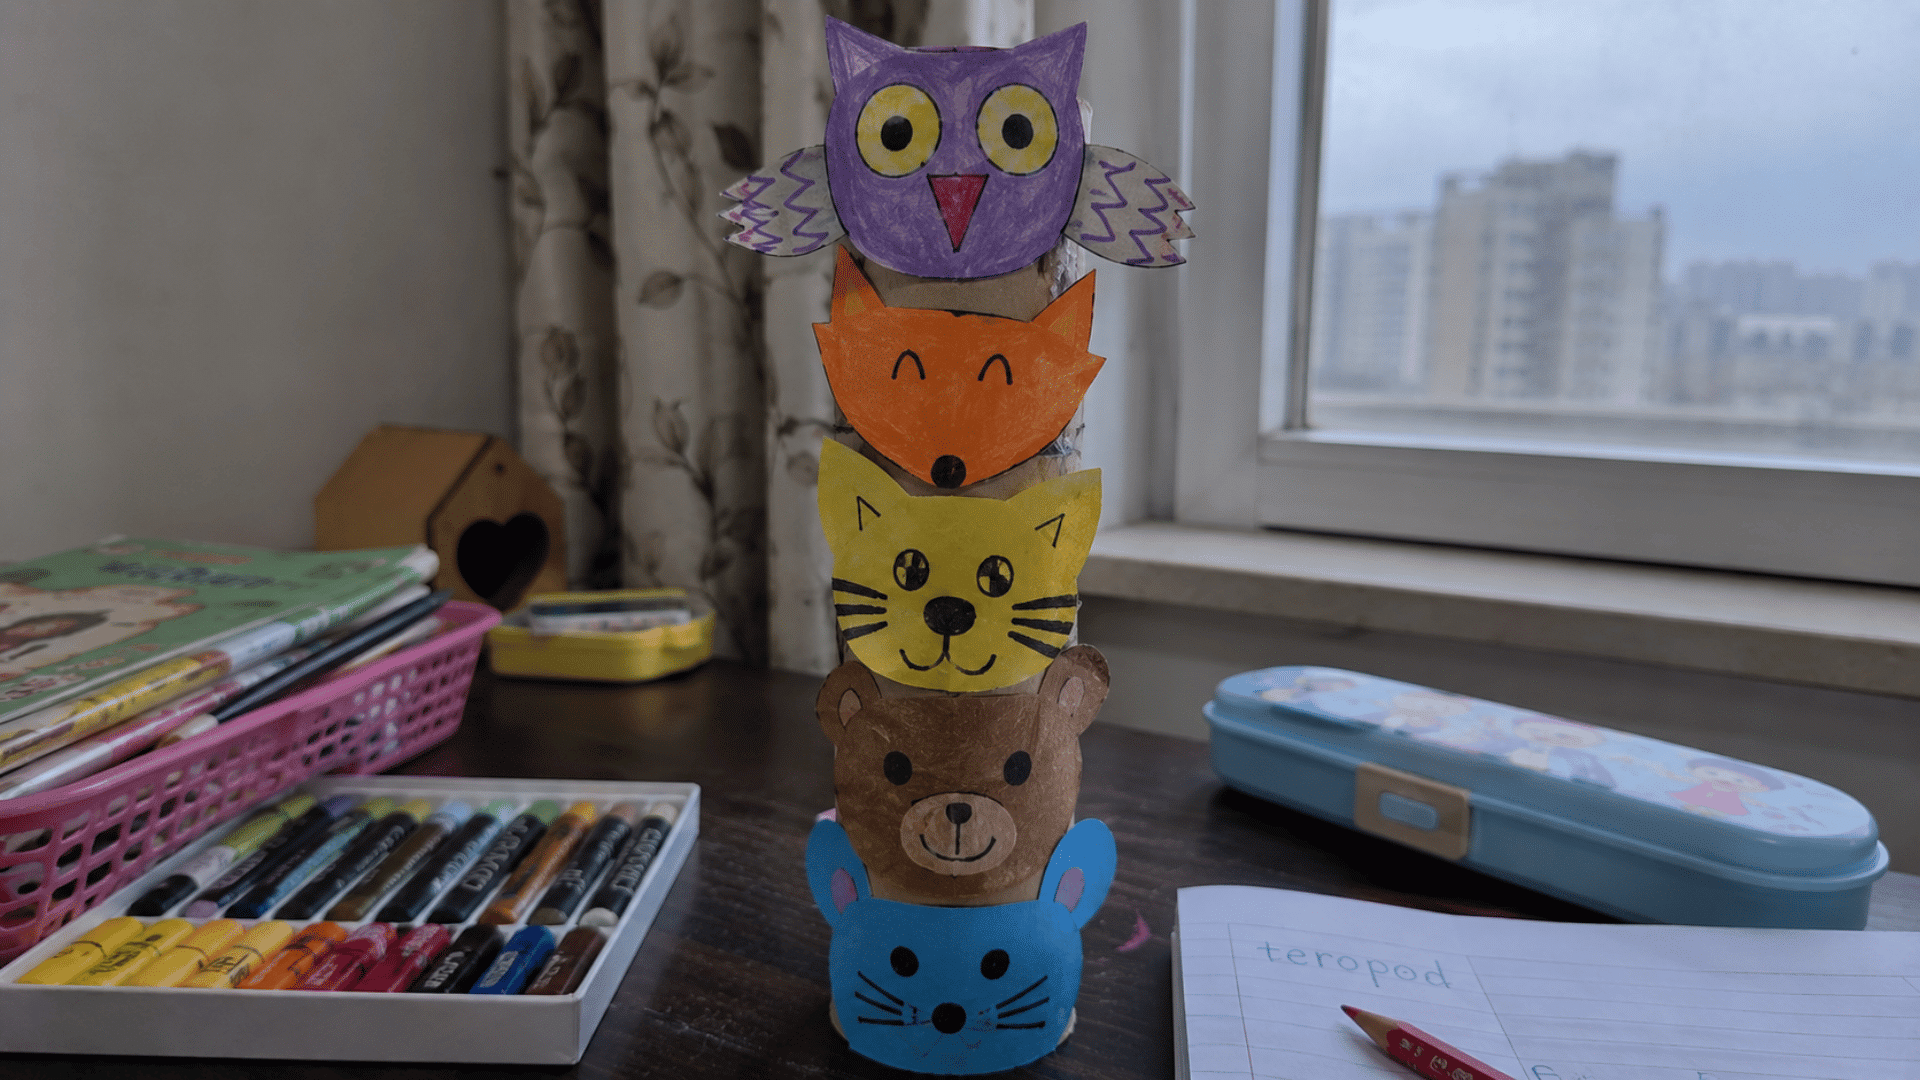
Creating a paper totem pole gives children an opportunity to learn about artistic traditions from some Northwest Coast Native Nations. It’s recommended for kids ages 7–11 as a respectful learning activity.
Items Required: Cardboard tube, construction paper, markers, glue, child-safe scissors.
How to Make It
- Draw several different animal faces on colored construction paper.
- Carefully cut out each animal and add simple facial details with markers.
- Glue the animals onto the cardboard tube from bottom to top.
- Press each piece gently so it sticks well before adding the next one.
- Talk about how animals can help tell stories while displaying the finished craft.
My Tip: Keep a few animal photos nearby so children can notice different shapes and features before they start drawing.
6. Nature Collage Craft
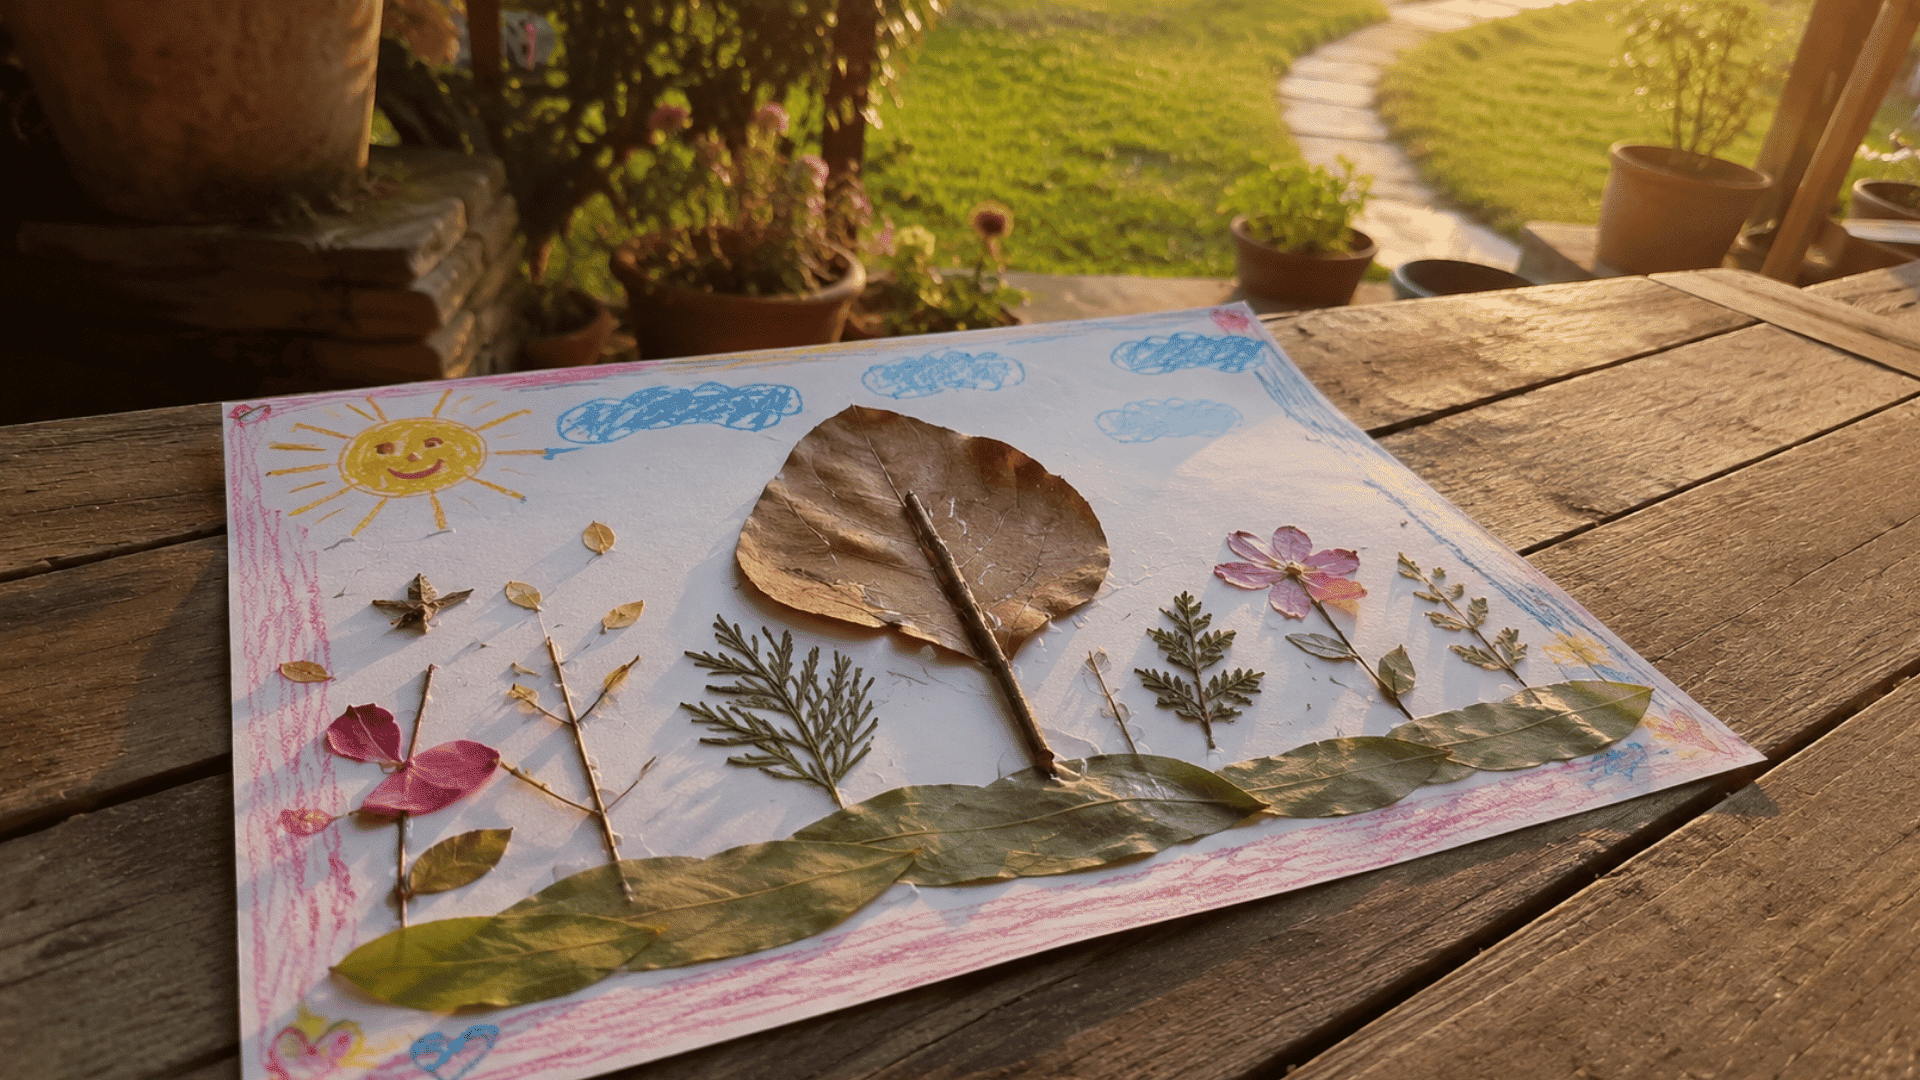
Leaves, flowers, and twigs can be turned into creative artwork with this nature-inspired project. It’s perfect for kids ages 4 and older, especially during spring and fall.
Items Required: Leaves, small twigs, flowers, grass, cardstock, glue, crayons or markers.
How to Make It
- Collect clean natural materials during a walk with an adult.
- Arrange the leaves, flowers, and twigs on the cardstock before gluing anything down.
- Glue each piece in place, pressing gently so it stays flat.
- Add extra drawings or borders with crayons or markers if desired.
- Let the collage dry completely before hanging it up or sharing it.
My Tip: If the leaves feel damp, press them inside a book for a day so they glue down more smoothly.
7. Corn Mosaic Art
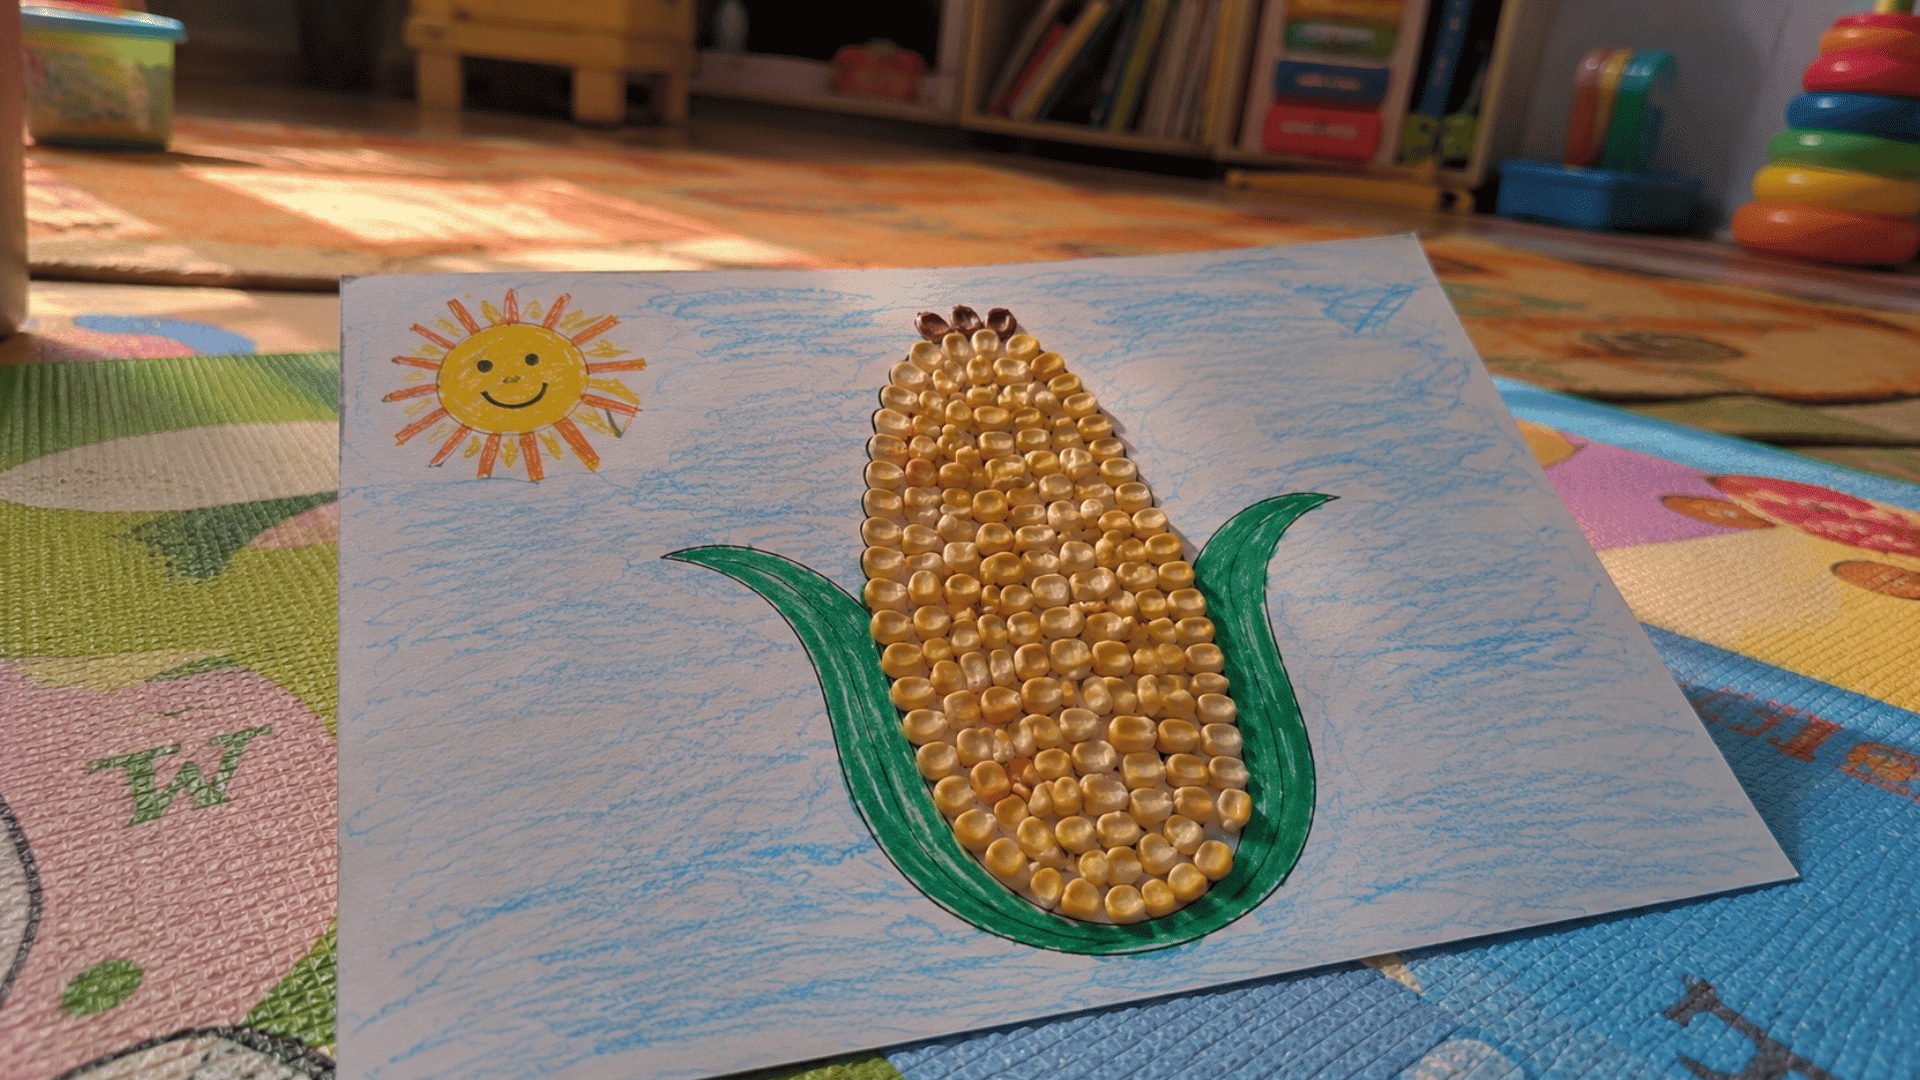
Corn mosaic art is a simple project that introduces children to an important crop grown by many Native Nations. It’s best for kids ages 6–10 and helps strengthen fine motor skills.
Items Required: Dried corn kernels, cardstock, school glue, pencil, markers or crayons.
How to Make It
- Draw a simple shape, such as a corn cob, sun, or animal, on the cardstock.
- Spread a thin layer of glue inside the outline a little at a time.
- Press the corn kernels gently onto the glue until the design is filled.
- Add color around the mosaic with markers or crayons if desired.
- Leave the artwork flat until the glue dries completely.
My Tip: Work in small sections so the glue doesn’t dry before the kernels are added.
8. Paper Bead Necklace
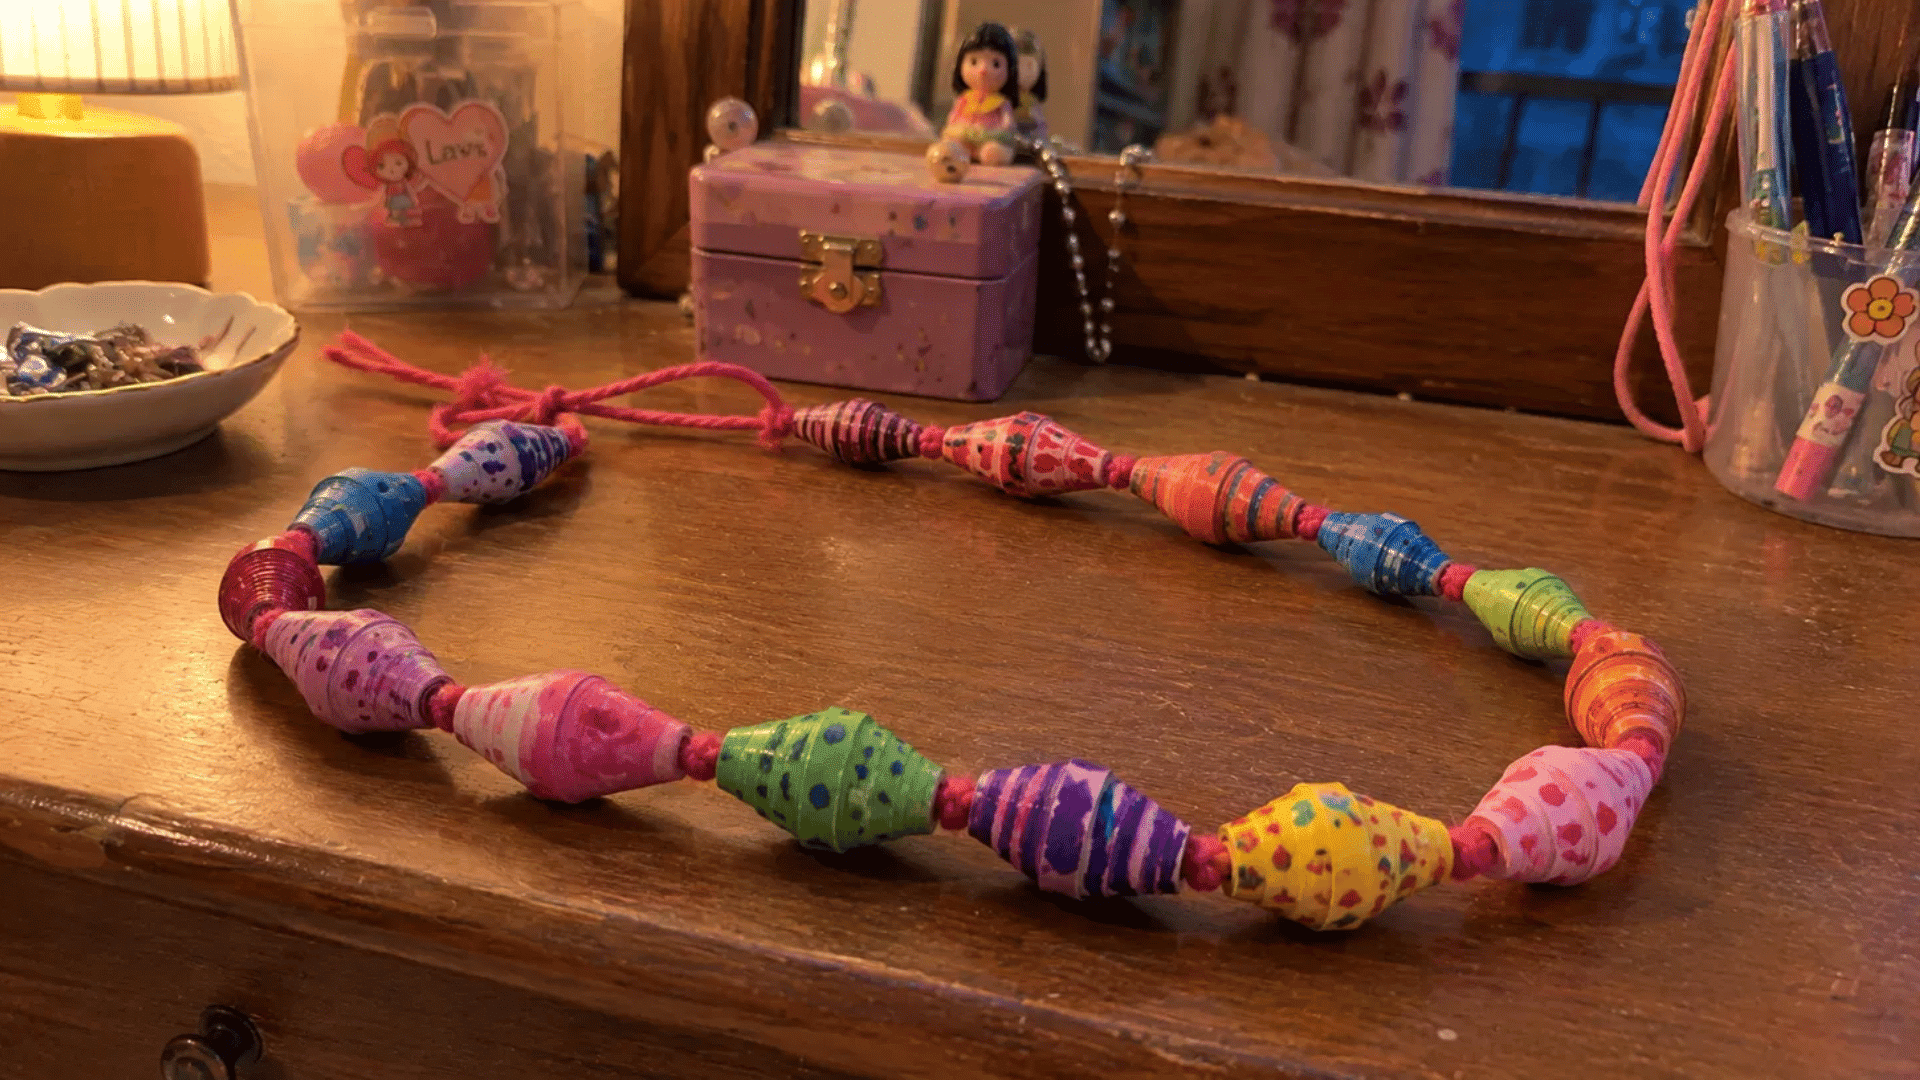
Rolling colorful paper into beads is an enjoyable way for children to create their own necklace. It’s suitable for kids ages 6–10 and also strengthens hand coordination.
Items Required: Colored paper, ruler, pencil, child-safe scissors, glue, string or yarn.
How to Make It
- Cut long triangle shapes from colored paper.
- Roll each strip tightly from the wide end toward the point.
- Glue the end to keep each bead from unrolling.
- Thread the finished beads onto a piece of string or yarn.
- Tie the ends together to complete the necklace.
My Tip: Roll each bead tightly so it keeps its shape after the glue dries.
9. Animal Track Stamping
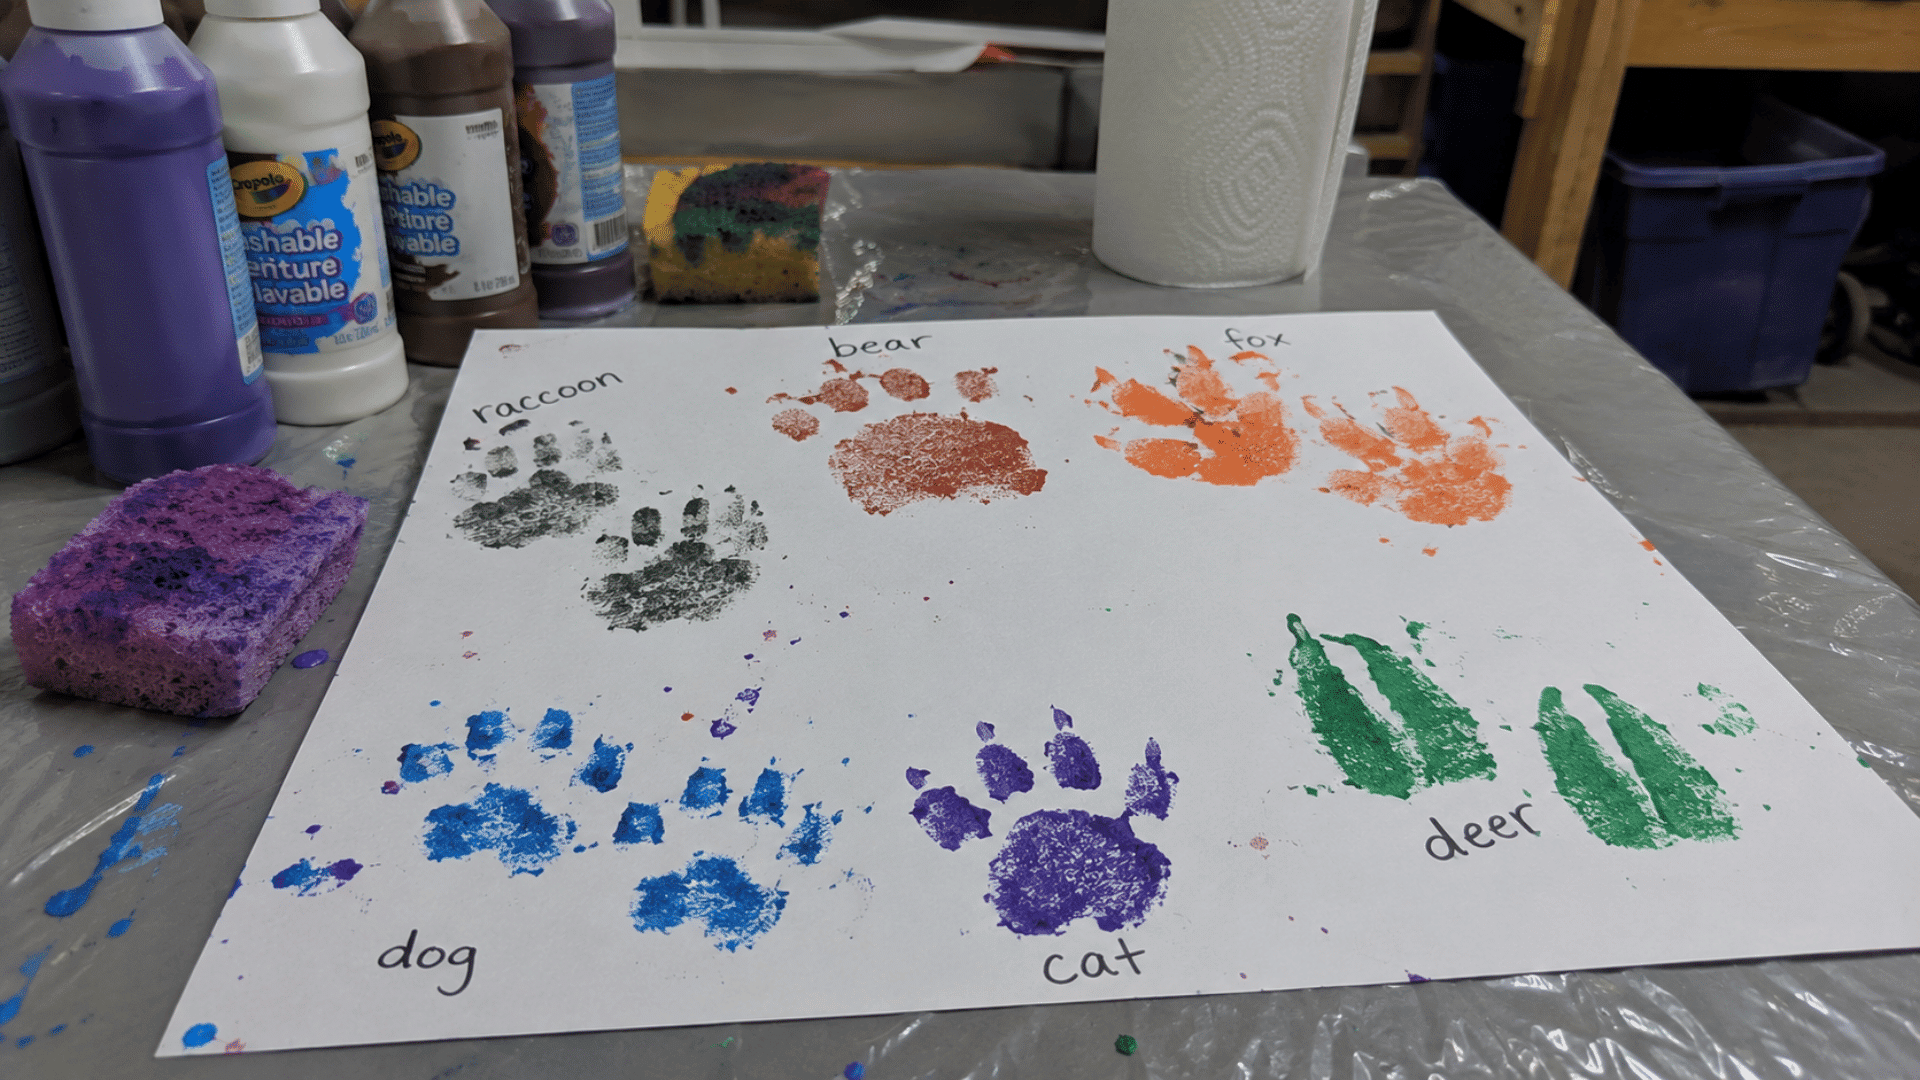
Children can create painted animal tracks while learning about wildlife found across different regions. This project is best for kids ages 4–8 and fits nicely into nature lessons.
Items Required: Craft foam or sponge, washable paint, paper, scissors, paper plates.
How to Make It
- Cut simple animal track shapes from craft foam or sponge.
- Pour a small amount of paint onto a paper plate.
- Dip each stamp lightly into the paint, using just enough.
- Press the stamp onto paper to create a trail of tracks.
- Compare the different track patterns and talk about the animals they belong to.
My Tip: Keep a damp cloth nearby so children can clean the stamps before changing colors.
10. Cardboard Canoe Craft
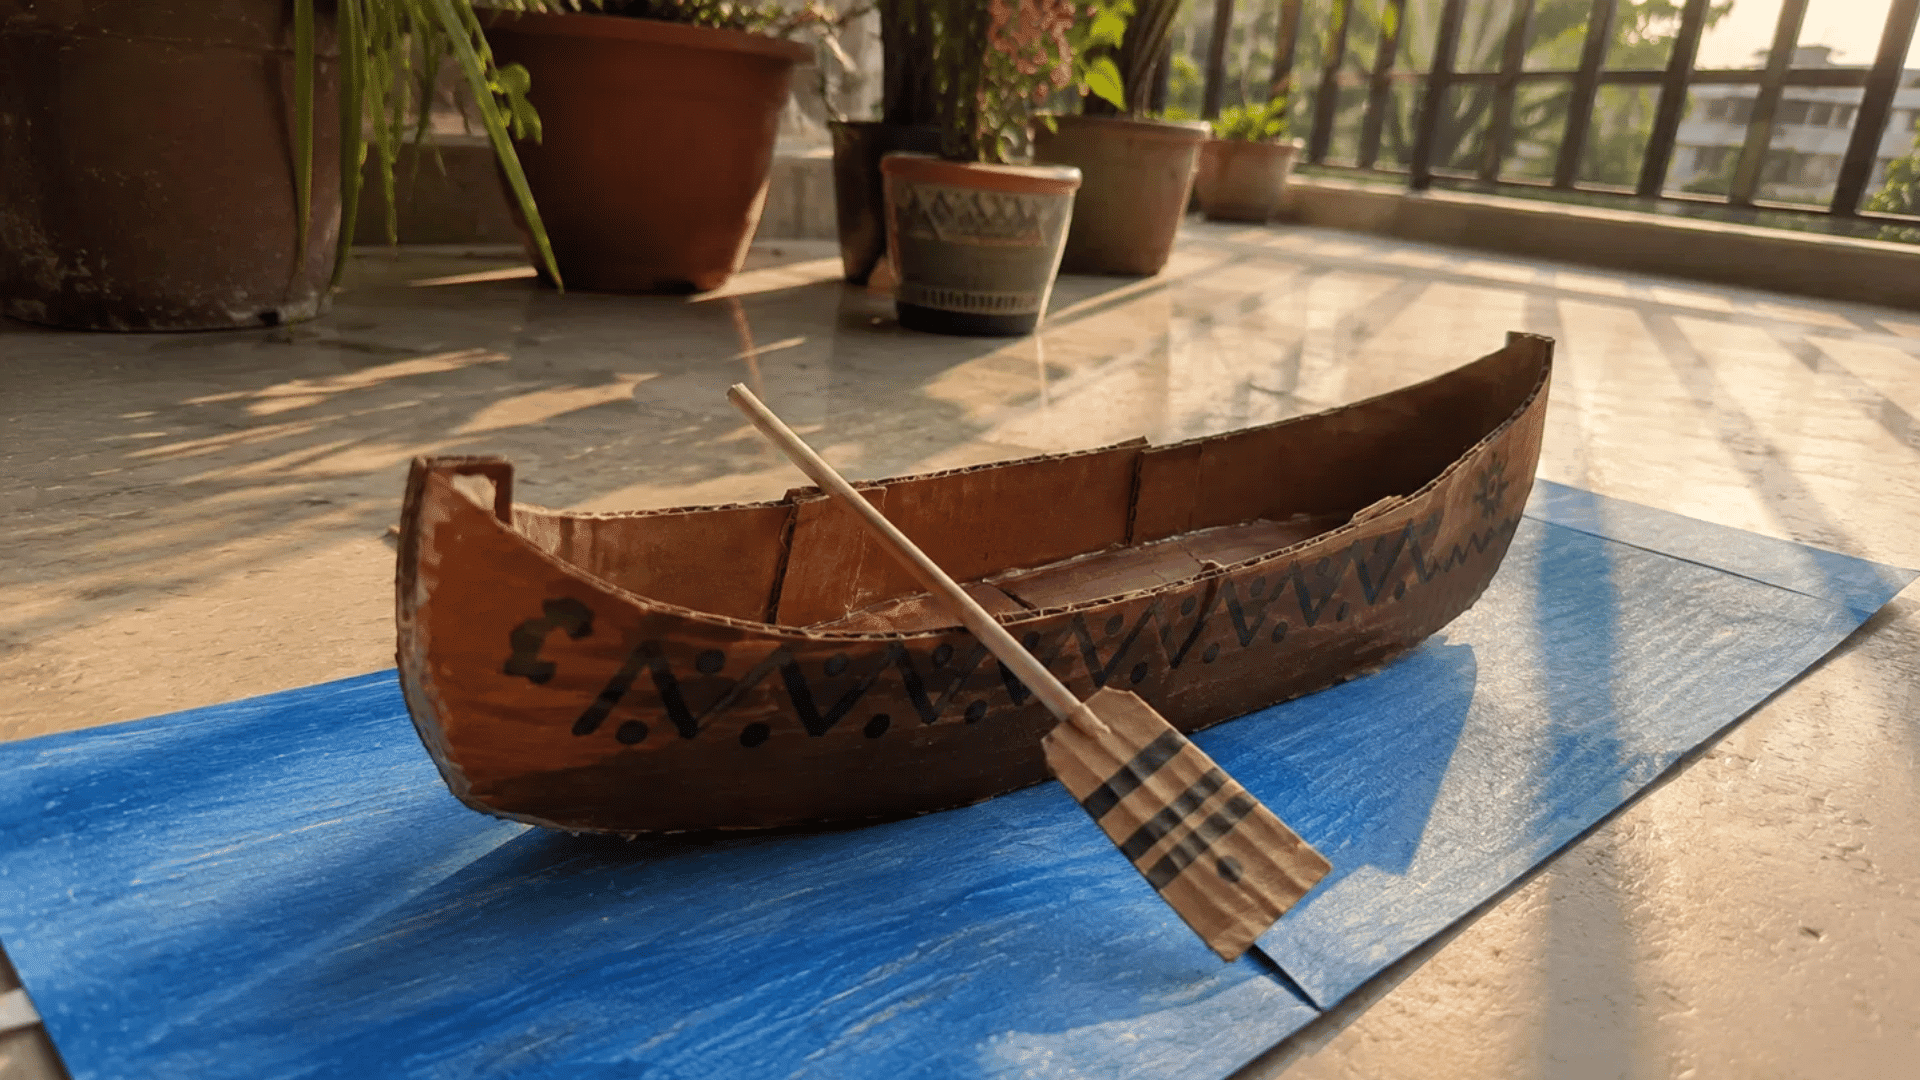
Building a small cardboard canoe introduces children to one way some Native Nations traveled across rivers and lakes. It’s recommended for kids ages 7–11 and complements geography lessons.
Items Required: Thin cardboard, brown paint, paintbrush, glue, child-safe scissors, markers.
How to Make It
- Draw and cut out two matching canoe shapes from cardboard.
- Glue the pieces together along the sides, leaving the top open.
- Paint the outside and allow it to dry completely.
- Add simple patterns with markers after the paint dries.
- Place the canoe on a blue paper “river” for a fun display.
My Tip: Thin cardboard is easier for children to cut and fold than thick shipping boxes.
11. Buffalo Paper Plate Craft
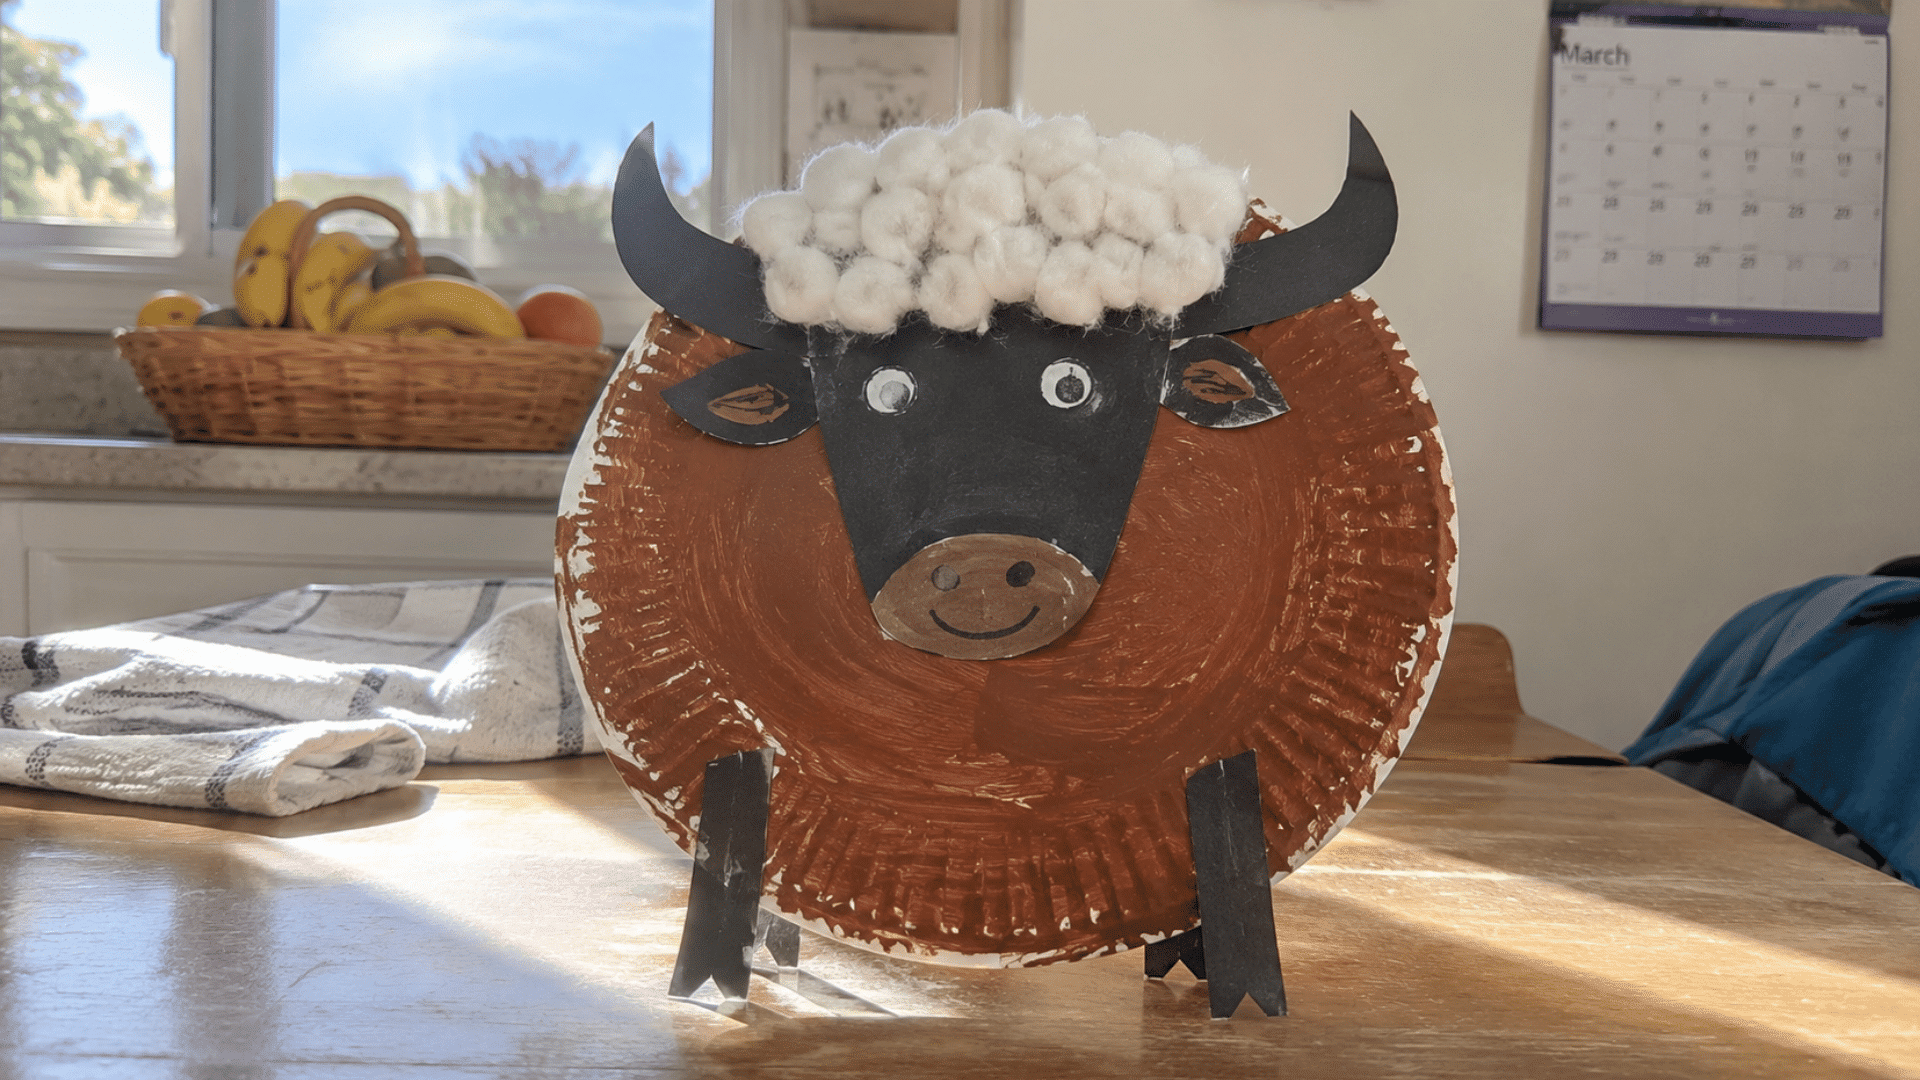
Turning a paper plate into a buffalo gives children a fun way to learn about an animal that was important to many Plains Nations. It’s a good fit for kids ages 4–8.
Items Required: Paper plate, brown paint, construction paper, cotton balls, glue, markers, child-safe scissors.
How to Make It
- Paint the paper plate brown and let it dry.
- Cut out the buffalo’s head, horns, and legs from construction paper.
- Glue the paper pieces onto the plate to form the buffalo.
- Add cotton around the neck to create a textured mane.
- Draw the eyes, nose, and other facial details with markers.
My Tip: Paint the paper plate first and let it dry before cutting the other pieces to save time.
12. Paper Corn Husk Doll Craft
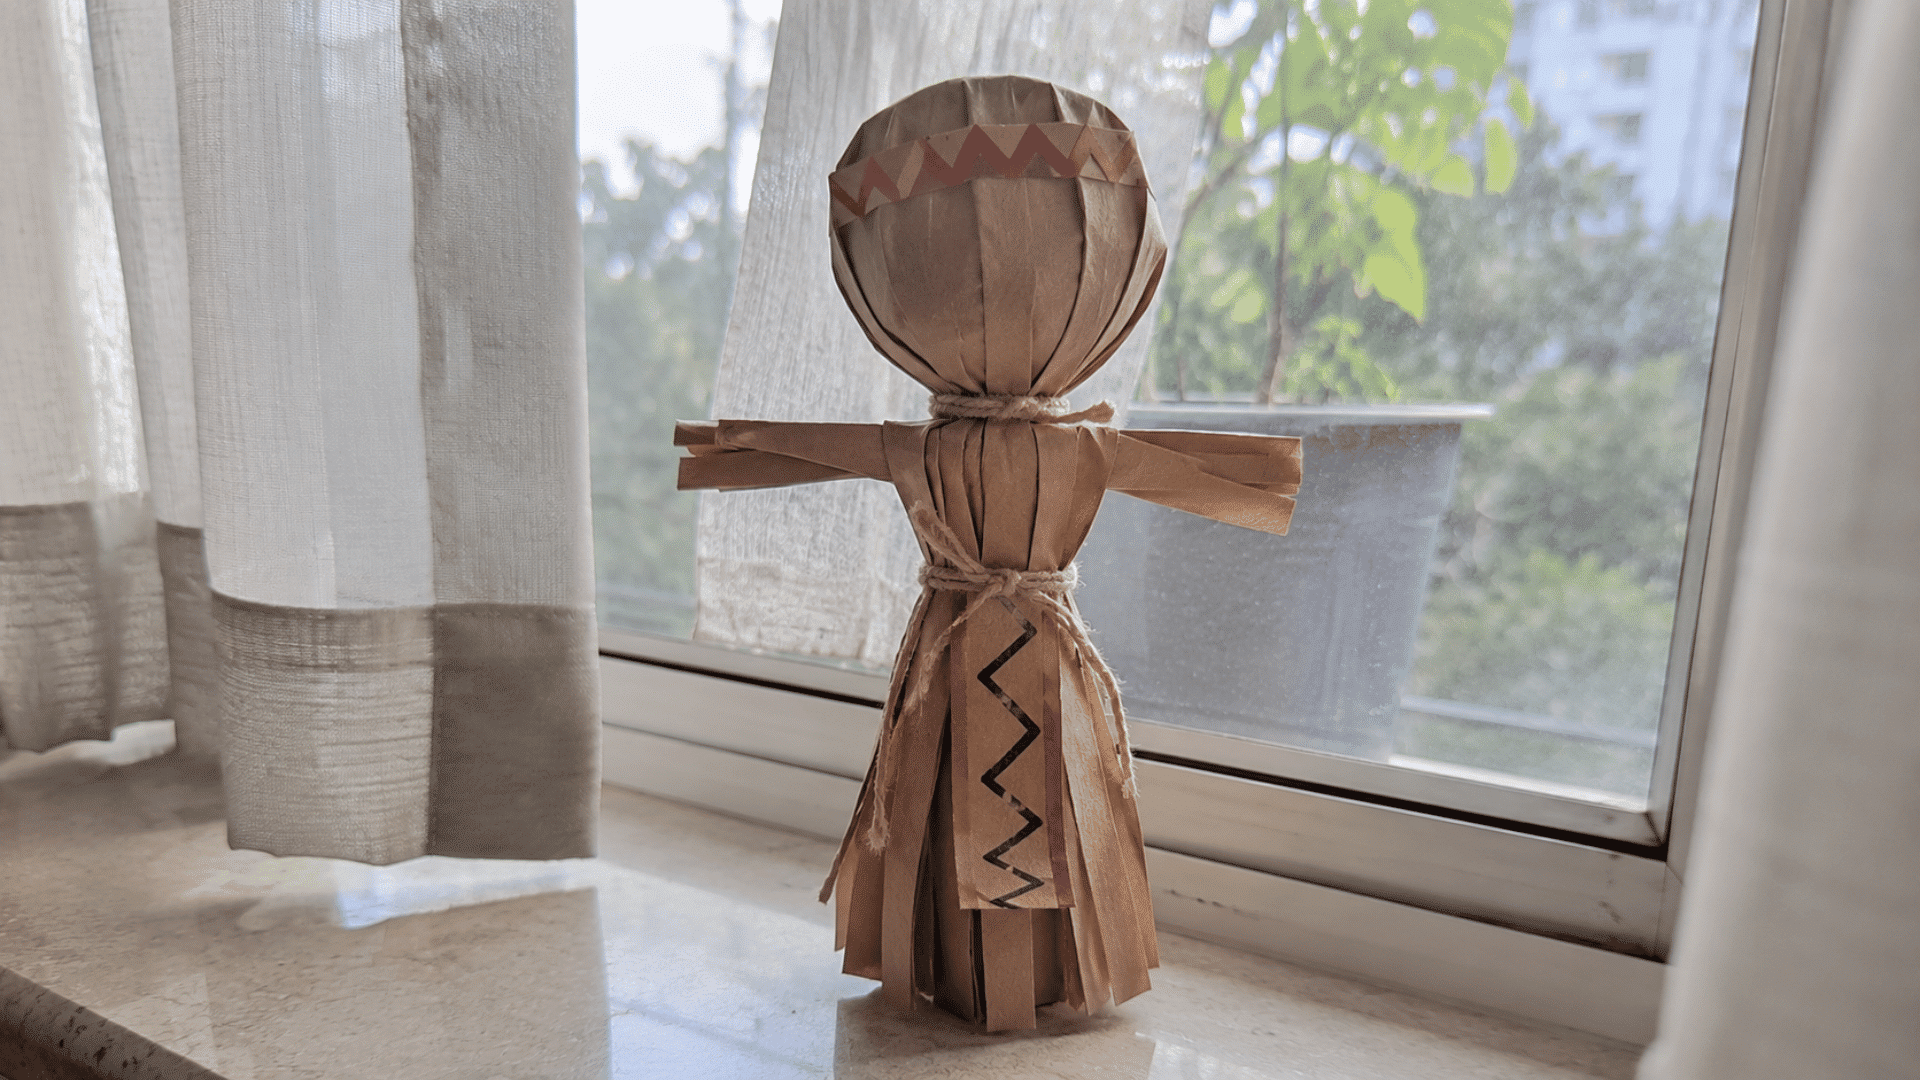
Paper strips can be folded into a doll inspired by a traditional craft made by some Native Nations. This classroom-friendly activity is best for kids ages 6–10.
Items Required: Brown construction paper, yarn, glue, child-safe scissors, markers.
How to Make It
- Cut long strips of brown construction paper to resemble corn husks.
- Fold and gather the strips to form the head and body.
- Tie yarn around the neck and waist to hold the shape together.
- Fold smaller strips to create the arms and glue them in place.
- Trim the ends evenly and decorate the doll with simple paper details.
My Tip: Cut all the paper strips before starting so children can focus on assembling the doll without stopping.
13. Woven Paper Mat Craft
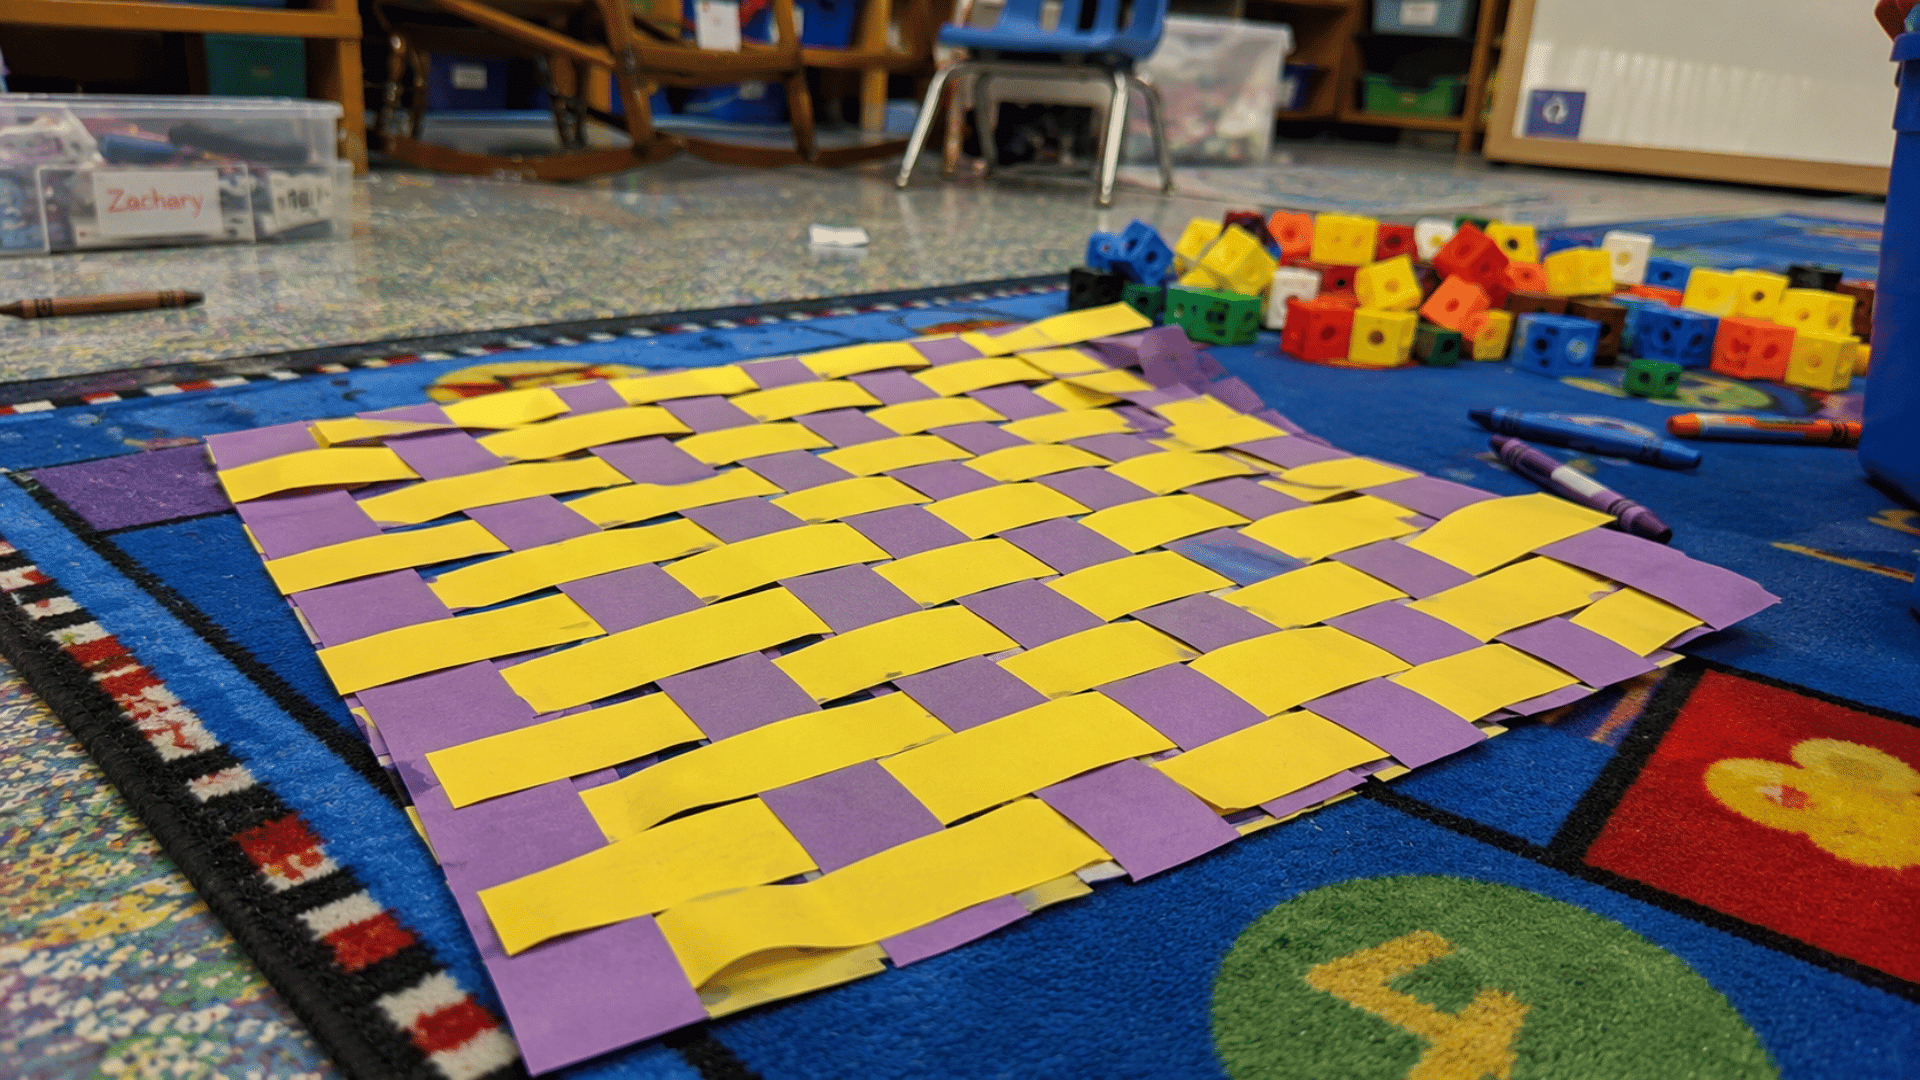
Weaving colorful paper strips helps children build hand coordination while practicing simple patterns. It’s a great choice for kids ages 6–10 during art or social studies activities.
Items Required: Colored construction paper, ruler, pencil, child-safe scissors, glue.
How to Make It
- Fold one sheet of construction paper in half and cut evenly spaced slits, leaving a border around the edges.
- Cut another sheet into long strips using a different color.
- Weave each strip over and under through the slits until the mat is filled.
- Glue the ends of the strips to the back so they stay in place.
- Trim any extra paper around the edges for a neat finish.
My Tip: Use two contrasting paper colors to make the woven pattern easier for children to see.
14. Handprint Buffalo Craft
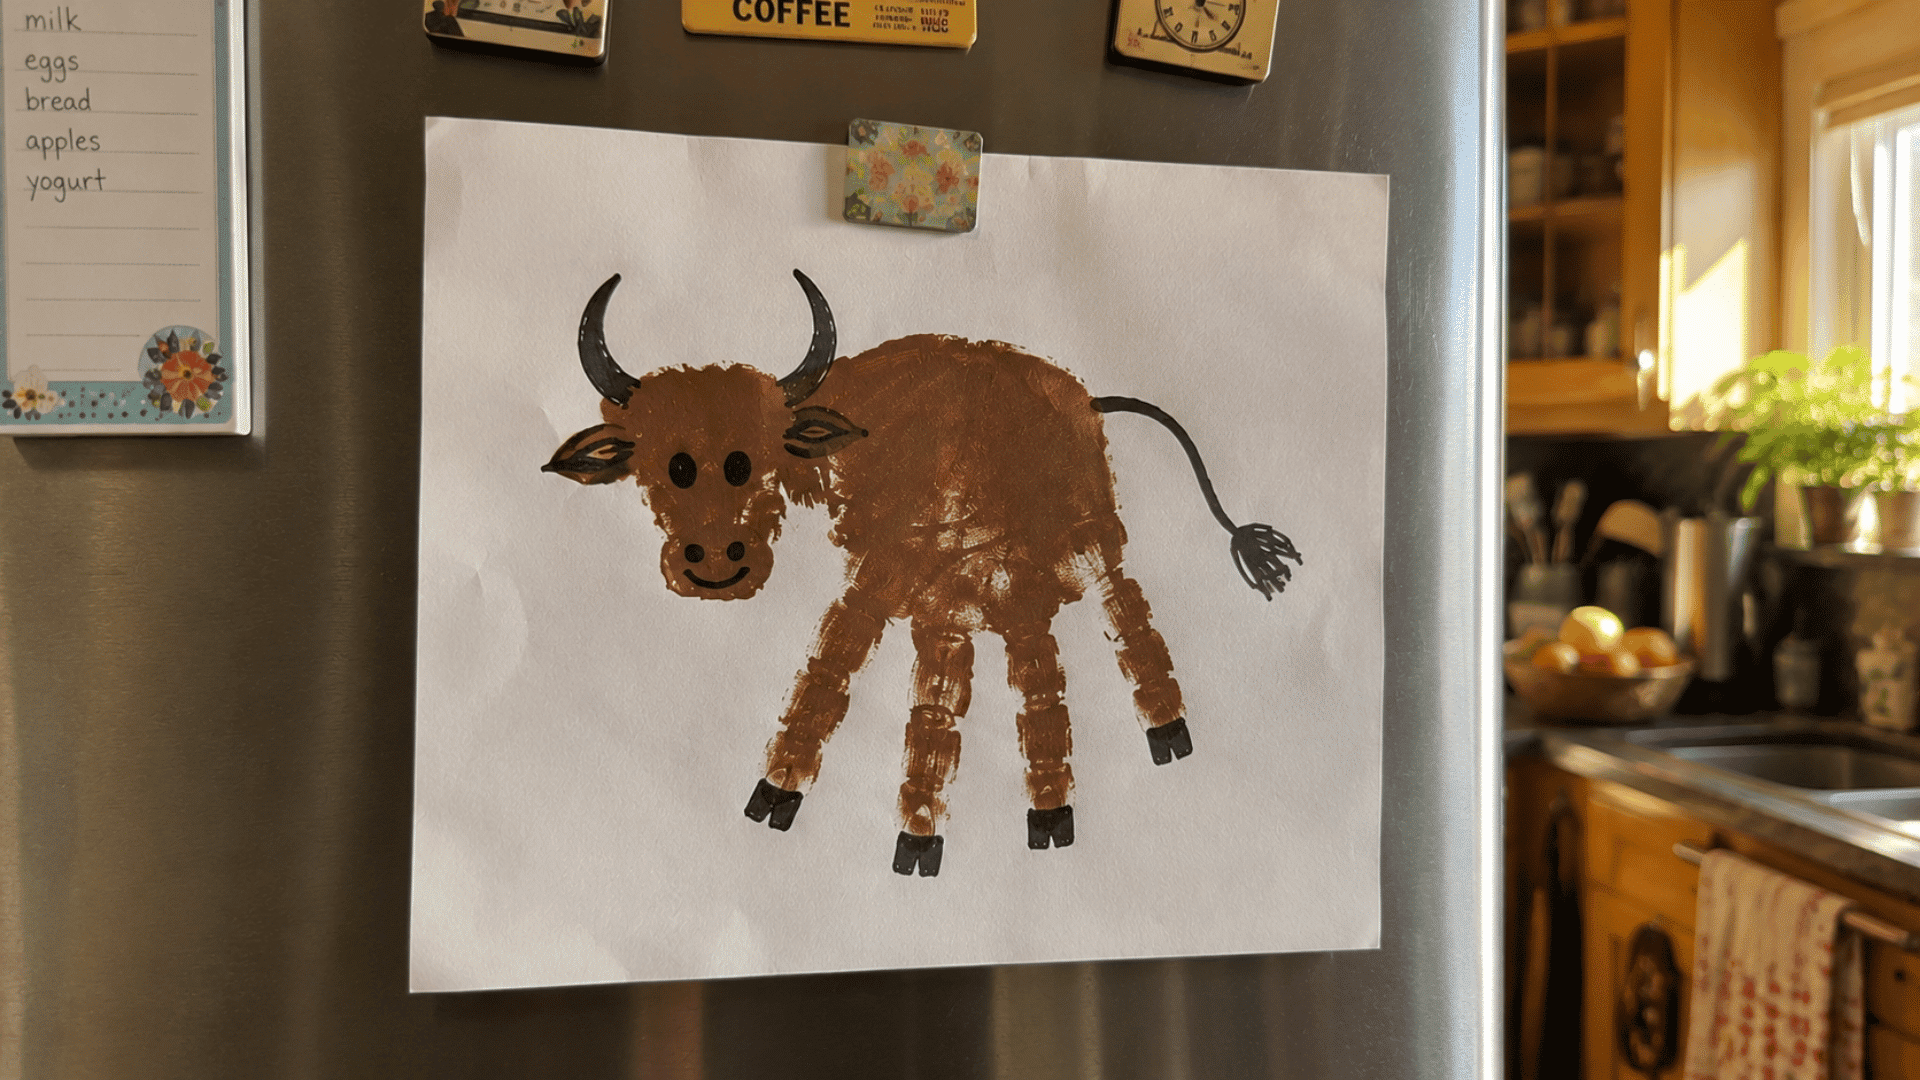
A painted handprint can be turned into a buffalo that children will enjoy displaying as a keepsake. It’s best for kids ages 4–7 and only requires a few basic supplies.
Items Required: Brown washable paint, white cardstock, paintbrush, black marker, paper towels.
How to Make It
- Paint the child’s palm and fingers with brown washable paint.
- Press the hand firmly onto the cardstock and lift it straight up.
- Allow the handprint to dry completely before adding details.
- Draw the buffalo’s head, horns, legs, and tail with a black marker.
- Write the date and the child’s name below the finished artwork.
My Tip: Keep baby wipes nearby so little hands can be cleaned before the paint starts to dry.
15. Four Directions Color Wheel Craft
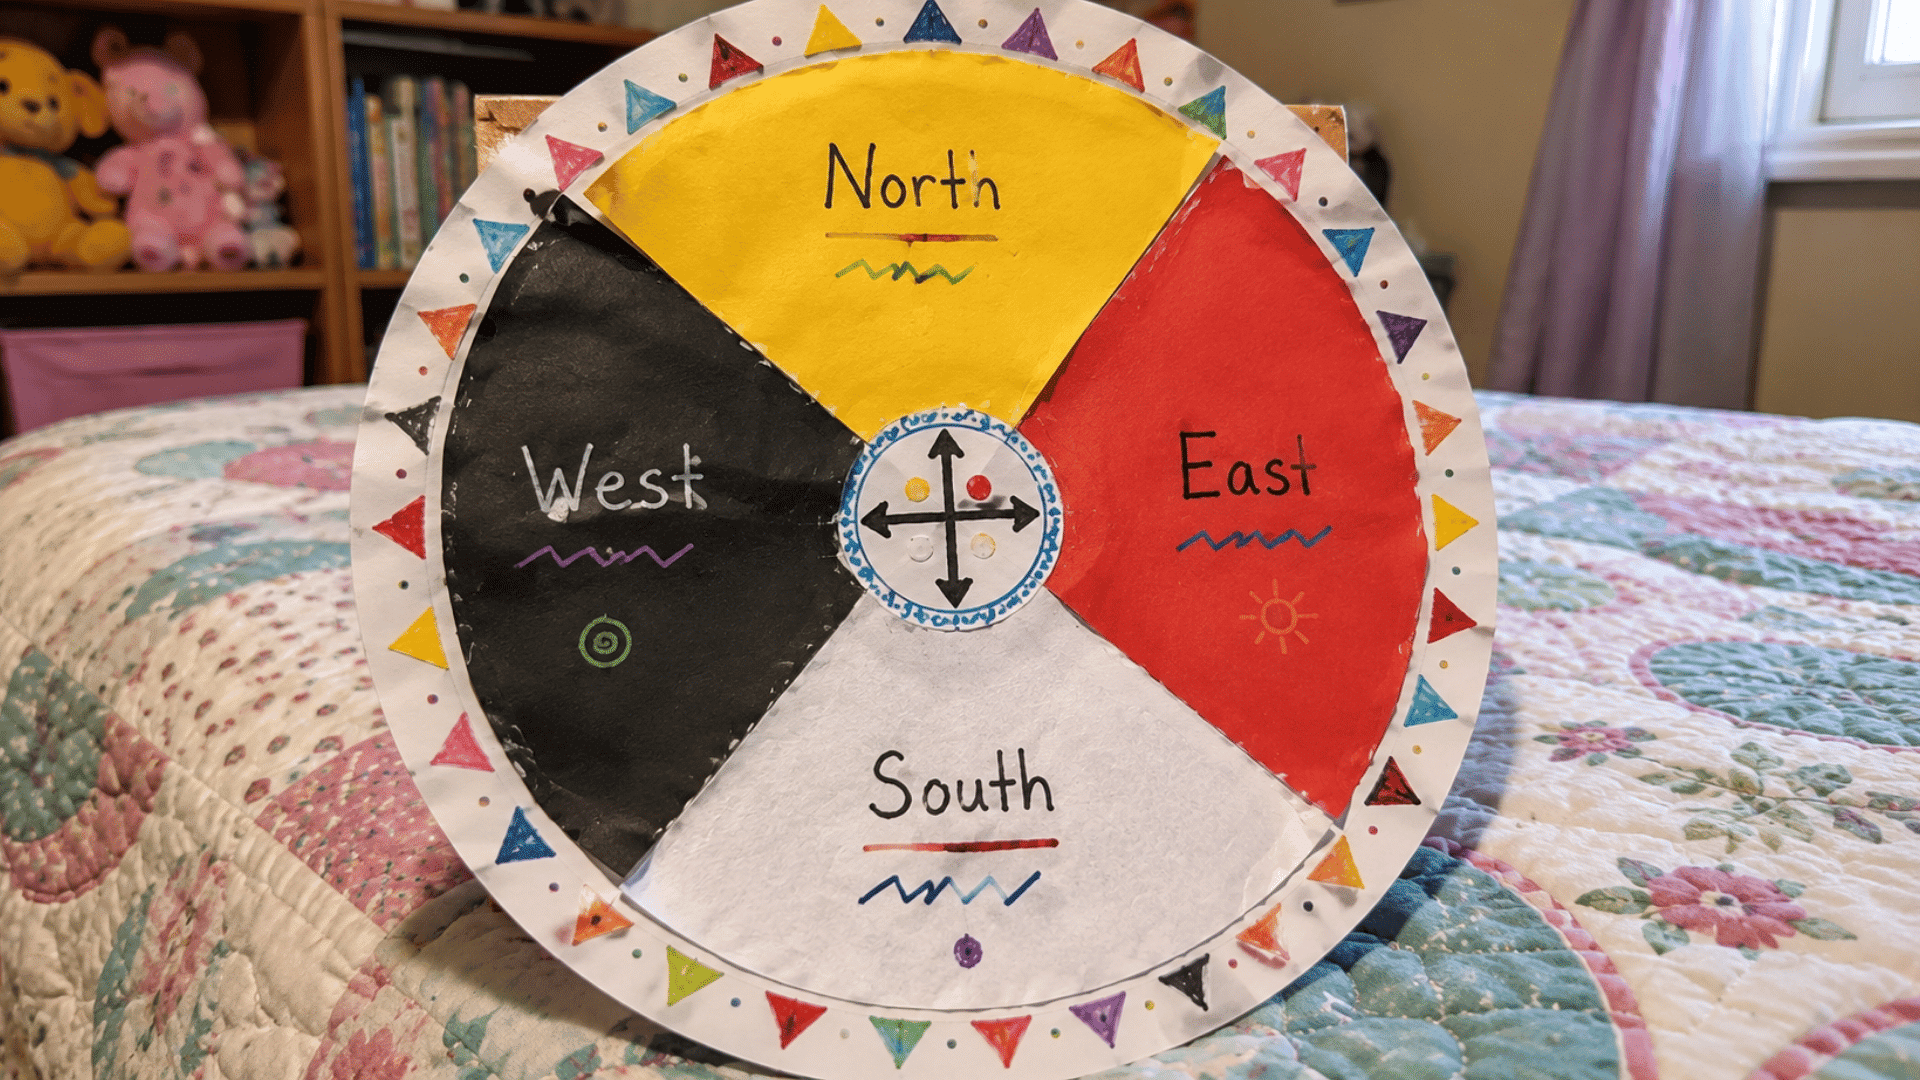
This colorful craft introduces the four directions through a fun paper activity. It’s best for kids ages 6–10 and encourages children to learn while creating.
Items Required: White cardstock, colored construction paper, compass template, glue, markers, child-safe scissors.
How to Make It
- Draw or print a large circle and divide it into four equal sections.
- Cut colored paper pieces and glue one color into each section of the wheel.
- Label the directions clearly with a marker.
- Decorate the border using simple geometric patterns.
- Discuss how different Native Nations may use different colors and meanings for the four directions.
My Tip: Keep a simple map nearby so children can match each direction to north, south, east, and west during the activity
Classroom and Family-Friendly Native American Activities
Crafts are a great starting point, but simple activities can help children learn even more about Native American cultures. They also encourage reading, discussion, and teamwork.
The ideas below are easy to use at home or in the classroom. Most need very little preparation and can be adapted for different age groups.
| Activity | Classroom Idea | Family Activity |
|---|---|---|
| Read a Native American Book | Read and discuss the story. | Read together before bedtime. |
| Explore a U.S. Map | Locate different Native Nations. | Find the same places together. |
| Nature Walk | Collect items for crafts. | Look for local plants and trees. |
| Storytelling Circle | Build a story as a group. | Take turns telling a story. |
| Pattern Drawing | Draw simple geometric patterns. | Decorate bookmarks or cards. |
| Traditional Foods | Learn about corn, beans, and squash. | Cook with one of the ingredients. |
| Museum Visit | Take a virtual museum tour. | Visit a local museum if possible. |
| Animal Matching | Match animals to their regions. | Spot local wildlife together. |
| Native Language Greeting | Learn a simple greeting. | Practice saying it together. |
| Regional Homes | Compare traditional homes. | Talk about homes in different climates. |
Every activity gives children another chance to learn through reading, conversation, and creativity. Even a few shared minutes can make the experience more meaningful.
Teaching Native American Culture Respectfully
Crafts become more meaningful when children learn about the culture behind each activity. A respectful approach helps create a better learning experience.
- Remember every Native Nation is unique: Explain that each Nation has its own history, language, traditions, and artistic styles.
- Share a little background: Introduce where the craft idea comes from before children begin creating.
- Use trusted learning resources: Choose books, museums, tribal organizations, or educational websites with accurate information.
- Avoid sacred symbols and costumes: Keep projects focused on learning instead of copying ceremonial items or cultural practices.
- Encourage respectful questions: Give children time to ask questions and discuss what they learned during the activity.
- Celebrate learning over perfection: Focus on the ideas behind the craft rather than making every project look exactly the same.
A respectful approach helps children enjoy craft time while building a deeper appreciation for Native American cultures. Even a short conversation can make each activity more meaningful.
Final Thoughts
Handmade projects have always reminded me that crafts can become much more than a way to pass the time. They often become opportunities to learn, ask questions, and create lasting memories.
These Native American-inspired activities show that meaningful learning doesn’t have to be complicated. A few everyday supplies can turn an afternoon into a creative experience.
Pairing each craft with a story, a book, or a short discussion helps children better understand the culture behind the activity. That extra context can make the project even more worthwhile.
I hope these ideas encourage children to create with curiosity while learning about Native American cultures with care and respect. Those lessons can stay with them long after craft time ends.
Frequently Asked Questions
Can These Crafts Be Used for Birthday Parties?
Yes, many of these activities work well as creative party stations for small groups of children.
What is the Best Way to Display Finished Crafts?
Display them on classroom bulletin boards, a wall at home, or a dedicated craft shelf where children can enjoy their work.
Can Children Make These Crafts Throughout the Year?
Yes, these projects are suitable for any season and can be connected to different lessons or family activities.
How Can Older Kids Make These Crafts More Challenging?
Older children can add extra details, create larger projects, or research the Native Nation connected to the craft before making it.