Thanksgiving feels even more exciting for kids when they have something colorful to make while the holiday preparations are happening around them.
A few simple craft supplies can quickly turn into turkeys, pumpkins, thankful trees, and plenty of creative surprises.
These Thanksgiving crafts for kids are designed to be easy, playful, and manageable, much like other simple crafts for younger kids that focus on cutting, coloring, gluing, and decorating.
Easy Thanksgiving Crafts for Kids to Make
These projects give kids something cheerful to make, use, or display when finished. They also leave room for personal touches, so each craft feels a little different.
1. Paper Plate Turkey
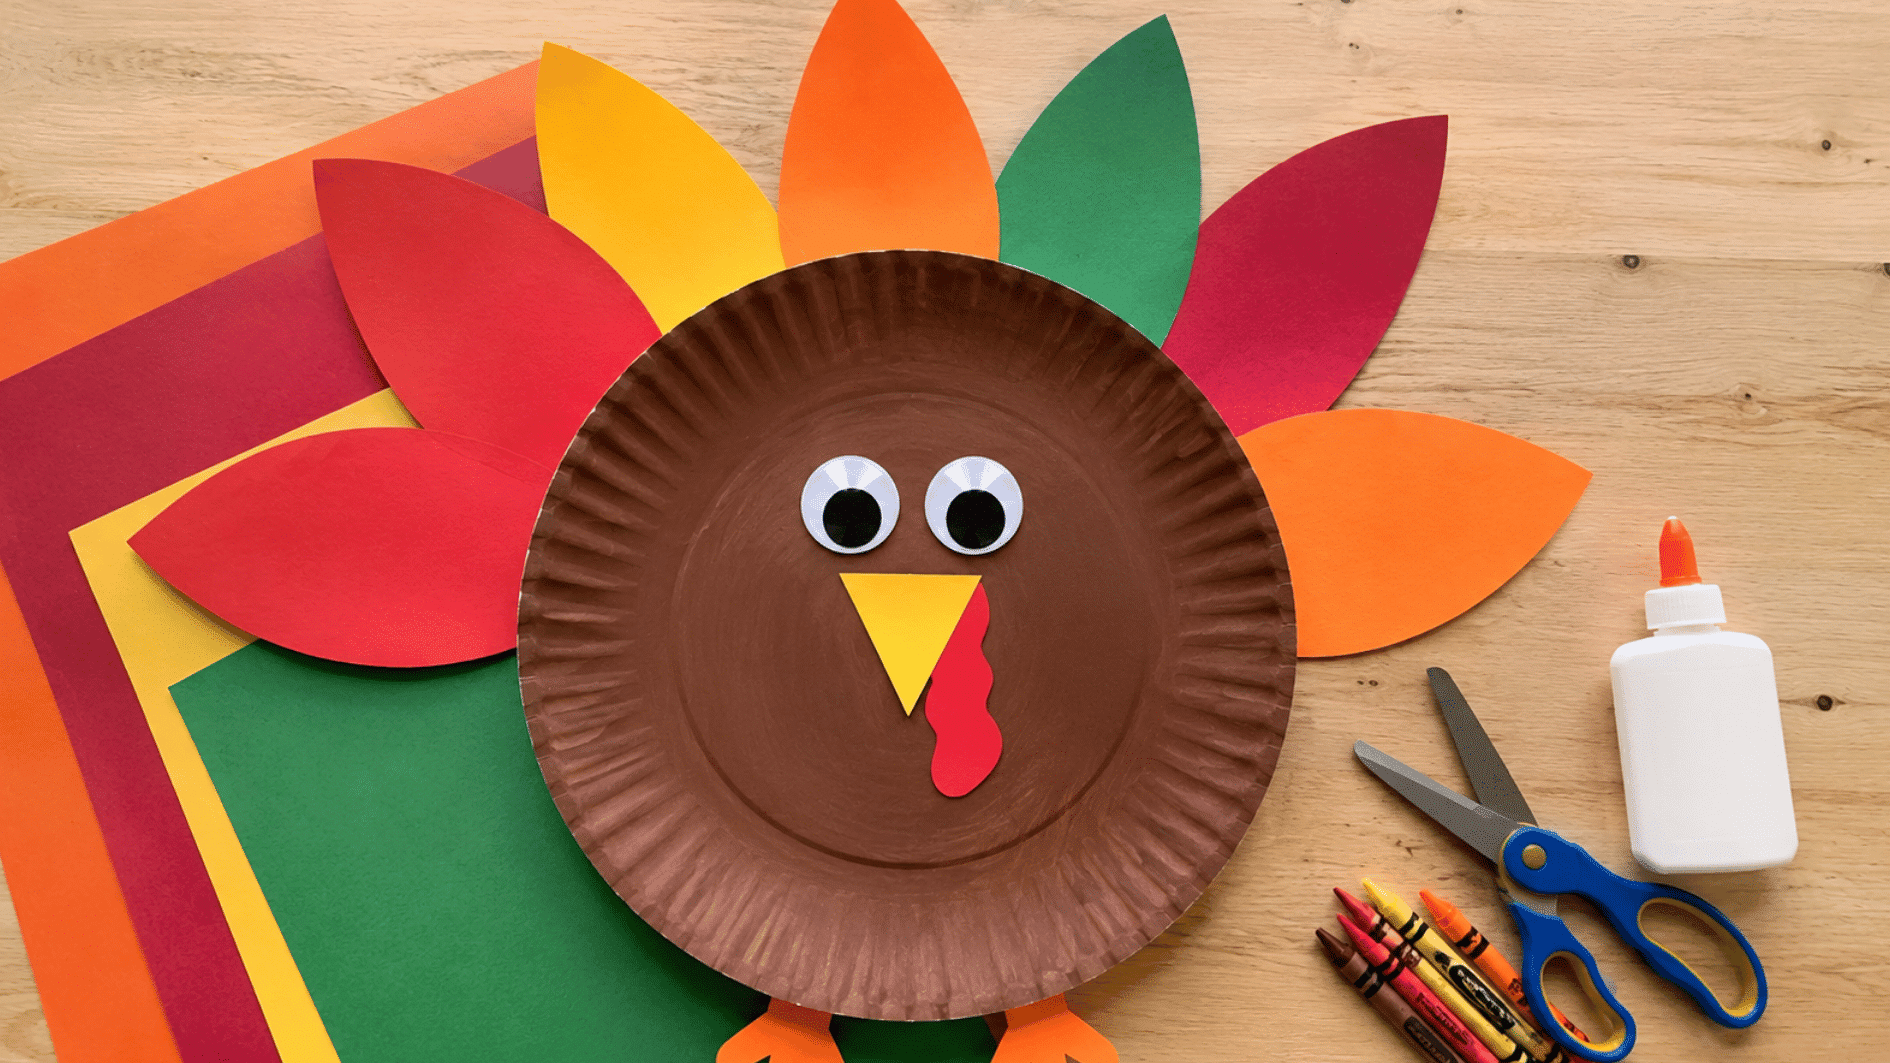
A paper plate makes a simple turkey base that kids can quickly decorate with colorful feathers and facial details. Once dry, it works well as a cheerful Thanksgiving display piece.
Materials: Paper plate, construction paper, washable paint or crayons, glue, child-safe scissors, marker.
How to Make It:
- Color the plate: Paint or color the front brown and let it dry if needed.
- Cut the feathers: Make 5 to 7 large feathers from different paper colors.
- Build the tail: Fan the feathers behind the plate and glue them in place.
- Make the face: Add paper eyes, a triangle beak, and a red wattle.
- Finish the turkey: Draw or glue on feet, then leave everything flat until secure.
Tip: Trace and cut handprints instead of individual feathers for younger kids.
2. Handprint Turkey Keepsake
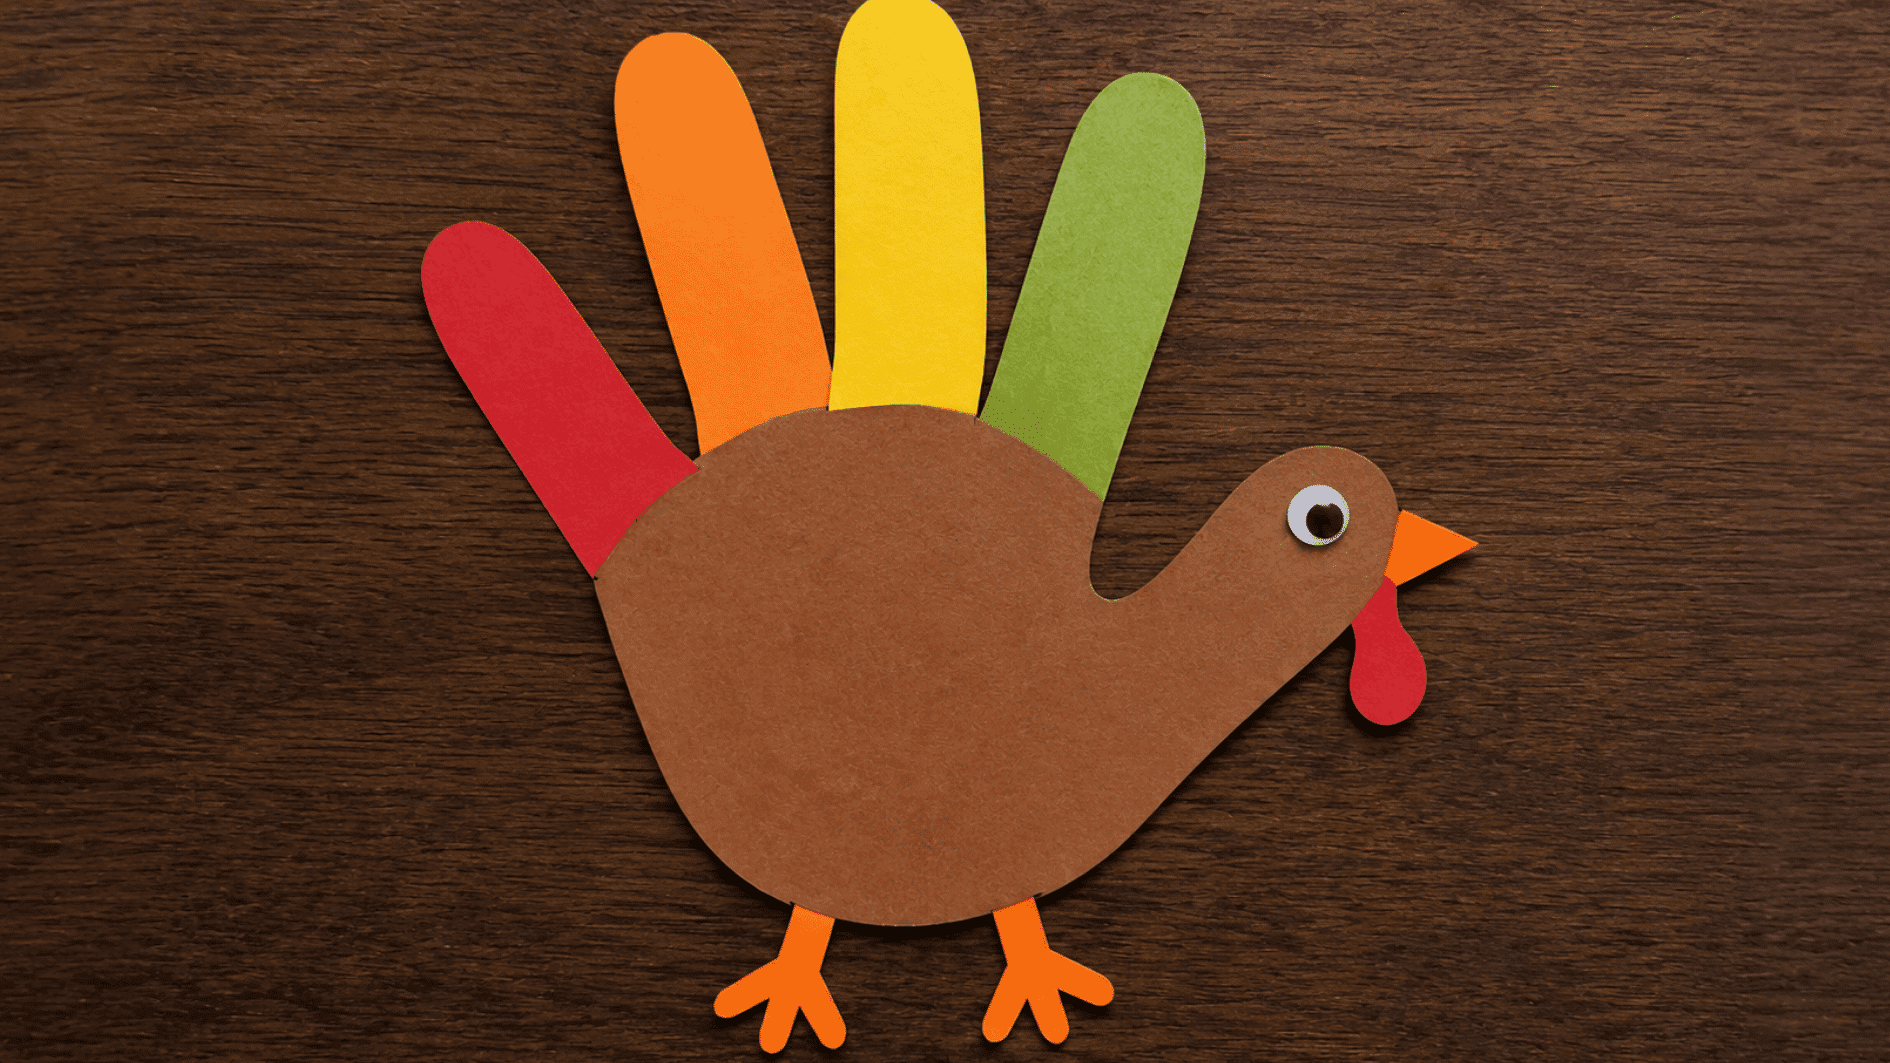
A traced hand becomes a turkey with almost no shaping, making this craft quick and personal. Adding your child’s name, age, and year turns it into a keepsake.
Materials: Construction paper, pencil, scissors, glue, markers.
How to Make It:
- Trace the hand: Spread the fingers apart and trace around the entire hand.
- Cut it out: Follow the outline carefully, especially between the fingers.
- Create the turkey: Use the thumb as the head and the fingers as feathers.
- Add details: Draw an eye, beak, wattle, legs, and feet.
- Make it a keepsake: Write your child’s name, age, and year near the bottom.
Tip: Adults can handle the cutting for children who are still learning to use scissors.
3. Paper Bag Turkey Puppet
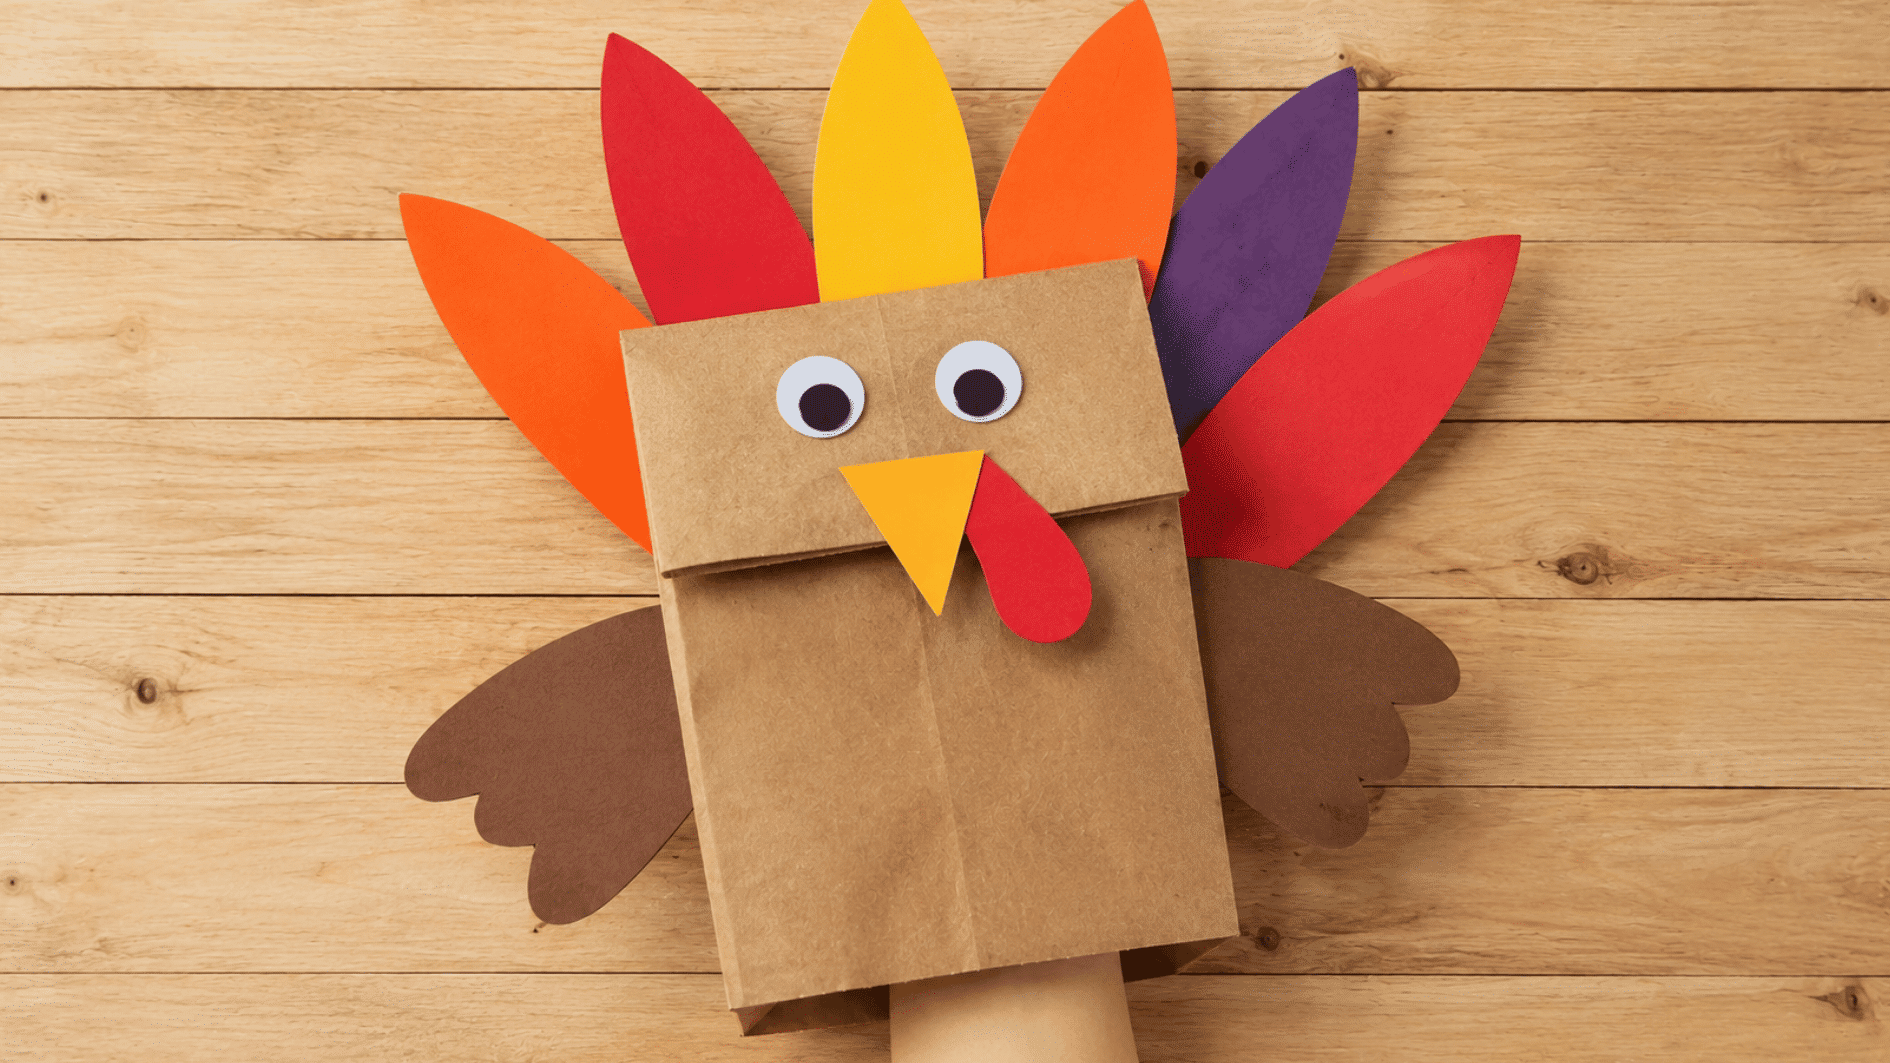
A brown paper bag becomes a playful turkey puppet with just a few paper additions. Kids can decorate the face and feathers, then use it for simple pretend play.
Materials: Brown paper bag, construction paper, glue, markers, scissors.
How to Make It:
- Position the bag: Lay it flat with the folded flap facing upward.
- Cut the feathers: Make several long feather shapes from colored paper.
- Attach the tail: Fan the feathers behind the bag and glue them down.
- Create the face: Add eyes, a paper beak, and a red wattle to the flap.
- Add wings: Glue one rounded paper wing to each side.
- Use the puppet: Let the glue dry, then slide a hand inside to move the flap.
4. Toilet Paper Roll Turkey
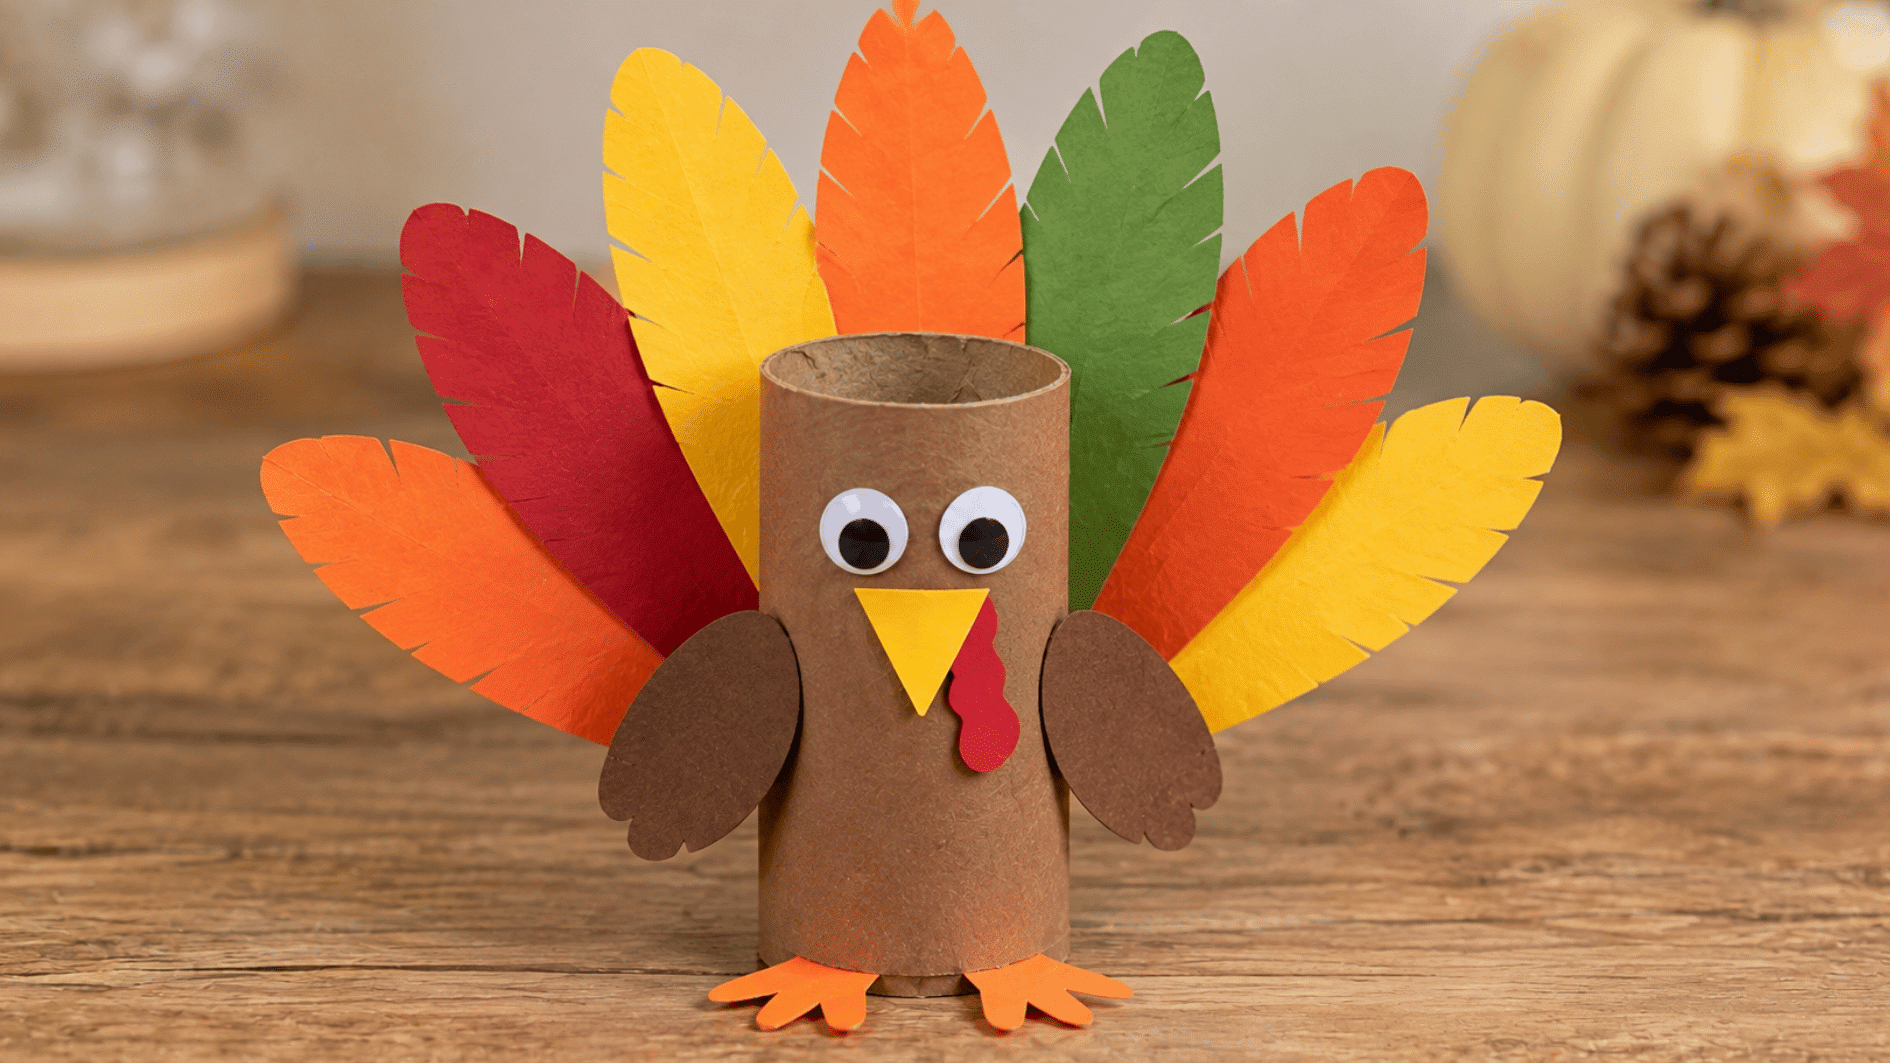
A cardboard tube gives this turkey a sturdy standing body that is easy to decorate. Paper feathers, wings, and facial details quickly turn it into a small Thanksgiving craft.
Materials: Cardboard tube, colored paper, markers or paint, glue, scissors.
How to Make It:
- Cover the tube: Color it brown or wrap it with brown construction paper.
- Make the feathers: Cut several colorful feathers slightly taller than the tube.
- Attach the tail: Fan and glue the feathers across the back.
- Add the face: Place eyes, a beak, and a wattle near the top front.
- Finish the body: Add small paper wings and feet, then let it dry upright.
5. Coffee Filter Turkey
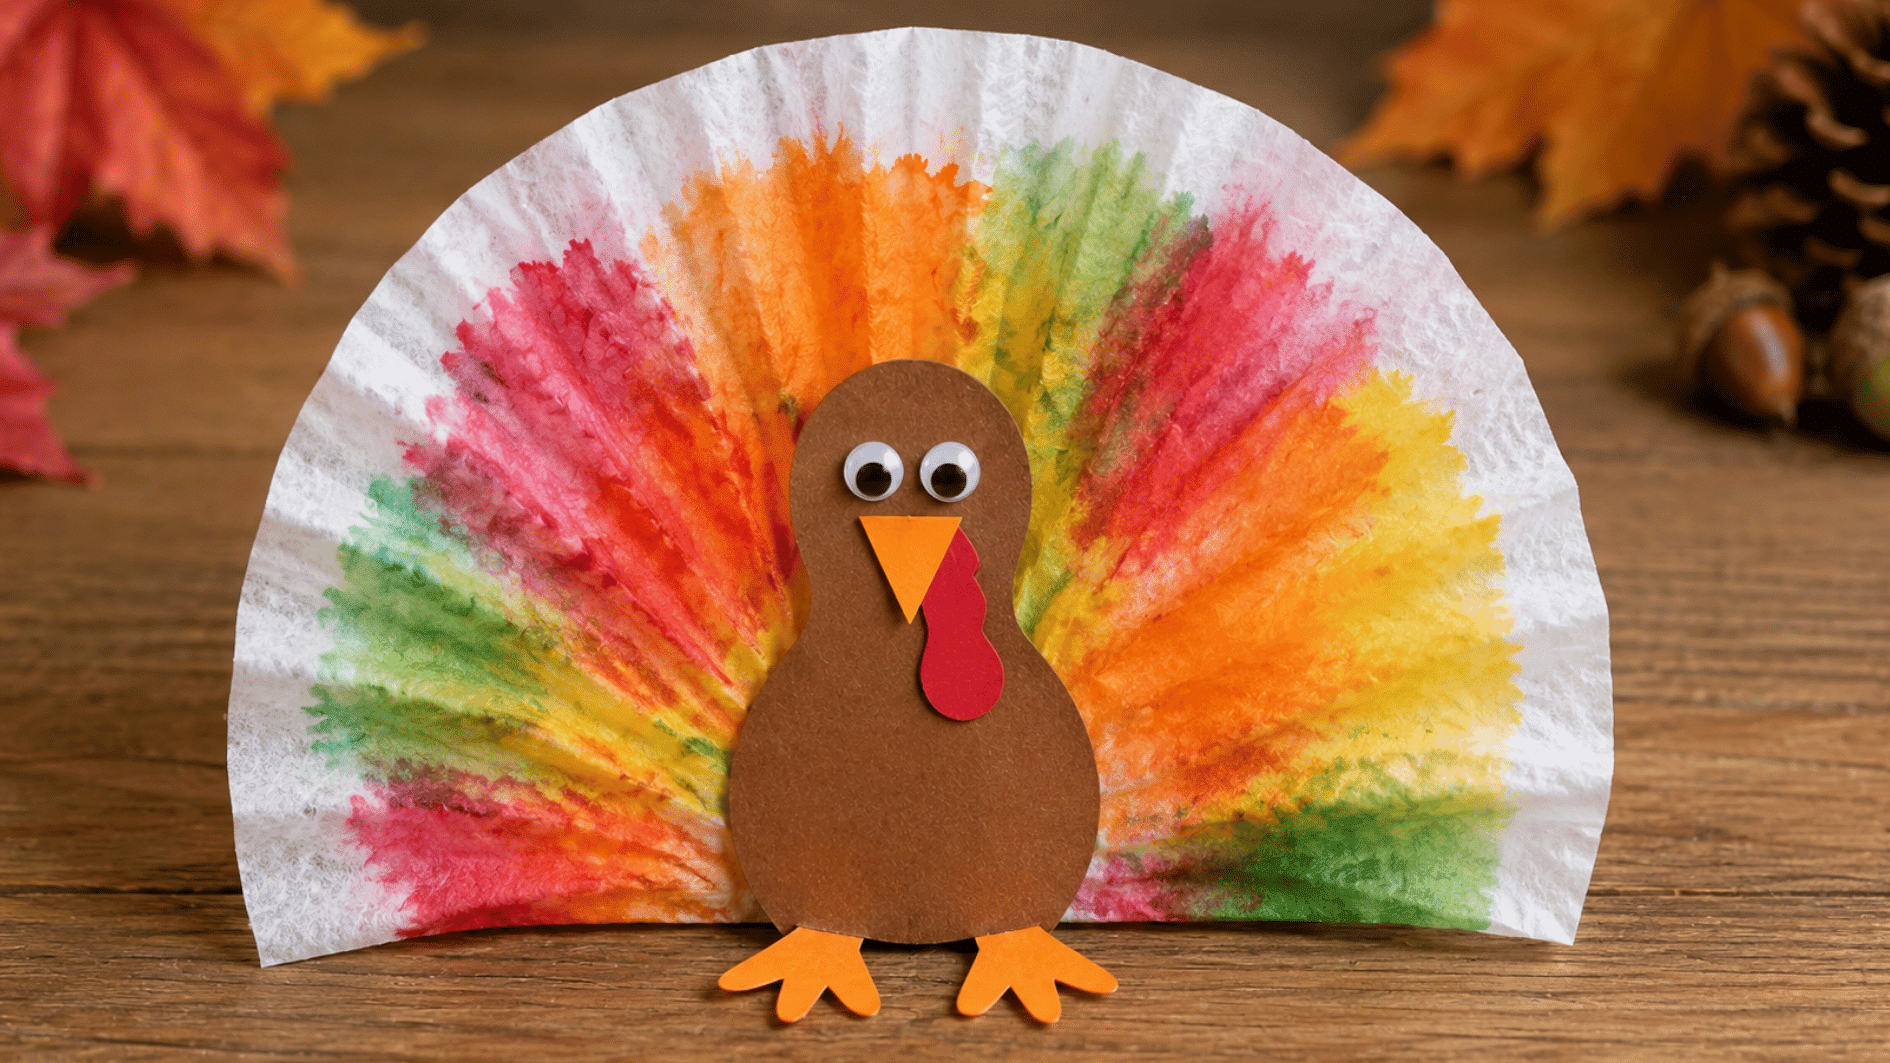
A coffee filter creates a colorful turkey tail as washable markers spread with a light mist of water. Once dry, a simple paper body completes the bright finished craft.
Materials: Coffee filter, washable markers, spray bottle, construction paper, glue.
How to Make It:
- Color the filter: Add several marker colors across the flattened filter.
- Mist it lightly: Spray just enough water to make the colors begin spreading.
- Let it dry: Keep the filter flat until it is completely dry.
- Make the body: Cut a small brown turkey shape from construction paper.
- Put it together: Glue the body over the center of the filter and add face details.
Tip: Mist the filter lightly. Too much water can blend the colors together and weaken the paper.
6. Cupcake Liner Turkey
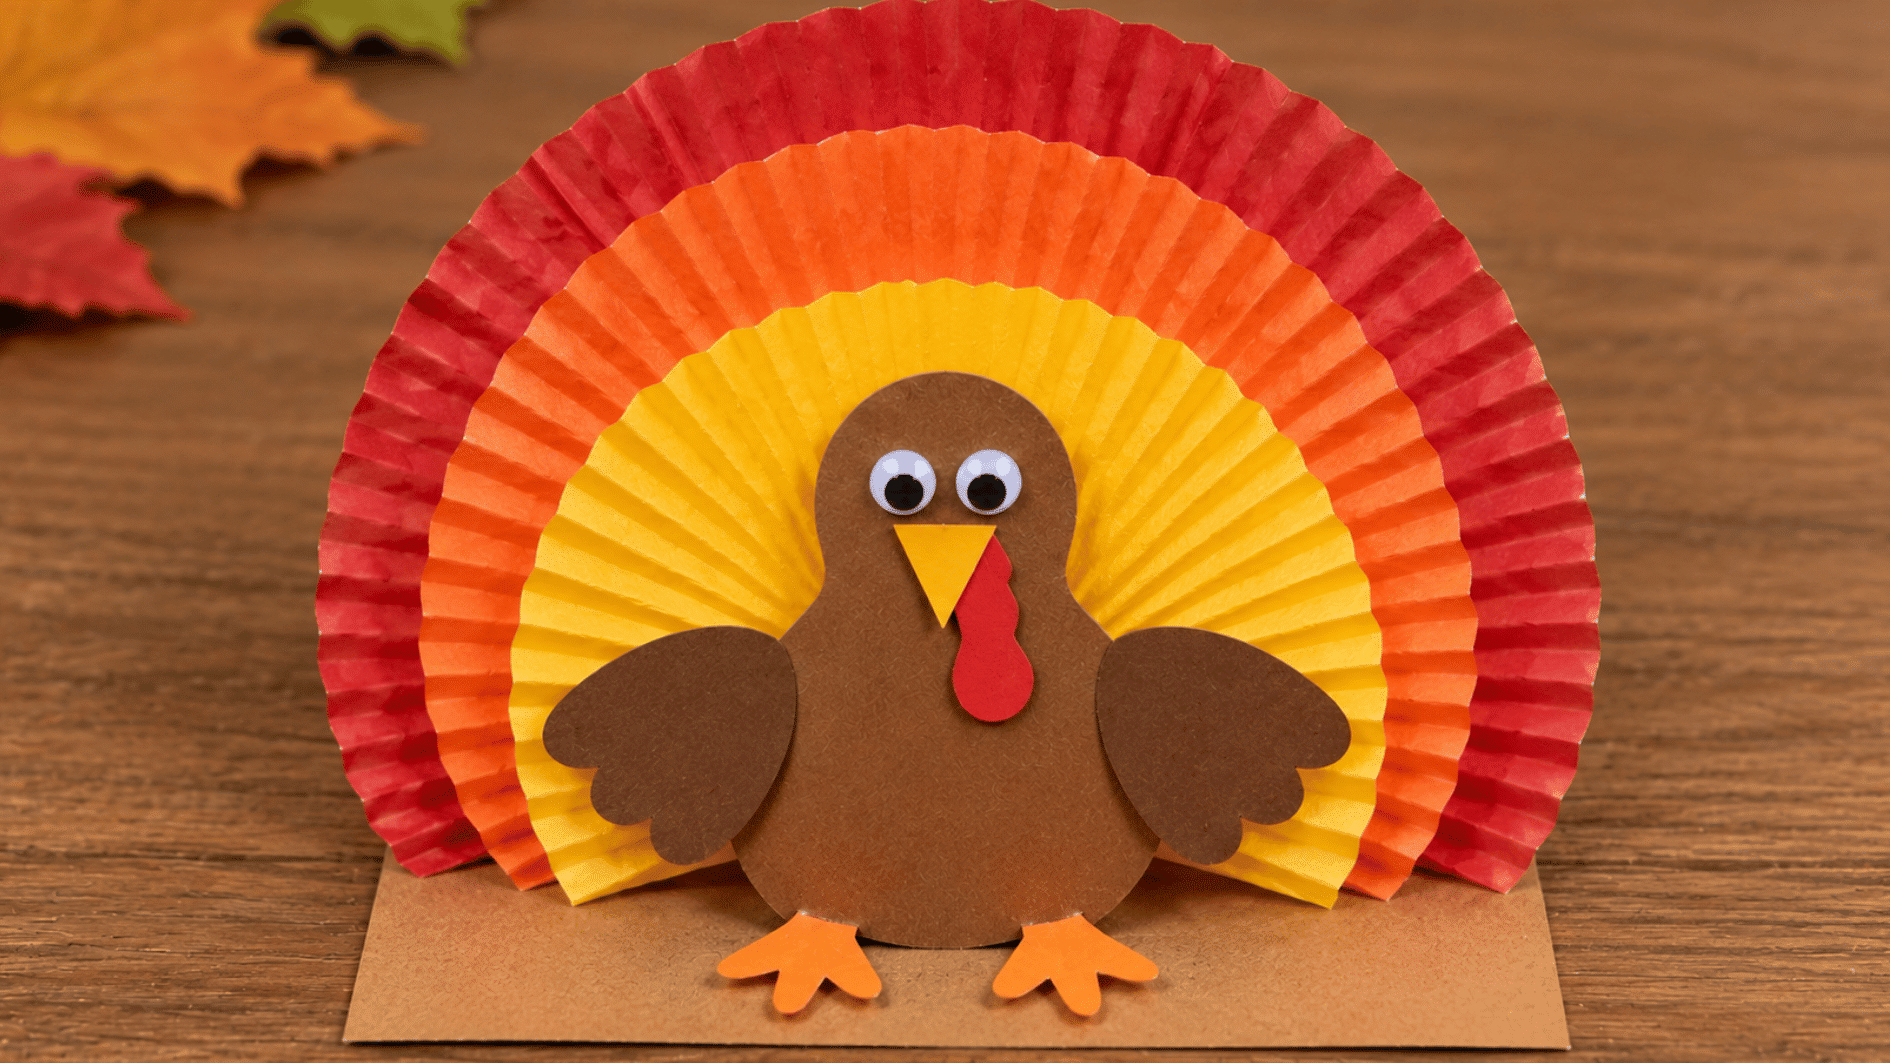
Cupcake liners naturally fan out like turkey feathers, which makes this project quick to assemble. Layering a few liners adds shape before a simple paper body goes in front.
Materials: Cupcake liners, cardstock, glue, markers, construction paper.
How to Make It:
- Flatten the liners: Open two or three liners while keeping some of their folds.
- Layer the tail: Overlap the liners in a fan shape on cardstock.
- Glue them down: Secure each layer so it stays in position.
- Add the body: Cut and glue a brown turkey shape over the center.
- Finish the face: Add eyes, a beak, wattle, and small feet.
7. Torn-Paper Pumpkin
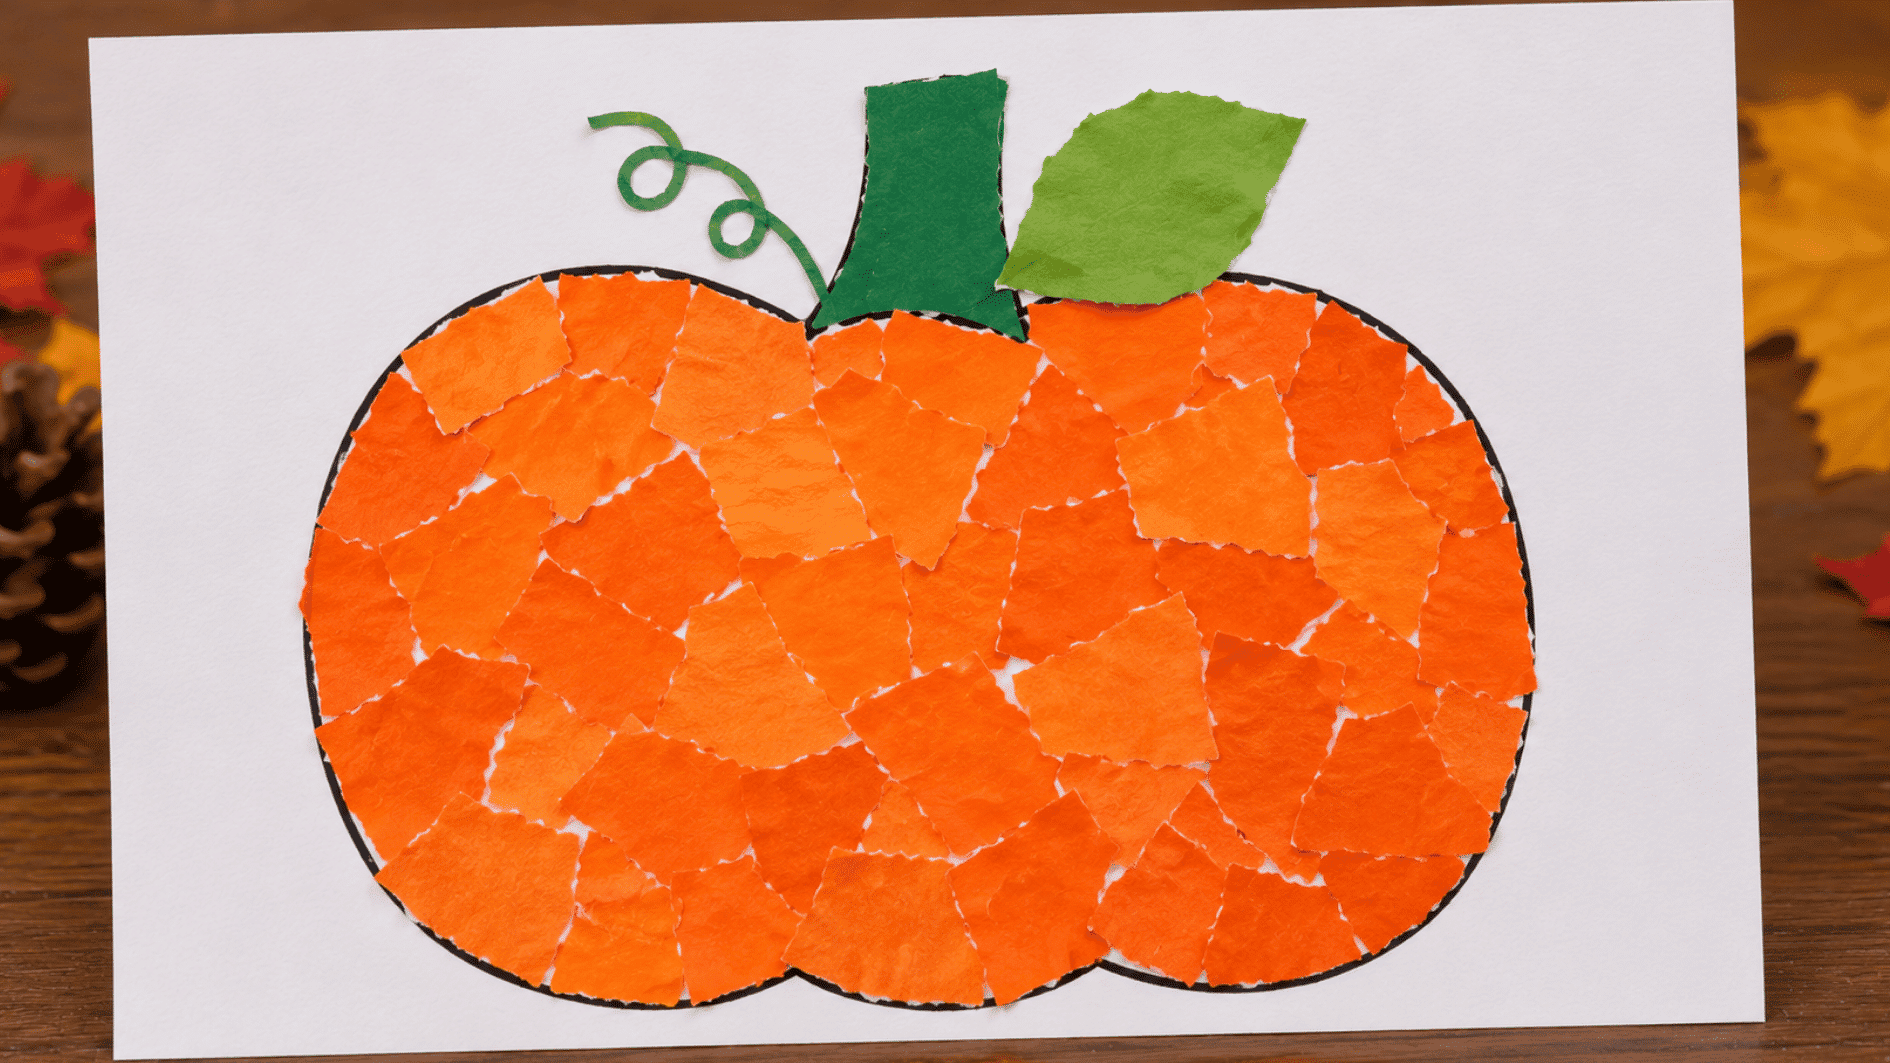
Torn orange paper gives this pumpkin plenty of texture without requiring careful cutting. Kids can fill a simple outline with overlapping pieces, then add a green stem and leaf.
Materials: Orange paper, green paper, cardstock, glue.
How to Make It:
- Draw the pumpkin: Make one large pumpkin outline on cardstock.
- Tear the paper: Rip orange paper into small, easy-to-handle pieces.
- Fill the shape: Glue the pieces inside the outline, overlapping gaps as you go.
- Add the top: Cut or tear a green stem and leaf and glue them above it.
- Let it dry: Keep the page flat until the pieces stay firmly attached.
8. Paper Leaf Wreath
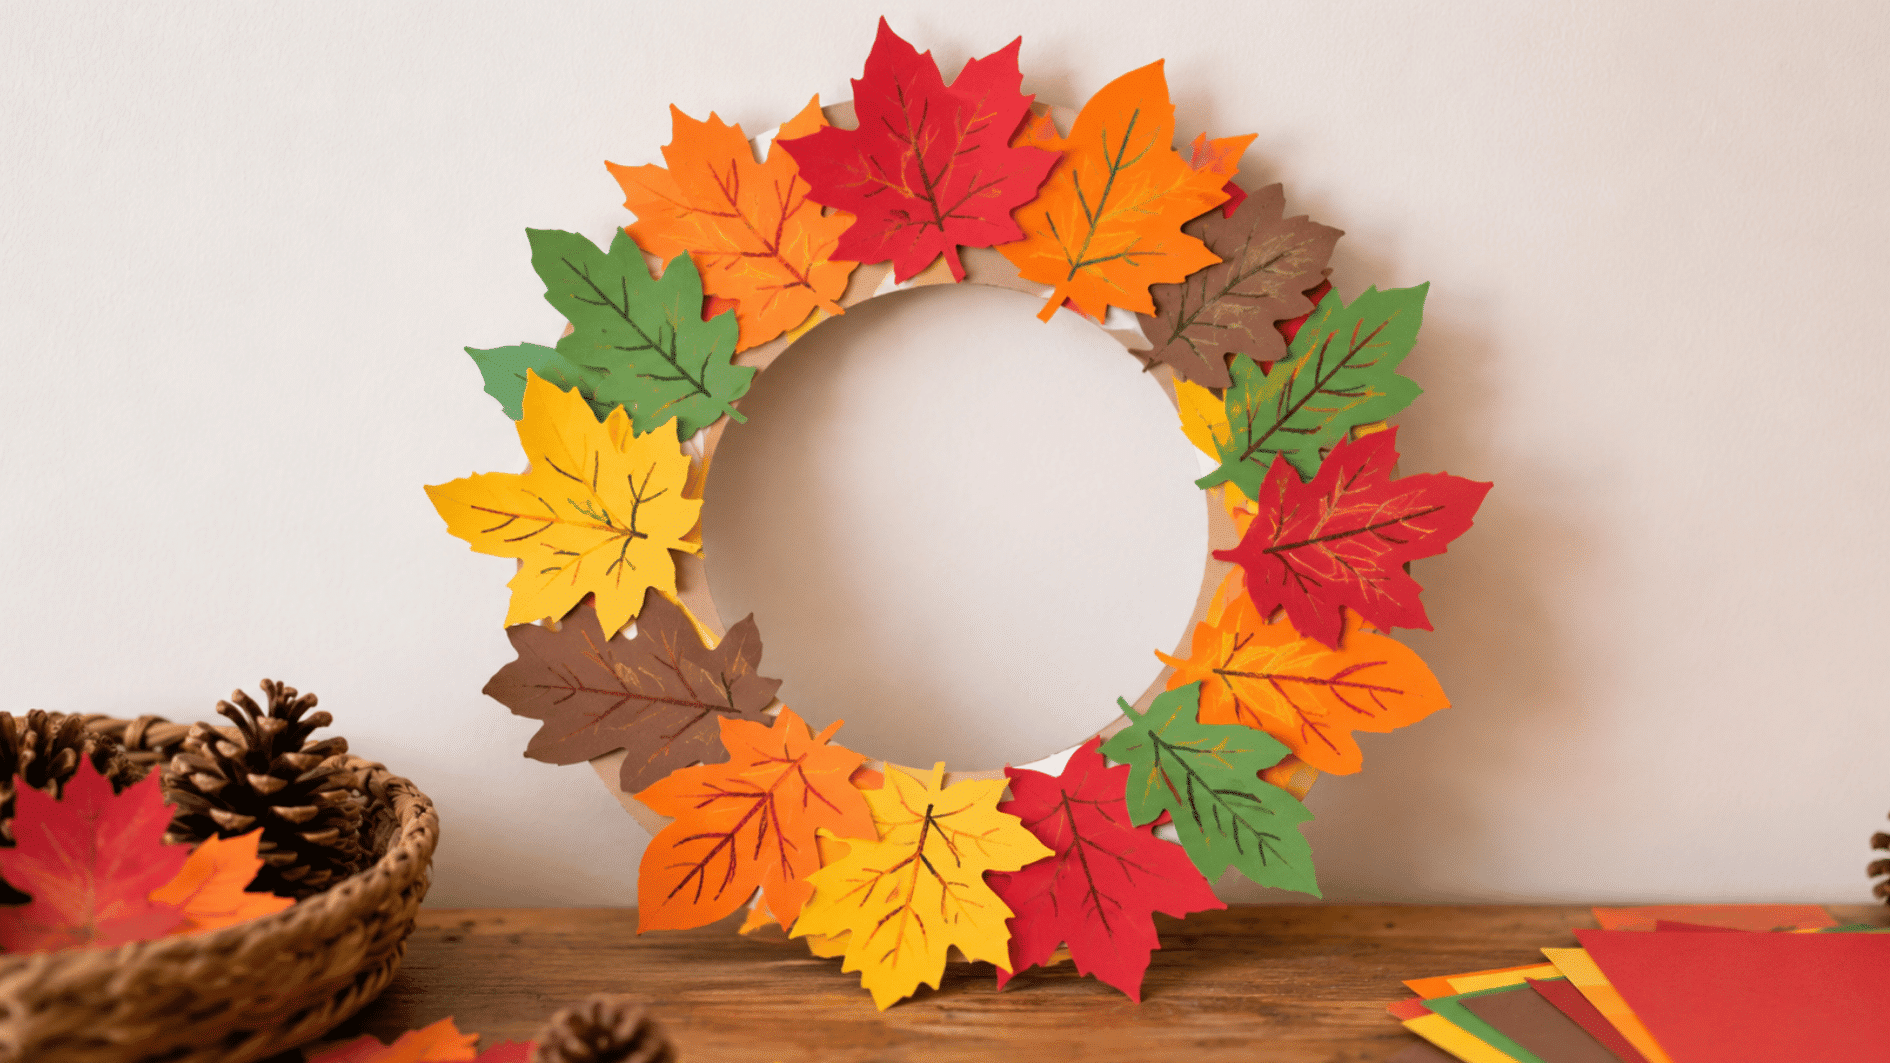
A paper leaf wreath gives kids a different kind of Thanksgiving decoration to make. Layered fall-colored leaves create a full circle that can hang on a door or wall.
Materials: Paper plate, colored paper, scissors, glue, markers.
How to Make It:
- Create the base: Cut the center from a paper plate to make a wide ring.
- Cut the leaves: Make several leaf shapes from red, orange, yellow, green, and brown paper.
- Add details: Draw simple veins or patterns on some of the leaves.
- Arrange the pieces: Lay the leaves around the ring, overlapping the edges slightly.
- Glue them down: Secure each leaf once you like the layout.
- Let it dry: Keep the wreath flat until the glue is fully set.
Tip: Mix larger and smaller leaves so the wreath looks fuller without needing too many pieces.
9. Paper Corn Craft
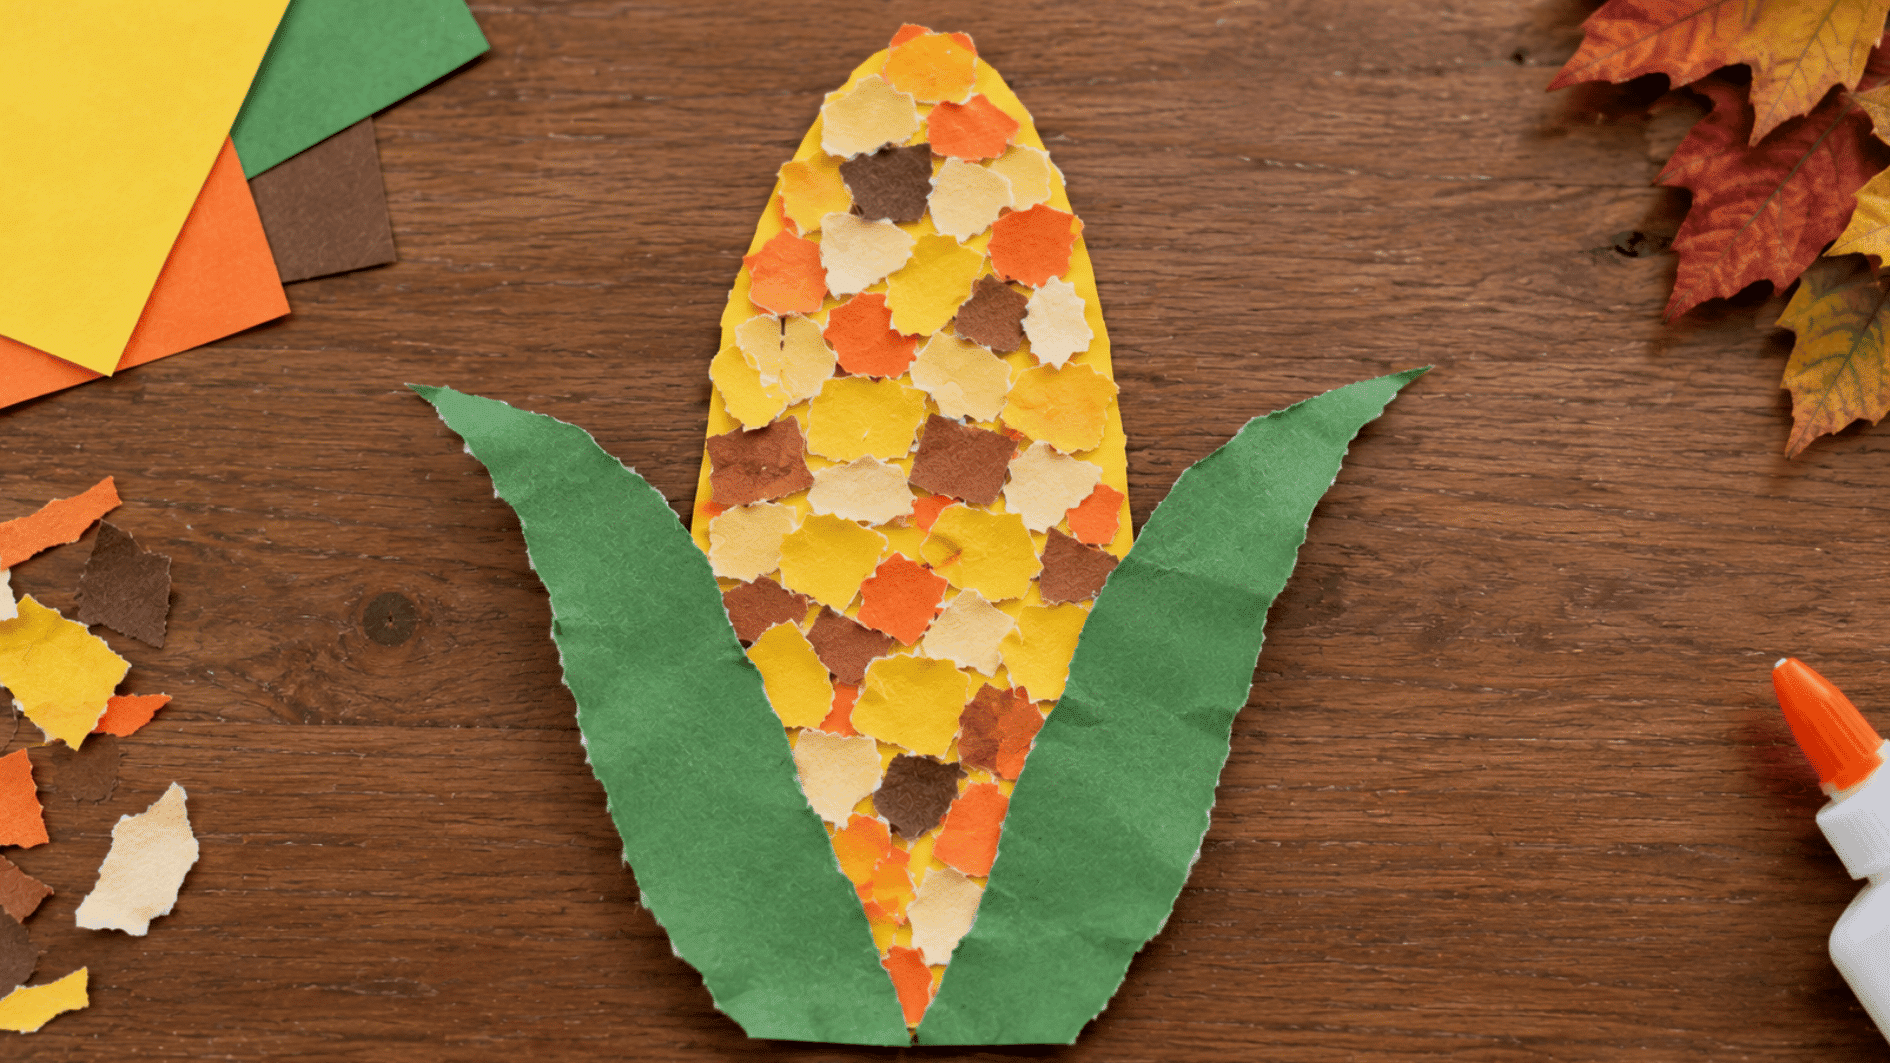
Small paper scraps become colorful kernels in this simple corn craft. Kids can tear or cut the pieces, then add green paper husks around the sides to finish the cob.
Materials: Yellow cardstock, green paper, paper scraps, glue, scissors.
How to Make It:
- Cut the cob: Make a long oval from yellow cardstock.
- Prepare the kernels: Tear or cut small pieces in yellow, orange, cream, and brown.
- Cover the cob: Glue the pieces close together across the yellow shape.
- Cut the husks: Make two long pointed leaves from green paper.
- Attach them: Glue one husk to each side and bend the tops slightly outward.
10. Leaf Turkey
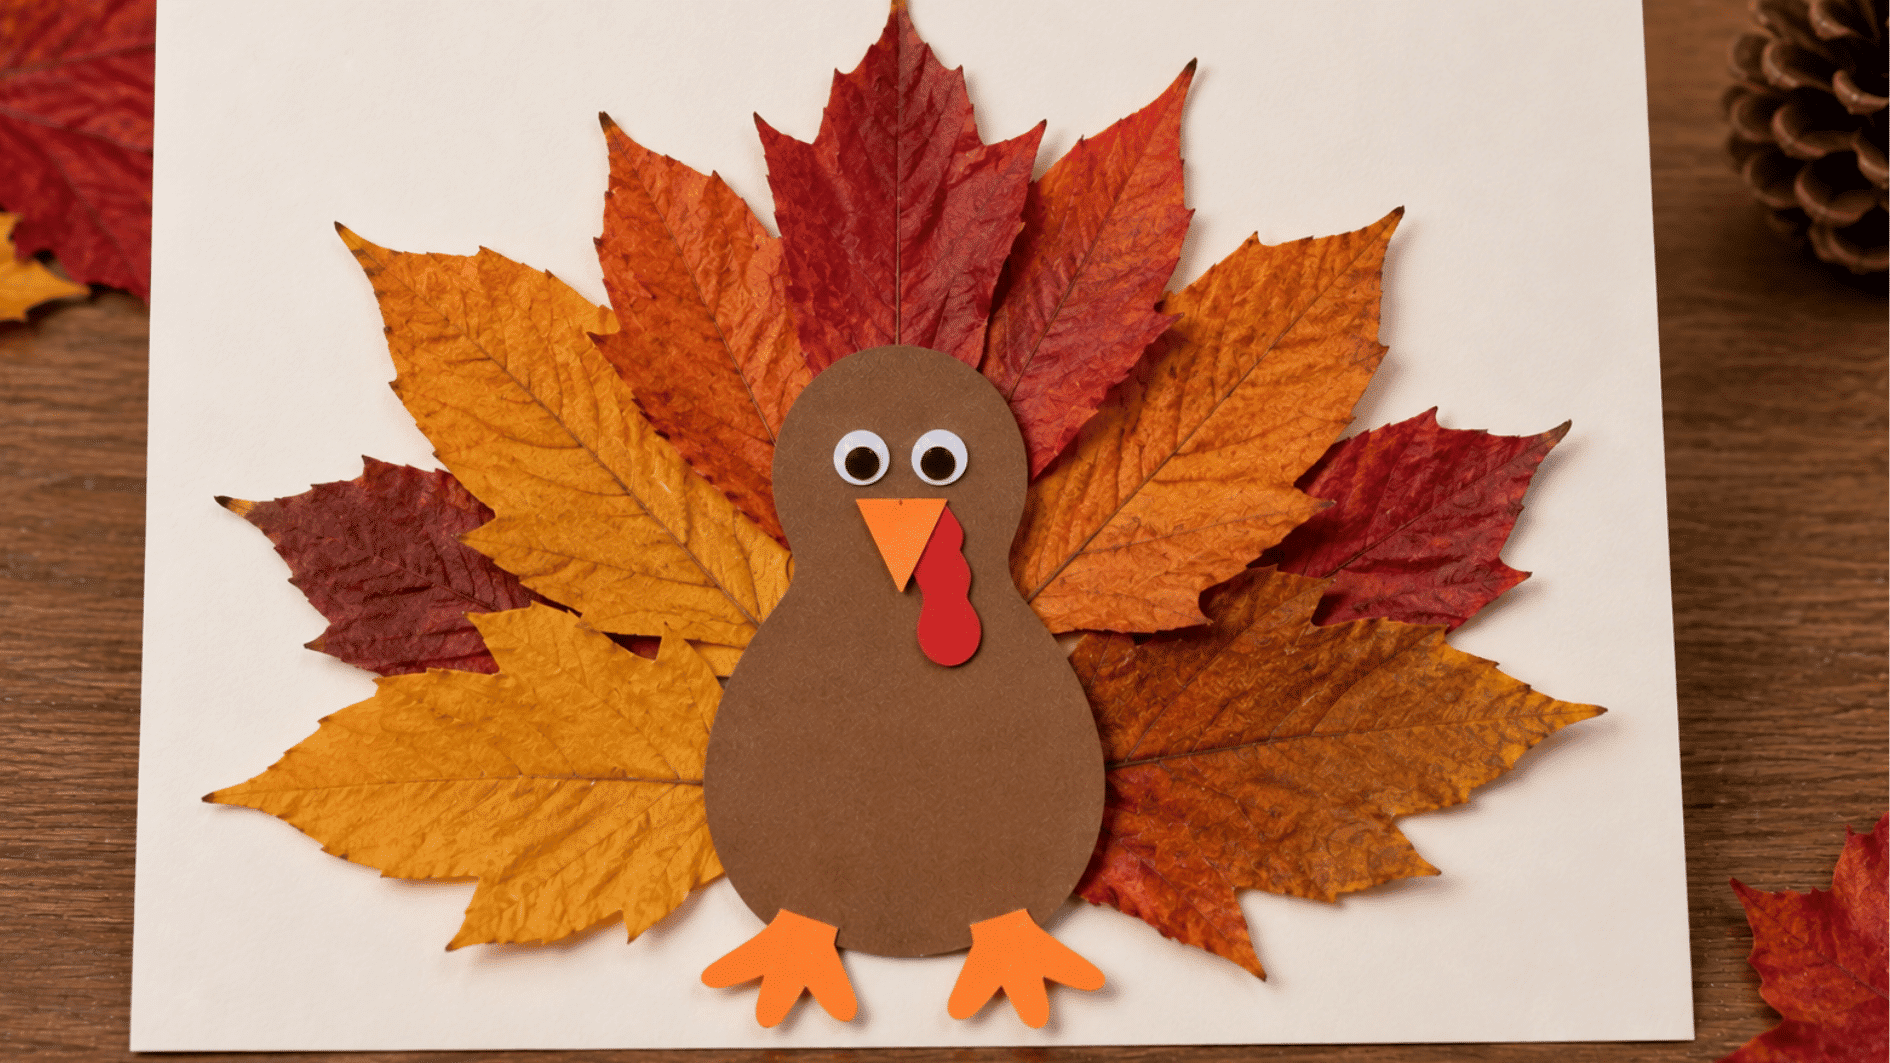
Dry autumn leaves become natural turkey feathers and make every finished craft look slightly different. Kids can arrange the leaves in a fan before adding a simple paper turkey body.
Materials: Dry leaves, cardstock, construction paper, glue, marker.
How to Make It:
- Choose the leaves: Pick flat, dry leaves that are easy to arrange.
- Make the tail: Fan them out on cardstock until you like the shape.
- Glue them down: Secure each leaf one at a time so the layout stays in place.
- Add the body: Glue a brown paper turkey over the lower ends of the leaves.
- Finish the face: Add eyes, a beak, wattle, legs, and feet.
11. Egg Carton Turkey
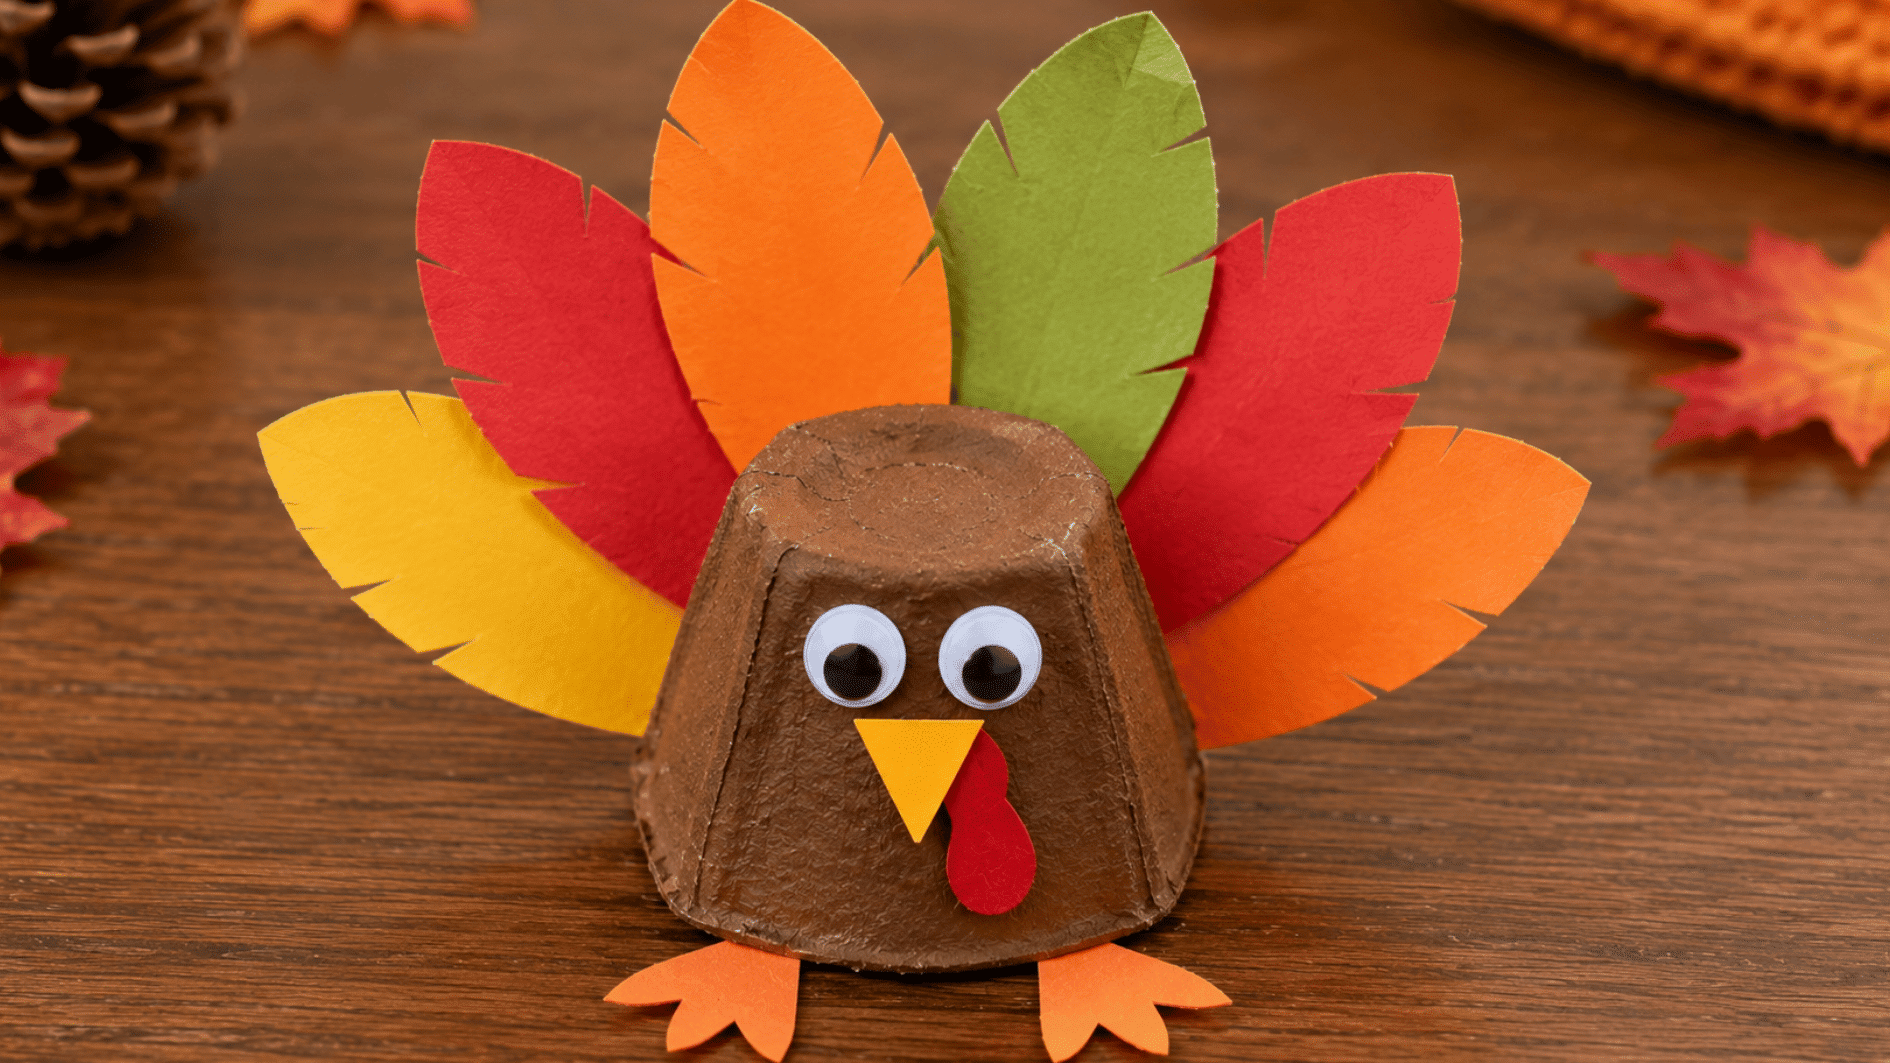
One egg carton cup creates a sturdy turkey body that needs very little shaping. Colorful paper feathers and small facial details quickly turn the recycled piece into a Thanksgiving decoration.
Materials: Cardboard egg carton, construction paper, glue, paint, marker.
How to Make It:
- Cut one cup: Separate a single egg carton section and trim rough edges.
- Color it: Paint the outside brown and let it dry.
- Make the feathers: Cut several colorful paper feathers.
- Build the tail: Fan and glue them behind the carton cup.
- Add the face: Attach eyes, a beak, wattle, and small paper feet.
Tip: An adult can cut the thick egg carton before kids begin decorating.
12. Thanksgiving Place Cards
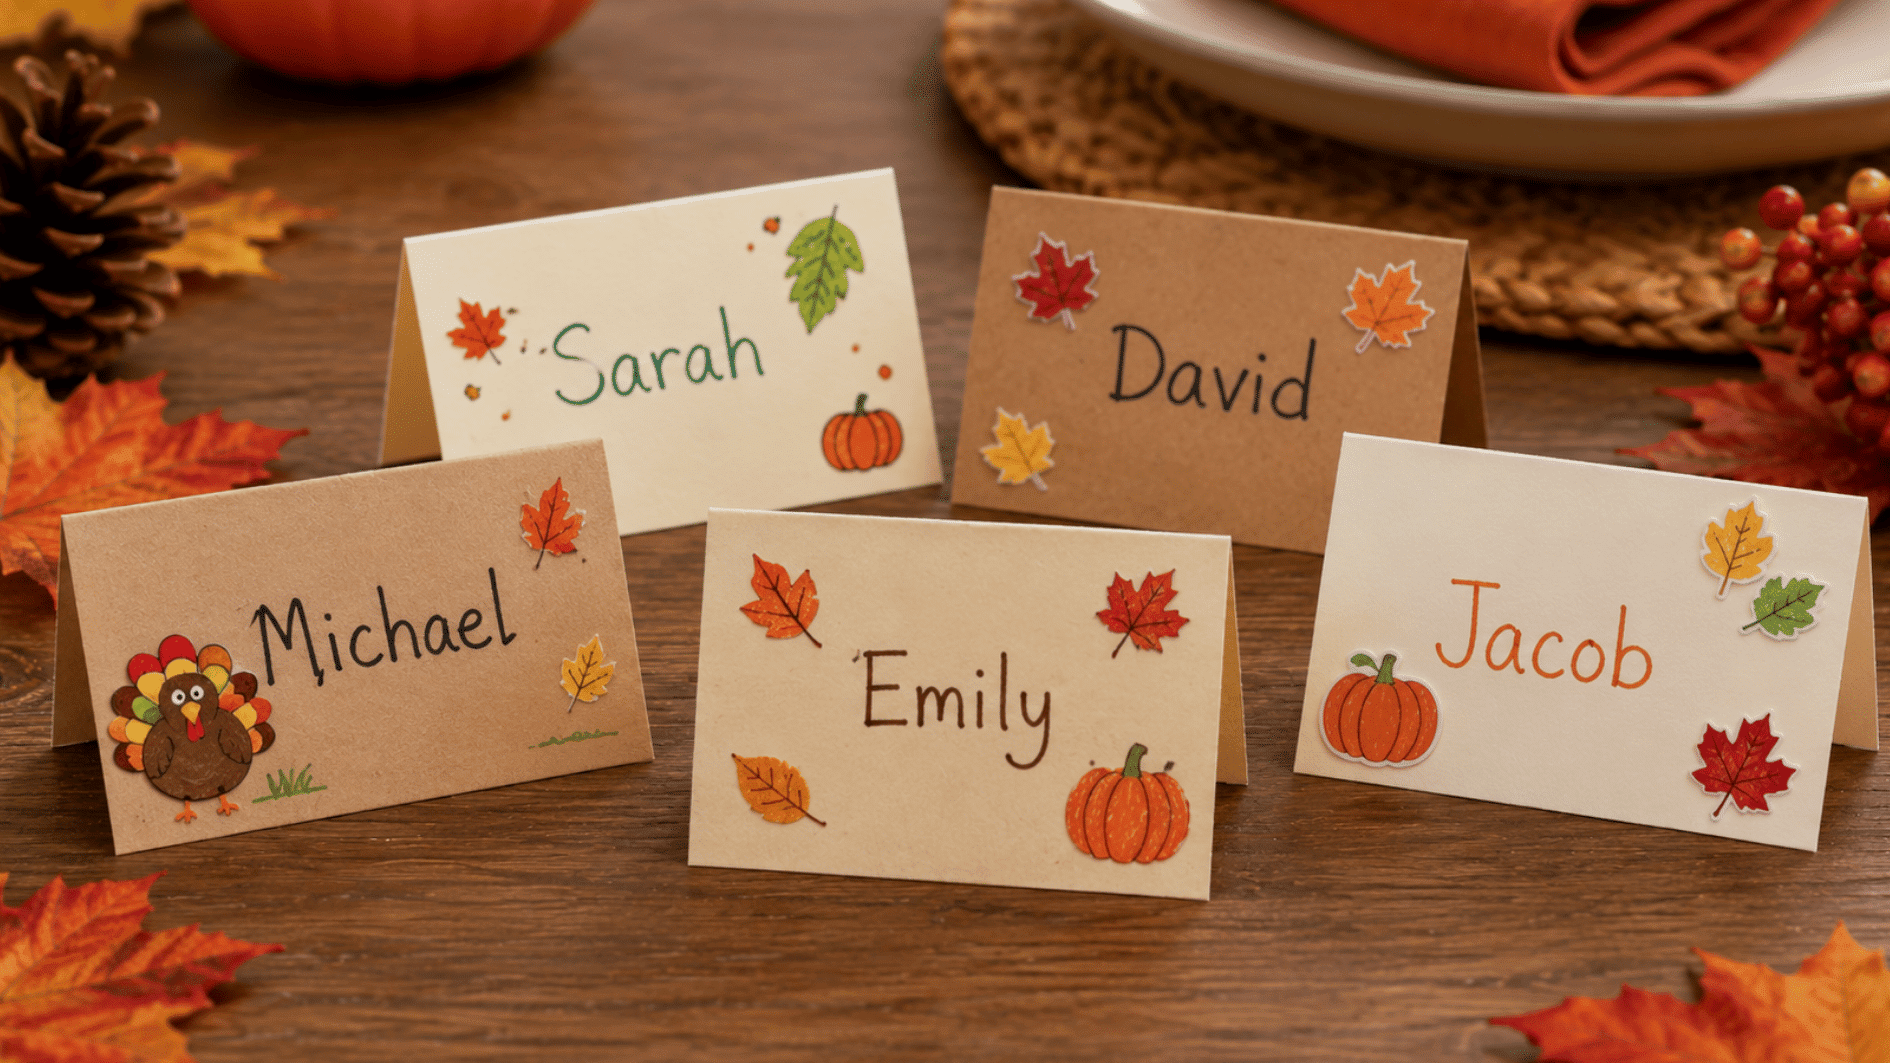
Small folded place cards use many of the same basic skills as handmade cards, including folding cardstock, adding names, and decorating the front with simple designs.
Materials: Cardstock, markers, crayons, stickers, glue.
How to Make It:
- Cut the cards: Make equal cardstock rectangles large enough for a name.
- Fold them: Bend each rectangle in half so it stands like a tent.
- Add the names: Write one guest’s name clearly across the front.
- Decorate them: Add small leaves, pumpkins, turkeys, or stickers around the name.
- Set them out: Place one finished card at each seat.
Tip: Younger kids can decorate the cards while an adult writes the guest names.
13. Thankful Tree
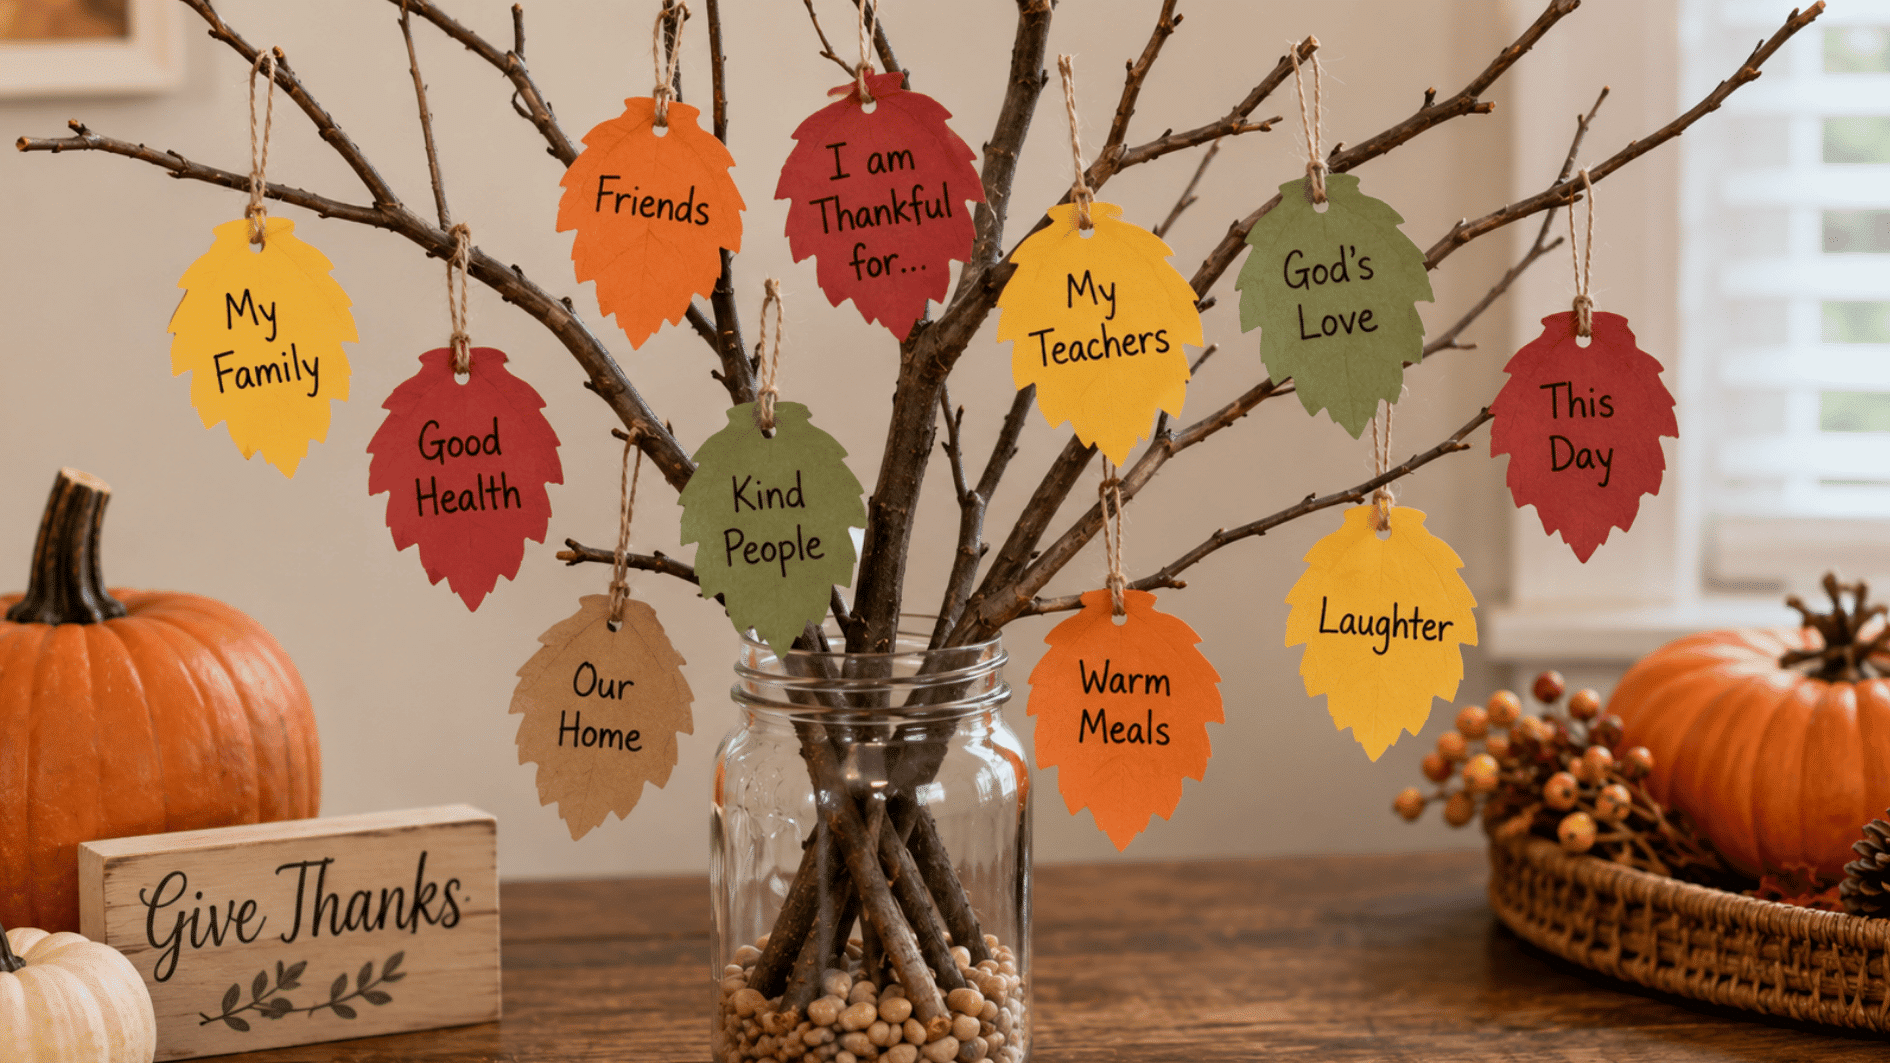
A few branches and paper leaves create a Thanksgiving display that everyone can help build. Each leaf holds a short thankful message, so the tree gradually fills throughout the day.
A thankful tree also fits naturally with kindness crafts for kids, since each paper leaf gives children a simple way to think about gratitude and appreciation.
Materials: Dry branches, sturdy jar, colored paper, string, scissors, marker.
How to Make It:
- Set up the branches: Place a few dry branches inside a sturdy jar.
- Cut the leaves: Make simple leaf shapes from colored paper.
- Write the messages: Add one thankful thought to each leaf.
- Add the string: Make a small hole and thread string through the top.
- Hang the leaves: Tie them around different branches with space between each one.
Tip: Add clean pebbles to the jar if the branches make it feel top-heavy.
14. Decorated Thanksgiving Placemats
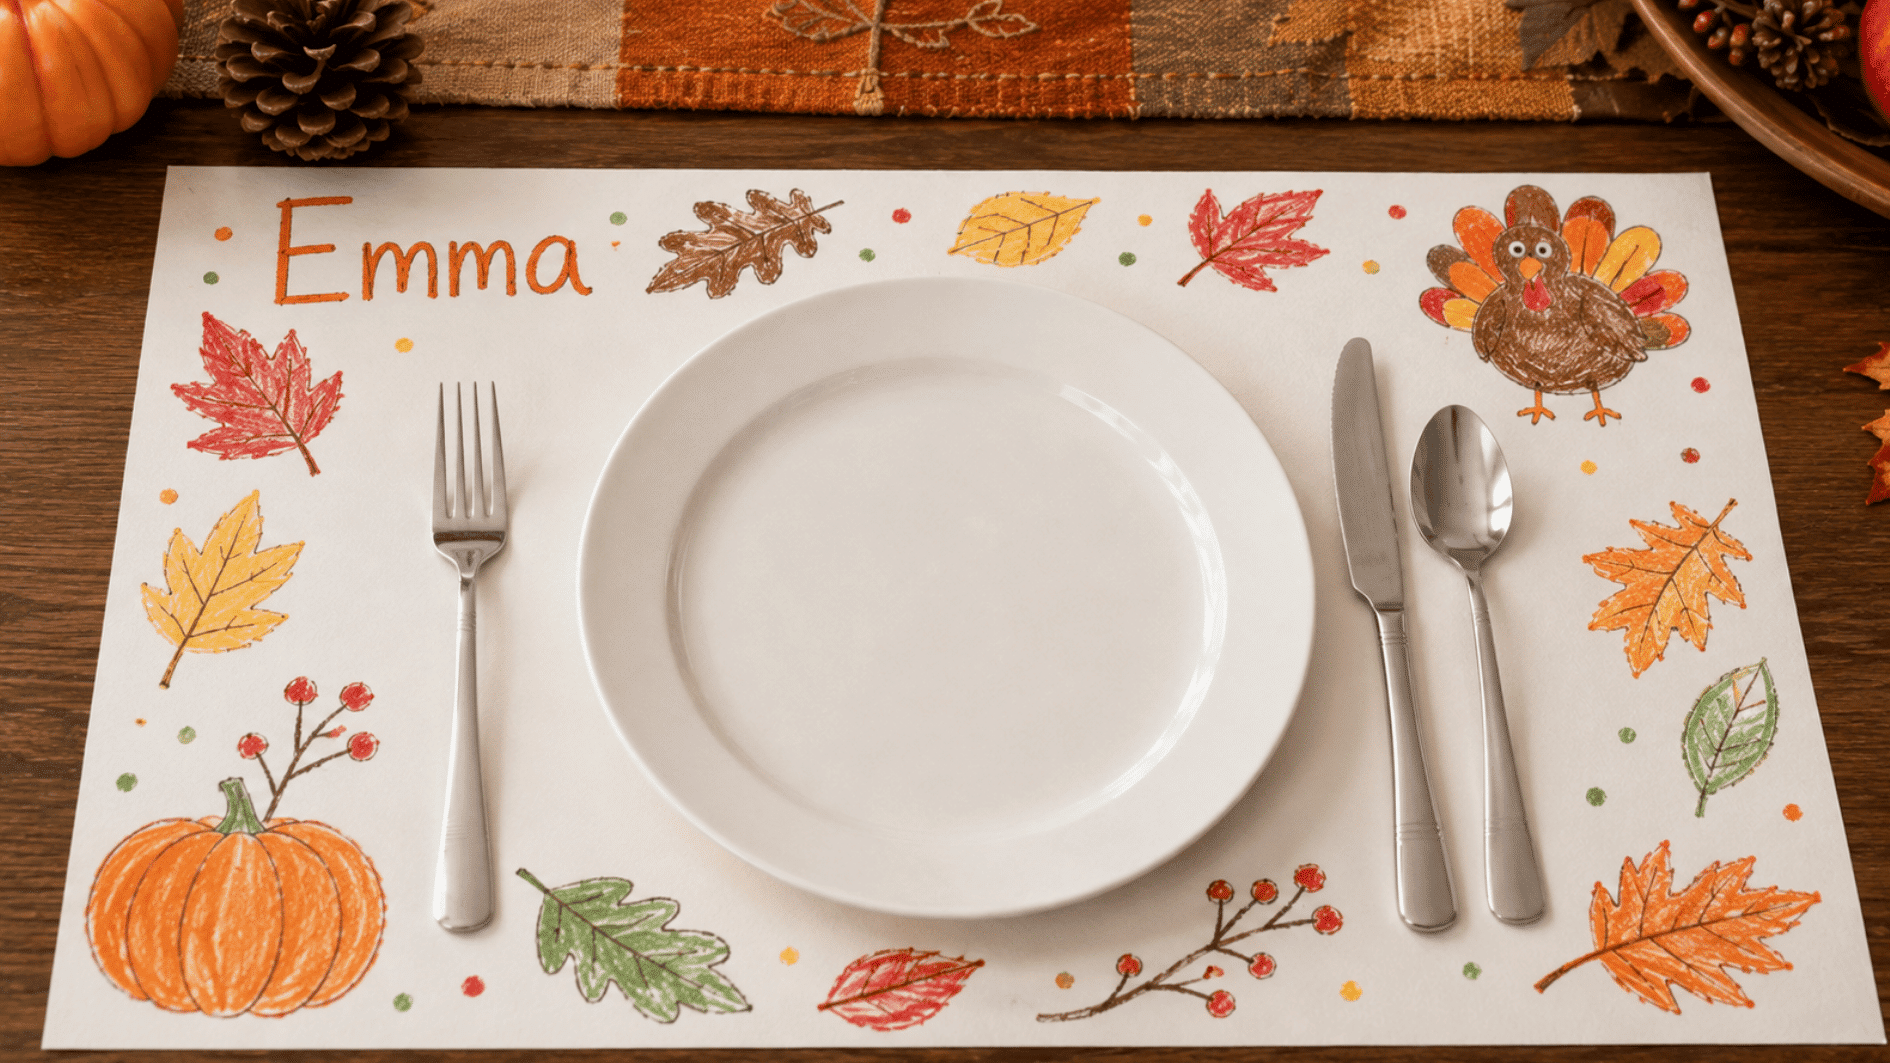
Large paper sheets give kids plenty of room to create personalized Thanksgiving placemats. They can decorate the borders while leaving the center open for plates, utensils, and serving space.
Materials: Large paper sheets, crayons, washable markers, stickers.
How to Make It:
- Cut the paper: Make large rectangles that fit comfortably beneath a dinner plate.
- Mark the center: Leave enough open space where the plate will sit.
- Add a name: Write it near a corner or along the top edge.
- Decorate the border: Draw leaves, pumpkins, turkeys, or seasonal patterns.
- Set them out: Make sure everything is dry before placing them on the table.
15. Paper Feather Garland
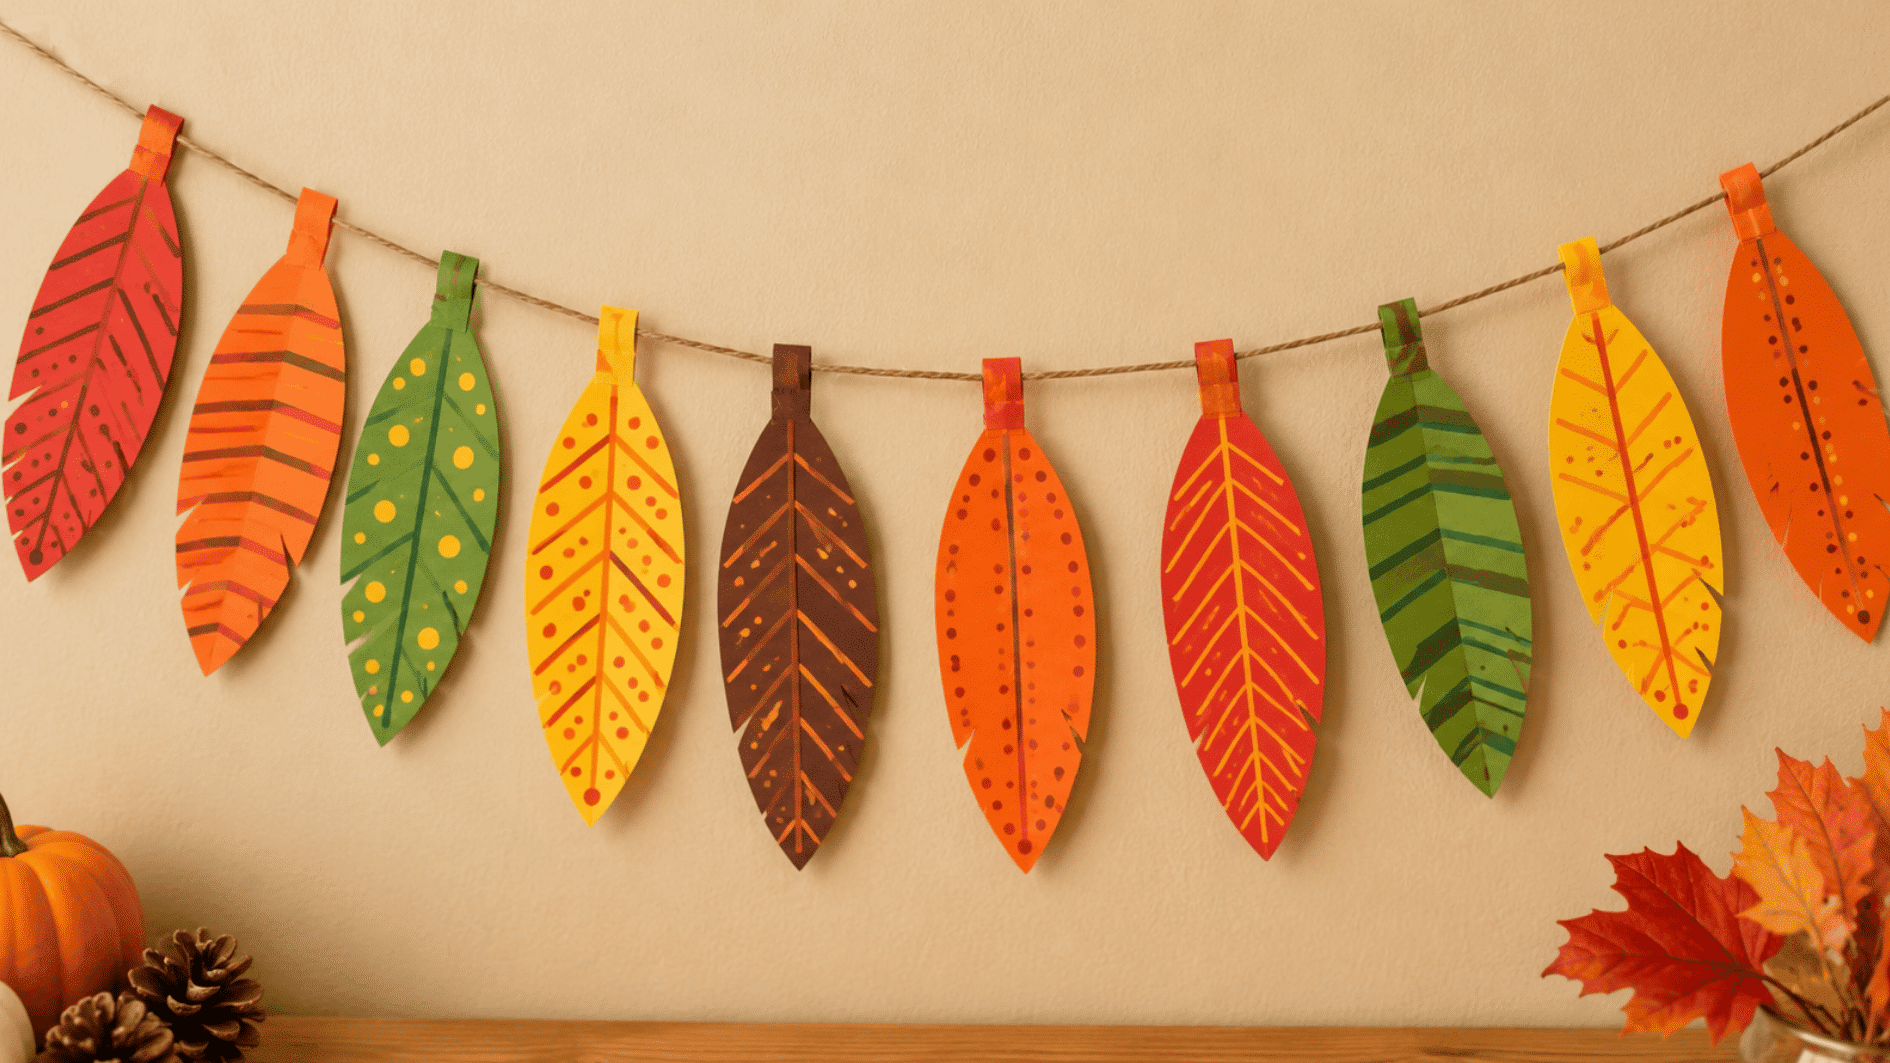
Repeated paper feathers make this garland easy for kids to decorate together. Once the feathers are colored and attached to string, they create a simple Thanksgiving decoration for any space.
Materials: Colored paper, scissors, markers, string, tape.
How to Make It:
- Make the feathers: Cut one feather template, then trace and cut several matching shapes.
- Decorate them: Add lines, dots, stripes, or other simple patterns with markers.
- Plan the layout: Arrange the feathers beside the string to choose their order and spacing.
- Attach the feathers: Tape each one along the string, leaving even gaps between them.
- Hang the garland: Display it in a safe spot away from candles, heaters, and cooking areas.
How Do You Pick the Right Thanksgiving Craft by Age?
The easiest project is not always the same for every child. Cutting skills, patience, and comfort with glue can matter more than age alone.
|
Age |
Good Craft Features |
Ideas From This List |
|---|---|---|
|
Ages 3–4 |
Tearing, coloring, large pieces |
Torn-paper pumpkin, handprint turkey |
|
Ages 5–6 |
Simple cutting and gluing |
Paper plate turkey, cupcake liner turkey |
|
Ages 7–9 |
Folding and more detailed assembly |
Folded pumpkin, place cards |
|
Ages 10+ |
Multi-step projects and decorations |
Thankful tree, feather garland |
Use these ages only as a starting point. You know how comfortable your child is with scissors, glue, and following several steps better than an age chart can tell you.
Thanksgiving Craft Safety Tips for Kids
Craft time should stay fun, but a few supplies still need adult attention. Check each project first so kids only use tools and materials that suit their age.
- Use child-safe scissors: Stay nearby while younger kids cut.
- Keep hot glue for adults: Hot-glue guns and fresh glue can cause burns.
- Check product labels: Follow age guidance on paints, glues, markers, and other supplies.
- Watch small pieces: Keep beads, googly eyes, and tiny decorations away from children who may put them in their mouths.
- Inspect natural materials: Check leaves, sticks, and pinecones for sharp edges, dirt, or insects.
- Separate crafts from food: Keep wet projects and loose supplies away from food preparation areas.
- Stay close during tricky steps: Help when kids use unfamiliar tools or need extra guidance.
Conclusion
Which craft do you think your kids would reach for first? Sometimes the projects that turn out a little different from the plan become the ones everyone talks about later.
Pick one idea that fits your day, put the supplies within reach, and let the rest happen naturally. The best part may be seeing what your kids come up with.
Frequently Asked Questions
How Far Ahead of Thanksgiving Can Kids Make Their Crafts?
Most paper crafts can be made one or two weeks ahead. Store them flat in a dry place until you are ready to use or display them.
How Can You Store Thanksgiving Crafts without Damaging Them?
Place flat projects between sheets of tissue paper. Keep three-dimensional crafts in a roomy box so decorations, folds, and raised pieces do not get crushed.
Can Thanksgiving Crafts Be Saved and Used Again Next Year?
Yes. Sturdy paper decorations can last another season when they are fully dry, kept away from moisture, and stored where they will not bend or tear.