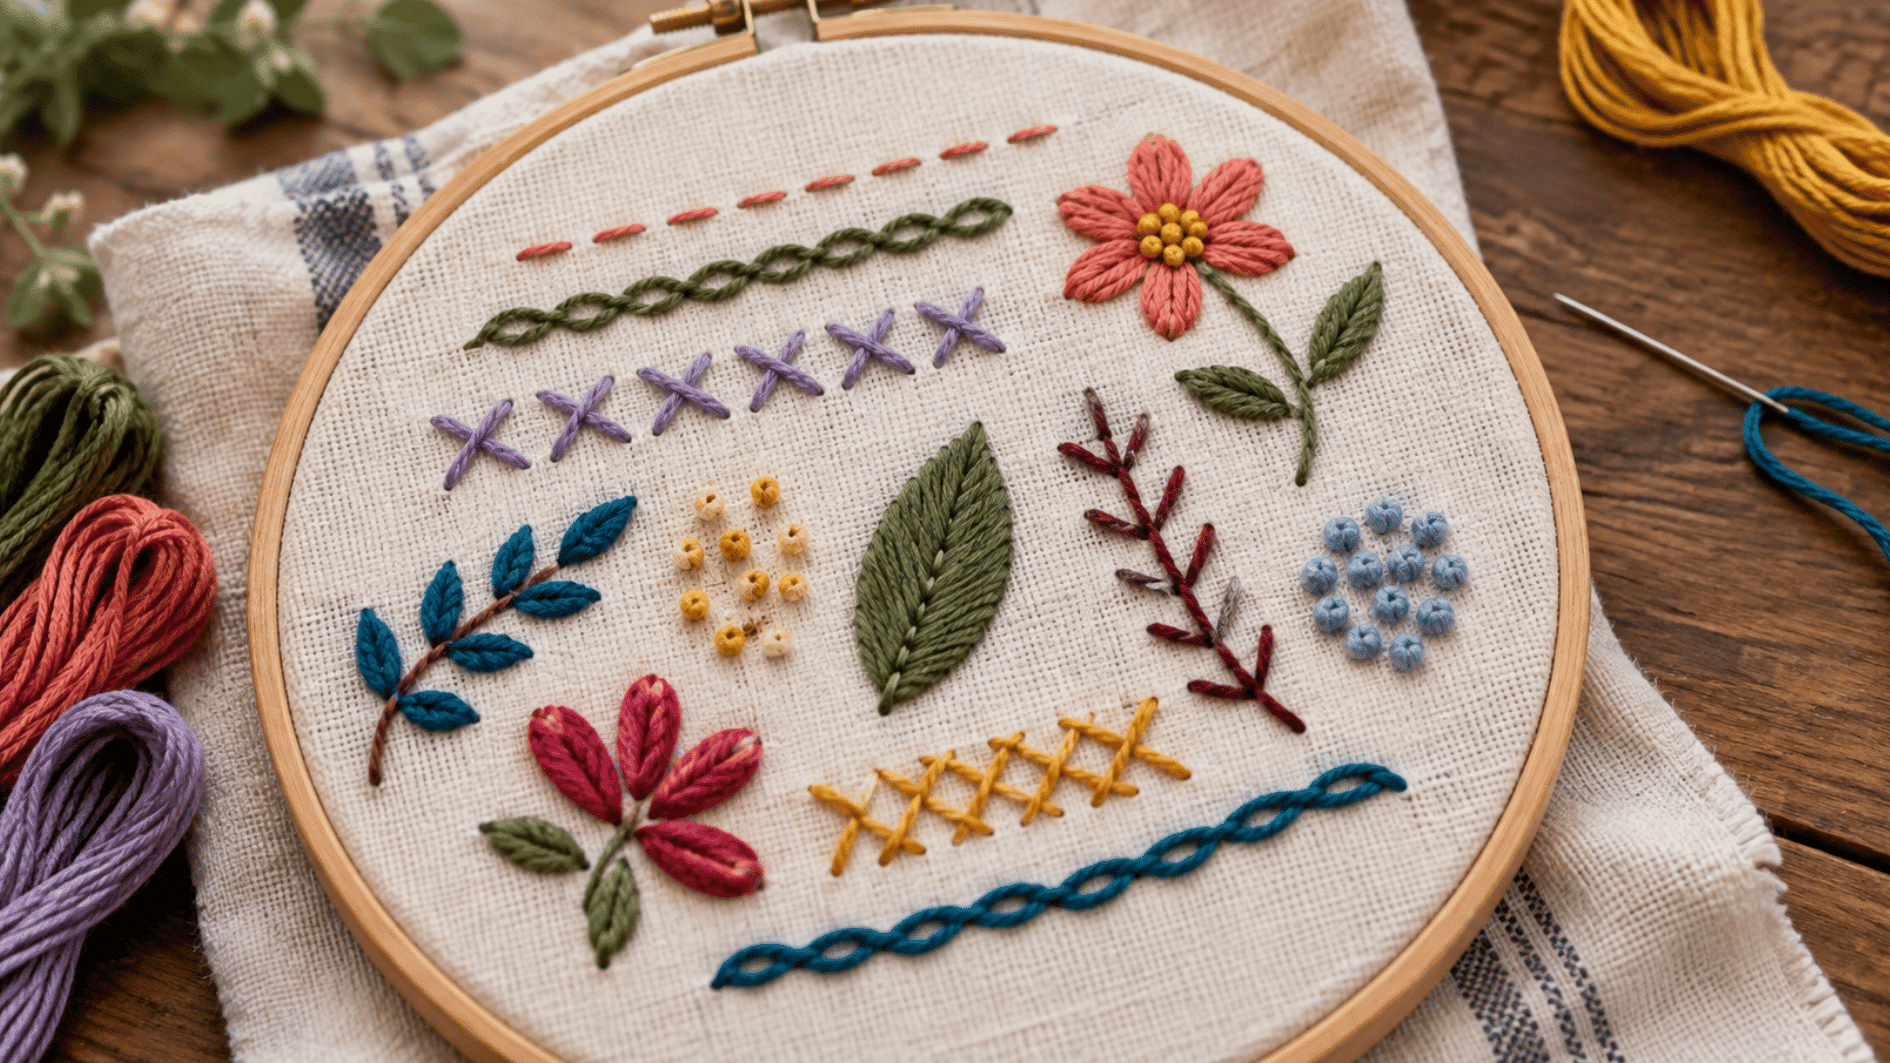
Embroidery stitches started making much more sense to me once I stopped trying to memorize names and began watching how the thread actually moved through the fabric.
After working with different sewing and craft techniques, I’ve learned that small details like tension, spacing, and stitch direction often make the biggest difference.
So how do you recognize different embroidery stitches?
You can recognize different types of embroidery stitches by looking at their shape, spacing, texture, and how the thread sits on the fabric. Some form solid lines, while others create gaps, loops, crossed patterns, smooth fills, or raised details.
Basic Types of Embroidery Stitches to Learn
Each stitch has its own distinct shape, and recognizing that shape is often the fastest way to identify a technique. Once you know how to thread your needle and manage your floss, you can start practicing the types of embroidery stitches worth knowing first.
1. Straight Stitch
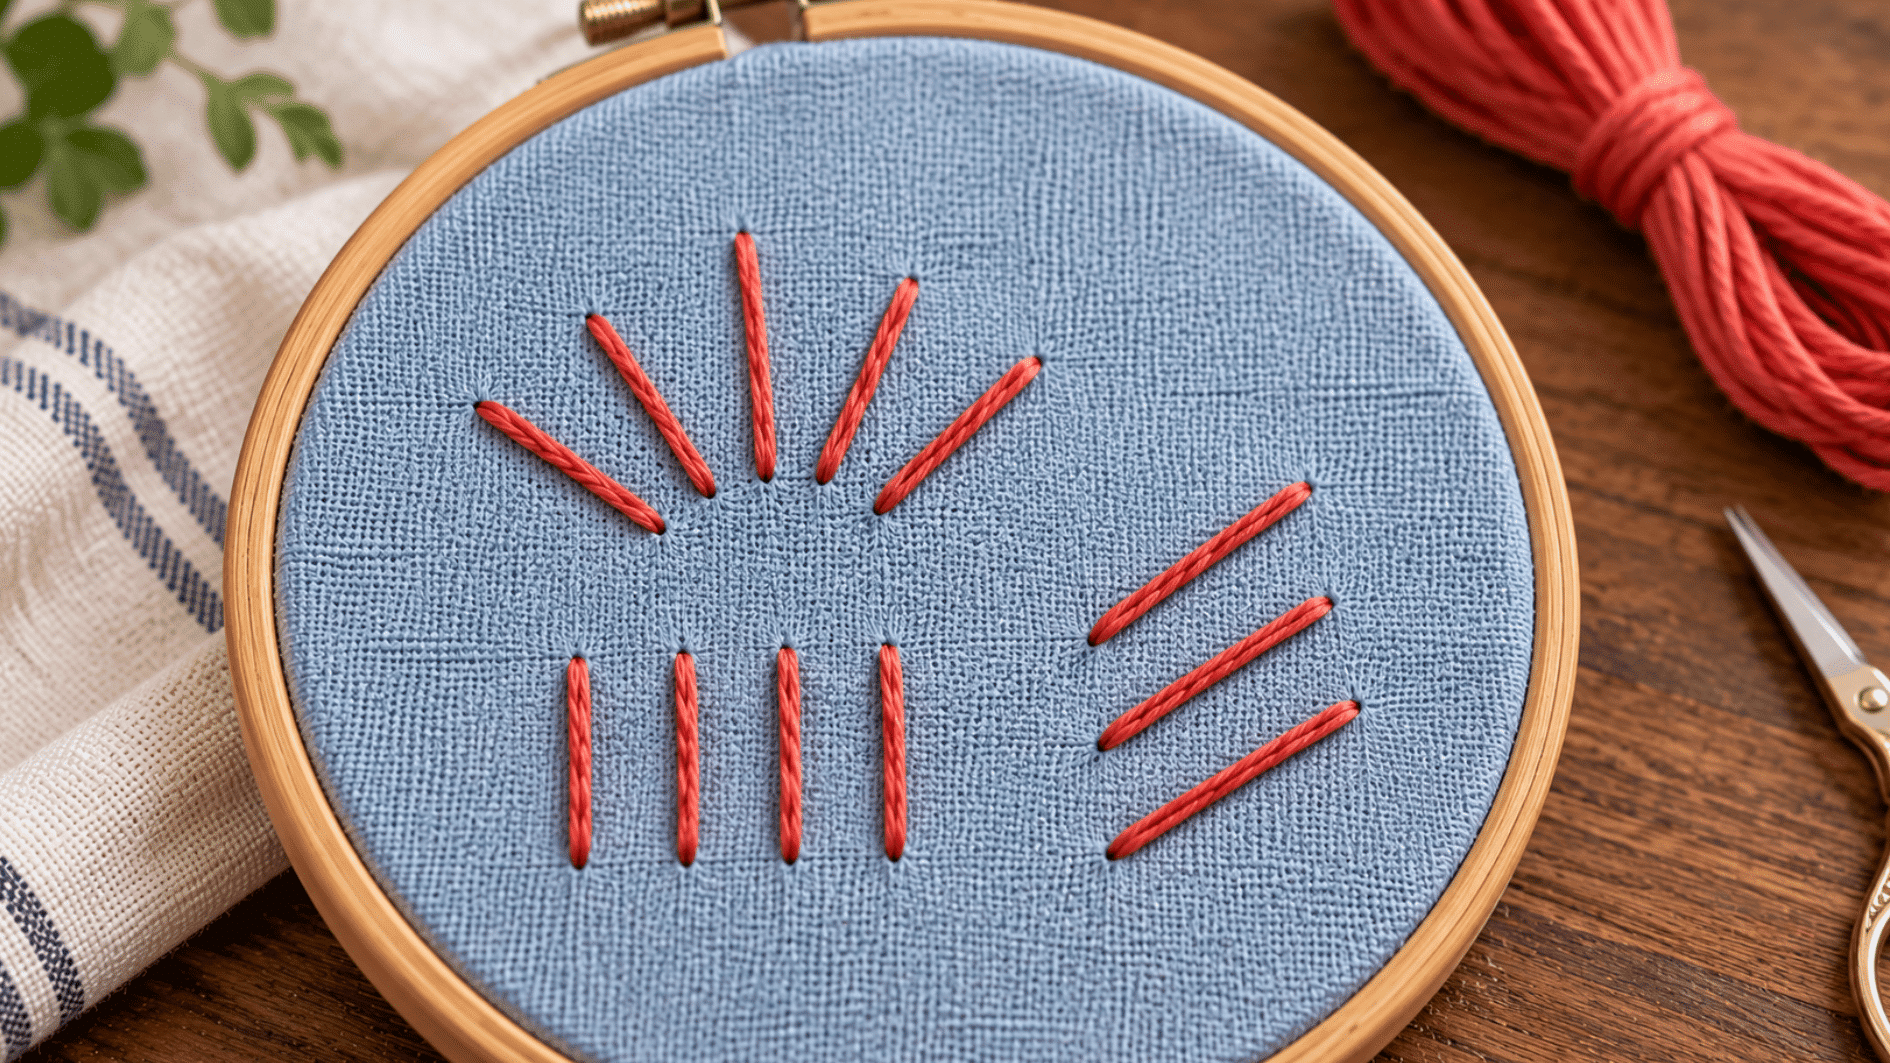
A straight stitch is a single, clean line running from one point to another. It’s the most basic stitch in embroidery, and several others build directly off it. I still use it constantly for quick accents when I don’t want to overthink a design.
- Bring the needle up at your starting point.
- Insert the needle down at your desired stitch length.
- Pull the thread through evenly, without puckering the fabric.
- Repeat for each individual stitch, adjusting length and angle as needed.
2. Running Stitch
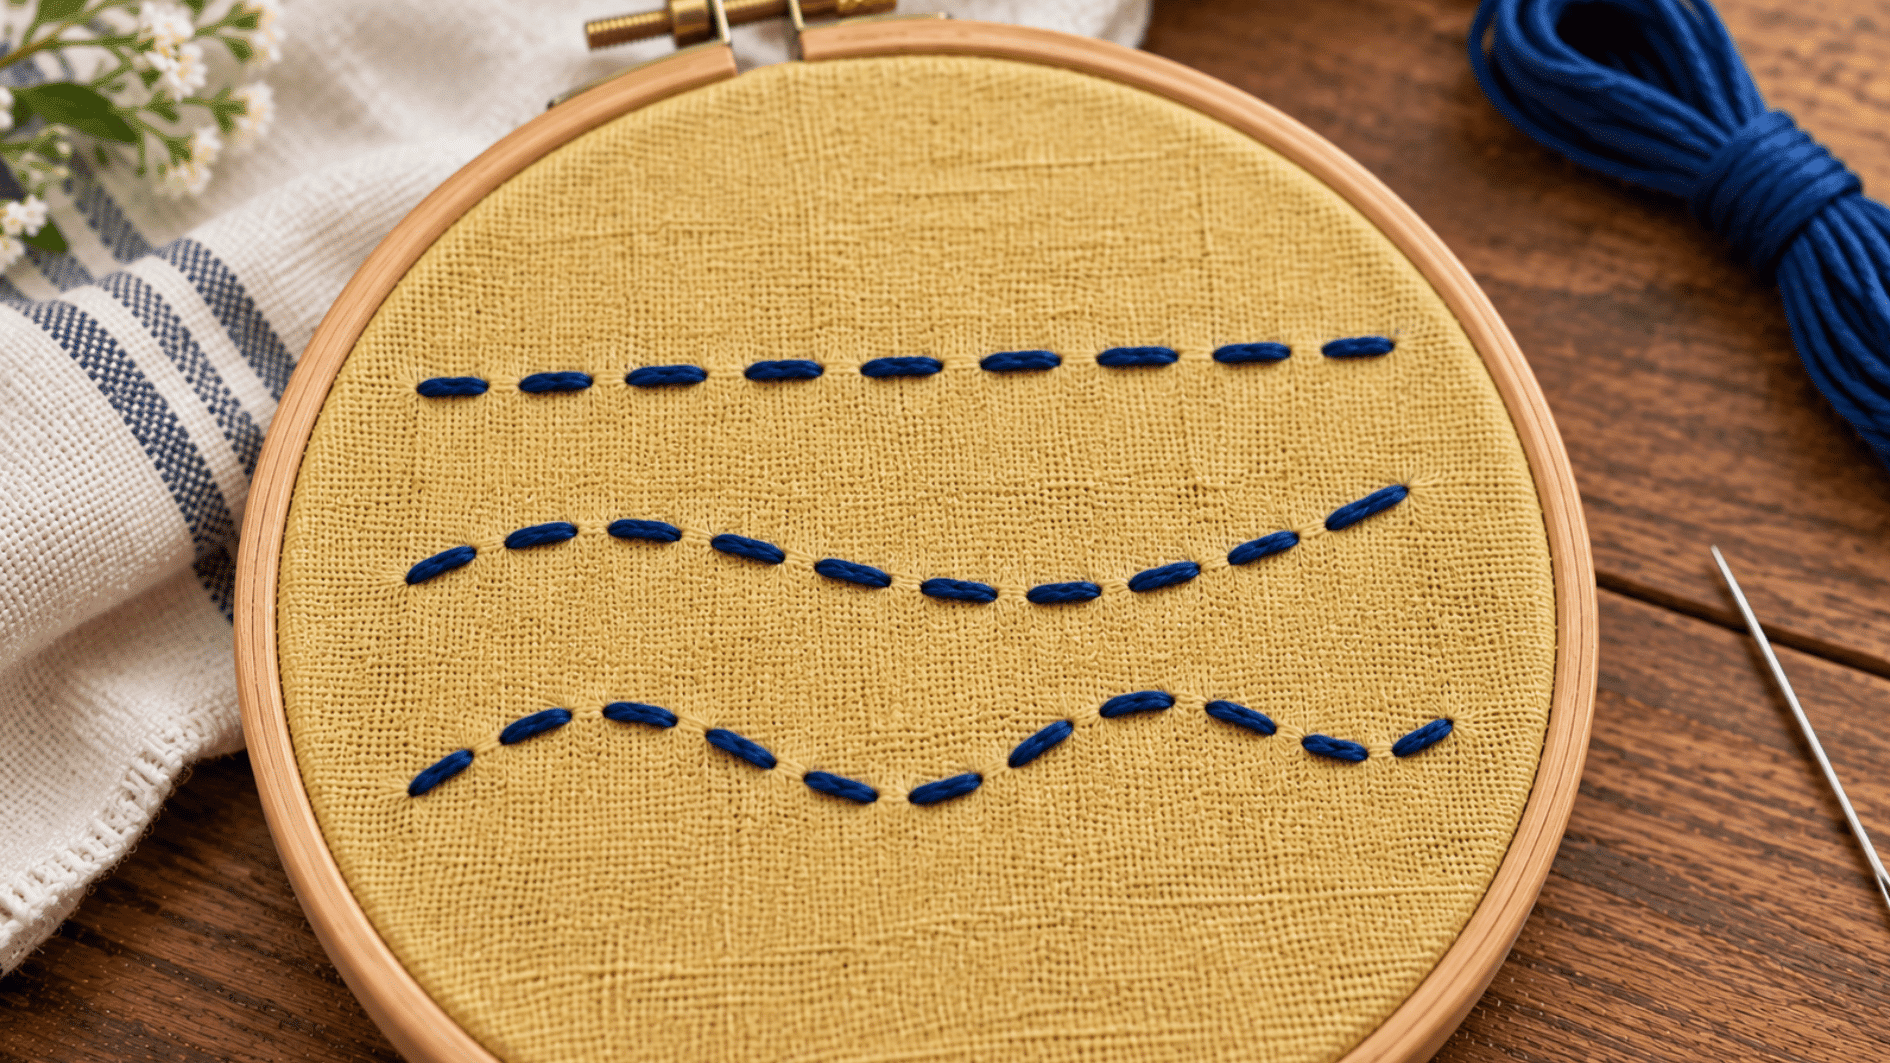
Running stitch creates a broken, dashed-line appearance, with visible gaps between each stitch. Even spacing gives it a tidy, repetitive rhythm along a line.
- Bring the needle up through the fabric.
- Insert it down a short, even distance ahead.
- Bring the needle back up the same distance further along.
- Continue this in-and-out motion, keeping stitch and gap length consistent.
3. Backstitch
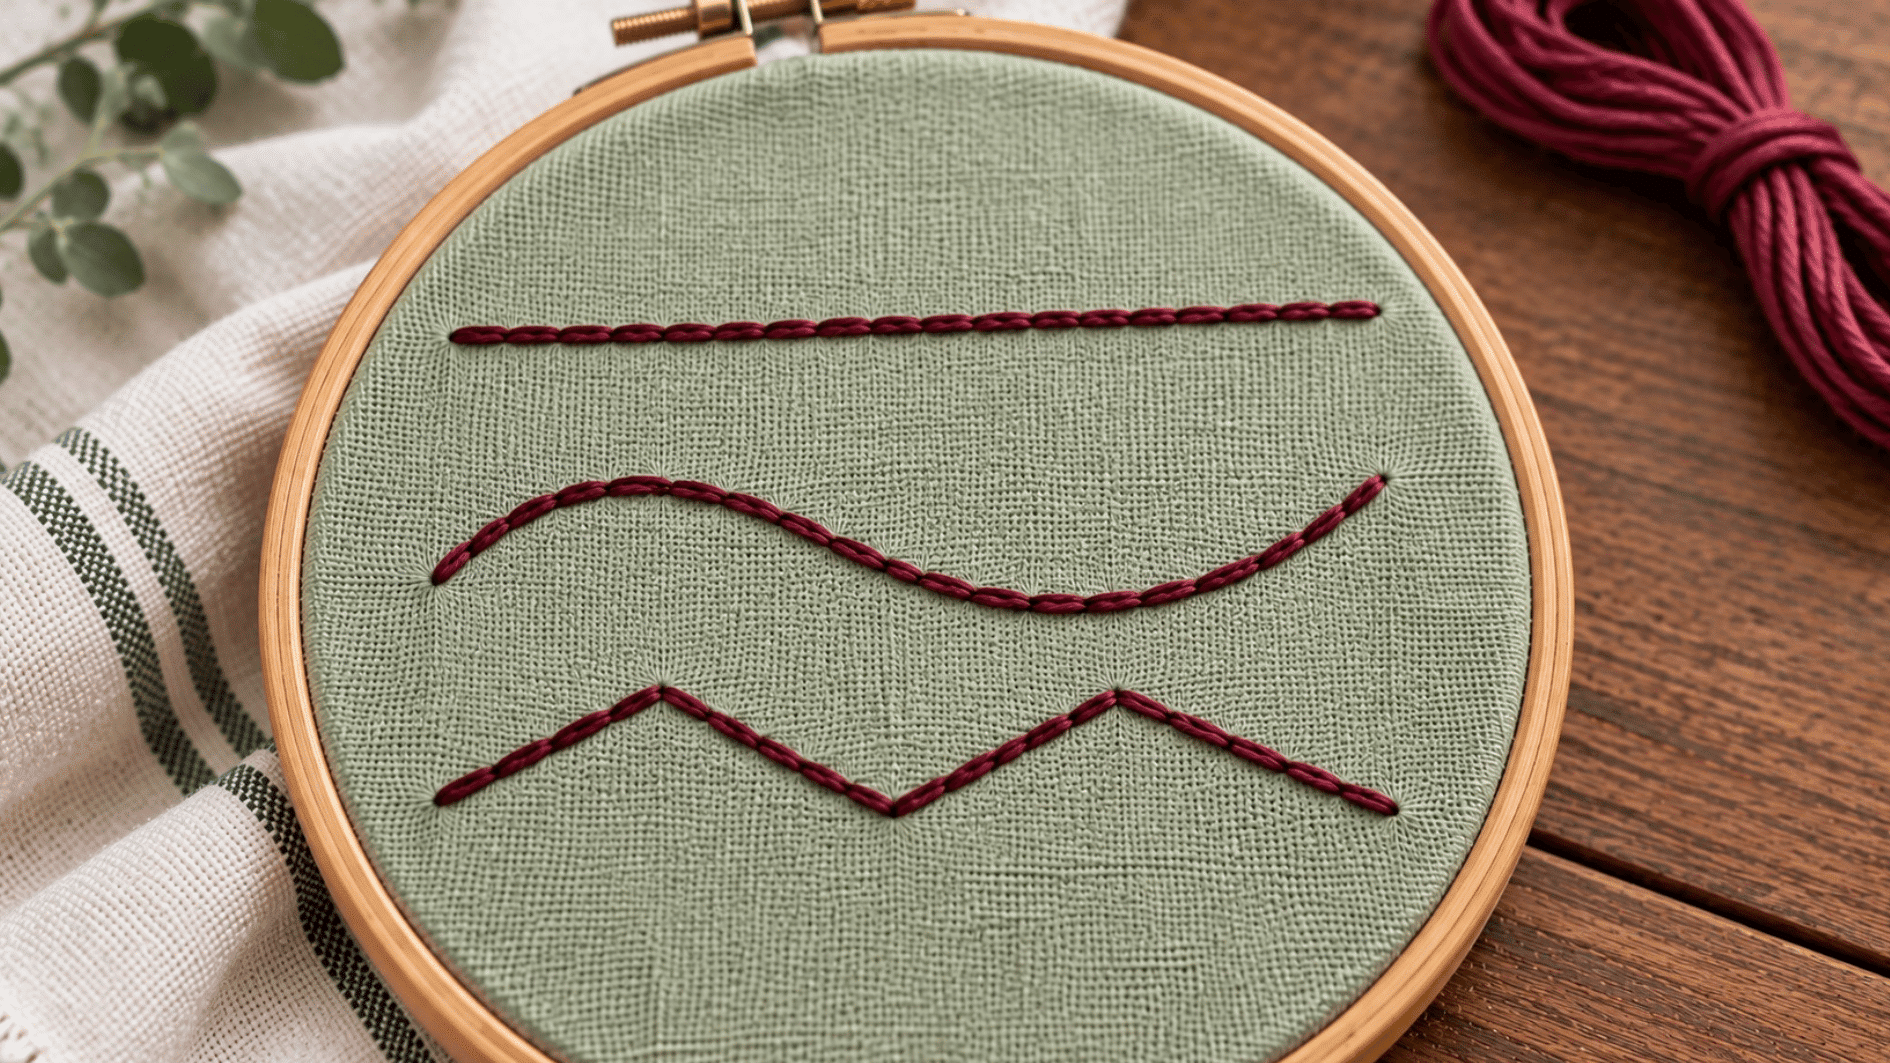
Backstitch forms a solid, continuous line with no visible gaps, since each new stitch loops backward into the end of the previous one. I use this one constantly for lettering, since nothing else gives quite as clean an edge.
- Bring the needle up a short distance ahead of your starting point.
- Insert the needle back down at the end of the previous stitch.
- Bring the needle up again, one stitch-length ahead.
- Repeat, always inserting into the same hole the last stitch ended at.
4. Stem Stitch
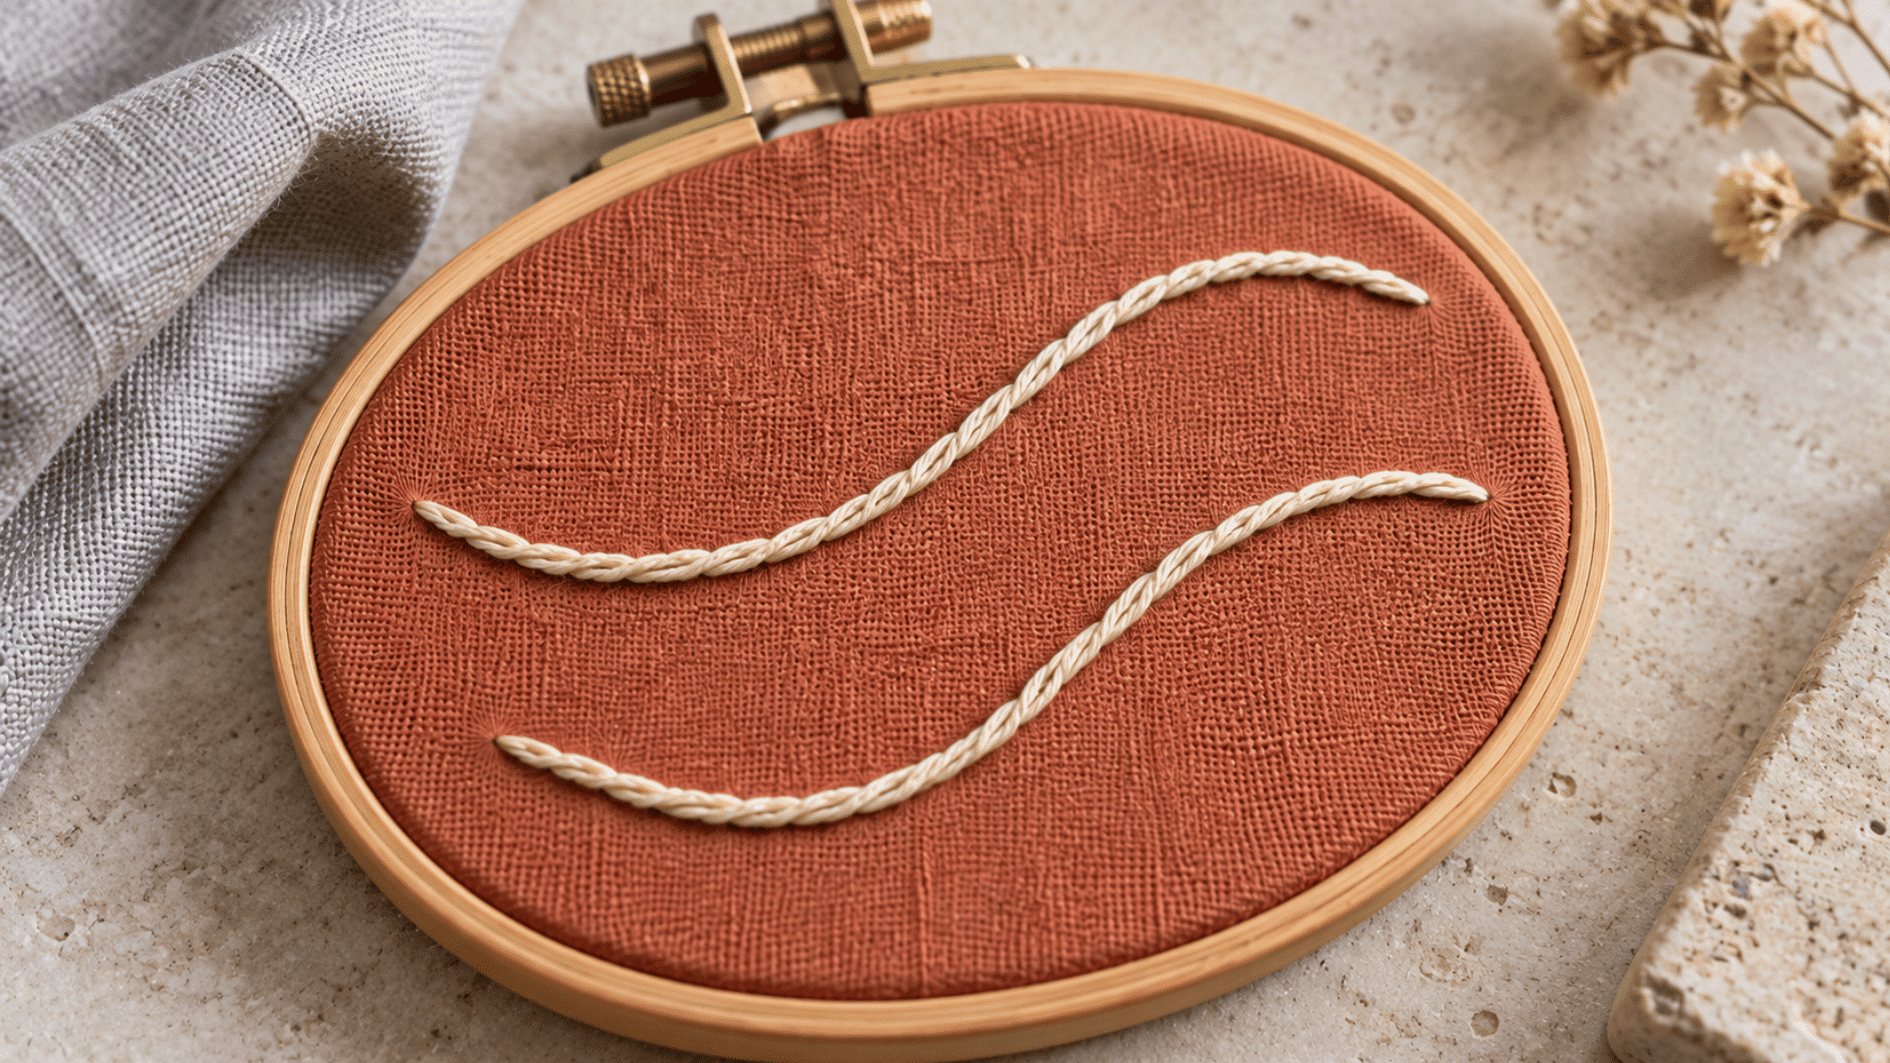
Stem stitch produces a slightly twisted, rope-like line, thanks to the consistent angle each stitch is worked at relative to the last.
- Bring the needle up at the start of your line.
- Insert it down slightly ahead and to one side of the line.
- Bring the needle back up halfway along the previous stitch, on the same side each time.
- Continue along the line, keeping the angle consistent throughout.
5. Split Stitch
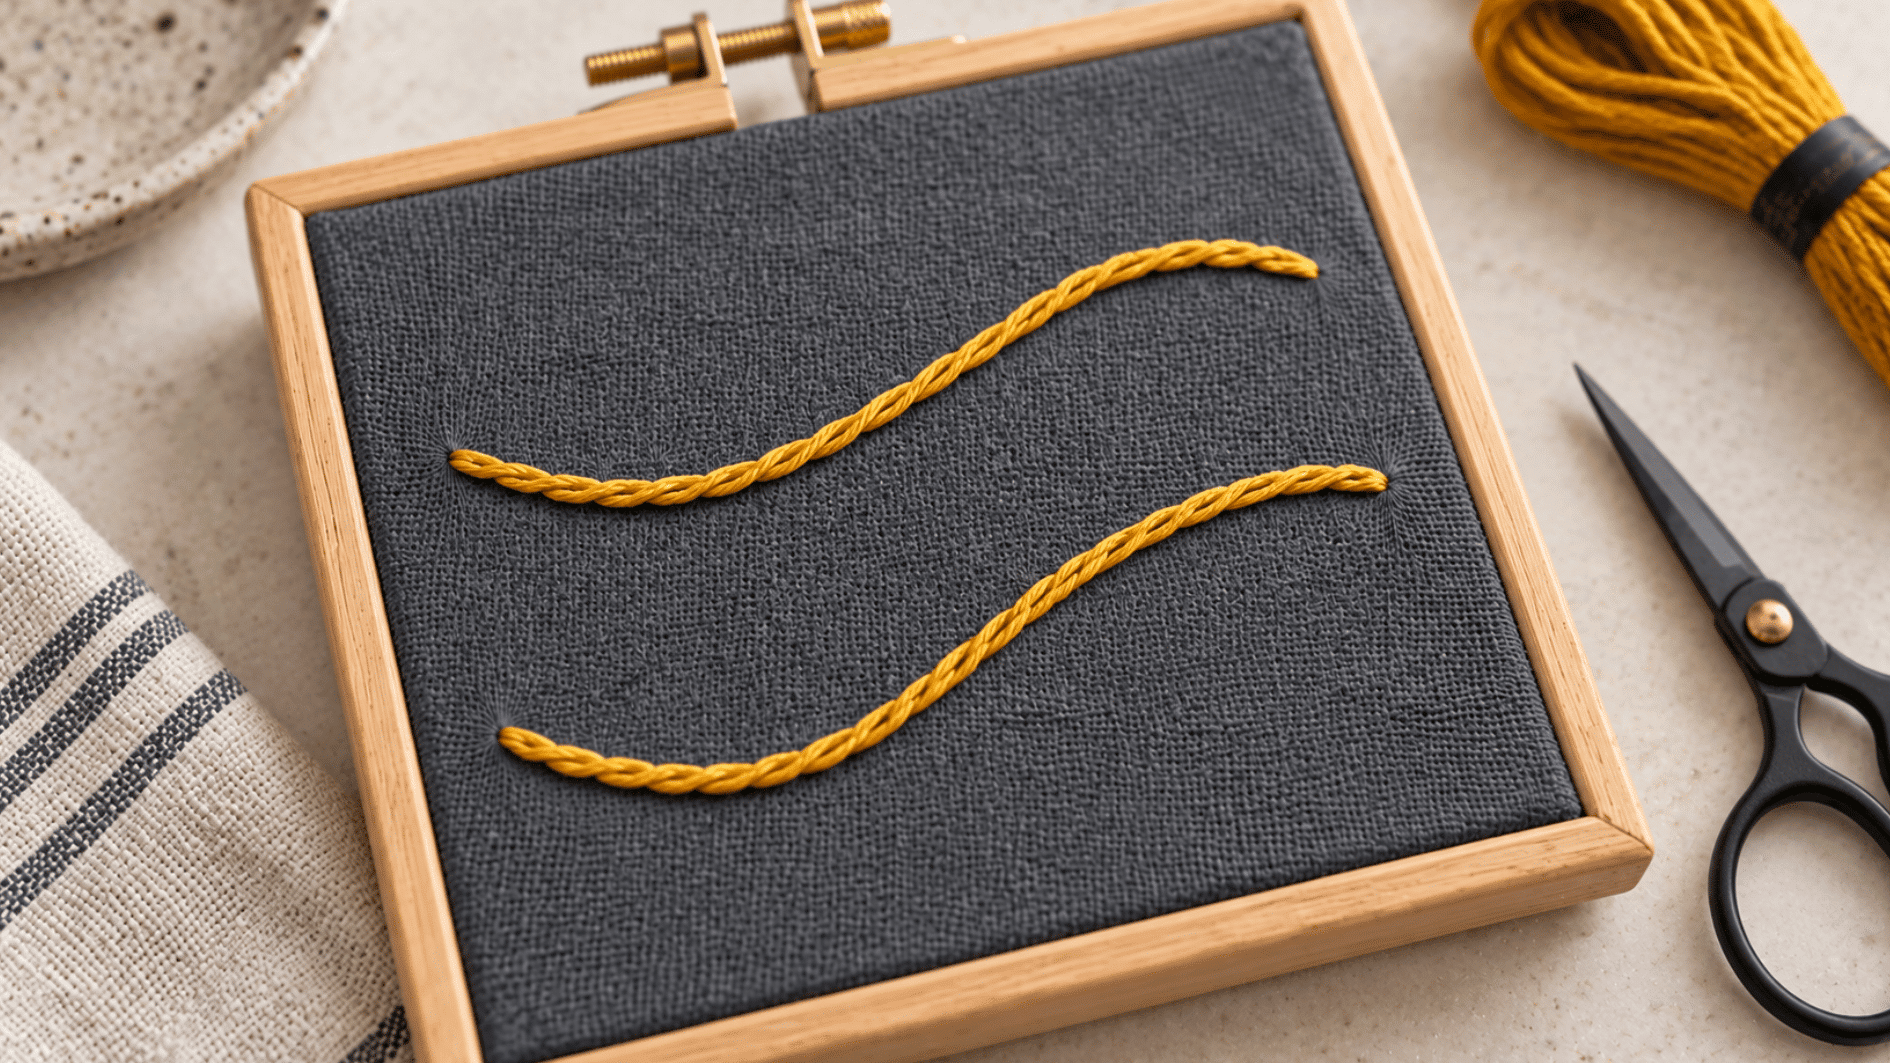
Split stitch has a braided, textured appearance, since the needle passes directly through the center of the previous stitch rather than beside it. It takes a bit more patience than stem stitch, but the texture it creates is worth the extra care. Work through it like this:
- Bring the needle up and make a straight stitch forward.
- Bring the needle back up through the middle of that stitch, splitting the threads.
- Insert the needle down slightly ahead to form the next stitch.
- Repeat, always splitting the prior stitch as you go.
6. Chain Stitch
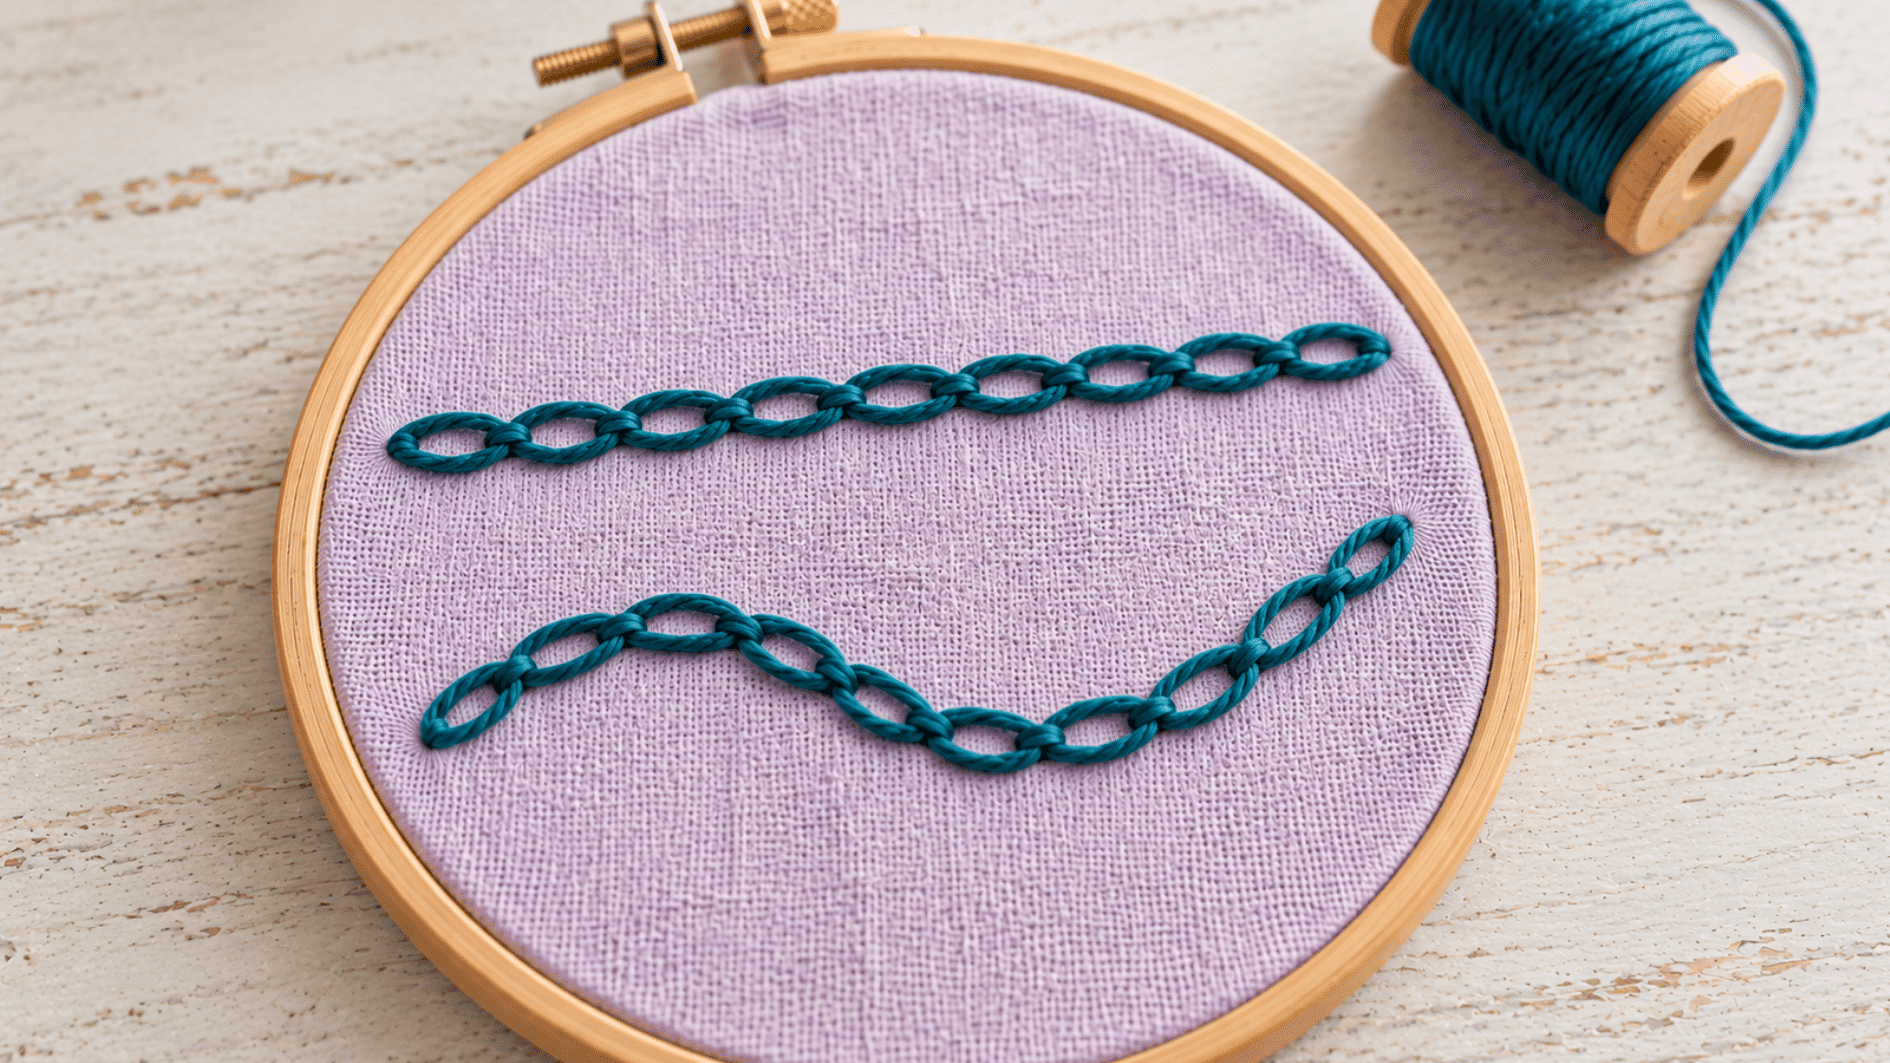
Chain stitch forms a series of connected loops, each one anchoring into the next like links in a chain. The tension here matters more than people expect, since pulling too tight flattens the loops right out.
- Bring the needle up and hold the thread down with your thumb to form a loop.
- Insert the needle back into the same hole it came from.
- Bring it back up a short distance ahead, through the loop of thread.
- Pull gently to shape the loop, then repeat for the next link.
7. Lazy Daisy Stitch
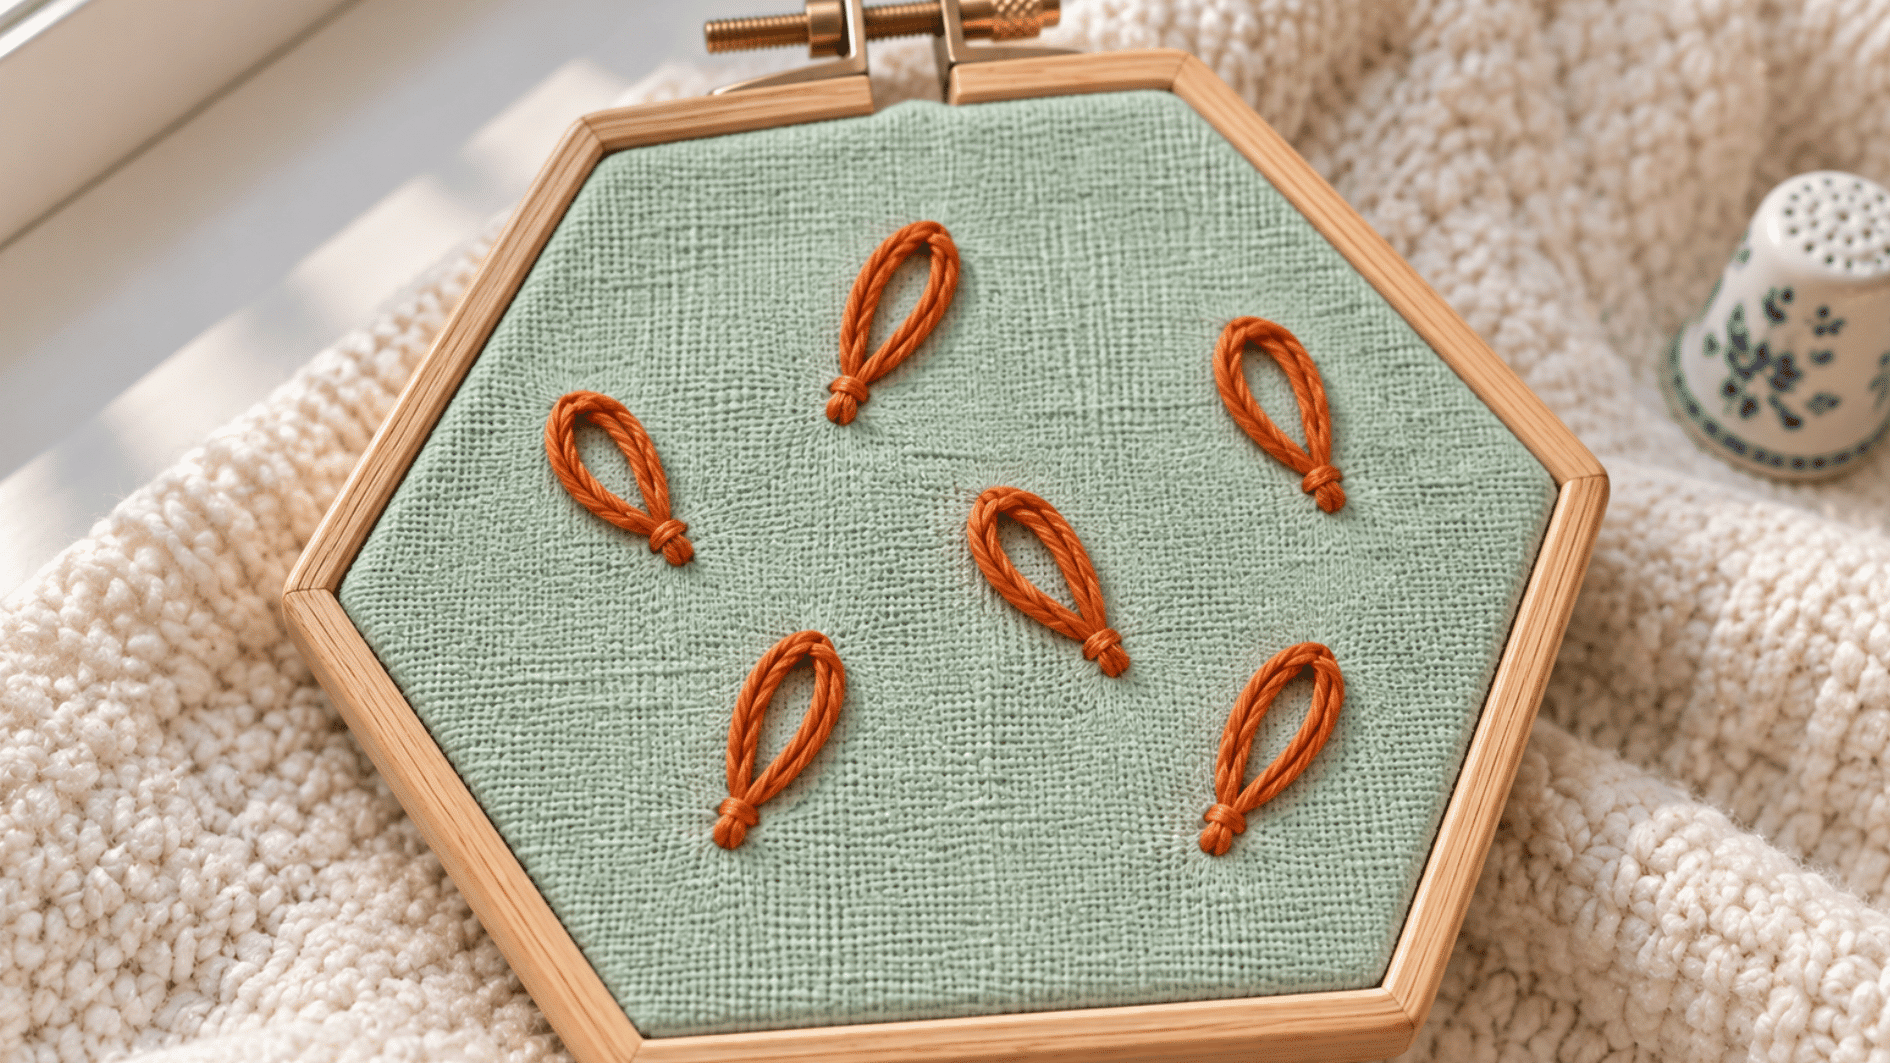
Lazy daisy stitch creates a single detached loop, anchored at the tip with a small straight stitch to hold its shape. Unlike chain stitch, each loop stands alone rather than linking forward. Follow these steps for one loop:
- Bring the needle up and form a loop, holding it with your thumb.
- Insert the needle back into the same hole.
- Bring it up again just past the loop’s tip, through the loop itself.
- Anchor the loop with a tiny straight stitch over the top.
8. Satin Stitch
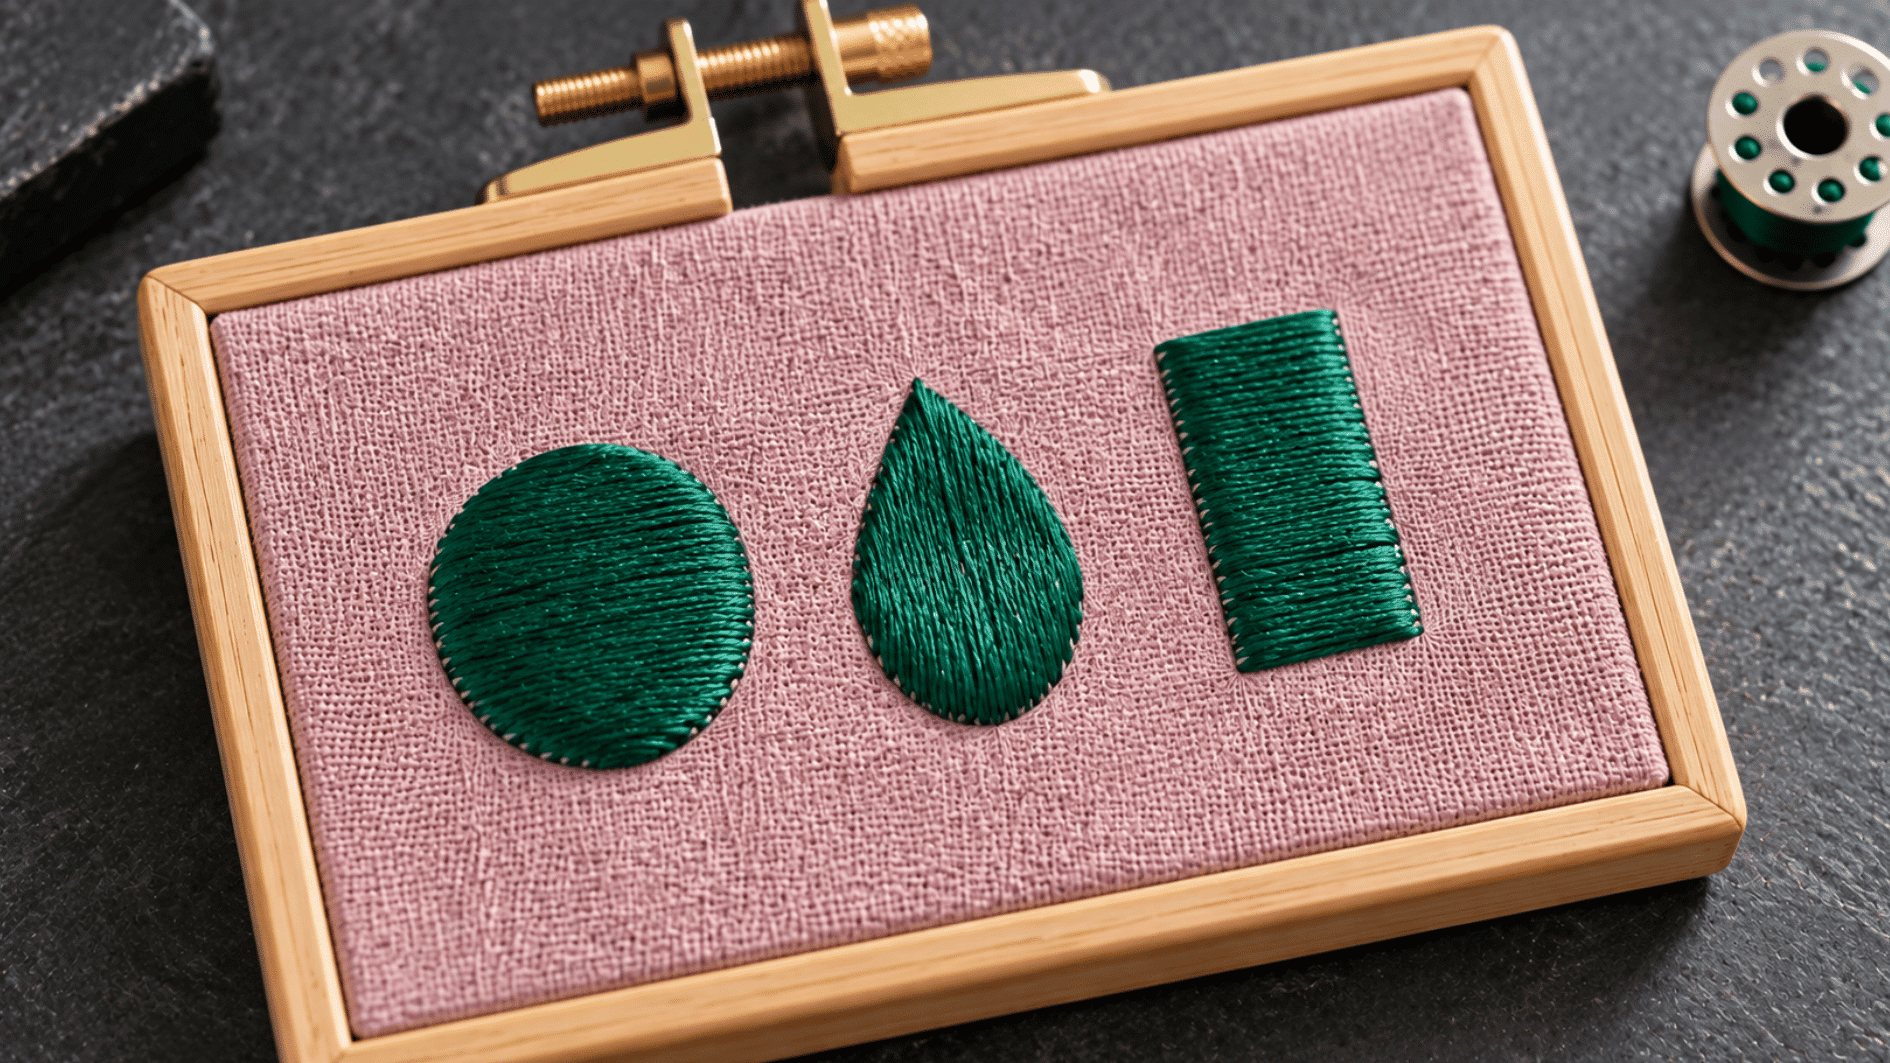
Satin stitch produces a smooth, solid fill with no visible gaps between individual stitches, giving the surface an almost polished look when done evenly.
- Outline the shape you want to fill, if needed.
- Bring the needle up on one edge of the shape.
- Insert it down directly opposite, forming one straight stitch across.
- Repeat side by side, keeping stitches close together with even tension.
9. Long and Short Stitch
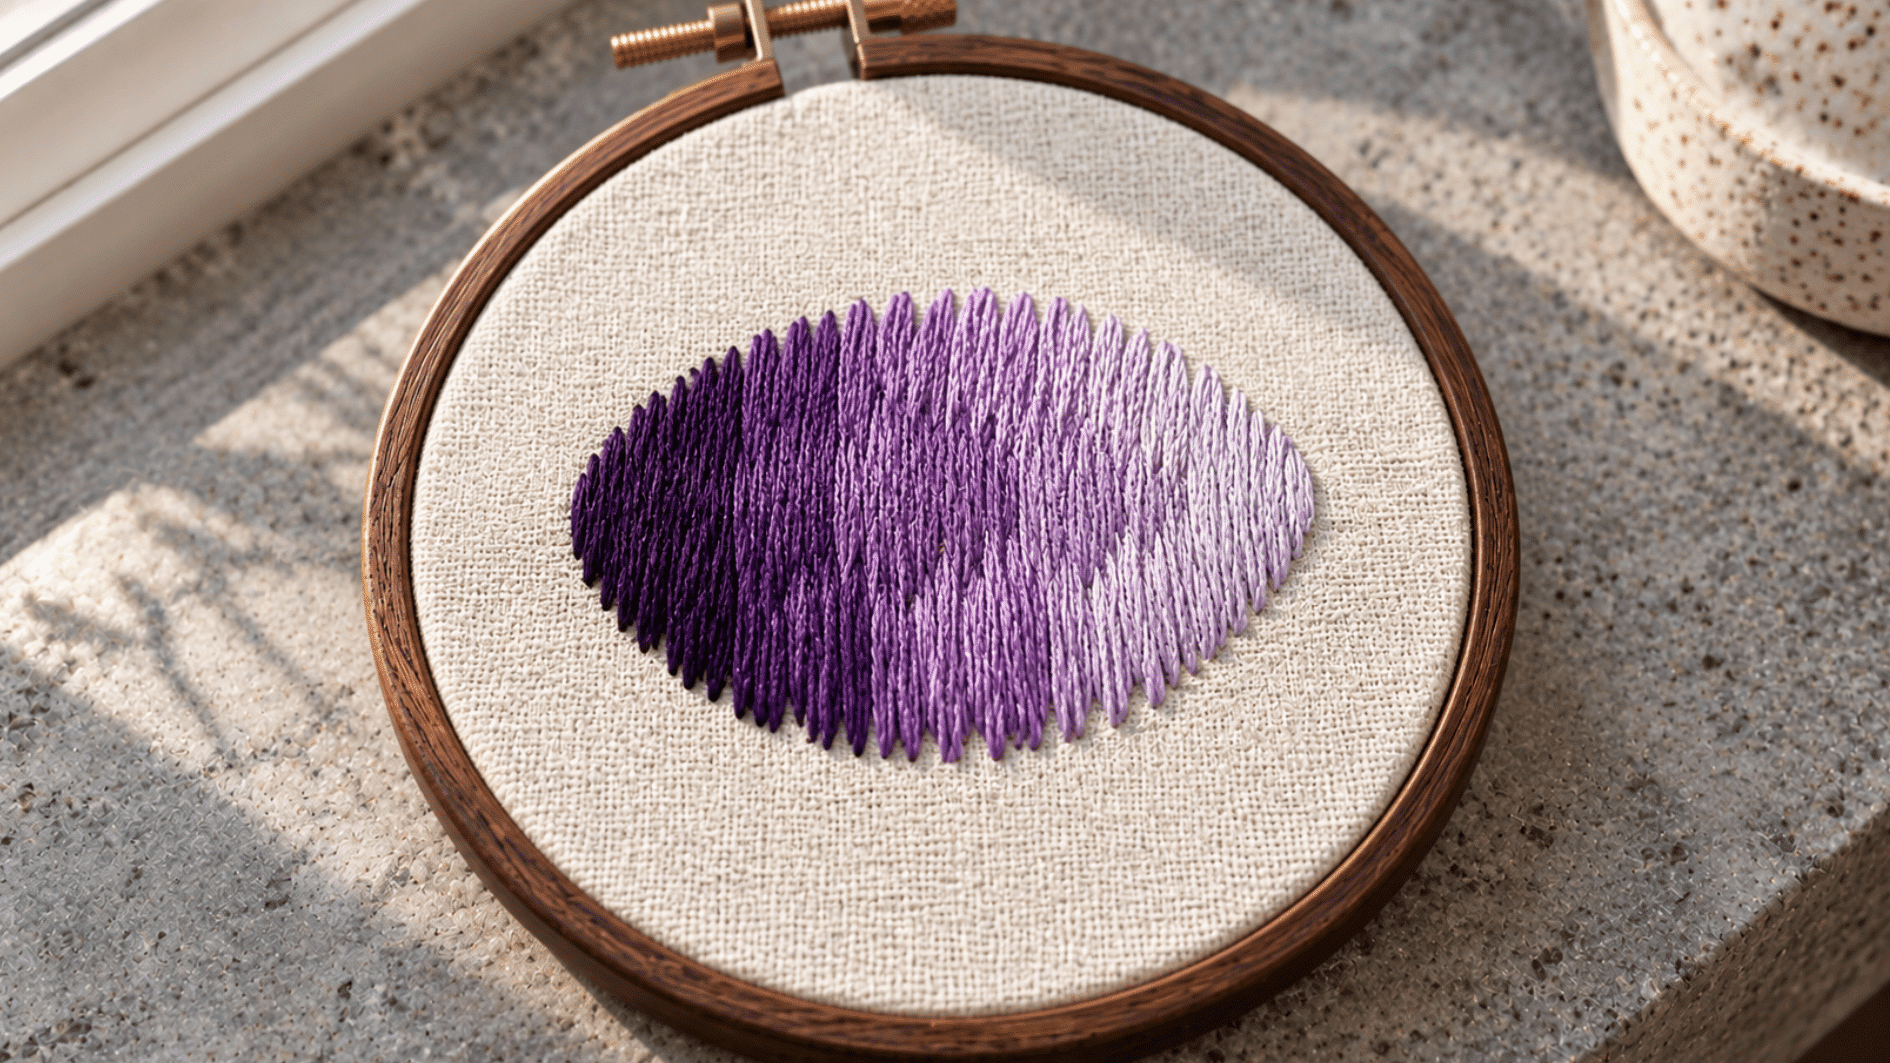
Long and short stitch creates a layered, blended fill by alternating stitch lengths row after row, letting colors merge smoothly into one another. Building it takes these steps.
- Stitch a first row alternating one long stitch, one short stitch, across the shape.
- Bring the needle up into the gaps left by the shorter stitches for the next row.
- Use stitches of matched length for all following rows to blend the transition.
- Continue until the shape is fully filled.
10. French Knot
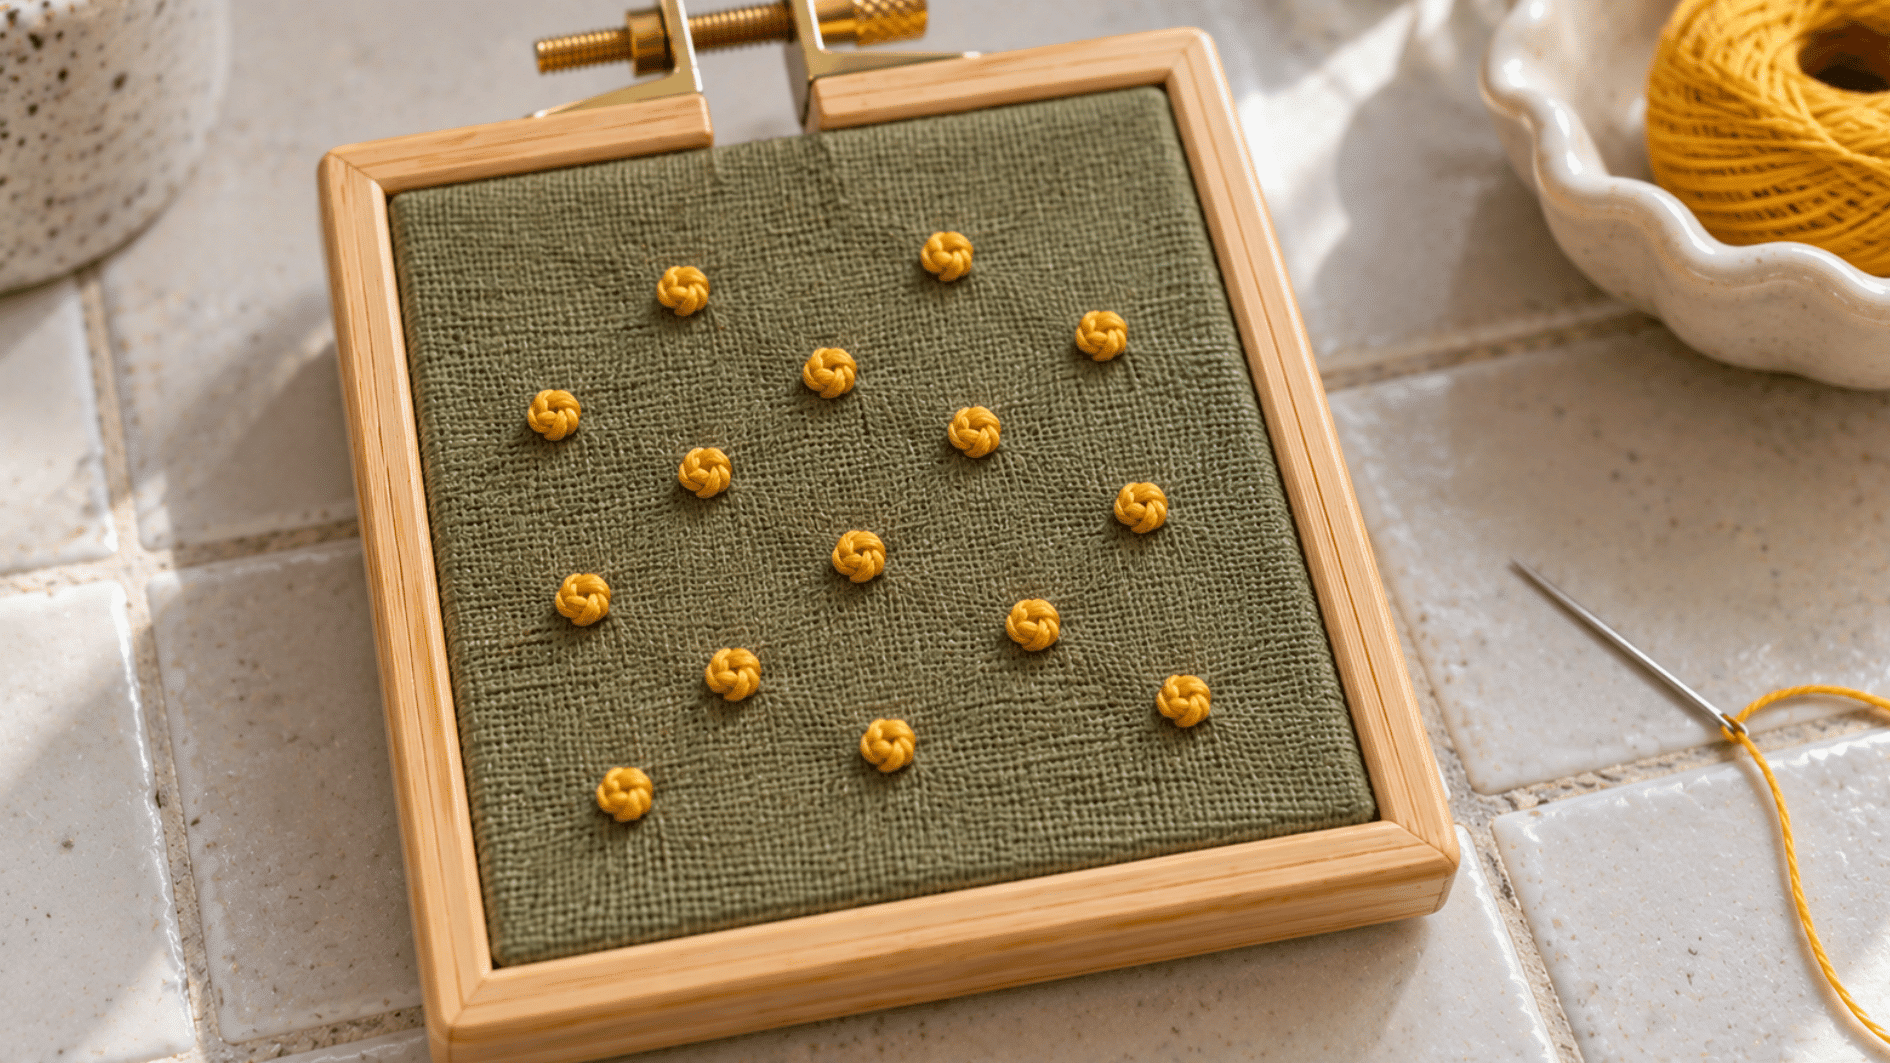
French knot forms a small, raised dot sitting just above the fabric surface. I still remember pulling my first ones straight through the fabric by accident, before learning the trick is holding tension the whole way.
- Bring the needle up through the fabric.
- Wrap the thread around the needle two or three times.
- Hold the wraps taut and insert the needle back down close to the original hole.
- Pull the needle through slowly, keeping tension until the knot sits flat.
11. Colonial Knot
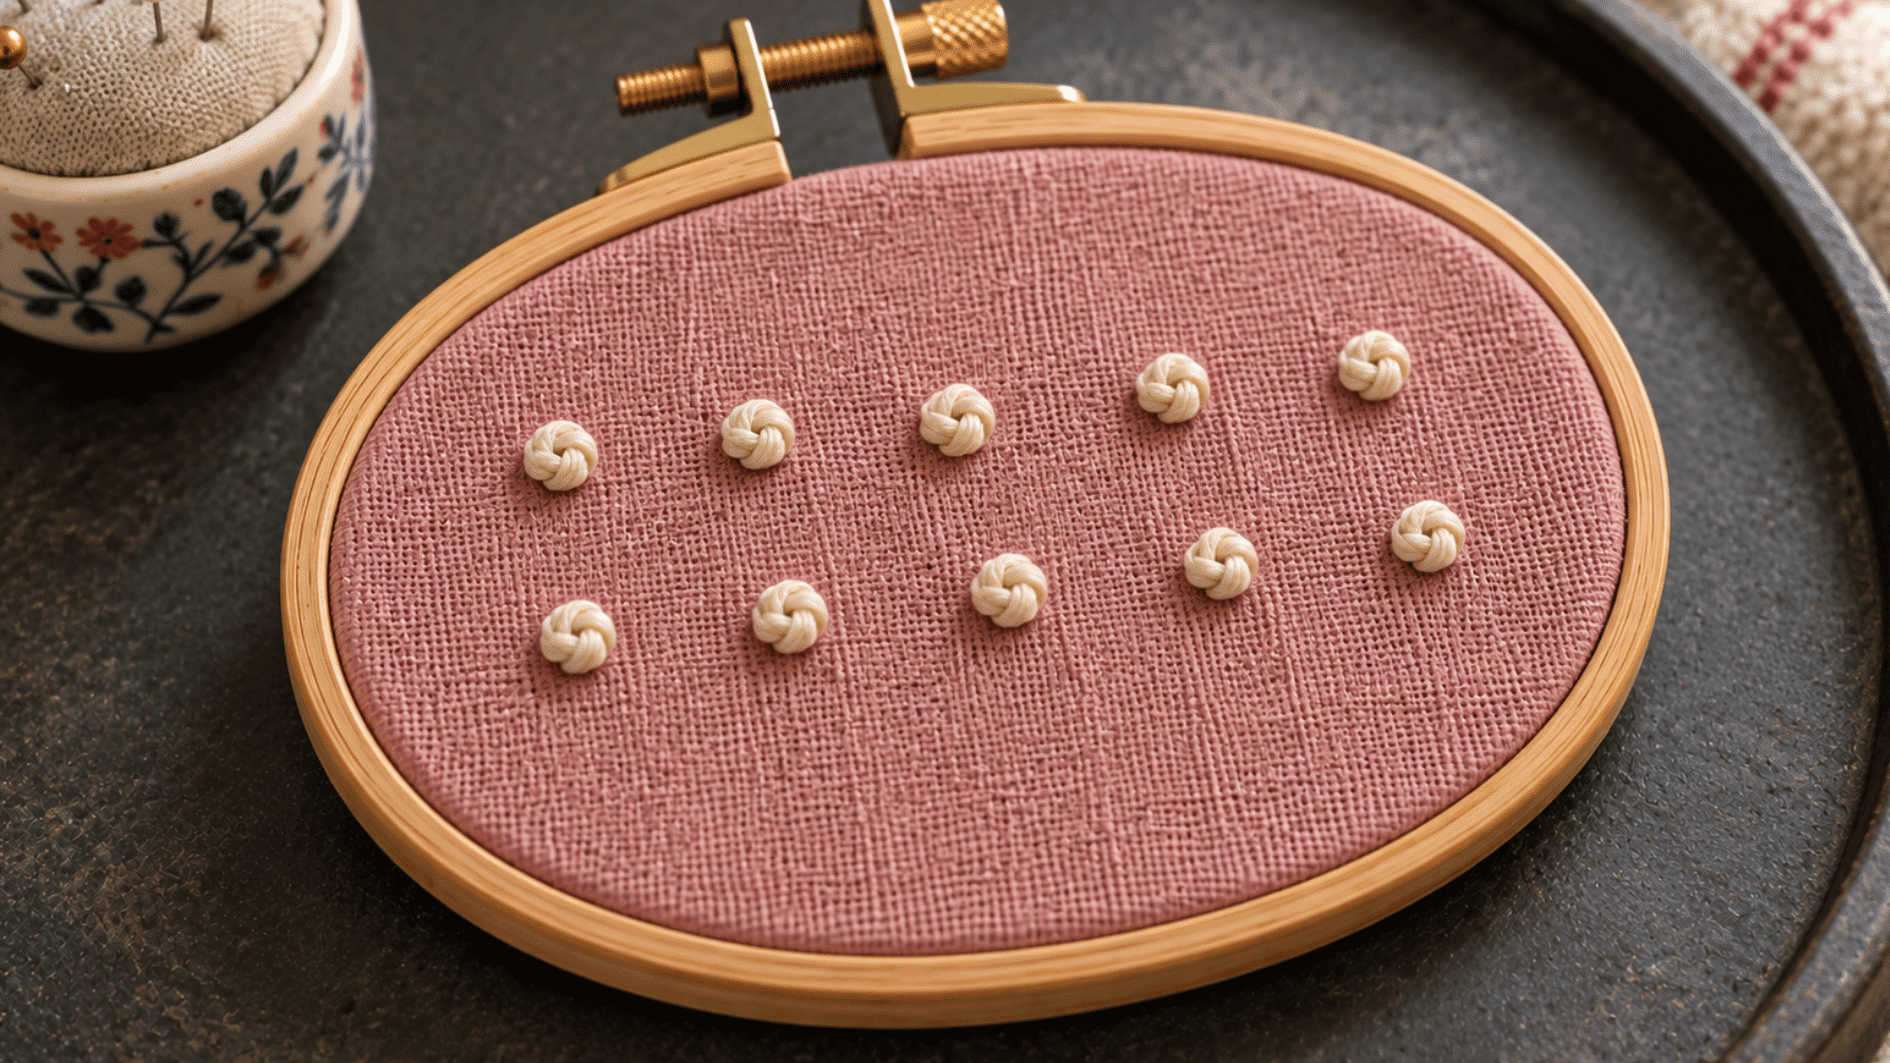
Colonial knot creates a compact, rounded knot with a firmer structure than a French knot, thanks to a figure-eight wrap instead of a simple loop.
- Bring the needle up through the fabric.
- Wrap the thread over and under the needle in a figure-eight motion.
- Hold the wraps snug and insert the needle back down near the starting point.
- Pull through gently, keeping the knot compact.
12. Blanket Stitch
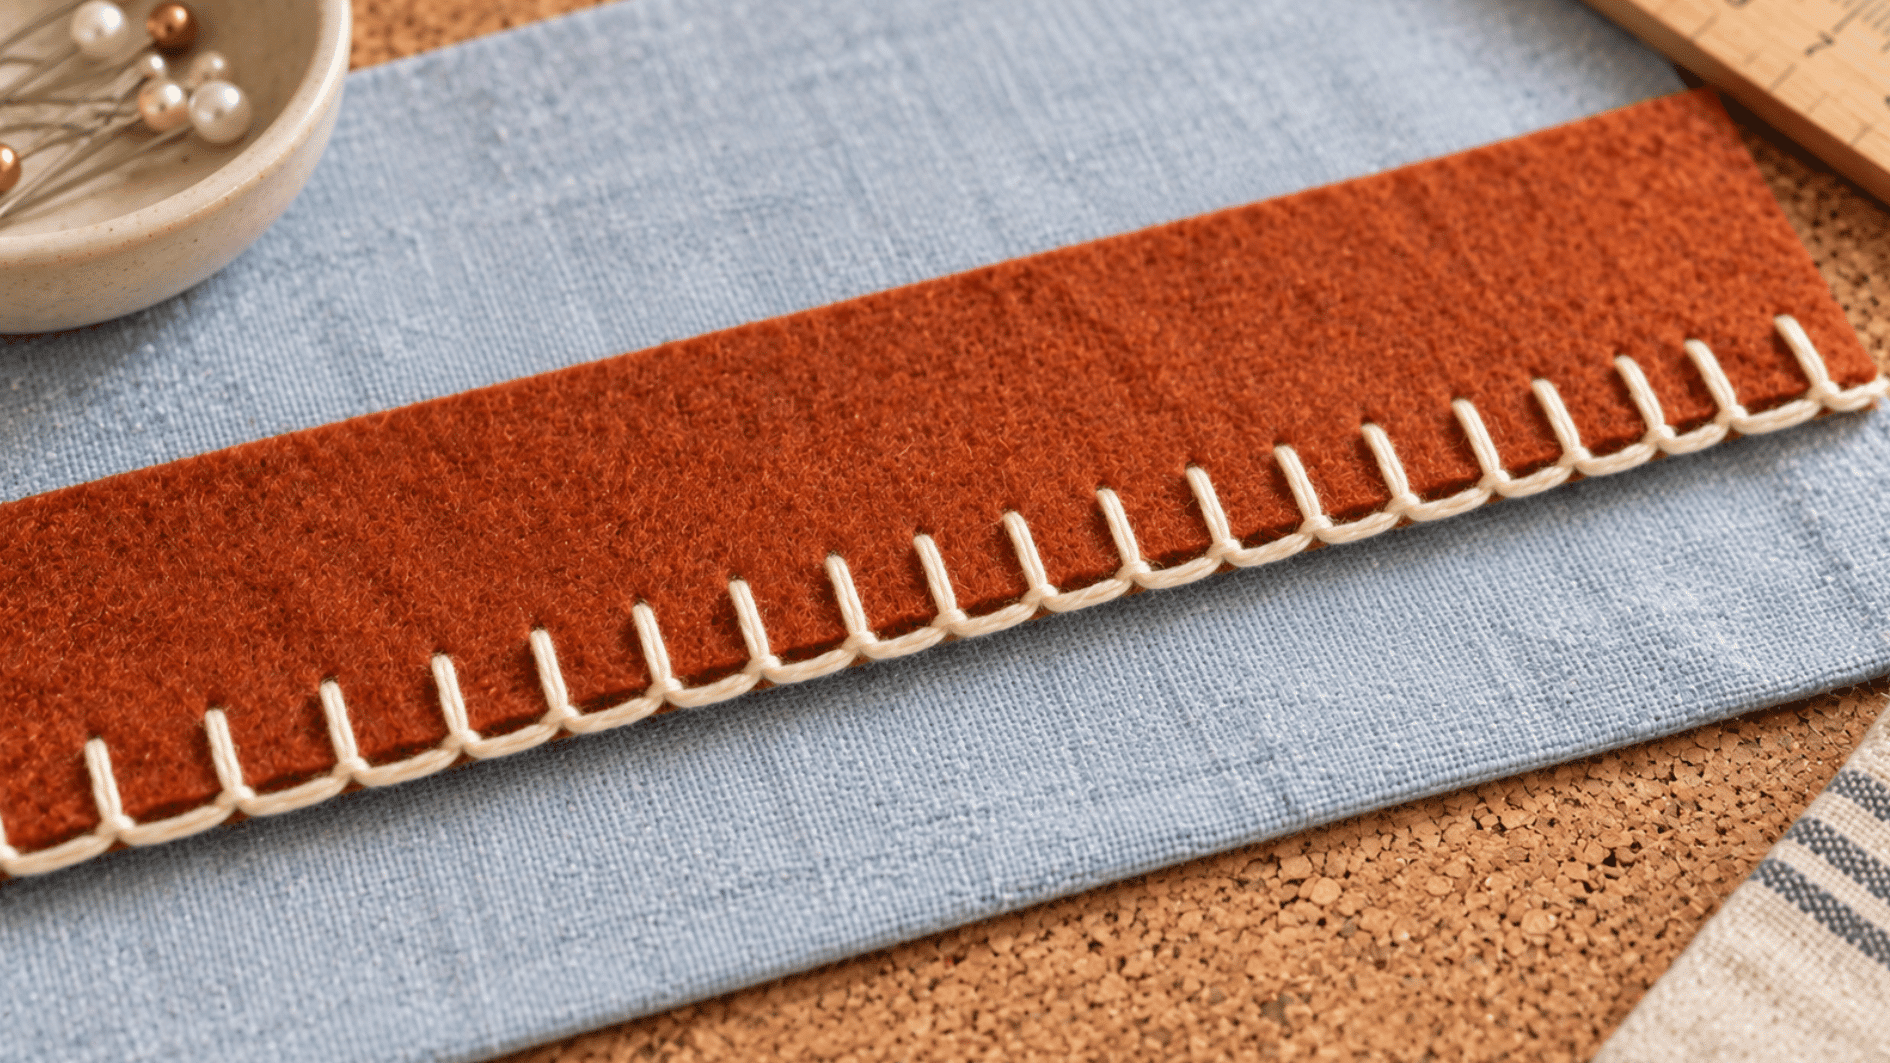
Blanket stitch produces an open, looped edge along the border of a shape or fabric, formed because the thread passes beneath the needle before being pulled taut.
- Bring the needle up along the fabric edge.
- Insert it down a short distance, then back up at the edge.
- Loop the working thread under the needle tip before pulling through.
- Repeat evenly along the edge, keeping loop size consistent.
13. Fly Stitch
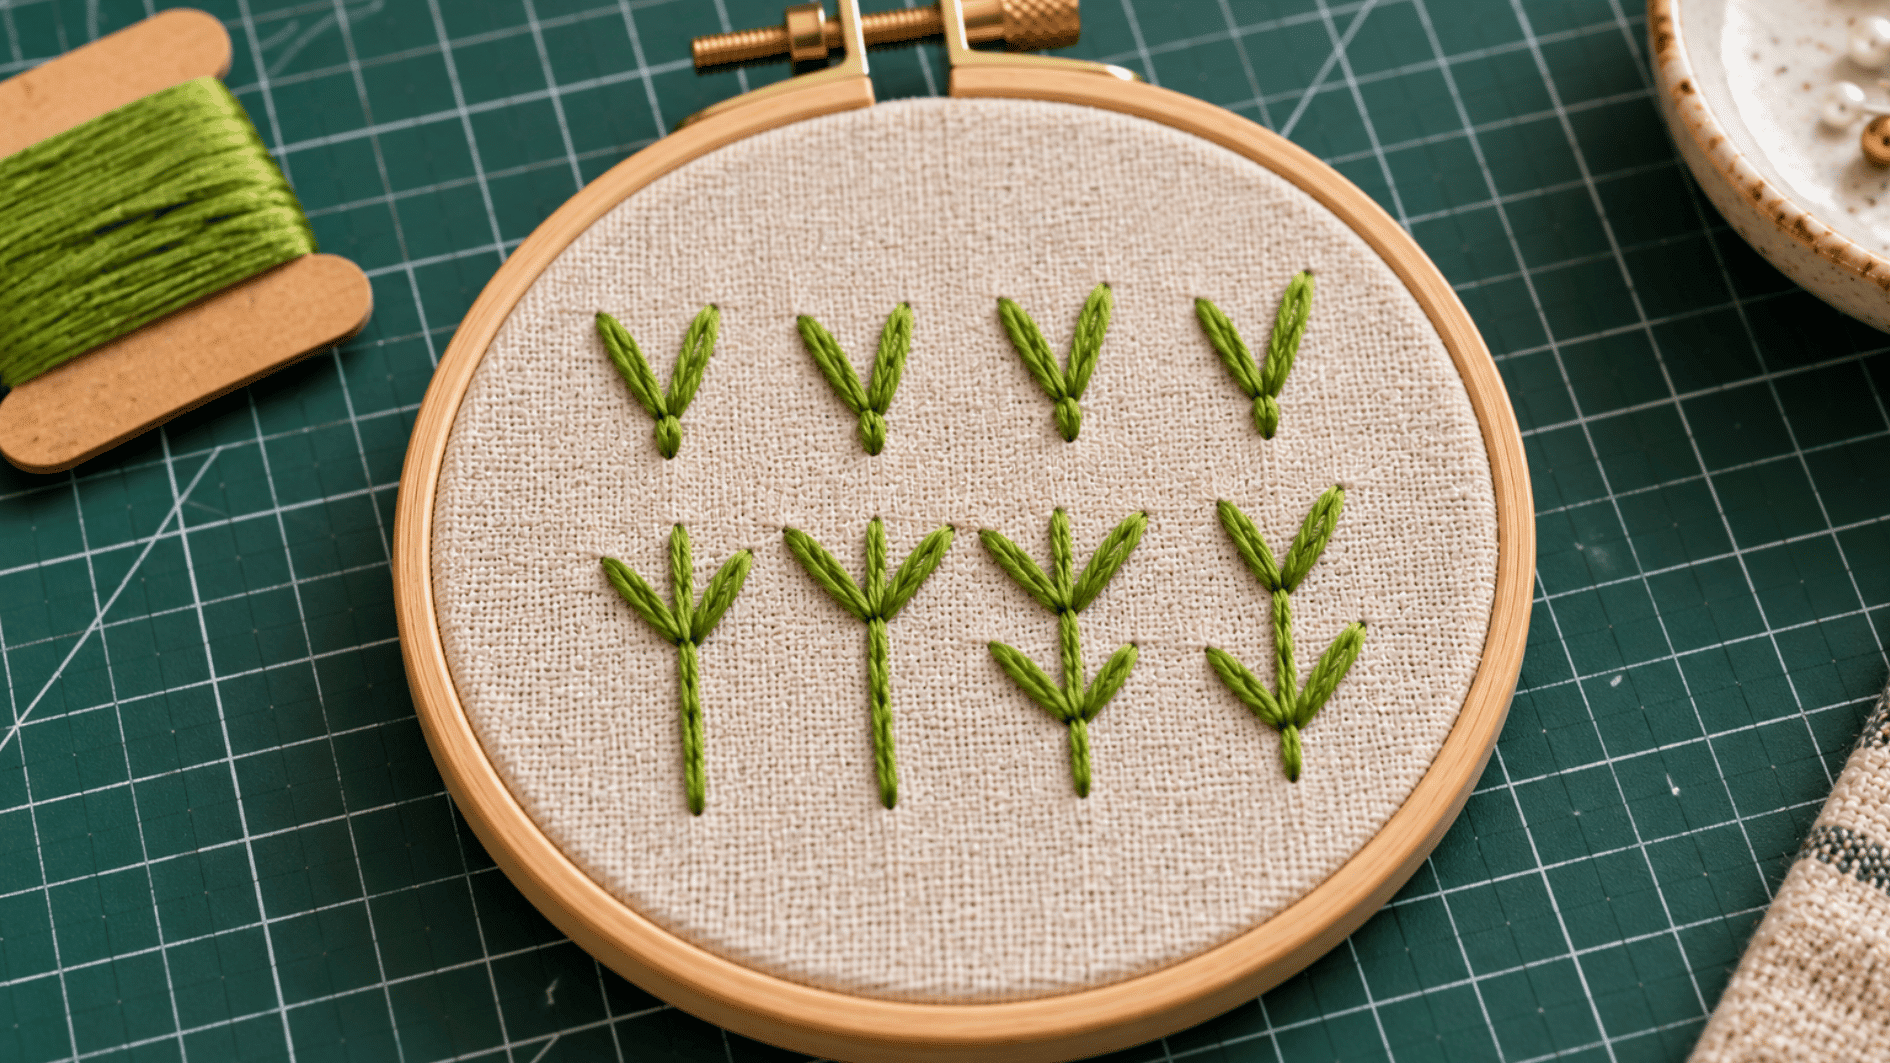
Fly stitch creates a V- or Y-shaped mark, depending on how long the anchoring tail stitch is left at the bottom.
- Bring the needle up on one side of where the V will form.
- Insert it down on the opposite side, leaving the thread loose as a loop.
- Bring the needle up at the base of the loop, catching the thread.
- Anchor with a short straight stitch, longer for a Y shape, shorter for a V.
14. Feather Stitch
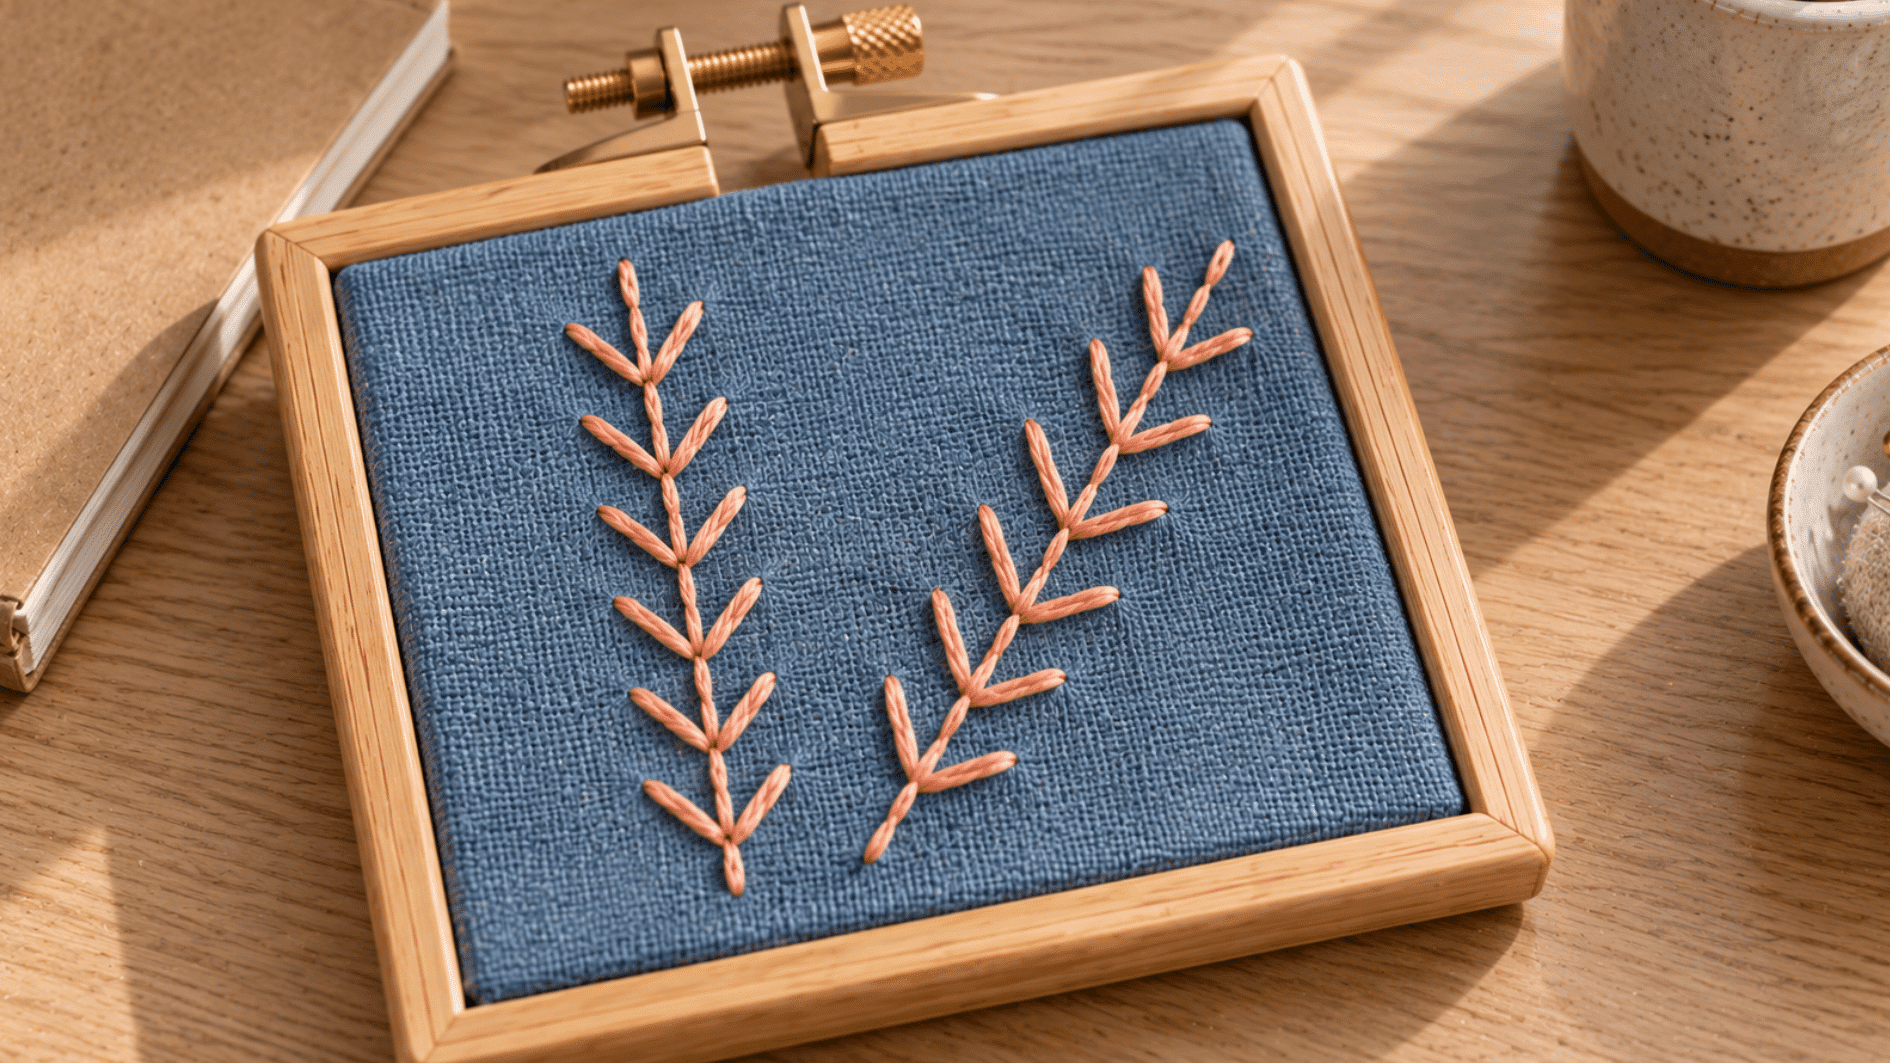
Feather stitch forms an open, branching pattern that fans out from a central line, resembling a delicate feather or fern.
- Bring the needle up near the centerline.
- Insert it down slightly to one side, looping the thread under the needle.
- Bring the needle up through the loop and pull gently.
- Repeat, alternating sides as you move down the line.
15. Herringbone Stitch
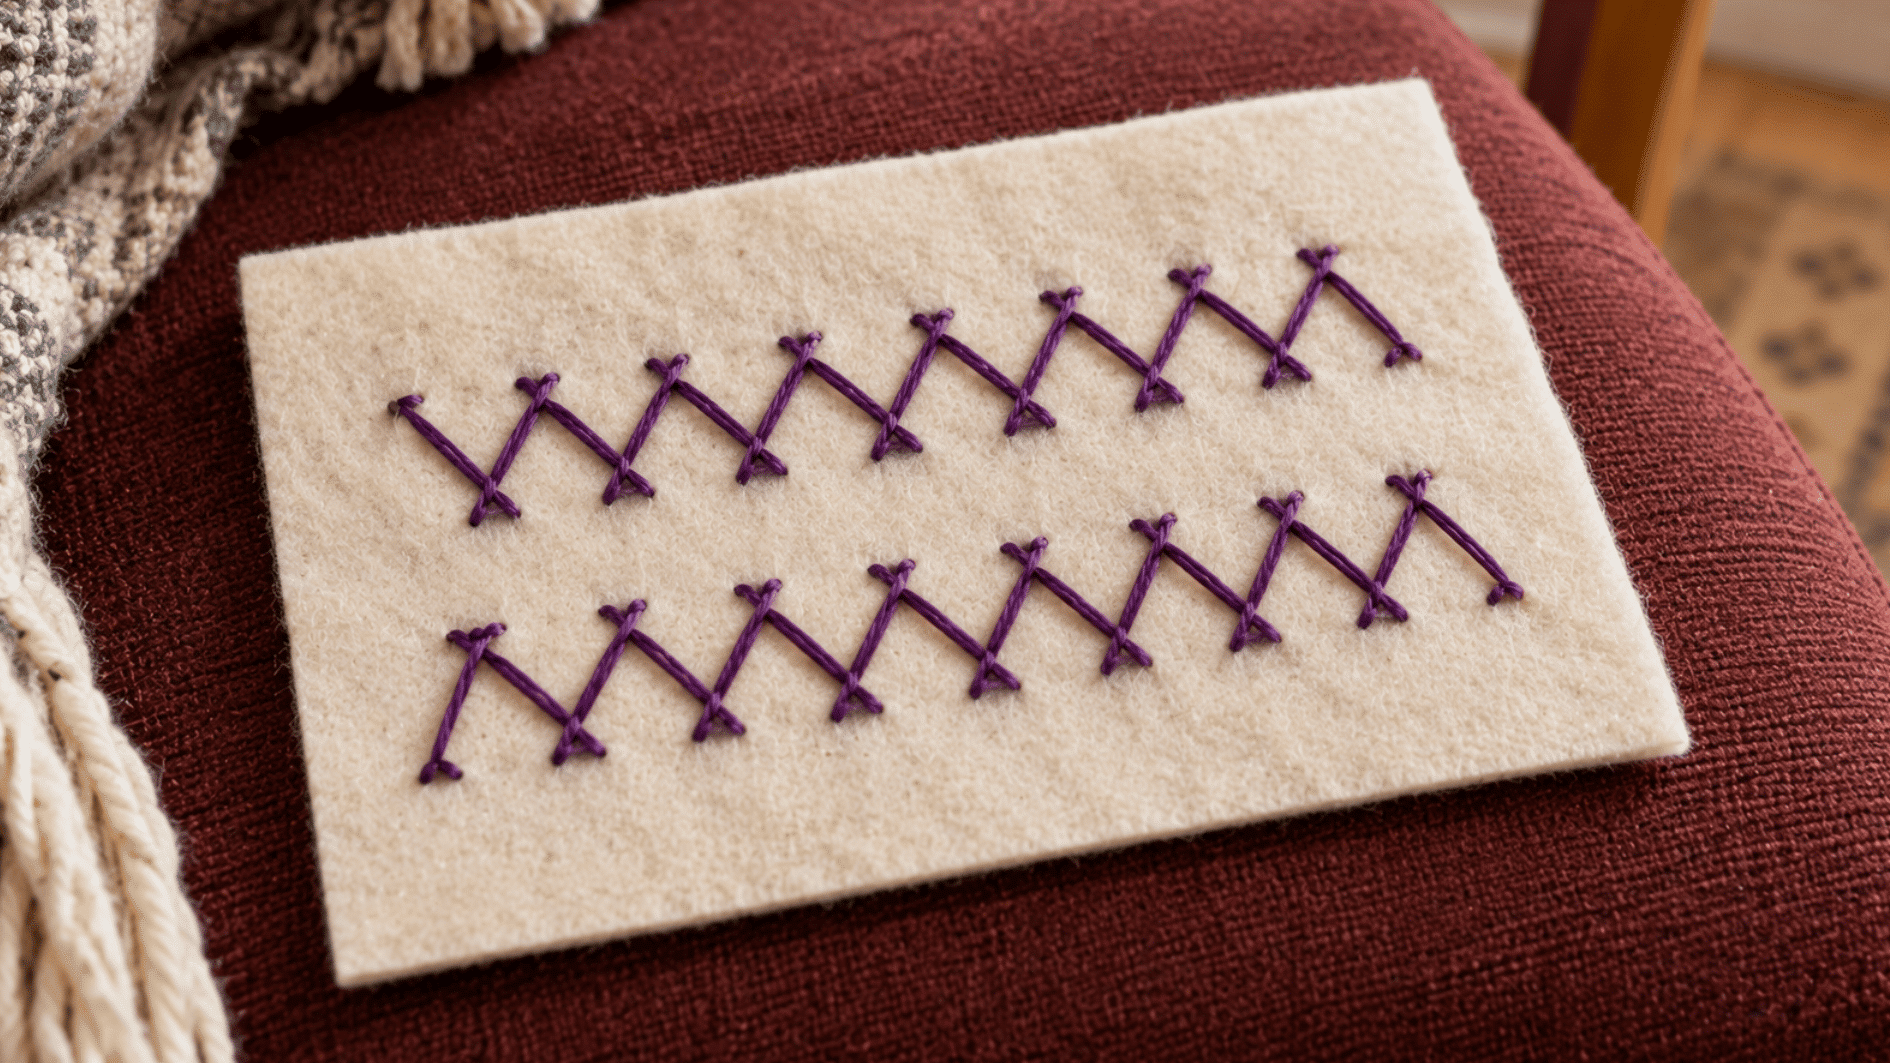
Herringbone stitch creates a crossed diagonal pattern, where each stitch overlaps the previous one at an angle to form a woven, zigzag texture. Here’s how the crossing pattern is built:
- Bring the needle up at the bottom left of your working area.
- Insert it diagonally at the top right, then bring it back up nearby.
- Cross back down to the bottom right, overlapping the prior stitch.
- Continue alternating top and bottom, keeping spacing consistent.
16. Couching Stitch
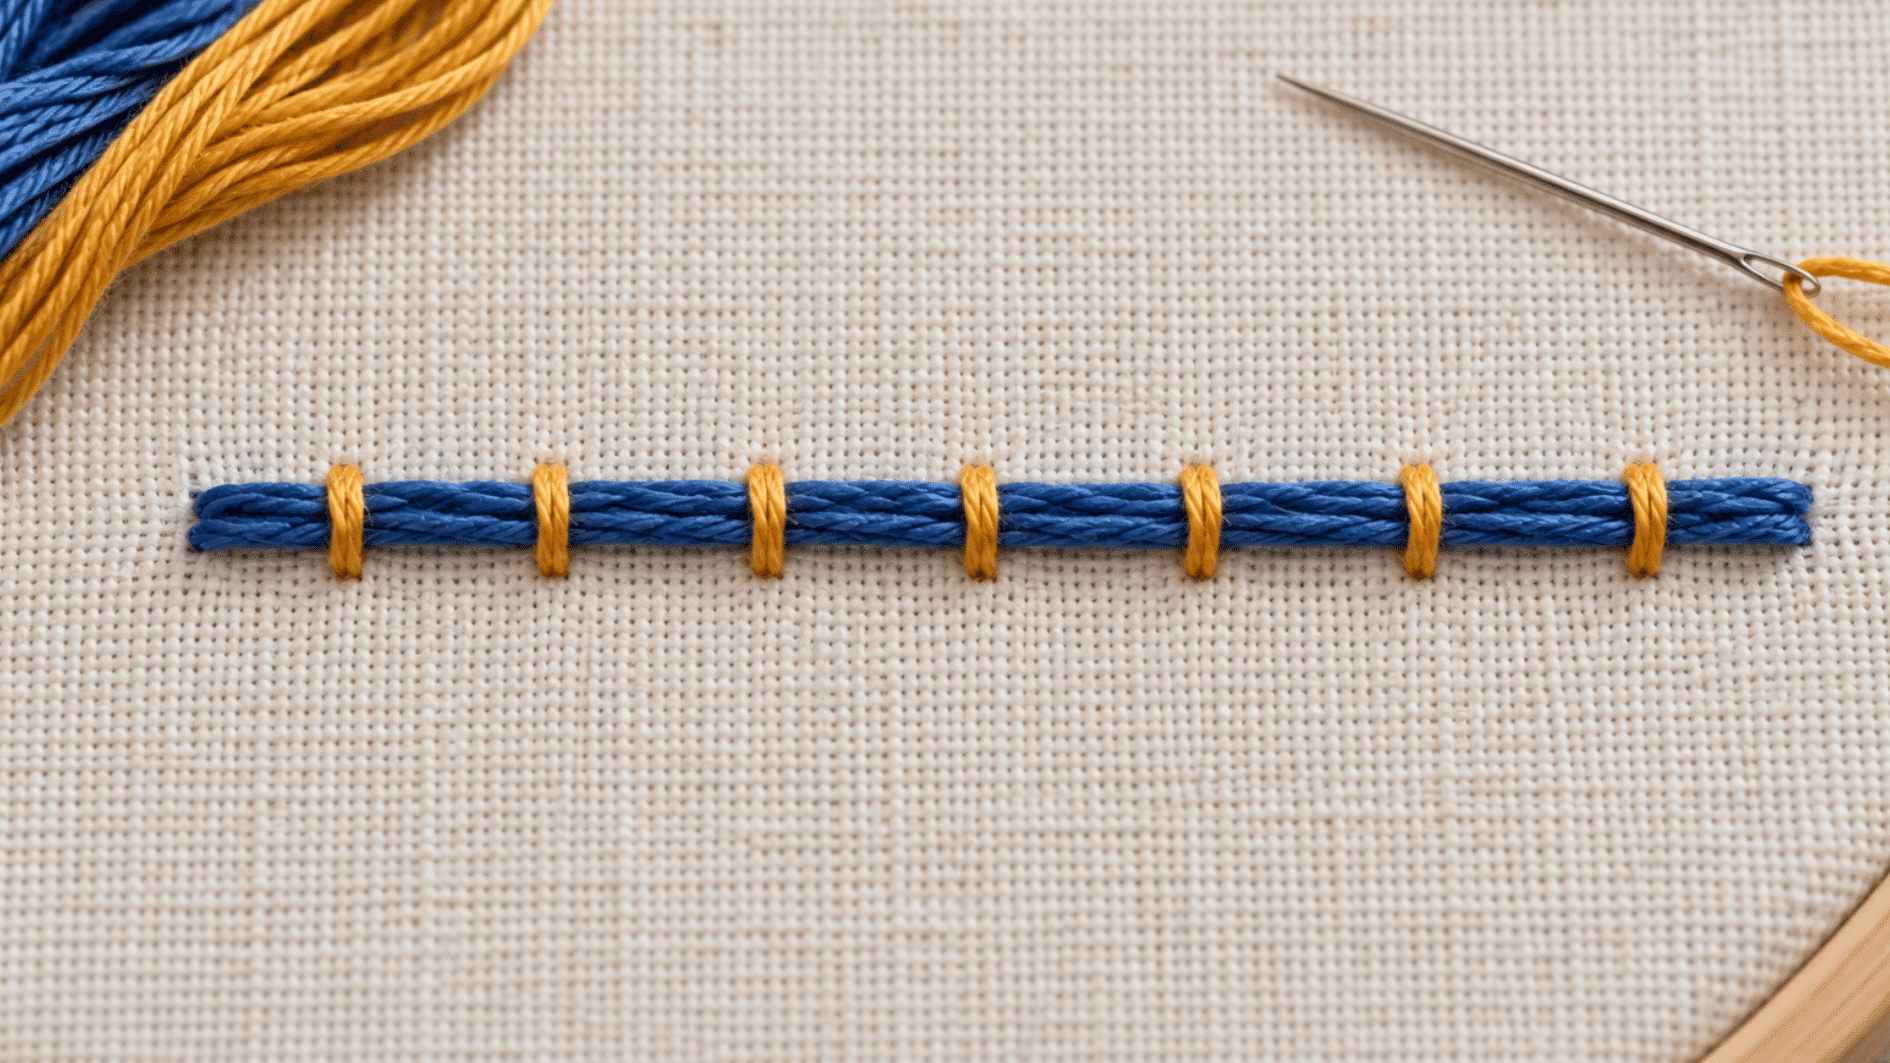
Couching stitch involves one thread lying flat on the fabric’s surface while a second, finer thread tacks it down at intervals.
- Lay the thicker thread along your design line.
- Bring a fine secondary thread up just beside it.
- Stitch over the laid thread and back down close by.
- Repeat at regular intervals along the entire length.
17. Seed Stitch
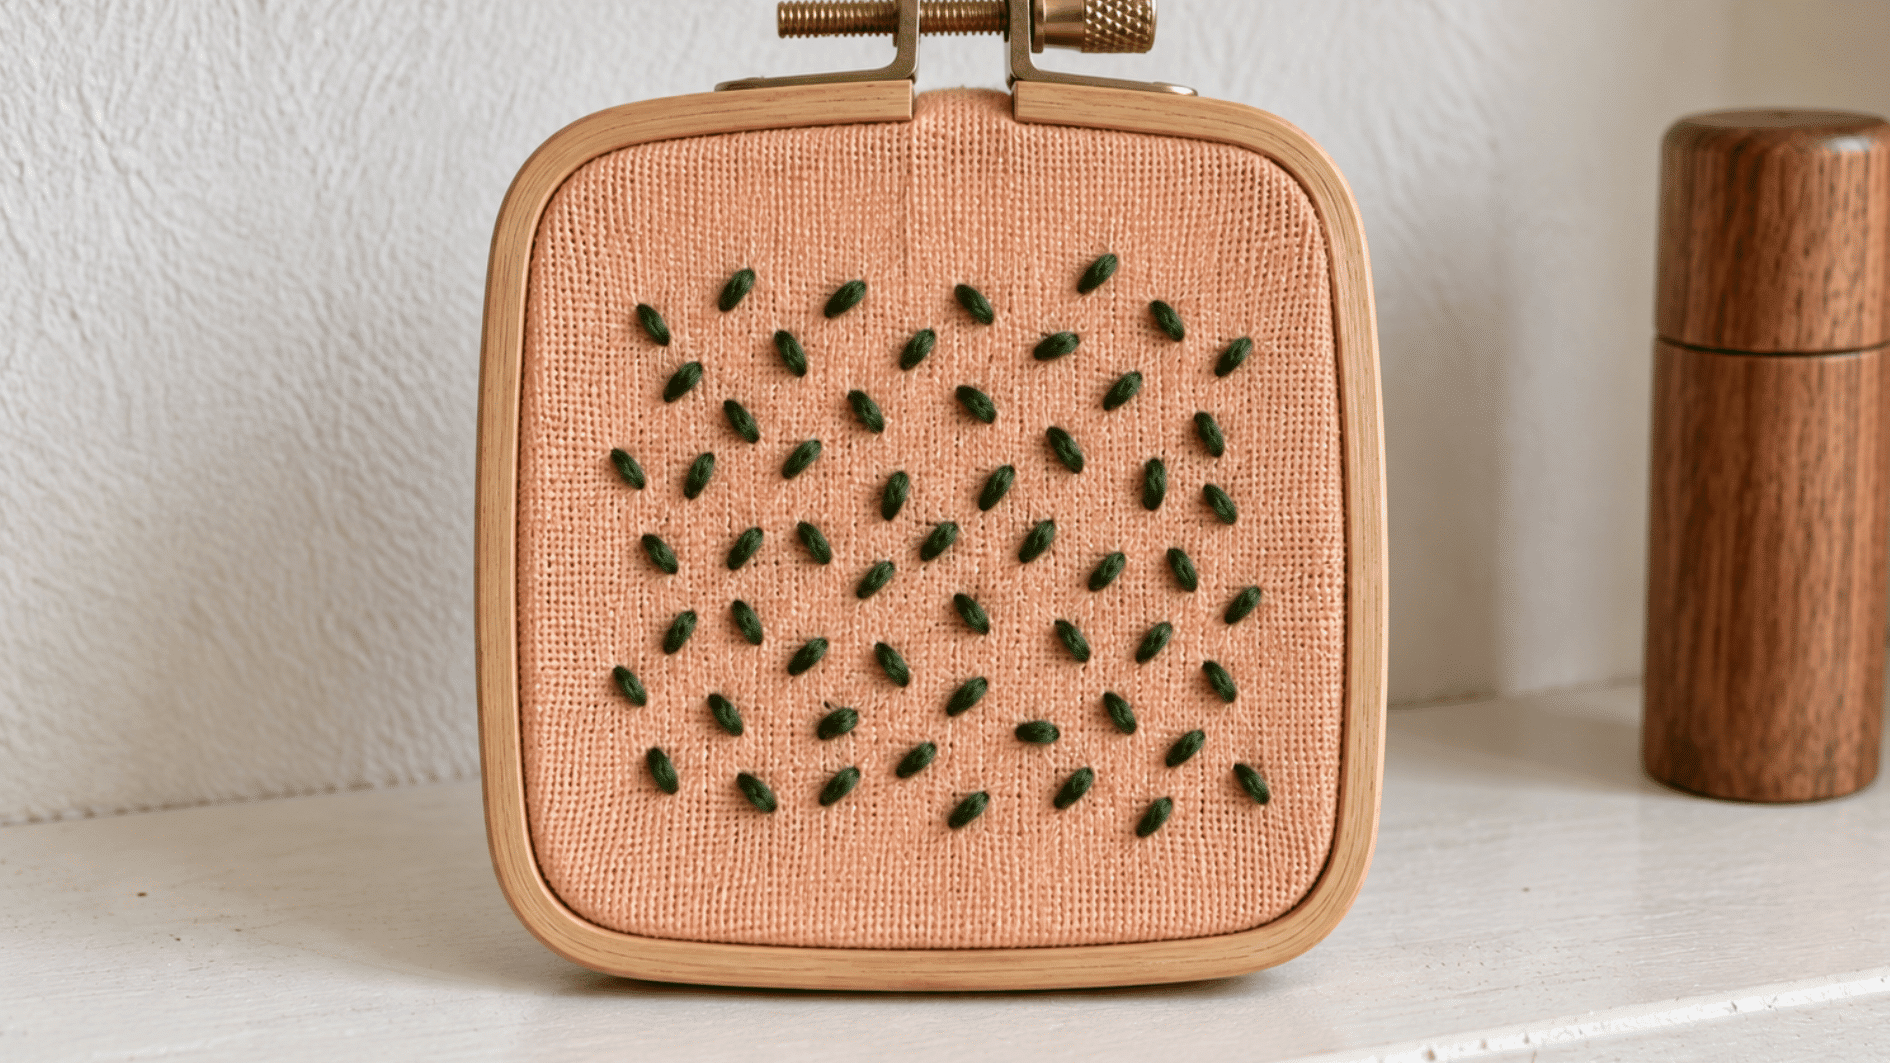
Seed stitch scatters small, individual stitches randomly across an area, creating a light, textured fill rather than a solid block of color.
- Bring the needle up at a random point within the area.
- Insert it down a short distance away, forming a tiny straight stitch.
- Move to a new spot and repeat, varying direction and spacing.
- Continue until the desired density of texture is reached.
18. Bullion Knot
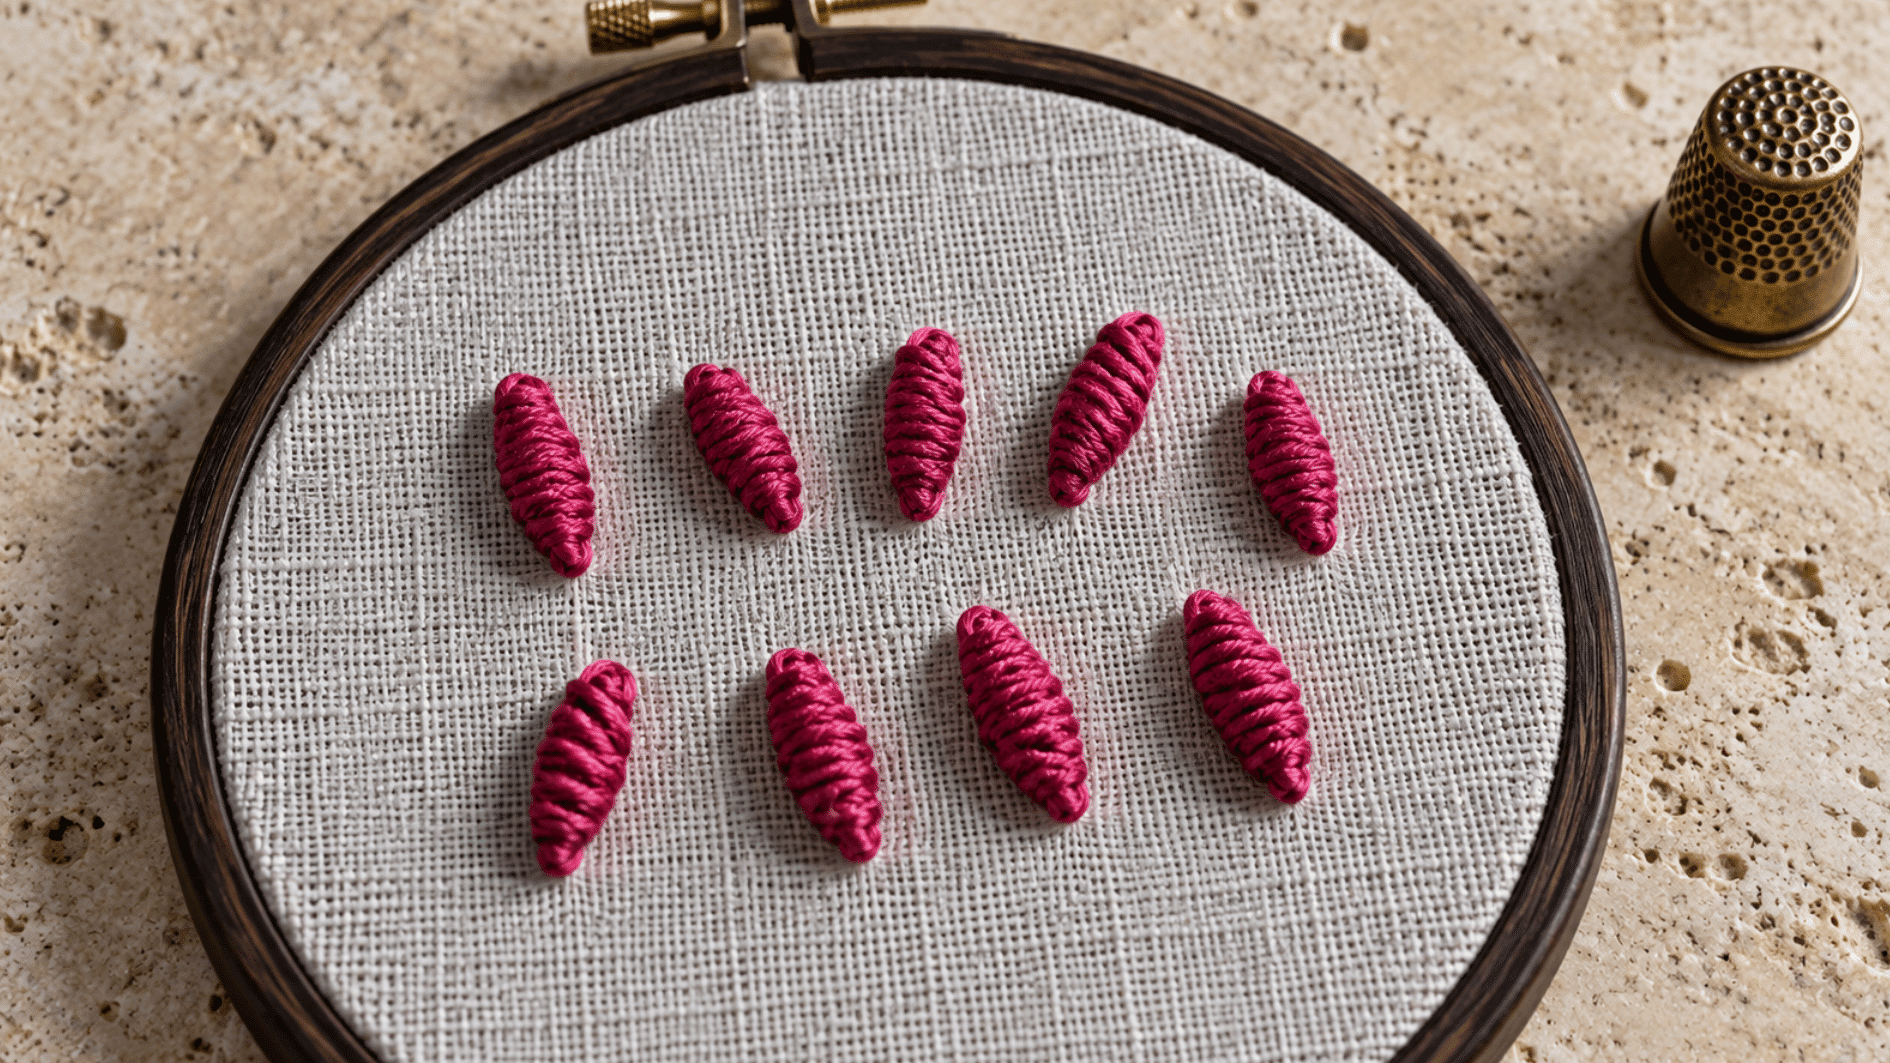
Bullion knot forms a raised, coiled shape resembling a tiny tube or twisted rope sitting above the fabric. I find this one takes the most patience of any stitch here, since rushing the wraps almost always ruins the coil.
- Bring the needle up, then back down a short distance away, without pulling it through.
- Wrap the thread around the needle’s tip several times.
- Hold the wraps and pull the needle through them slowly.
- Lay the coil flat against the fabric and secure with a small stitch.
Matching the Type of Stitch to What You Want to Make
|
What You Need |
Try These Stitches |
Best For |
|---|---|---|
|
Outlines |
Backstitch, stem stitch, split stitch |
Clean or textured lines |
|
Filled shapes |
Satin stitch, long and short stitch |
Solid or blended fill |
|
Flowers |
Lazy daisy, French knot, bullion knot |
Petals, centers, buds |
|
Texture |
Seed stitch, French knot, couching |
Raised or scattered detail |
|
Borders |
Chain stitch, feather stitch, herringbone stitch |
Decorative edges |
|
Small details |
Straight stitch, backstitch, French knot |
Tiny lines, dots, accents |
Tips to Make Your Embroidery Stitches Look Neater
A few small habits separate messy stitching from clean, professional-looking work. I picked most of these up through trial and error, and they’re worth building into your routine early.
- Manageable Thread Length: Shorter lengths resist tangling and fraying as you work.
- Even Tension: Consistent pressure keeps stitches sitting flat against the fabric.
- Loose Pulls: Avoid yanking stitches tight enough to pucker the surface.
- Consistent Sizing: Repeated stitches should stay similar in size for a uniform look.
- Same Fill Direction: Working one direction keeps filled areas looking smooth.
- Scrap Practice: Test harder stitches on extra fabric before committing to a project.
- Fewer Strands: Use less floss for small, delicate details.
Wrapping It Up
Turns out nobody actually teaches you this stuff in one go. You just pick up one stitch, then another, until suddenly you’re not guessing anymore.
I started exactly where you probably are, hovering a needle over fabric, second-guessing every move. Somewhere between the first stitch and the fifth, it stopped feeling like a mystery.
That’s really the whole point of learning the types of embroidery stitches. Not memorizing them all at once. Just starting with straight stitch embroidery, letting your hands get comfortable, and building from there.
So go thread that needle. You’ve got more instinct for this than you think.
Frequently Asked Questions
How Many Strands of Embroidery Floss Should You Use?
It depends on the effect. Use 1 to 2 strands for fine detail, 3 for general stitching, and more for a bolder result.
What Type of Needle Is Best for Hand Embroidery?
Embroidery or crewel needles work best, since their larger eyes fit multiple floss strands easily.
Do You Need an Embroidery Hoop for Hand Embroidery?
Not always, but it helps. A hoop keeps fabric evenly tensioned, making most stitches easier to control.
What Fabric Is Best for Practicing Embroidery Stitches?
Stable, woven fabrics like cotton or linen work best for beginners, since stretchy or loosely woven materials are harder to control.
How Do You Transfer an Embroidery Pattern Onto Fabric?
Common methods include washable pens, transfer paper, tracing, and water-soluble stabilizer.