I’ve killed enough houseplants to trust glass more than soil these days. Usually, it’s overwatering something that needs to be left alone. A terrarium changed that.
Making a terrarium sounds complicated, but it’s actually simple. Once you have a few basic supplies and a little patience, putting it together takes no time, even on your first try.
If you’ve been wanting more greenery indoors, this guide is for you. It walks you through every step, from container to plants. You’ll end up with a miniature garden worth showing off.
What Exactly is a Terrarium?
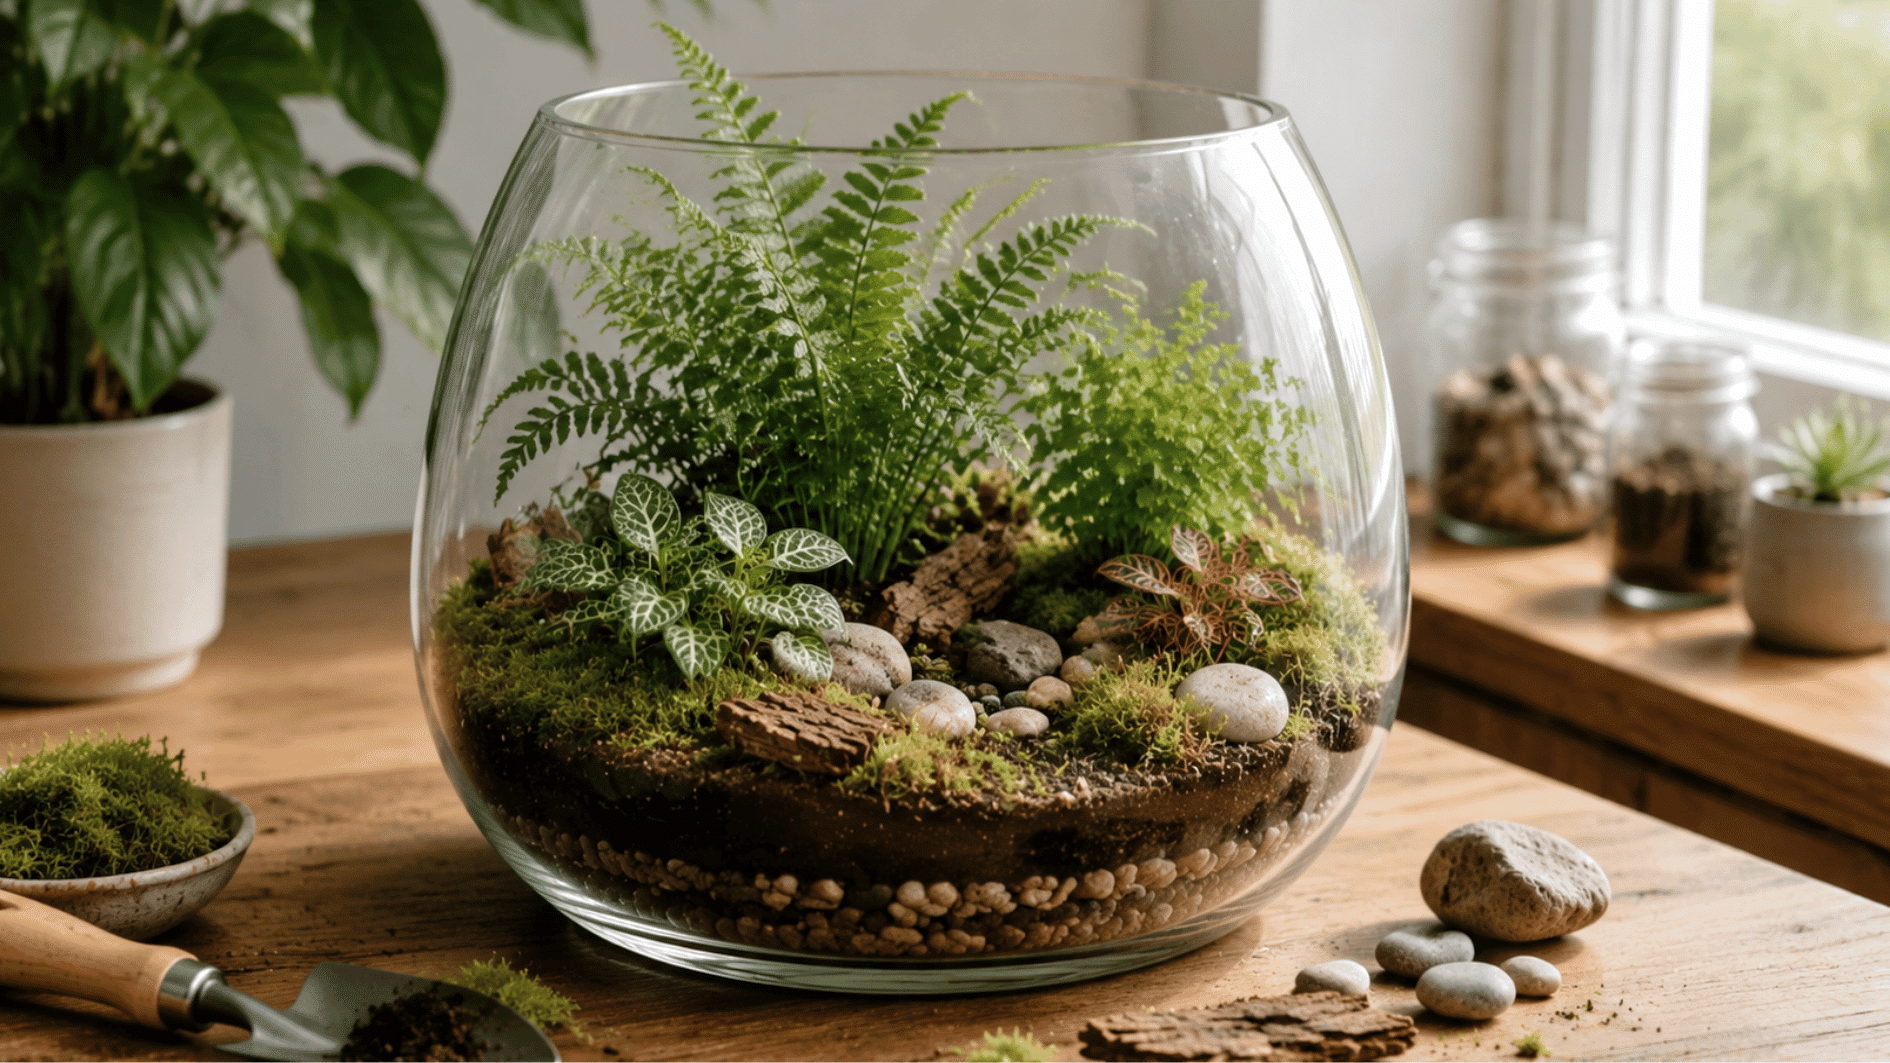
A terrarium is a small garden inside a clear container. Glass jars, bowls, and fish tanks all work well. It creates a tiny space where plants grow with very little help from you.
A closed terrarium seals in moisture with a lid. Water evaporates, hits the glass, and drips back down. This cycle can feed plants for weeks. Overwater it first, though, and it causes mold instead.
Open terrariums skip the lid entirely. They suit plants like succulents that need airflow over humidity. Closed containers trap moisture. Open ones let it escape. That’s why the plant choice flips.
Terrariums stay popular because they ask for so little. No yard, no bulky pots, no daily watering routine. Once it’s set up right, one glass container runs almost entirely on its own.
Everything You Need for Building a Terrarium
Getting everything ready first makes learning how to make a terrarium much easier. The container, plants, and materials each play their own part. Together, they build a terrarium that actually lasts.
1. Choose the Right Container
Choosing the right container shapes everything about your terrarium: how much light it gets, how humid it stays, and how easy it is to maintain.
| Factor | Options | What to Know |
|---|---|---|
| Container type | Glass jars, bowls, fish bowls, decorative glass containers | Choose based on the look you want and available space |
| Size | Small vs. large | Bigger containers fit more plants but need more upkeep; match size to your plant count |
| Open vs. closed | Closed (sealed) vs. open (uncovered) | Closed is ideal for moisture-loving plants; open needs more airflow and drought-tolerant plants |
| Glass clarity | Clear vs. tinted/frosted | Clear glass lets in more light and shows off the ecosystem best |
2. Pick Plants That Thrive Inside a Terrarium
Choosing compatible plants helps create a healthier, longer-lasting terrarium. Some plants love a sealed, humid environment, while others need dry air to survive, so match your picks to your container type.
| Plant Type | Best For | Key Trait |
|---|---|---|
| Moss | Filling gaps, ground cover | Holds moisture well between other plants |
| Ferns | Closed, humid terrariums | Handles low light and damp air with ease |
| Fittonia | Closed terrariums | Adds color, needs consistently damp soil |
| Small tropical plants | Closed, enclosed spaces | Built for warm, humid conditions |
| Succulents | Open terrariums | Needs dry air, struggles in high humidity |
3. Other Essential Items
Along with your container and plants, a few basic materials help create the right growing environment. Here’s what you’ll need and where each item is used.
| Material | Purpose | Placement |
|---|---|---|
| Glass container | Holds the terrarium | Outer container |
| Pebbles or gravel | Creates drainage | Bottom |
| Activated charcoal | Keeps soil fresh | Above pebbles |
| Potting soil | Supports plant roots | Above charcoal |
| Moss | Retains moisture | Around plants |
| Decorative items | Adds a finishing touch | Top layer |
Plant and Assemble Your Terrarium Step-by-Step
Every layer has a job. Get the order right, and your terrarium manages its own moisture without drainage holes. Get it wrong, and you’re fighting mold or dry roots within days.
Step 1: Add a Drainage Layer
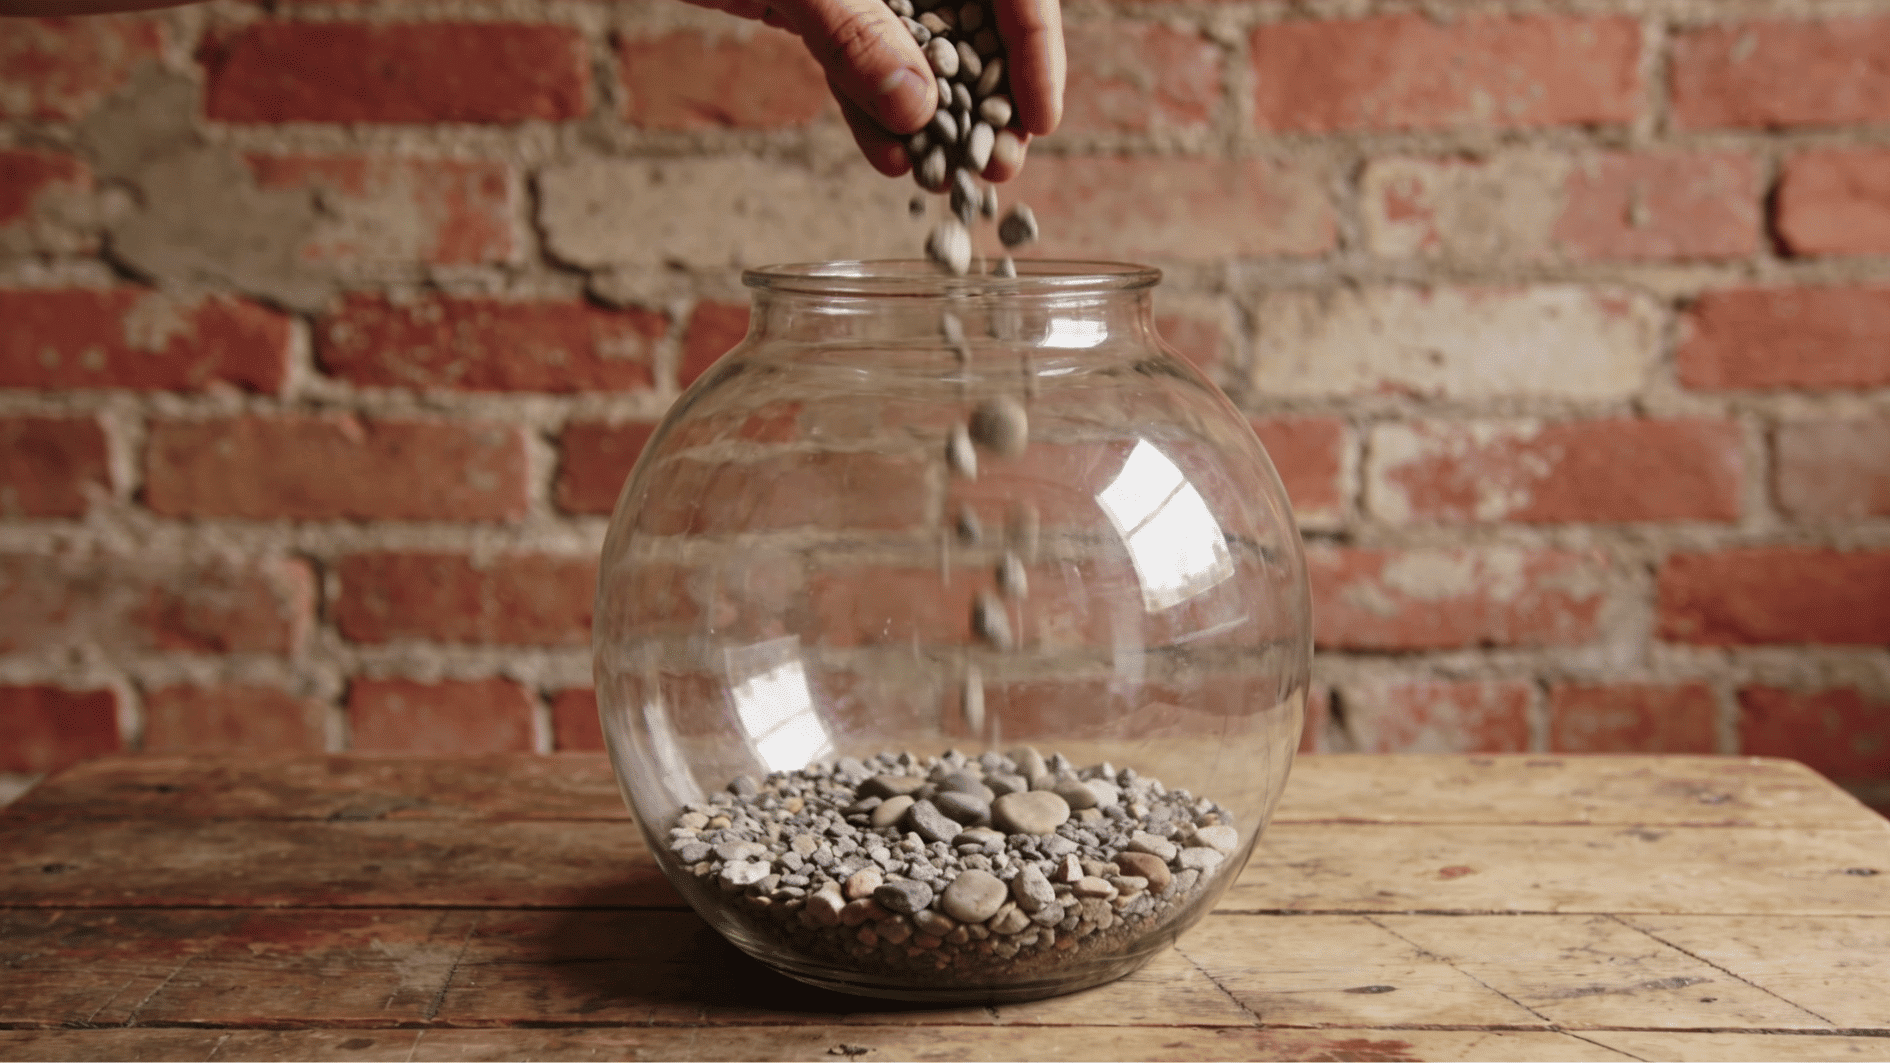
Start at the bottom. Add pebbles, gravel, or small stones, about 1 to 2 inches deep. This layer catches excess water and keeps it away from the roots.
Bigger containers need a slightly deeper layer here, since there’s more water to hold. Small stones or aquarium gravel work best, since they pack tightly, still leaving gaps for water to collect.
Step 2: Add Activated Charcoal
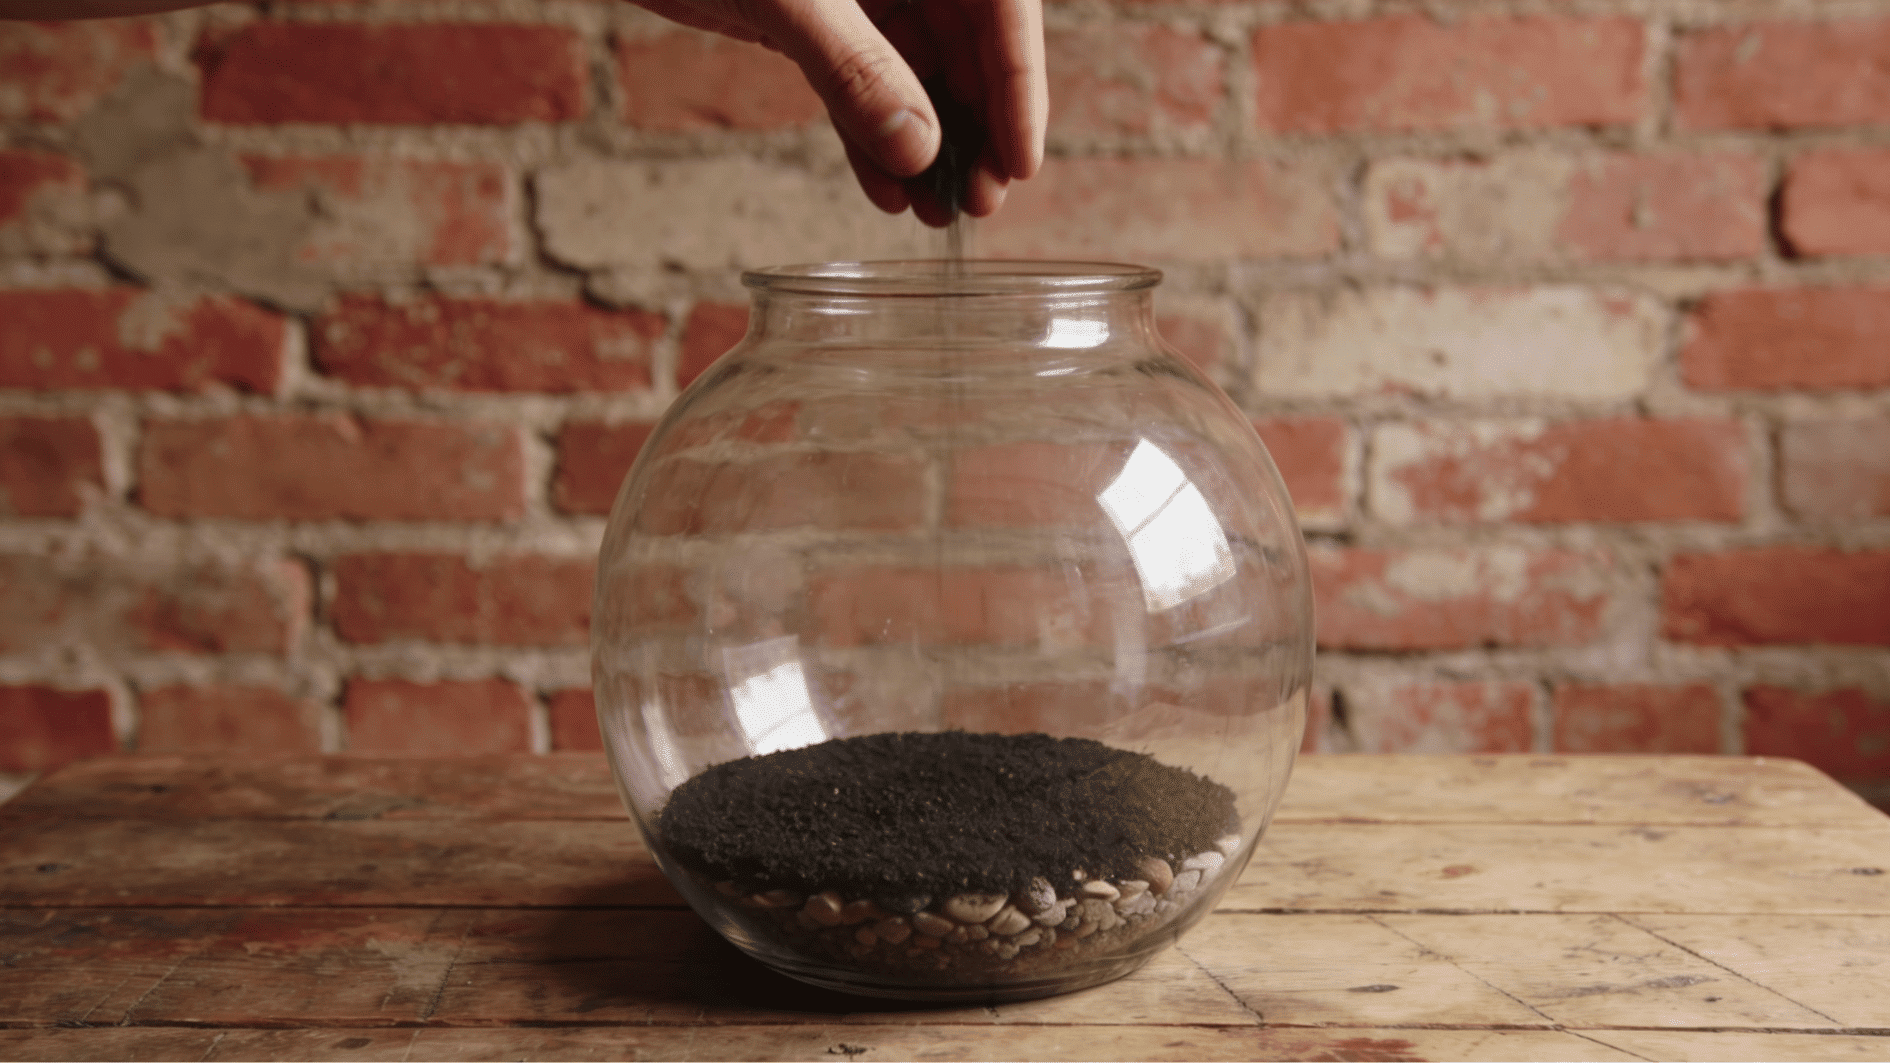
Spread a thin layer of activated charcoal over the stones, just enough to cover them. It keeps the terrarium smelling fresh and stops buildup as water recycles through it.
Closed terrariums need this most, since trapped moisture can turn stale fast. Open ones benefit too, just a little less urgently. Skip this layer, and you’ll likely notice a musty smell within a few weeks.
Step 3: Add Potting Soil
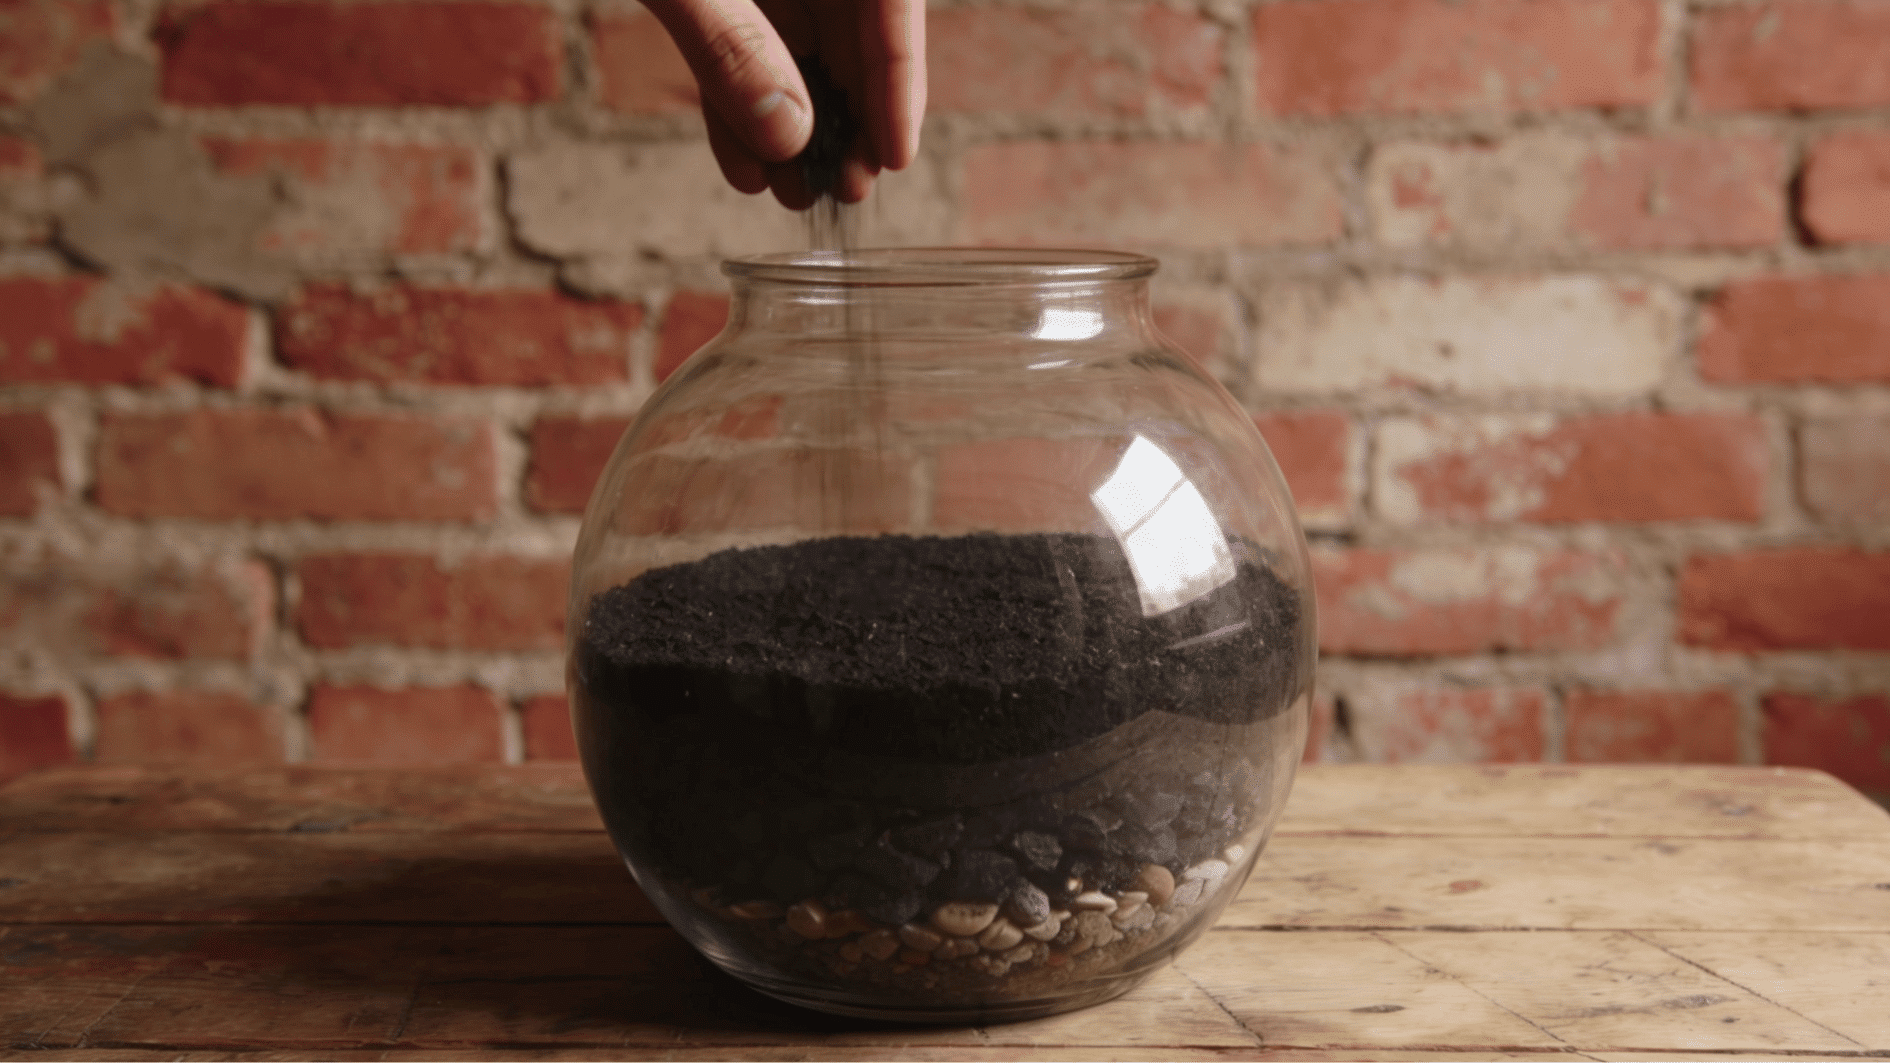
Add your potting soil next, choosing a mix suited to your plants. Ferns and tropical plants like a moisture-retentive mix, while succulents need something sandier that drains fast.
Give the soil enough depth for roots to settle in, usually 2 to 3 inches. Level the surface, and leave a little space below the rim. That’s the full base: glass container, pebbles, charcoal, then soil.
Step 4: Prepare Your Plants
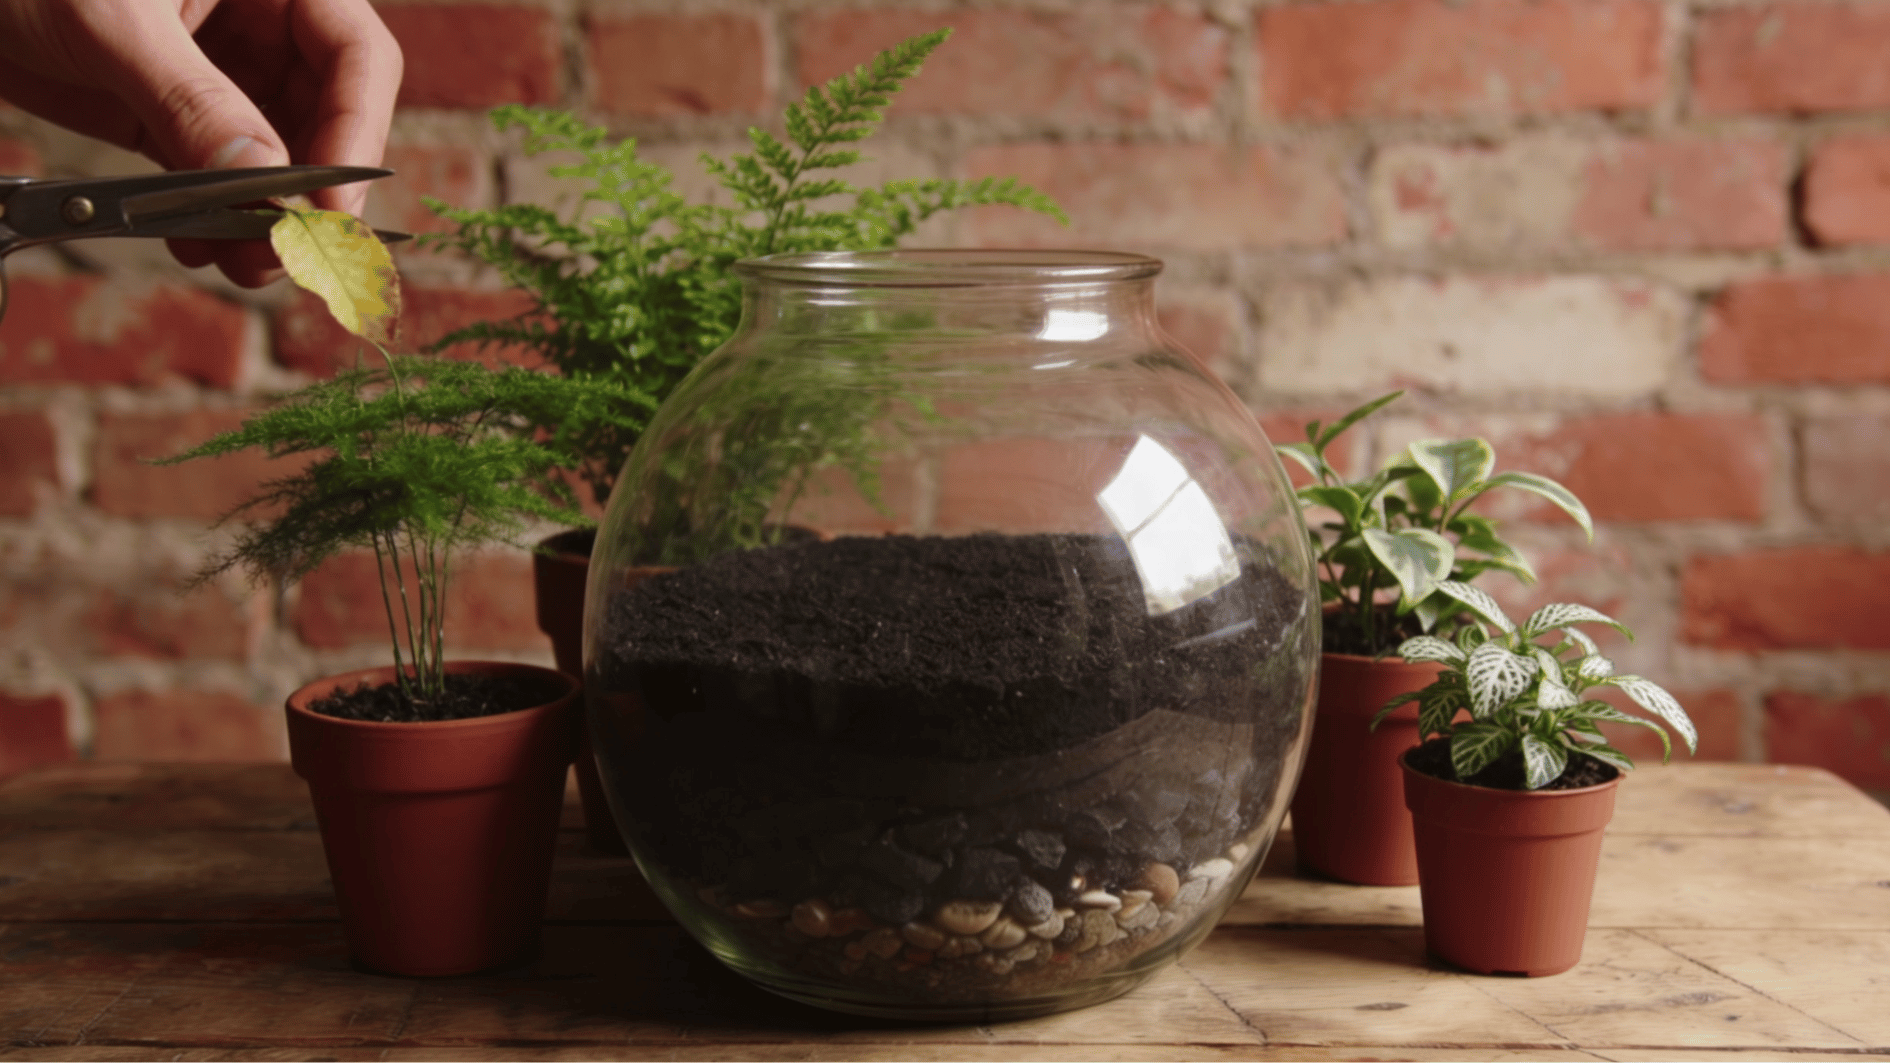
Before planting, shake off excess soil from the roots and trim any damaged or yellow leaves. This gives roots room to spread into the new soil right away.
Check the roots for pests or rot while you’re at it, since a problem here spreads fast in a closed, humid space. Group your plants by height, so you already know where each one will go.
Step 5: Plan Your Layout
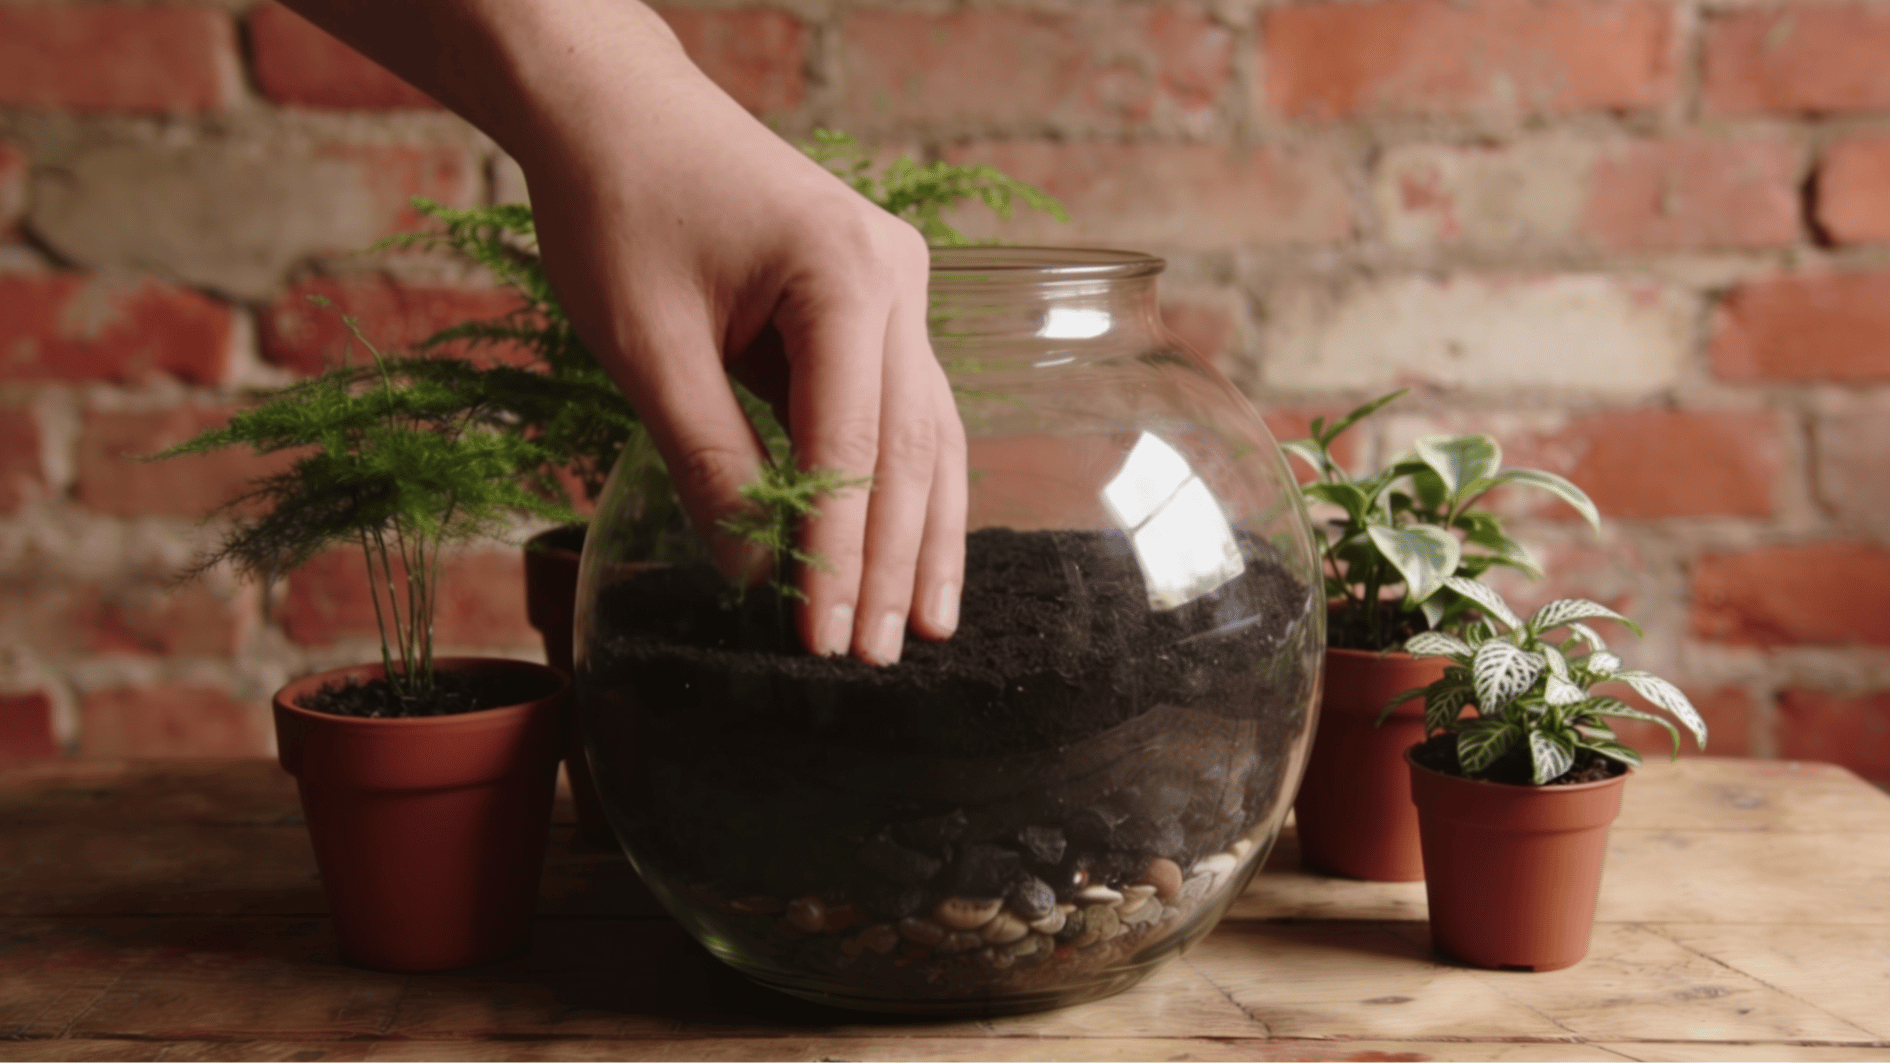
Place your tallest plants toward the back or center. Ferns and taller tropical plants work well here, since they add height without blocking anything smaller.
Fill the middle with fittonia or other medium foliage for fullness. Finish with small plants and ground cover near the front and along the edges, where they remain visible.
Thinking about height first makes the whole layout easier to plant, since you won’t need to dig around plants you’ve already placed.
Step 6: Plant Your Terrarium
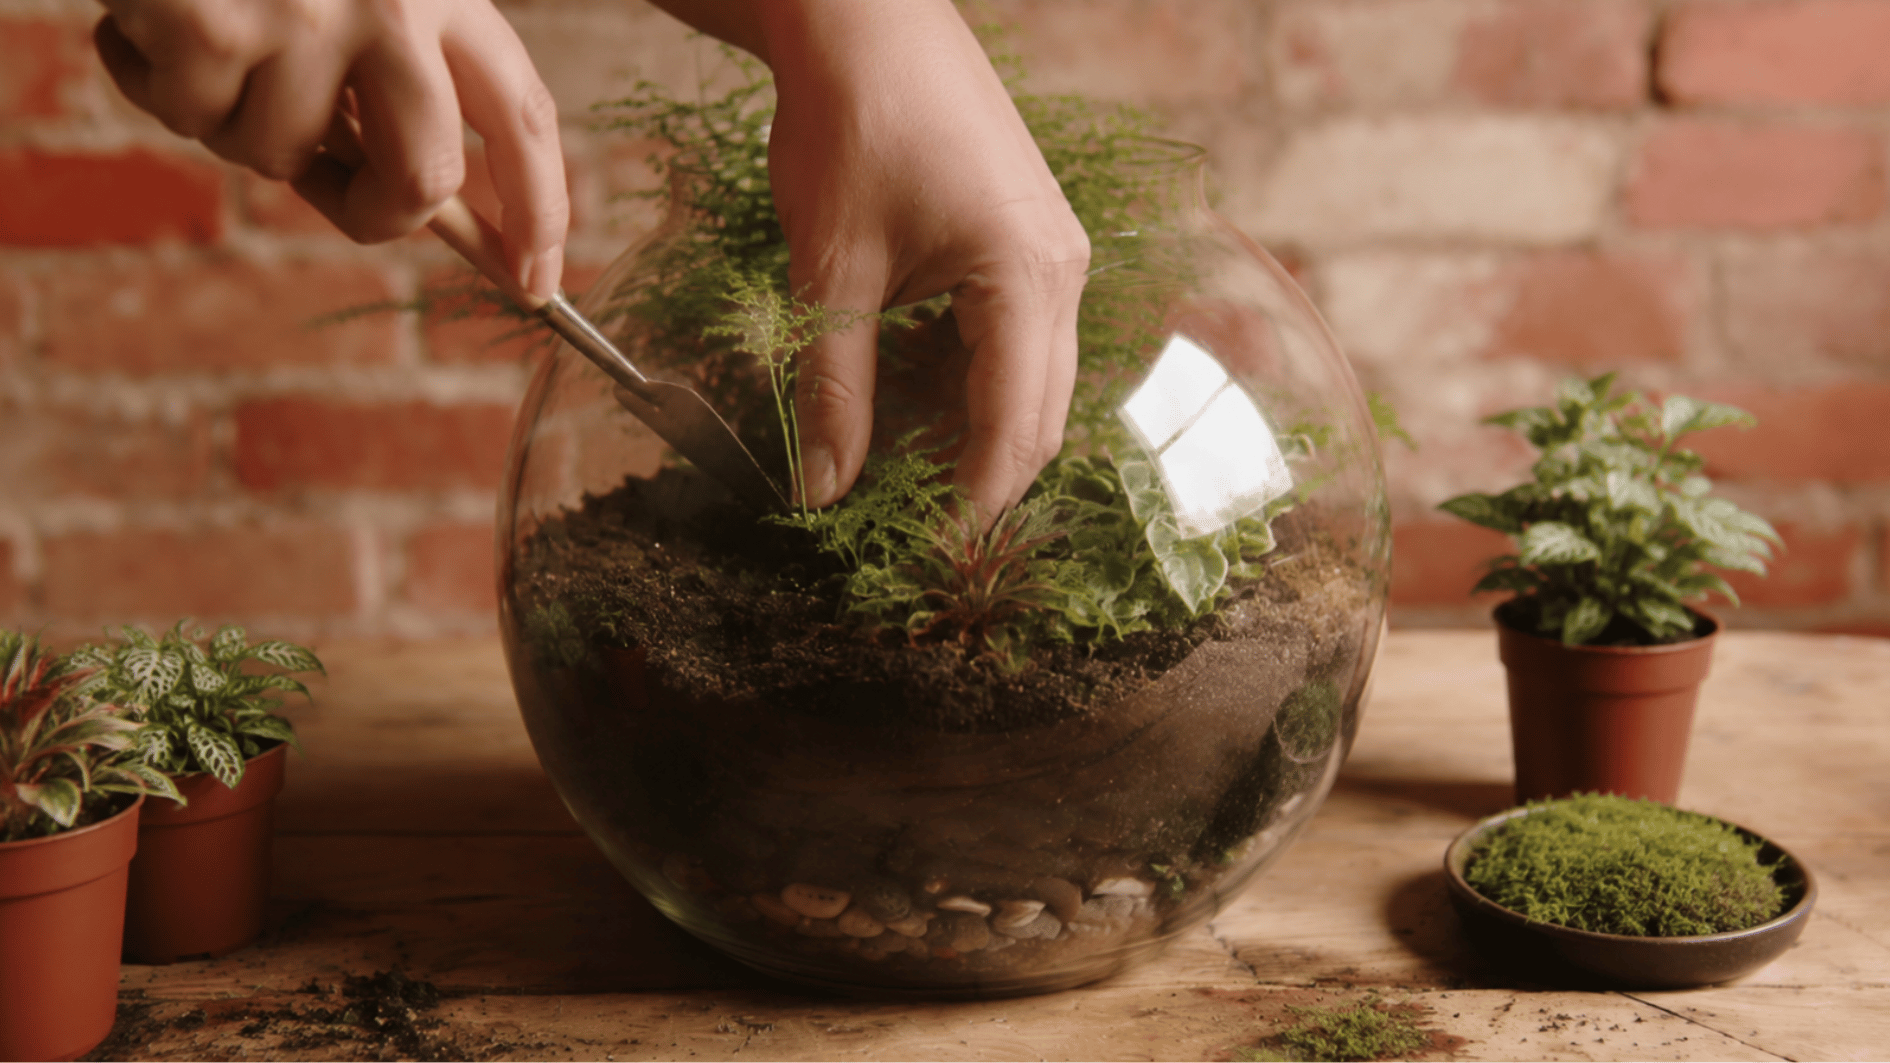
Dig small holes with a spoon, following the layout you’ve planned. Start with the back row and work forward, so you’re not reaching over plants you’ve already placed.
Place each plant gently, and firm the soil around the roots so it holds them in place. Leave a little space between plants so air can move and roots have room to grow.
Step 7: Add Finishing Touches
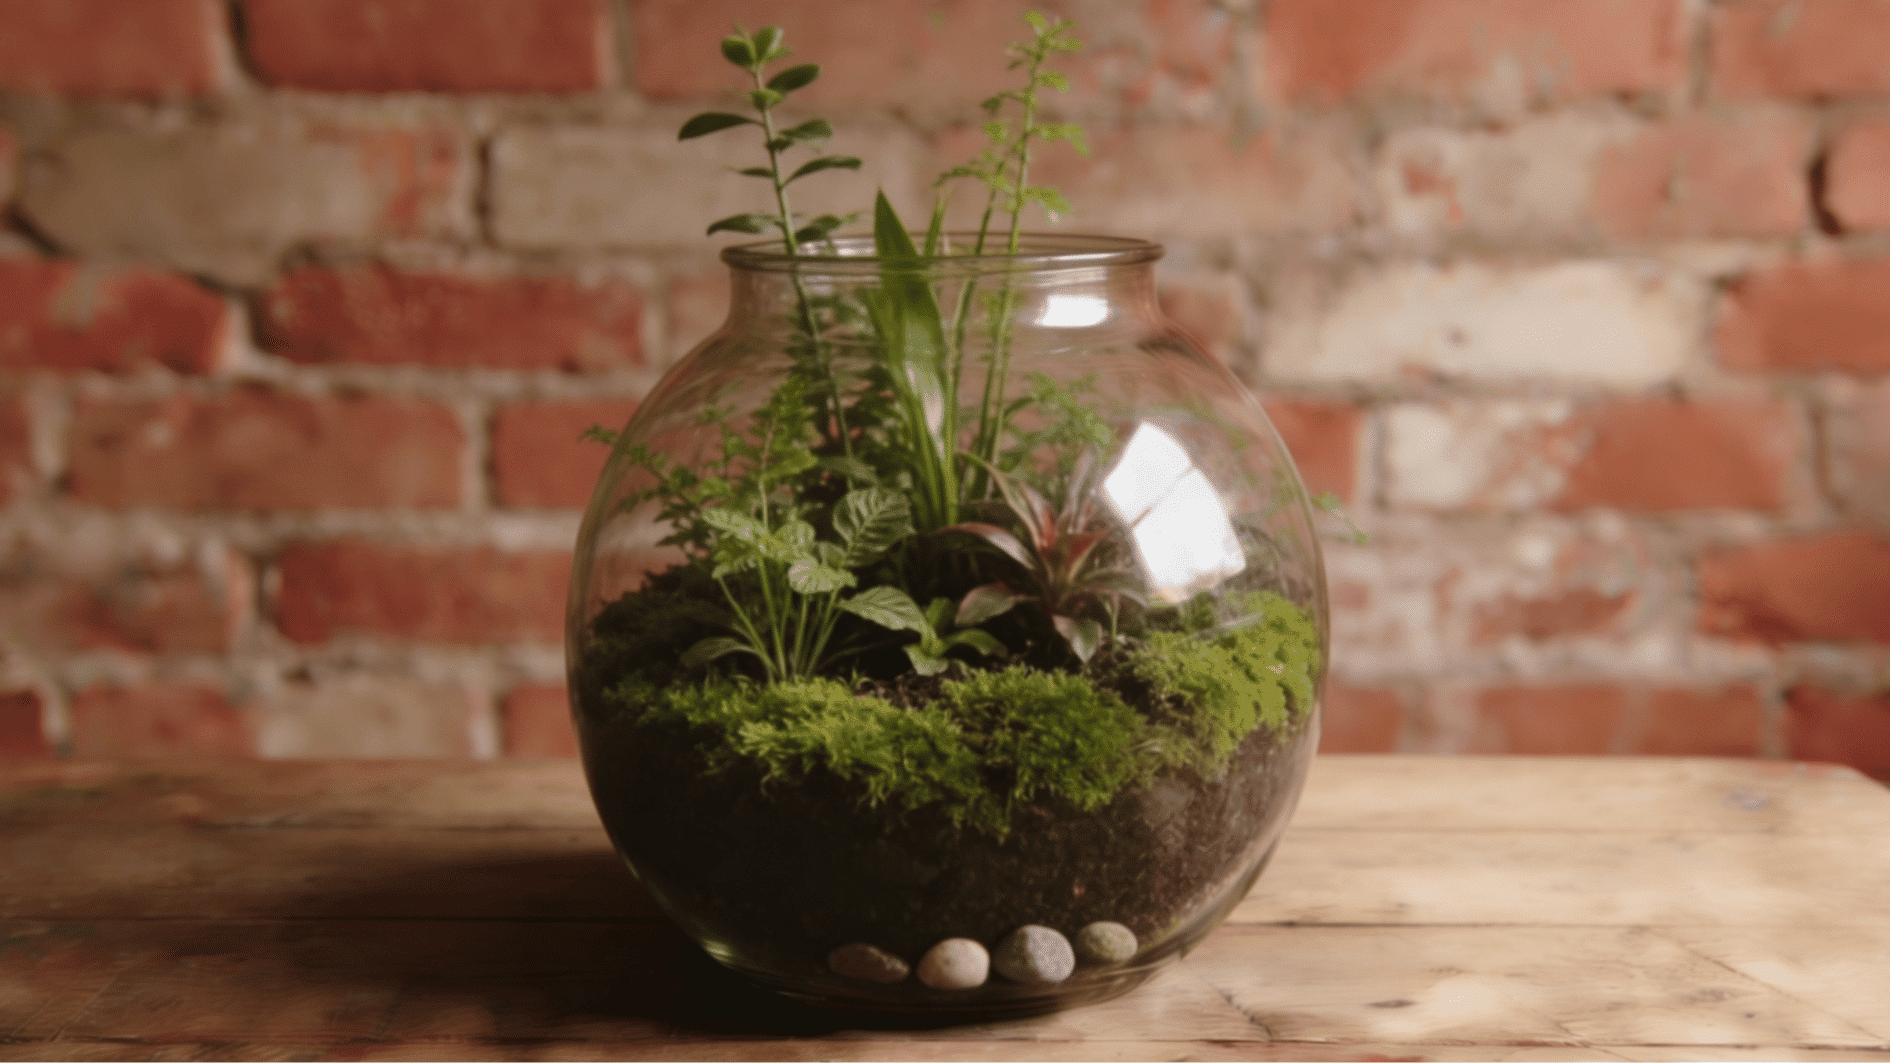
Cover any exposed soil with moss for a clean, natural look and to help hold moisture near the roots. Add a few decorative stones, bark, or sand if you’d like, but keep it simple, since too many extras crowd the plants and block airflow.
Take one last look before you’re done. Make sure every plant stands upright, the soil is level, and the glass is wiped clean of soil or fingerprints. A quick check now saves you from having to fix a lopsided plant a week later.
Setting Your Terrarium Up in the Right Place
The right spot makes a big difference. It helps your terrarium stay healthy. Give it the right light and a stable temperature. Your plants will reward you with steady growth.
Best Places
- Near a bright window with indirect light: This provides steady brightness without overheating the glass or scorching the plants.
- On a coffee table near natural light: Choose a spot that receives soft daylight for several hours.
- On a shelf in a well-lit room: Make sure nearby walls or furniture do not block too much light.
- On a desk away from direct sun: This works well when the room stays at a stable temperature.
- In a room with consistent conditions: Steady light and temperature support even growth and balanced moisture
Places to Avoid
- In harsh afternoon sunlight: Strong sun can overheat the container, burn leaves, and dry the soil quickly.
- In dark corners: Low light can cause weak, stretched growth and fading leaf color.
- Next to heaters or fireplaces: High heat dries the soil and lowers humidity inside the terrarium.
- Under air-conditioning vents: Cold, dry airflow can create sudden temperature changes.
- Near drafty doors or windows: Frequent hot and cold shifts can stress the plants and disturb moisture levels.
Quick Tip: Rotate your terrarium every few weeks so all sides receive similar light.
Watering Schedule for a DIY Terrarium
Overwatering kills more terrariums than anything else. Getting this one habit right solves most beginner problems before they even start.
| Terrarium Type | When to Water | Typical Frequency | Signs It Needs Water |
|---|---|---|---|
| Closed terrarium | Only when condensation disappears for several days, and the soil looks dry | Every 1–3 months or less | Dry soil, no condensation, or slightly wilted plants |
| Open tropical terrarium | When the top inch of soil feels dry | Every 1–2 weeks | Dry surface soil, drooping leaves, or slower growth |
| Succulent terrarium | After the soil dries completely | Every 2–4 weeks | Wrinkled leaves or very dry, loose soil |
| Cactus terrarium | Only when the soil is fully dry | Every 3–6 weeks | Slight shriveling or prolonged dry soil |
| Moss terrarium | When the moss begins to look pale or less springy | Light misting every 1–2 weeks | Faded color, dry texture, or curling edges |
| Newly planted terrarium | Add a small amount after planting, then monitor moisture | Check every few days for the first 2 weeks | Dry soil, wilting, or no condensation in a closed jar |
Note: Check for condensation daily for the first week. Heavy fog on the glass means you’ve watered too much, even if the soil still looks dry on top.
Creative DIY Terrarium Ideas to Try Next
Once you’ve built one terrarium, these variations are worth trying next. Each one uses the same base process, just with a different plant mix and finish.
1. Mini Woodland Terrarium
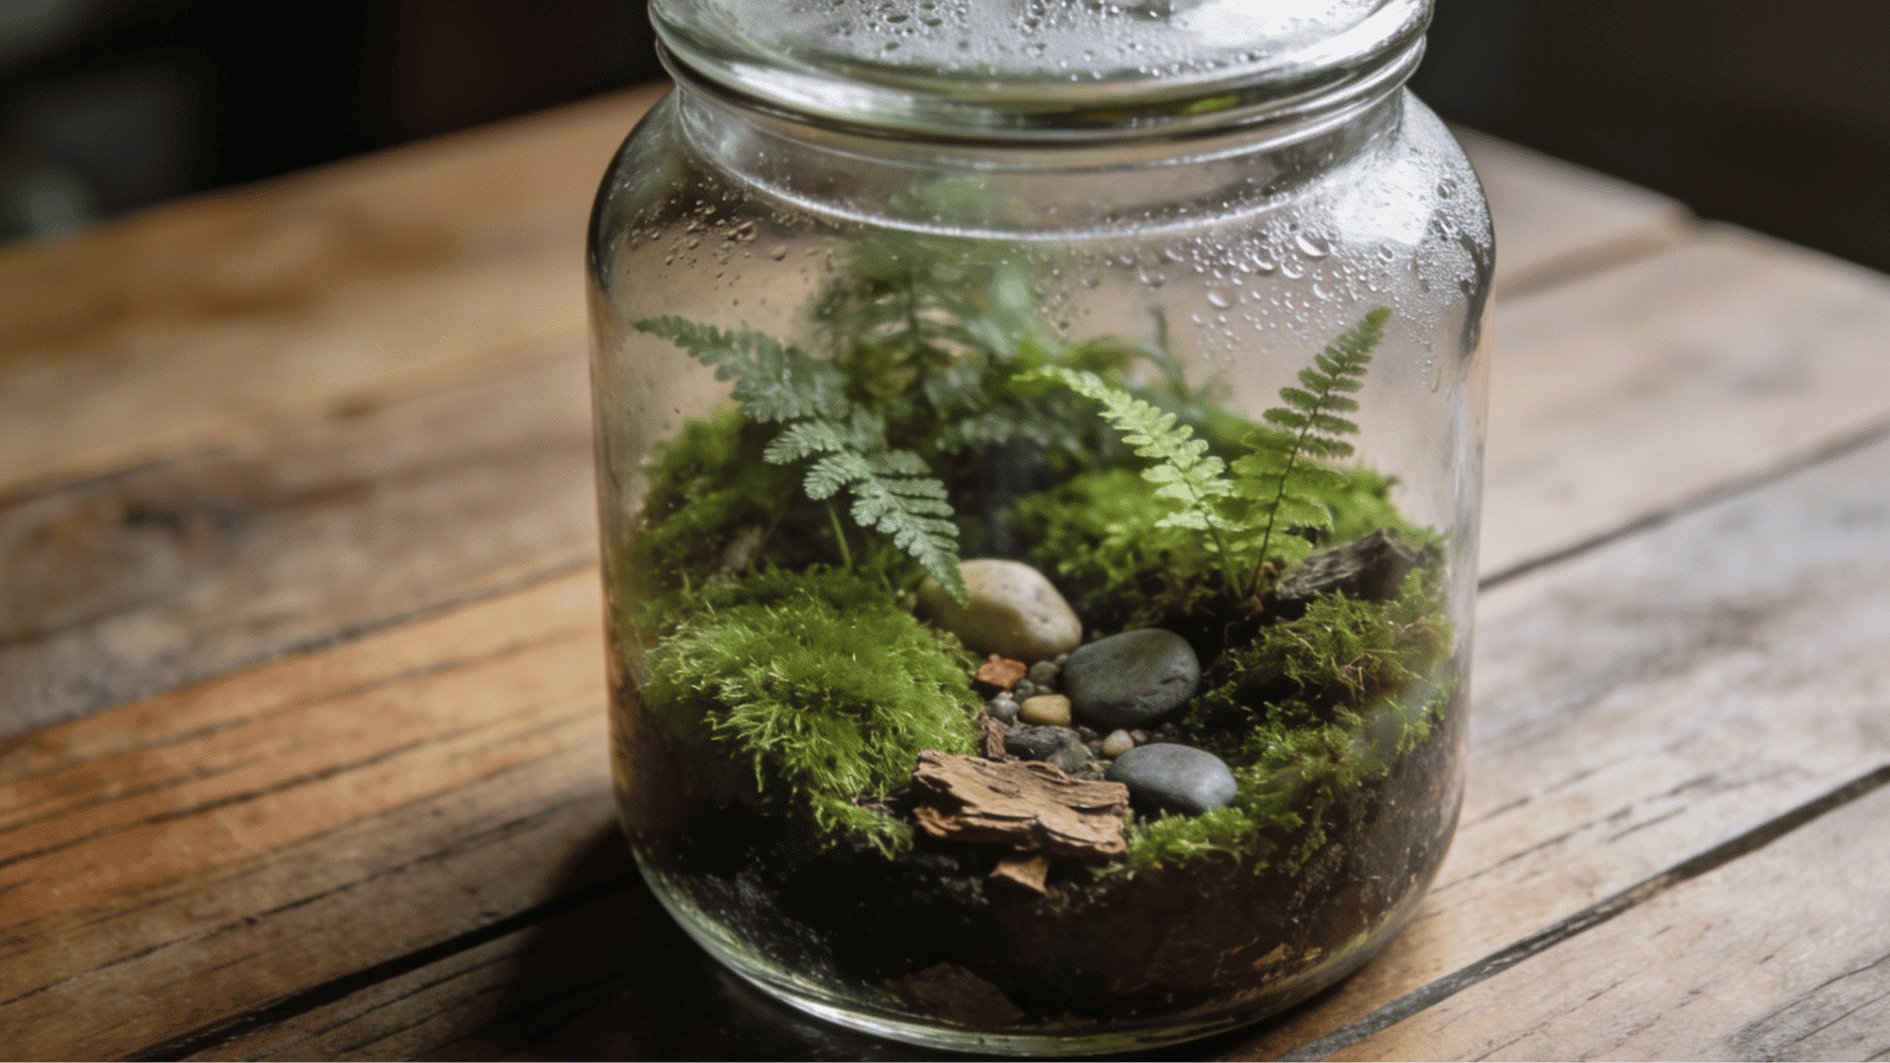
This style recreates a forest floor inside the glass. It’s one of the easiest themes to get right. Moss and ferns work best here. Both love the extra humidity inside.
Scatter your stones unevenly, like a real forest floor. This theme suits closed containers especially well. Condensation enhances the look rather than harming it.
2. Succulent Open Terrarium
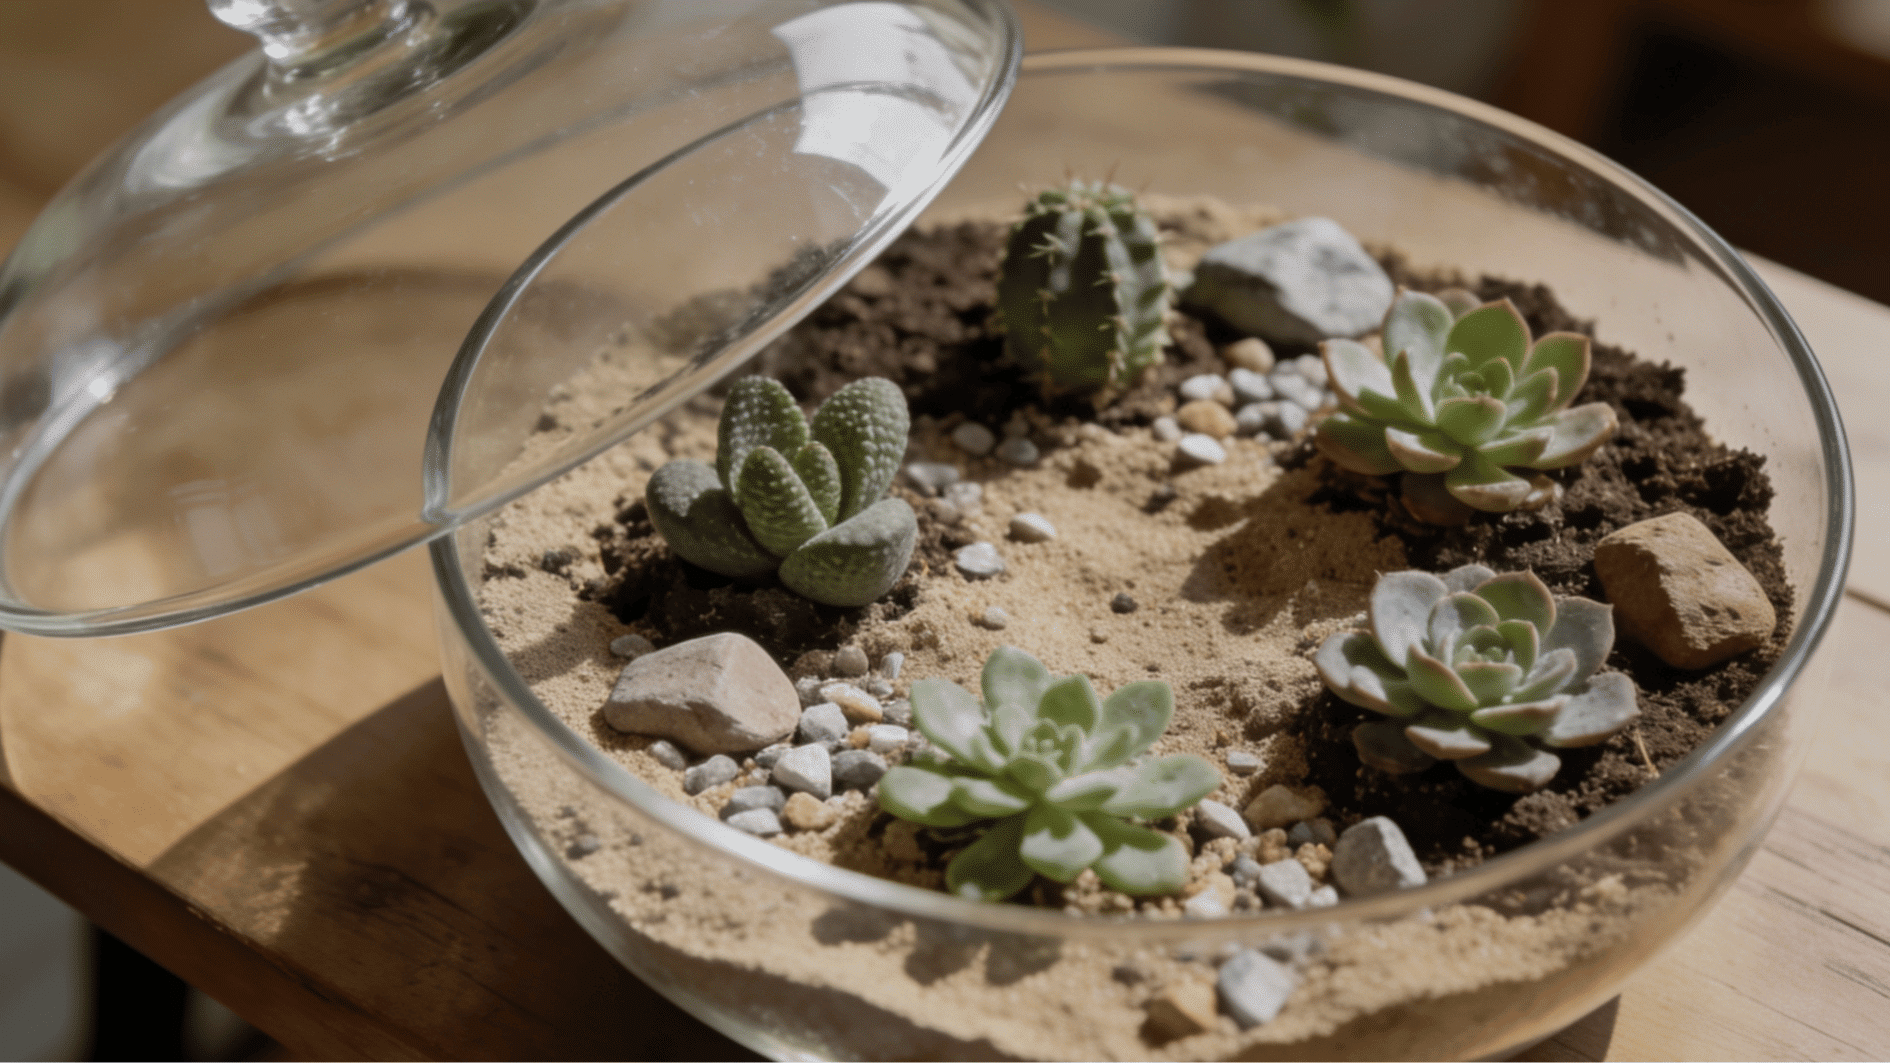
Succulents need the opposite setup from woodland plants. This one flips the formula entirely. Swap the potting mix for sandy, well-draining soil. Succulents rot fast in anything that holds water.
Keep this one open only. A light mist once a week is usually enough.
3. Decorative Theme Terrarium
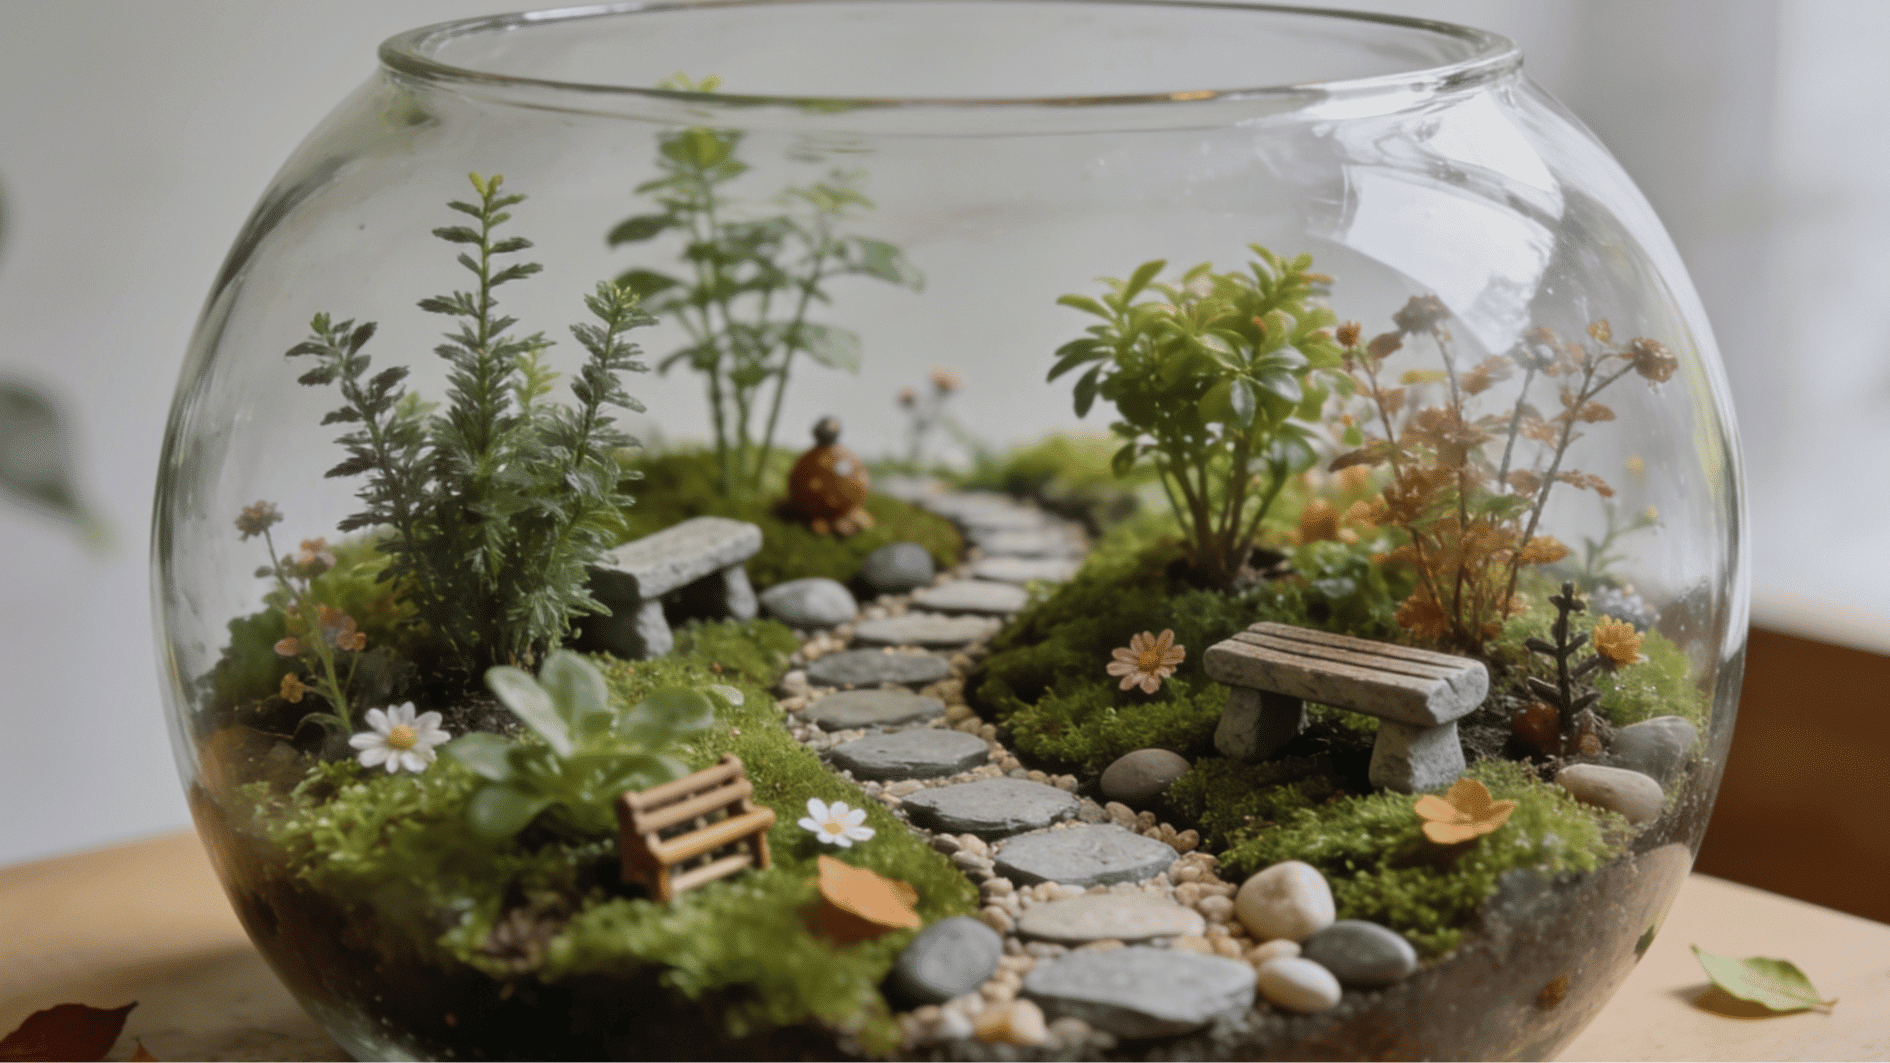
This one’s less about plant choice. It’s more about styling the space around them. A fairy garden look works well here. Try tiny benches, lanterns, or small pathways between plants.
You can also swap decor with the seasons. Small pumpkins work for fall. Mini ornaments suit winter. Just keep it minimal, so the plants stay the focus, not the props. This one’s less about plant choice and more about styling the space around them.
Common DIY Terrarium Mistakes to Avoid
Most terrarium problems trace back to one of six setup mistakes. Catching these early saves you from having to restart the whole thing.
- Mixing plants with different needs: a succulent and a fern want opposite moisture levels. Group plants that thrive in the same conditions, always.
- Overwatering: more water doesn’t mean healthier plants. Mist lightly and check the soil before adding more.
- Skipping the drainage layer: roots sitting in trapped water rot fast. A layer of pebbles or gravel at the base keeps water away from the soil.
- Placing it in direct sunlight: glass traps heat fast, and plants cook inside within hours. Bright, indirect light works better year-round.
- Overdecorating the container: stones and figurines look nice until they crowd out root space. Leave room for plants to actually grow.
Final Thoughts
Terrariums look like something only plant experts can pull off. I thought so too, until I built my first one. Turns out, it’s almost stupidly simple, and that’s the real charm of learning how to make a terrarium.
No green thumb required. Just a jar, a few layers, and a little patience. Once it’s sealed and settled, it runs almost entirely on its own, with barely any fussing.
So stop scrolling and start building. Grab any jar lying around, layer it up, and let your first terrarium do its thing. The only real mistake is overwatering, so go easy on that.
Frequently Asked Questions
How Long Does a DIY Terrarium Last?
A well-maintained terrarium can last for years, even decades, in closed setups, depending on the plants and care.
Can You Make a Terrarium Without Activated Charcoal?
Yes, but it’s not ideal. Charcoal keeps soil fresh and prevents odor, so skipping it means more frequent cleaning.
Do Terrariums Attract Bugs?
Only if you use unwashed materials, like moss straight from outside. Rinse and dry everything first, and a sealed terrarium stays bug-free.
Can You Add Fertilizer to a Terrarium?
Rarely, and only in small amounts. Most terrarium plants grow slowly and don’t need regular feeding like outdoor plants do.