Scrapbook pages often start with a few favorite photos, but turning those memories into pages you’ll actually enjoy looking back on takes a bit of planning.
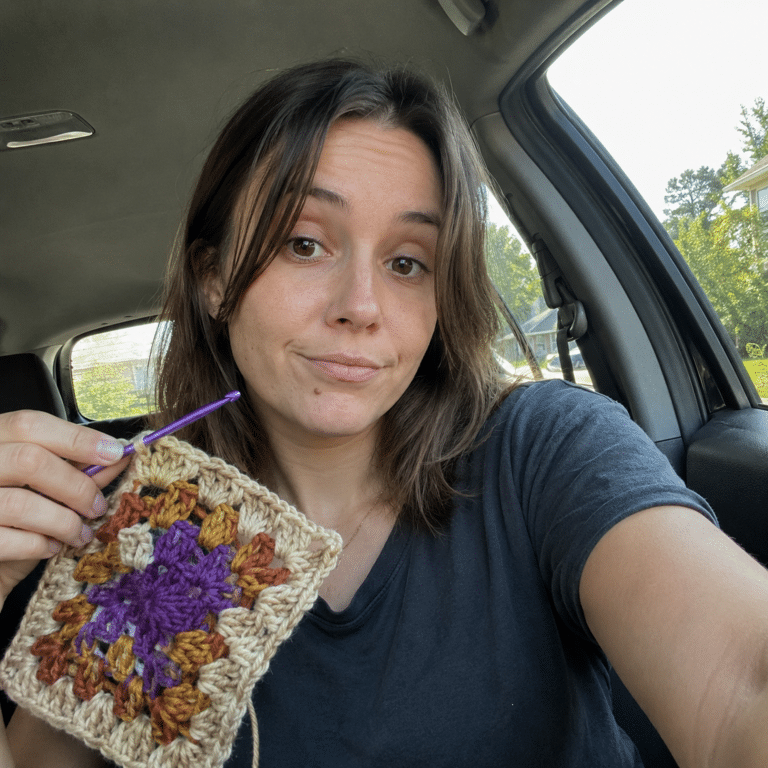
Growing up around sewing projects, fabric scraps, and handmade keepsakes, Violet Gordon learned early that personal touches matter more than complicated designs.
That perspective shows up in every idea on this list – nothing here requires advanced skills or a fully stocked craft room.
This guide covers layout ideas, themes, and techniques that work across skill levels and occasions. Some are quick. Some take more time. All of them give you something real to try on your next page.
Why Does Storytelling Matter In Scrapbooking?
Most scrapbook pages look better when the photos and memories lead the design. Use decorations to support the story, not replace it.
- Start with the strongest photo or moment first.
- Add a short note, date, quote, or small keepsake to give the page meaning.
- Use stickers, patterned paper, die cuts, and washi tape to set the mood.
- Keep the layout easy to follow so the eye moves from one moment to the next.
- Aim for a page that feels personal years later, not just pretty today.
Creative Scrapbook Themes, Designs, and Page Ideas Worth Trying
Not every page needs a heartfelt caption or a full journaling block. The ideas below cover a range of themes, designs, and page styles – pick what fits the memory you’re working with.
Theme-Based Scrapbook Ideas
A theme gives your album a clear direction, so you’re not staring at a pile of photos wondering where to start.
1. Family Legacy Album
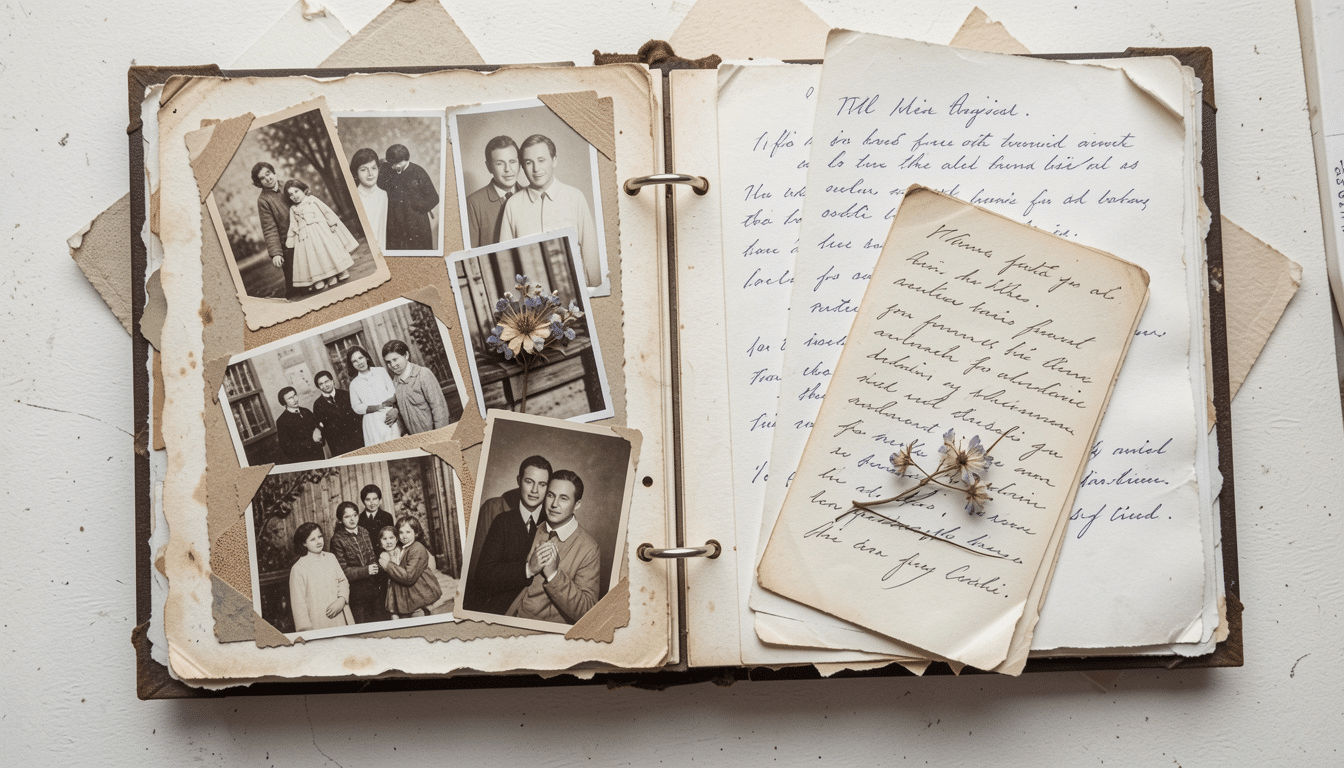
Old family photos, handwritten recipes, and letters carry stories that often get lost between generations. A legacy album gives those pieces a permanent home, organized by family branch, decade, or a single person’s life.
Even scanning and printing a faded photo with a short caption underneath does more to preserve a story than leaving it in a shoebox.
Ask older relatives to write something in their own handwriting, that alone becomes one of the most valuable things in the album.
2. Travel Memories Collection
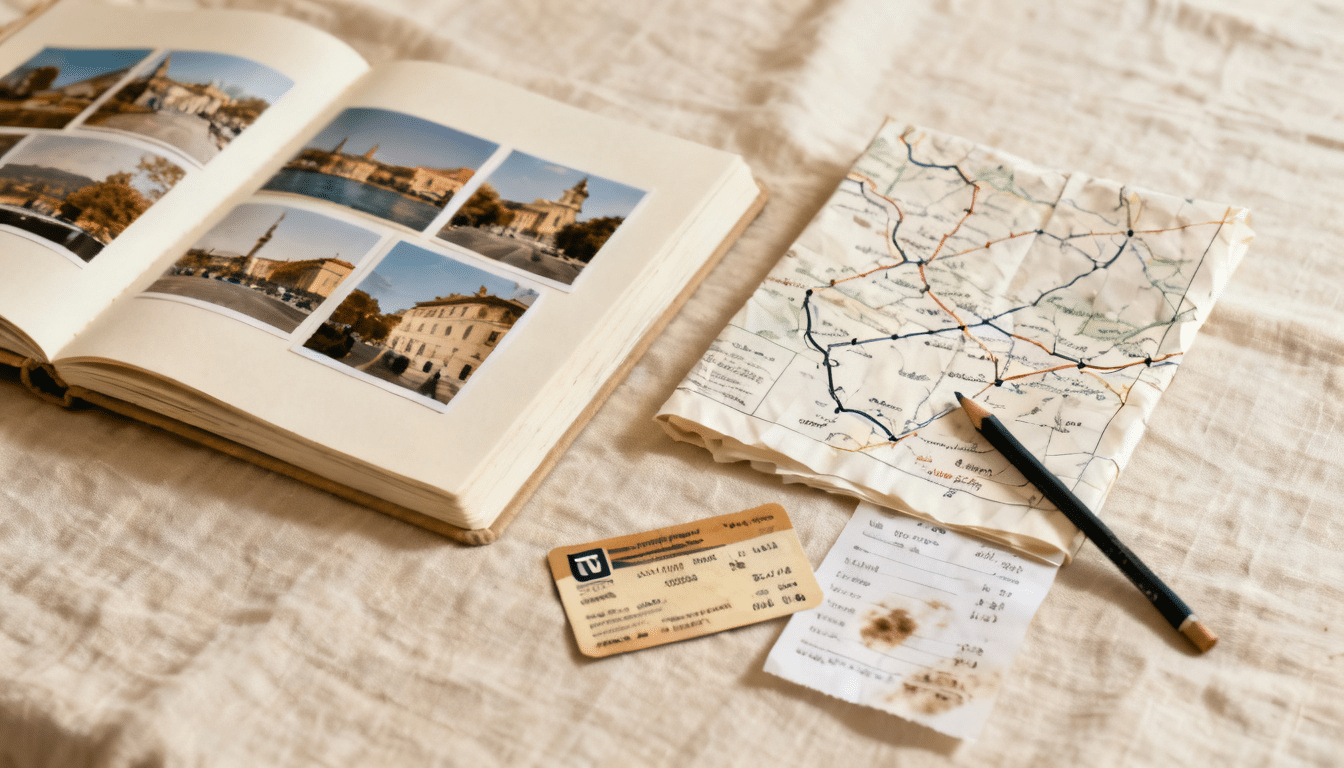
The best travel pages go beyond photos of landmarks. Tuck in a metro ticket, a coffee shop receipt, or a hand-drawn map of the neighborhood you got lost in, those details bring a trip back faster than any photo can.
Organize by destination or by trip, depending on how much material you’re working with. If you traveled with others, ask them to contribute one photo or note, it adds a perspective your own camera missed.
3. Baby’s First Year Scrapbook
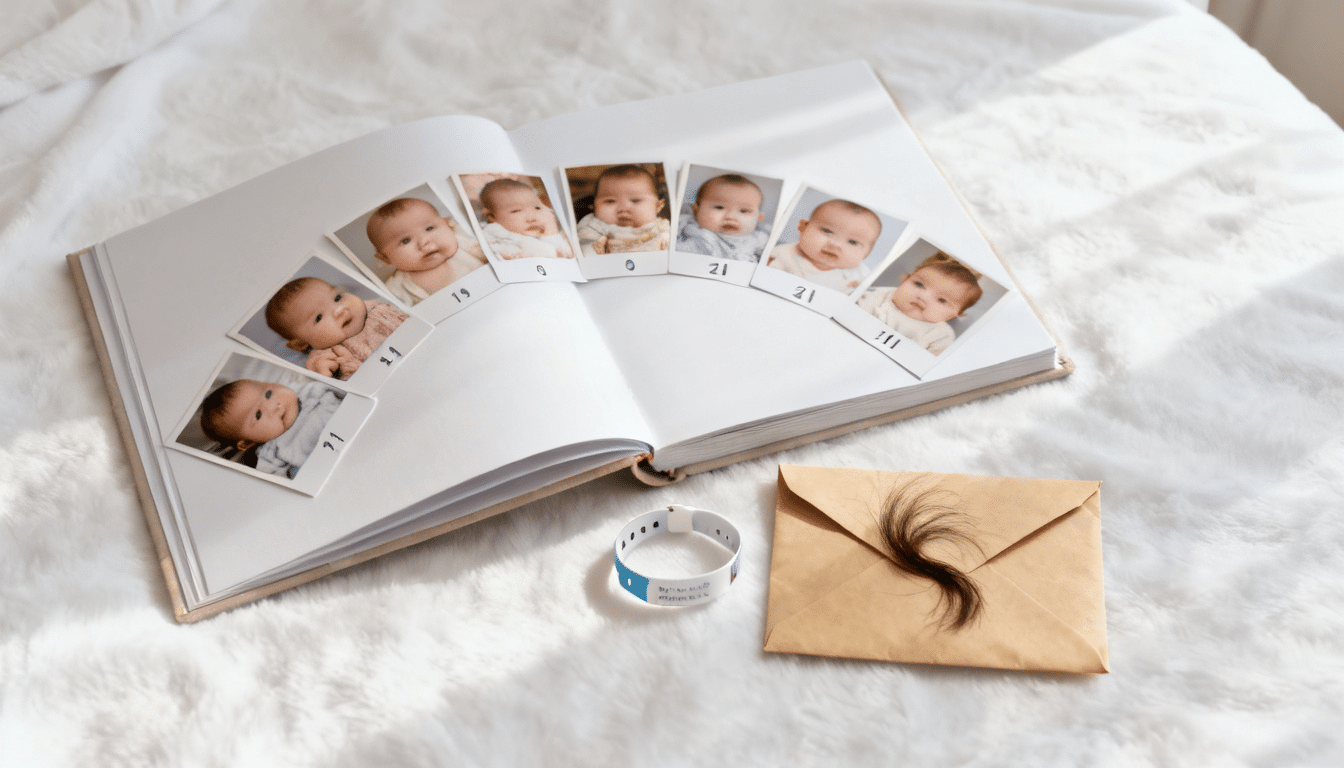
The first year moves fast, faster than most parents expect. A milestone-focused layout helps track growth in a way that a phone camera roll never quite does.
Think monthly photo comparisons, first words written out by hand, and small keepsakes like a hospital bracelet or a lock of hair. Leave a few blank pages at the back for notes you’ll want to add later – there’s always something you forgot to include.
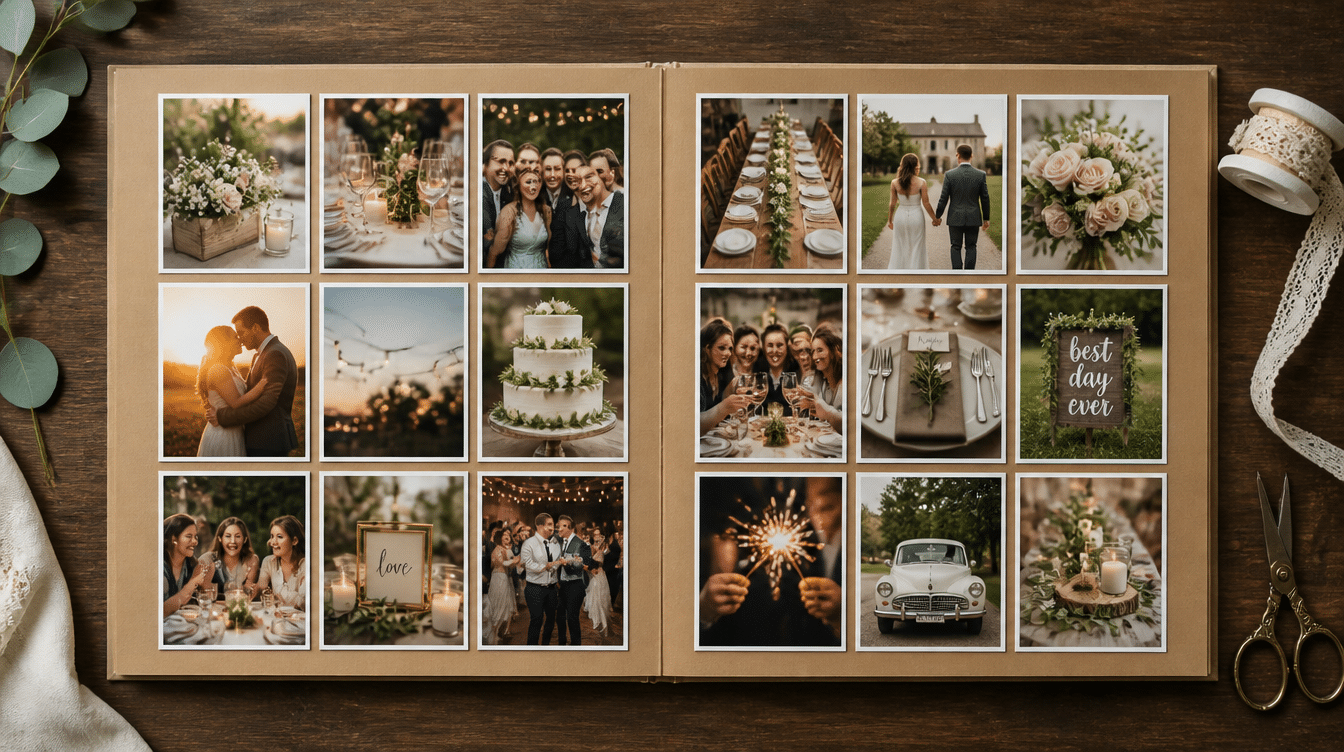
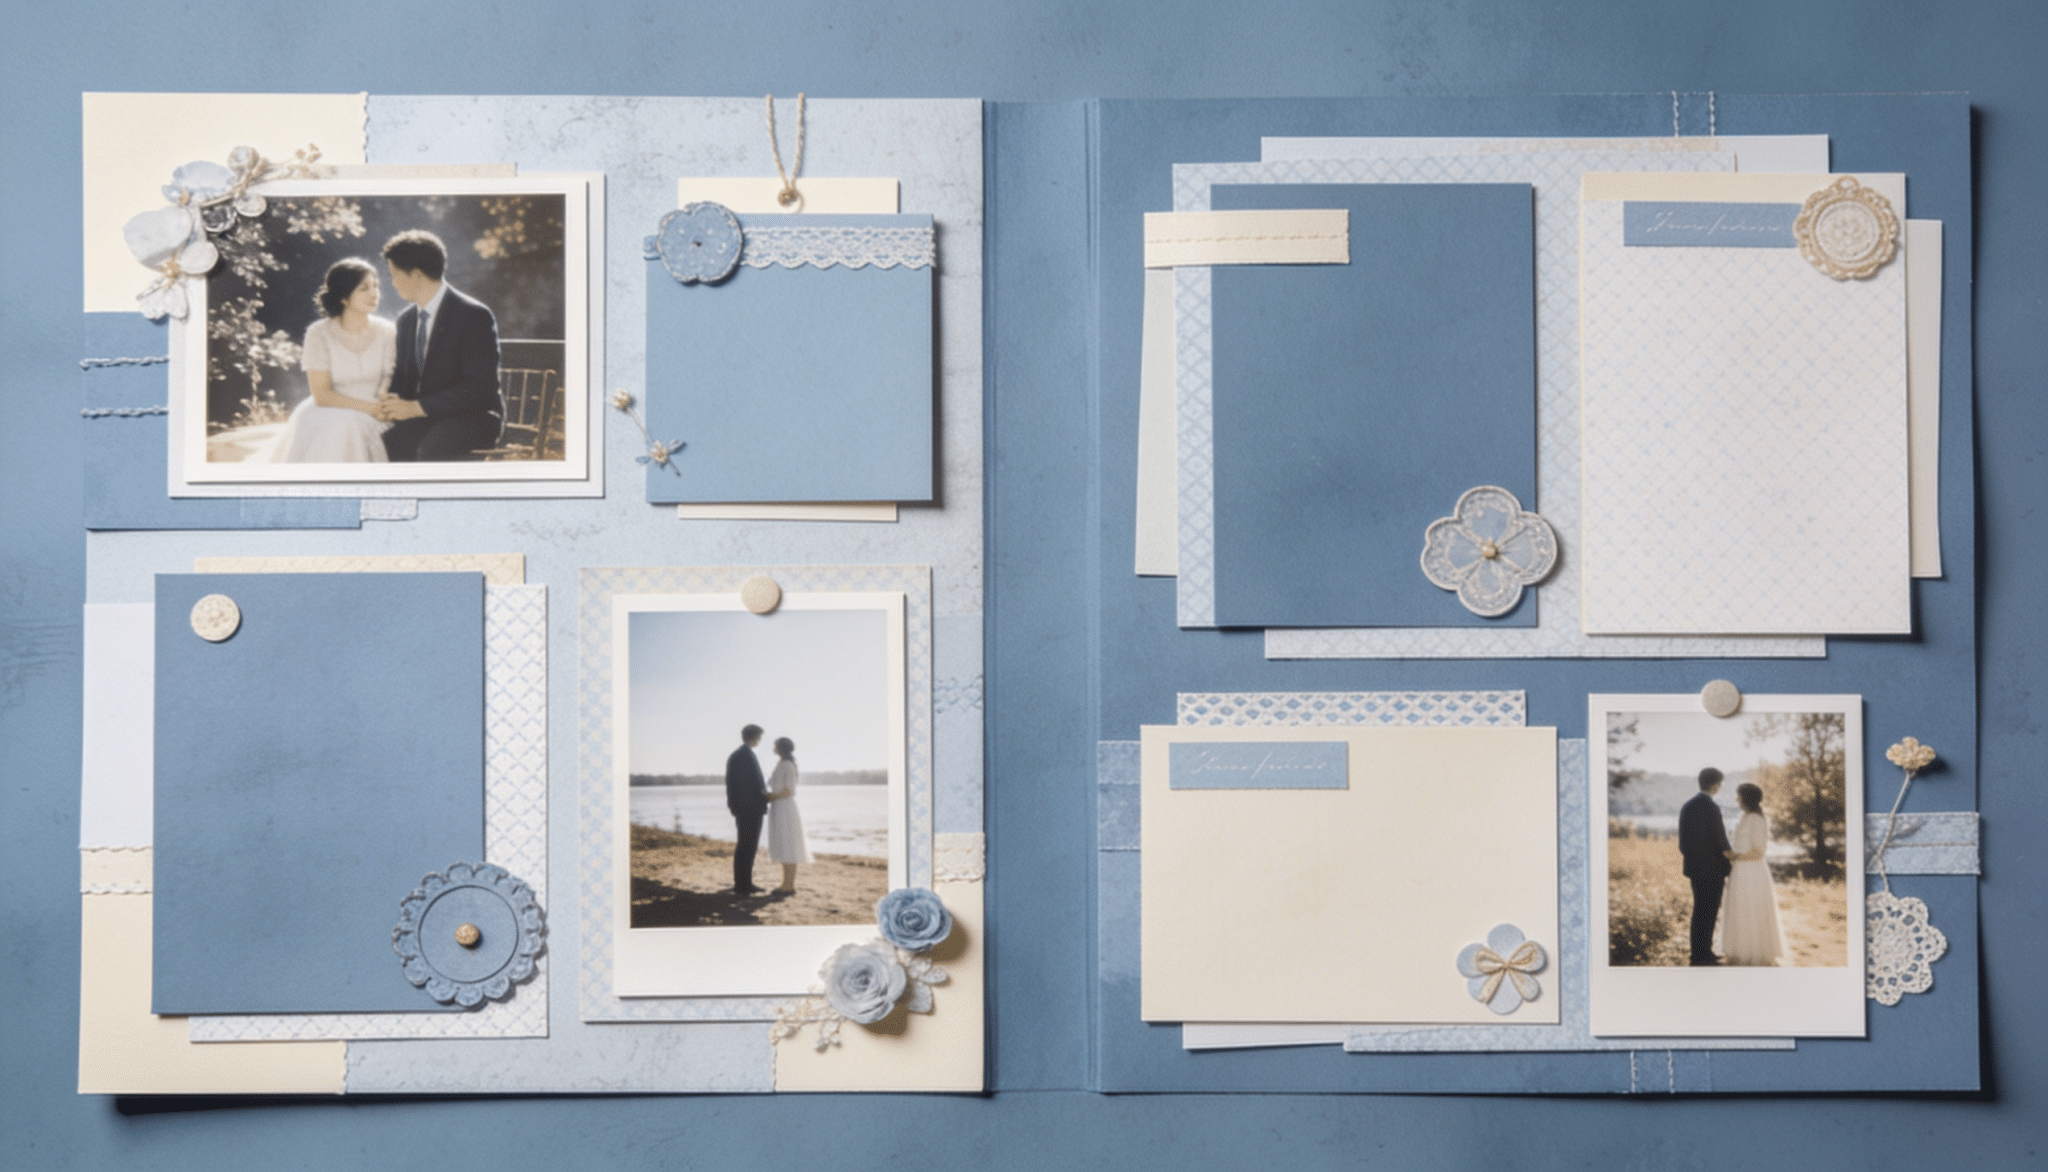
4. Wedding Day Highlights
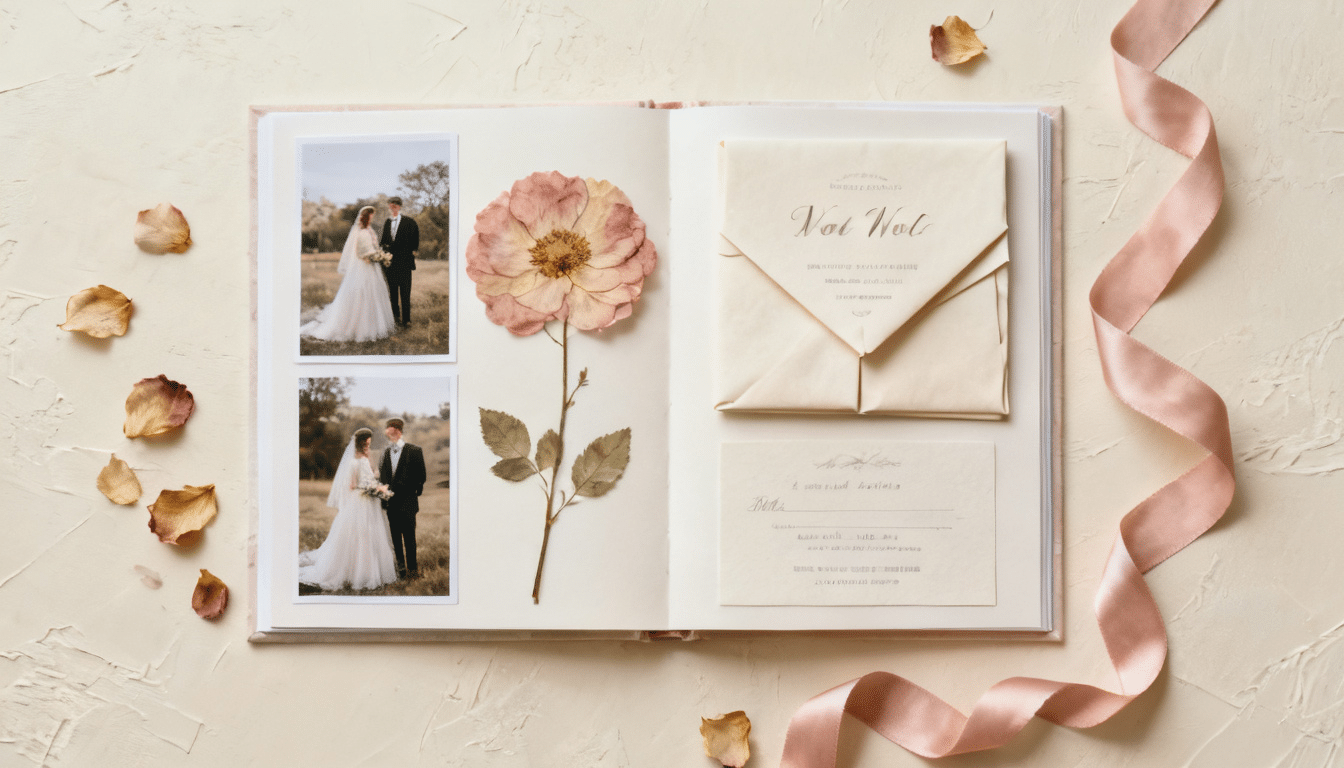
Photos tell part of the story. The rest lives in the details. Include the invitation, a handwritten copy of the vows, a pressed flower from the bouquet, or a note from the morning of the wedding.
Consider adding a page from the rehearsal dinner or a note written by someone who couldn’t attend, those tend to be the most read pages in the album.
5. Birthday Through the Years
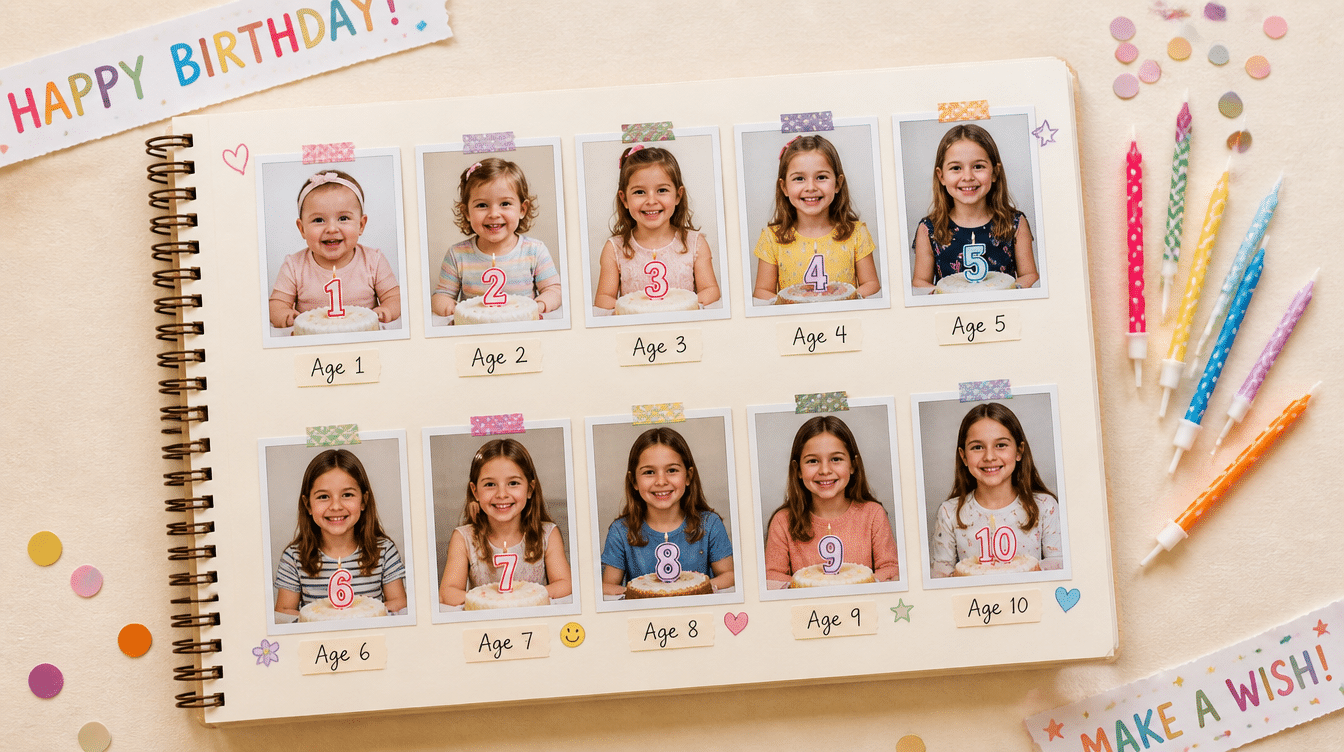
Comparing photos across birthdays, same pose, different ages creates a timeline that’s hard to replicate any other way. Add a small note each year about what the person was into at the time.
Even a one-line entry per birthday keeps the tradition going without making it feel like a project.
6. School Memories Album
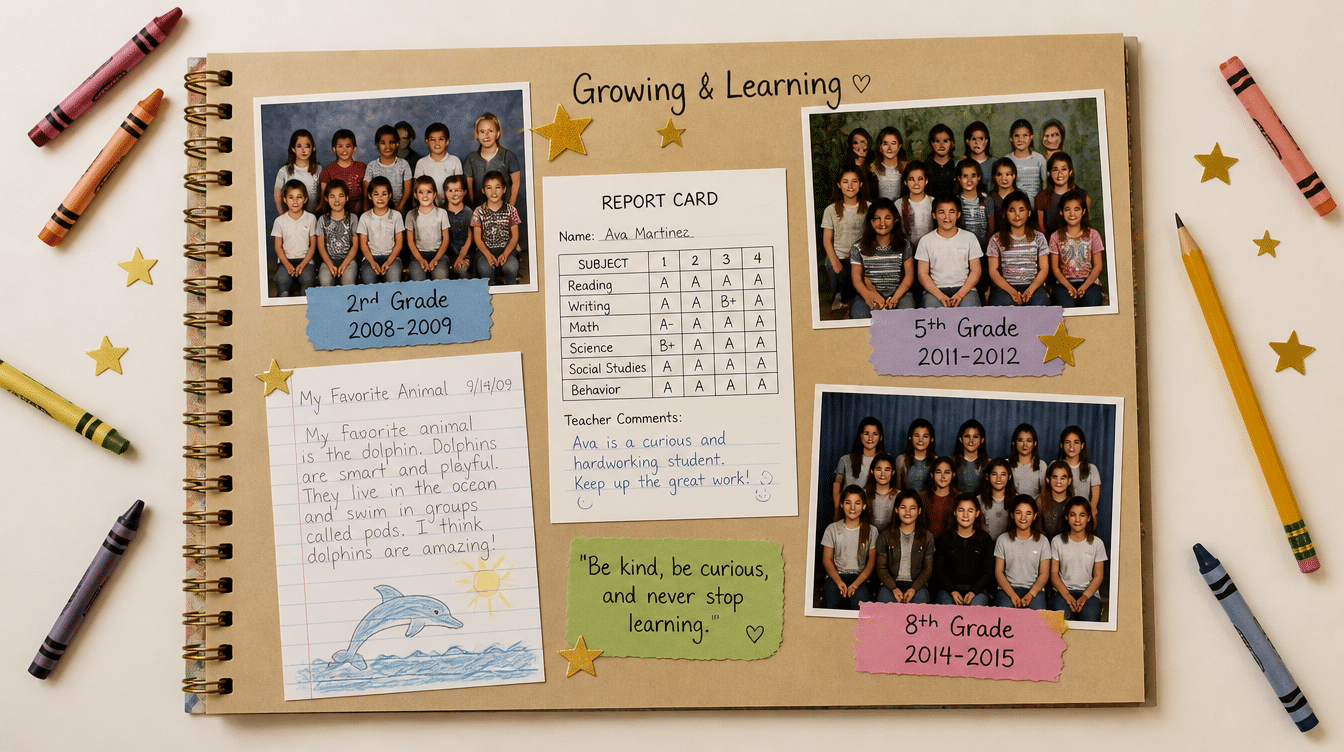
Report cards, class photos, and artwork tell a story no parent forgets. Build one album that runs from kindergarten through senior year, or dedicate a section to each grade.
A note from a favorite teacher or a best friend’s signature on a school year page makes it feel personal in a way photos alone can’t.
7. Holiday Traditions Collection
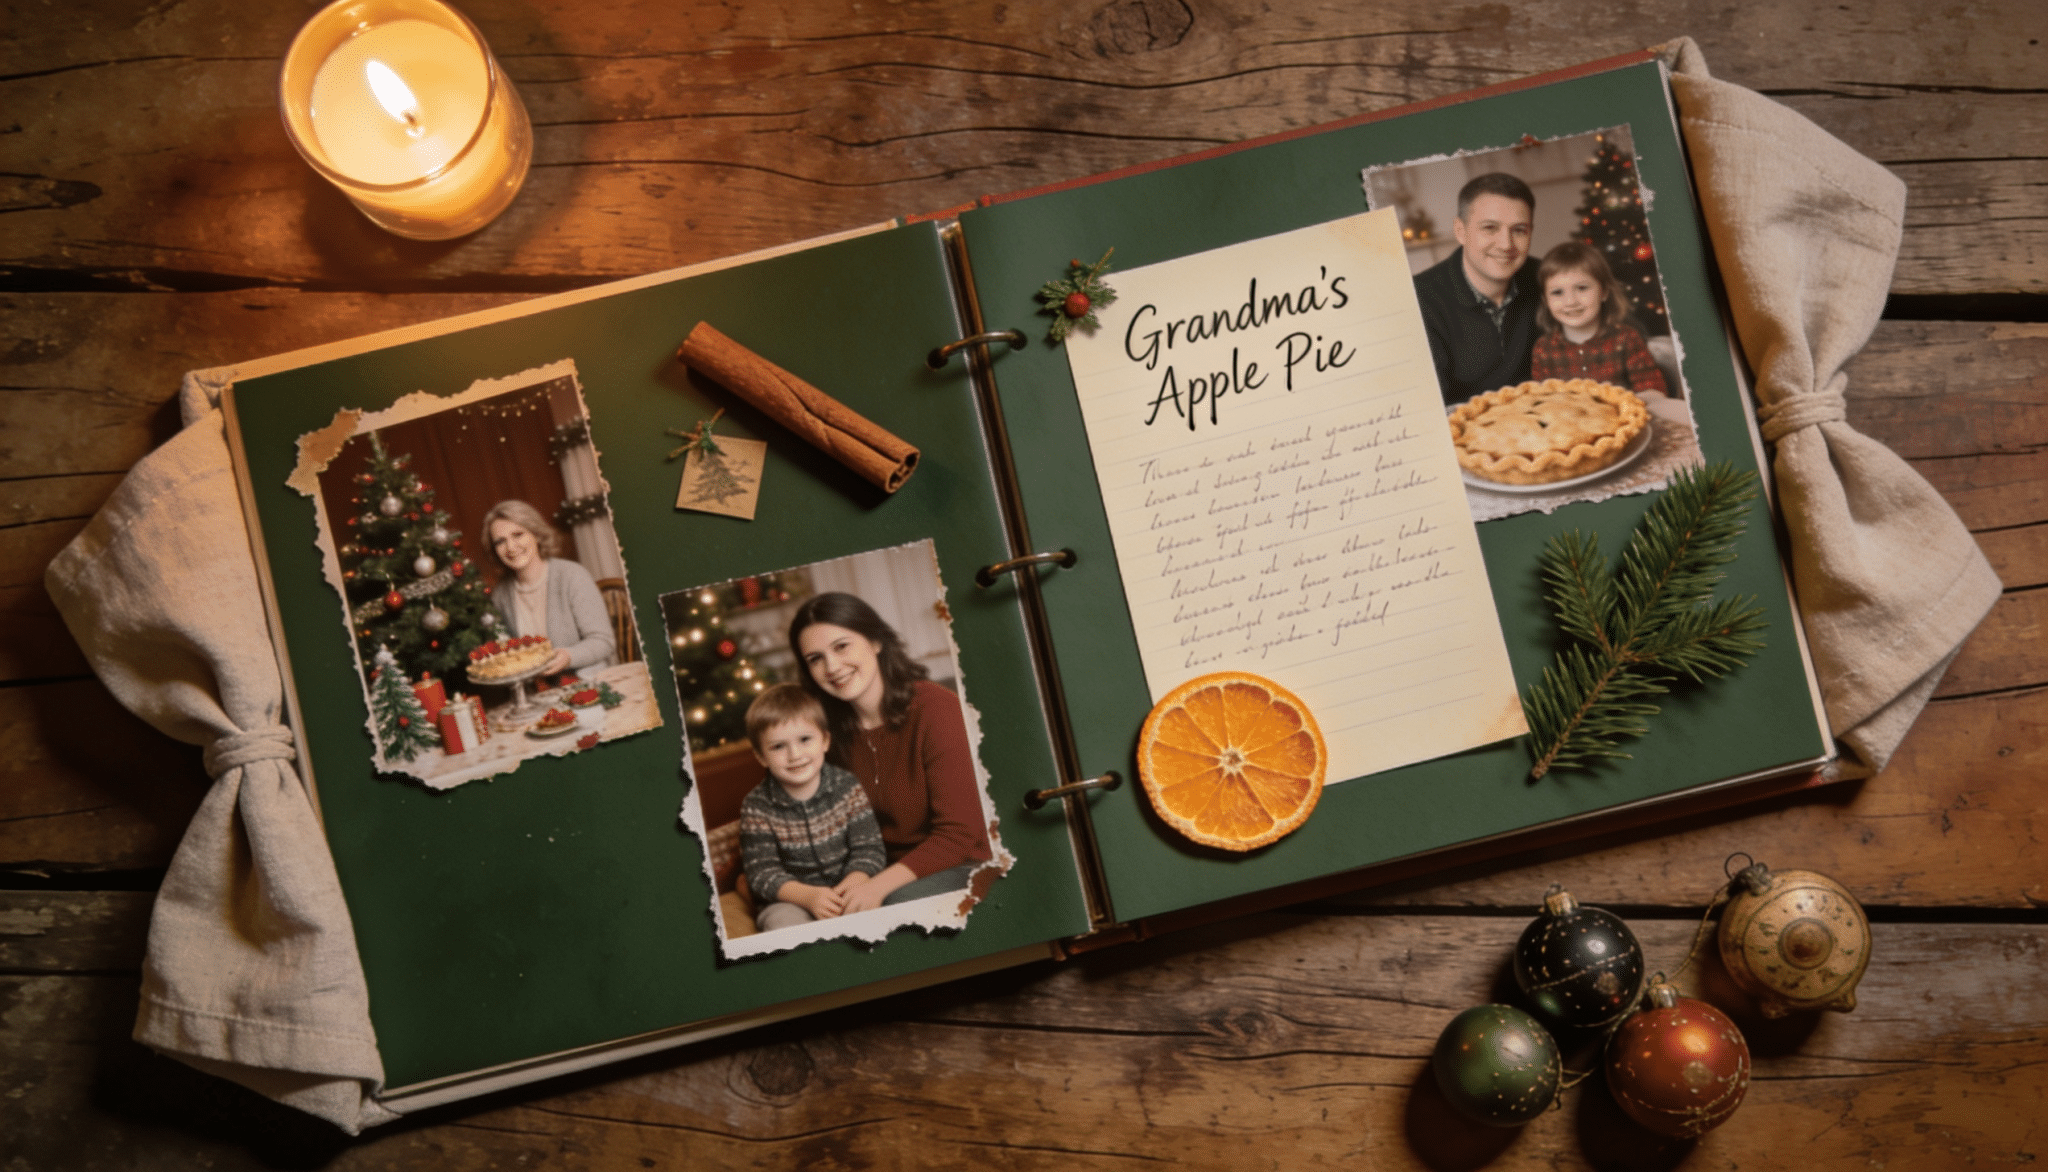
Some families make the same cookies every December. Others have a specific hike they do every Thanksgiving. Focus on the details that repeat year after year, those are the ones that end up meaning the most.
Photographs of the same table setting or the same faces in the same spots over multiple years tell a quiet story all on their own.
8. Friendship Memory Book
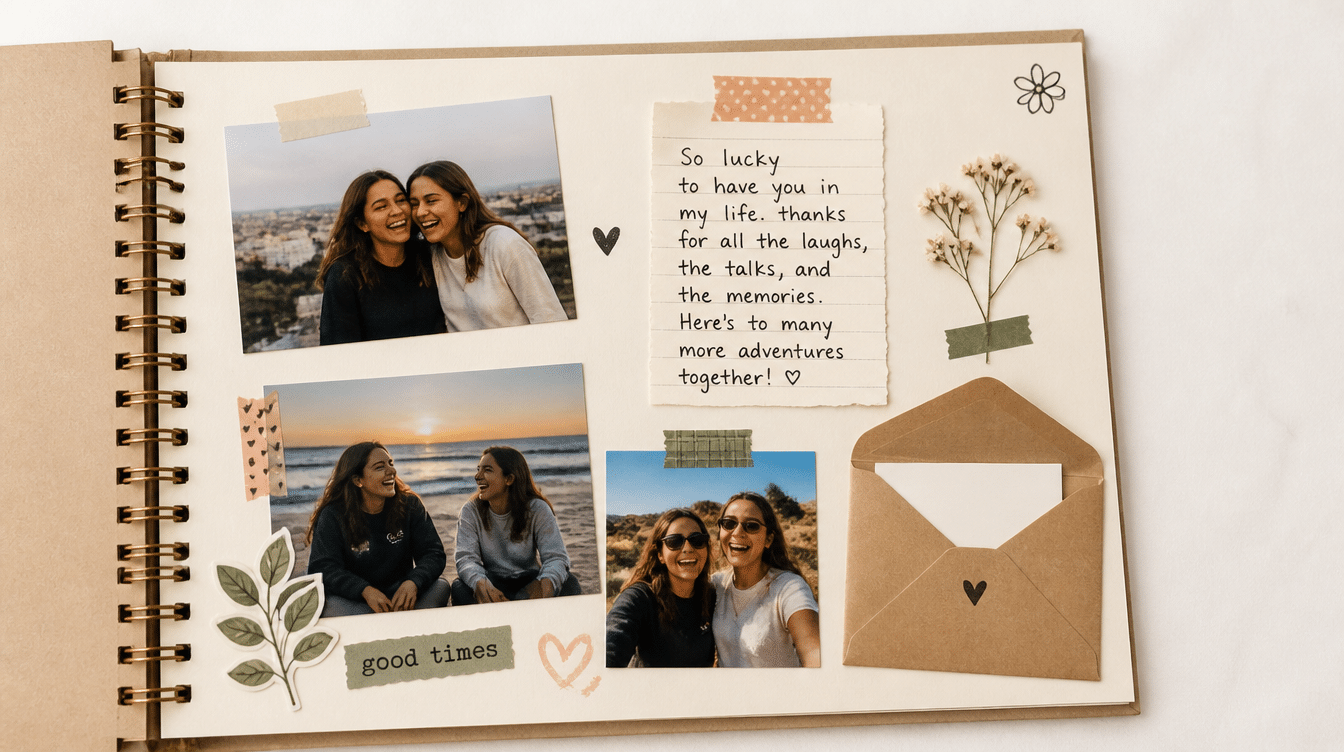
Candid photos almost always beat posed ones in a friendship album. Pair them with a favorite memory written in your own handwriting, an inside joke, or a screenshot of a text conversation that made you laugh.
A small envelope pocket on one page works well for holding notes, receipts, or anything too bulky to glue flat.
9. Pet Memory Pages
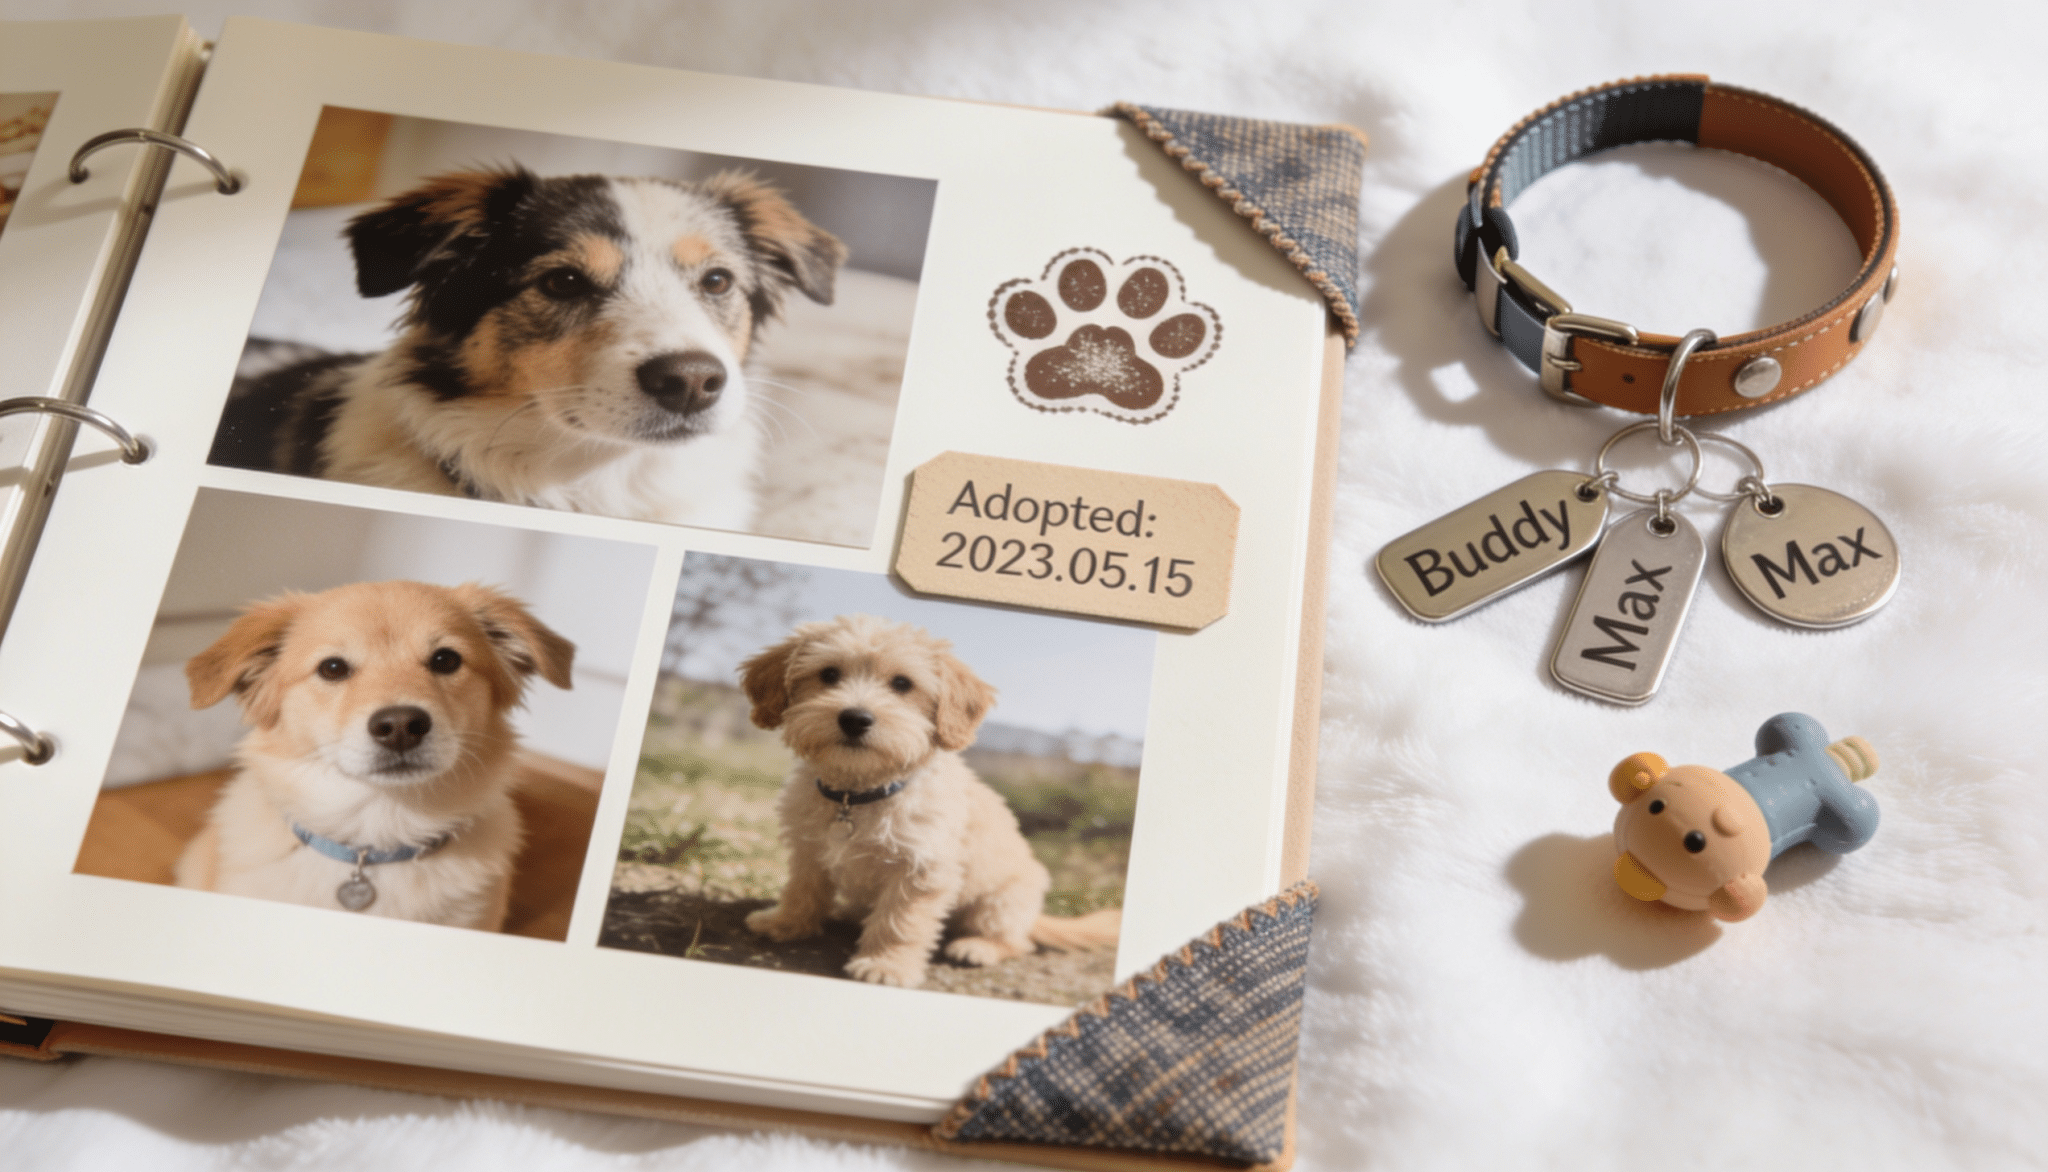
An adoption day photo, a page from their first winter, a shot of their favorite spot on the couch – these add up to a record you’ll be glad you kept.
Include milestones, vet visit notes, or just the everyday moments that made you smile.
A paw print stamped directly onto a page, even a messy one – is the kind of detail that makes the album impossible to put down.
10. Seasonal Highlights Album
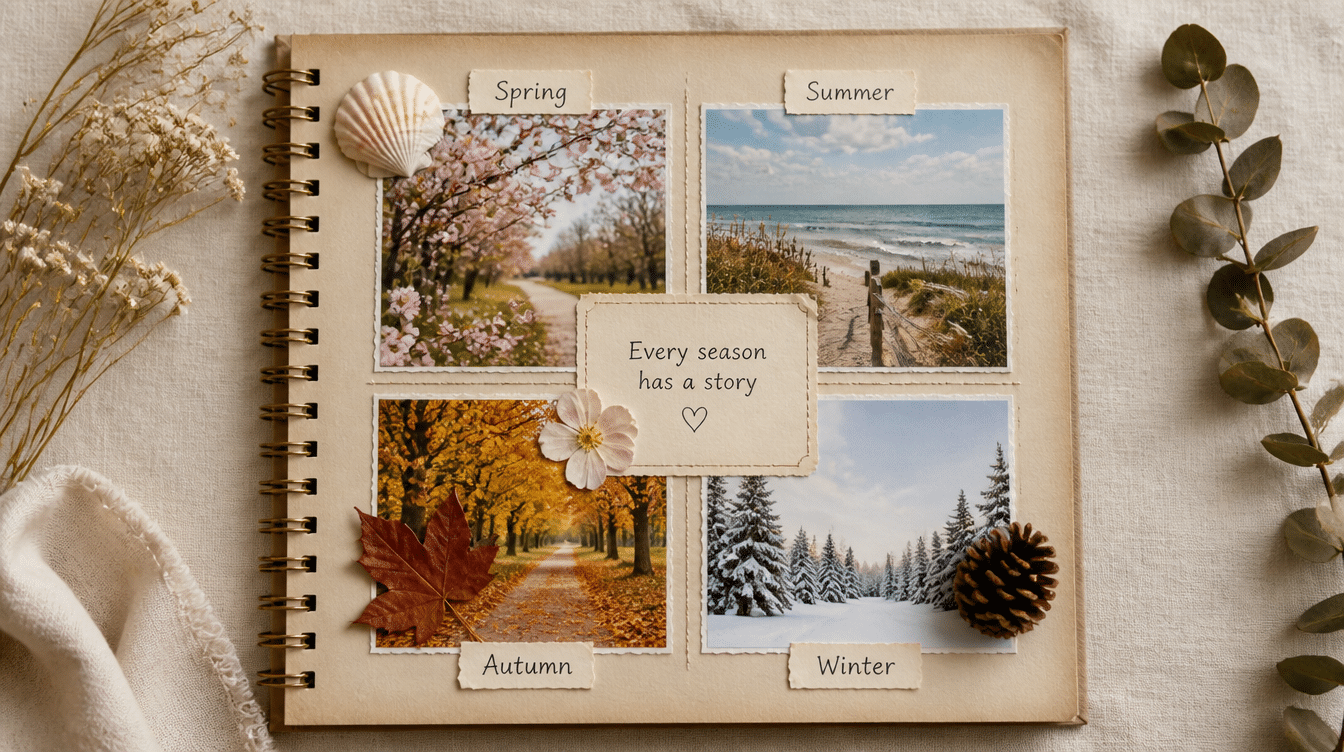
Organizing by season instead of year gives an album a natural rhythm.
Spring pages might hold Easter photos and garden snapshots. Summer covers cookouts and road trips. Fall gets the harvest and Halloween. Winter closes with holidays and snow days.
Repeating the same layout format across all four seasons creates a visual consistency that makes the album easy to flip through.
11. Sports Season Recap
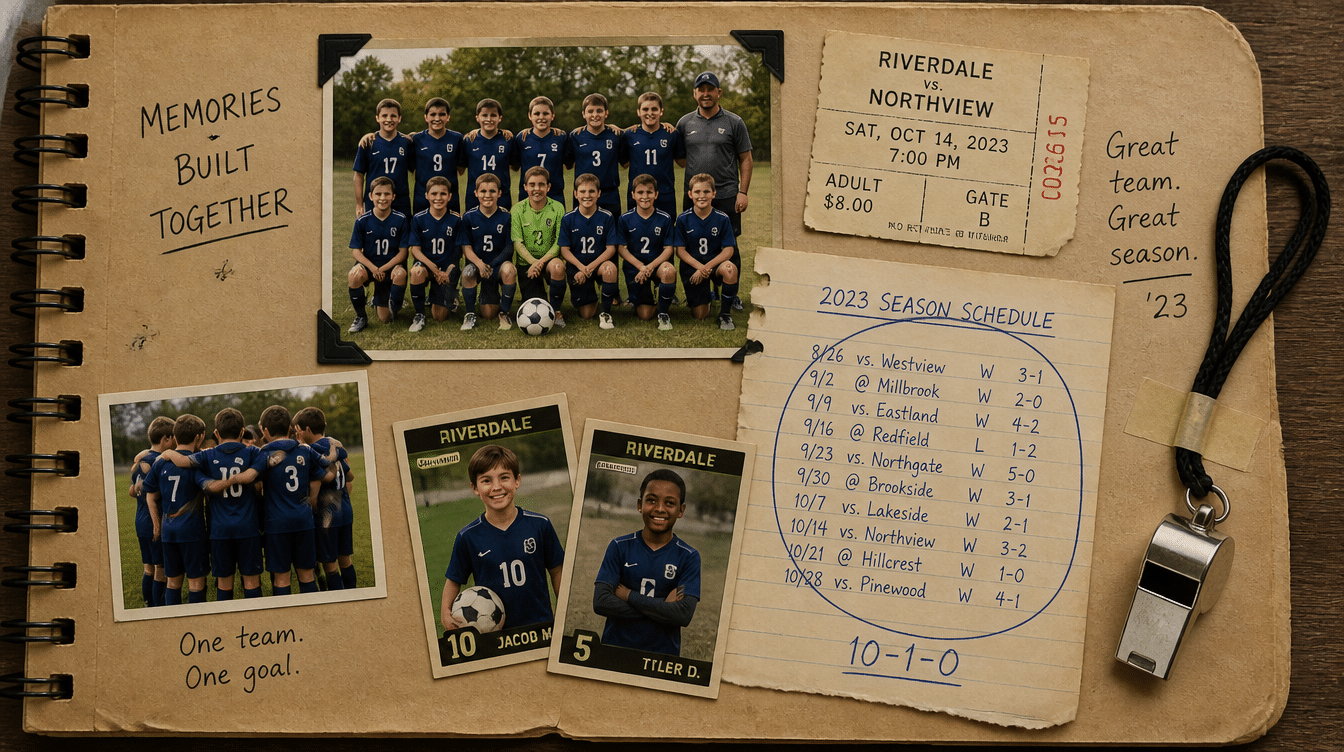
Add a game-day ticket stub, a handwritten note about a specific play, or a photo from the postgame celebration.
The wins matter, but so do the practices, the bus rides, and the teammates. A season stats card or a printed schedule with wins circled adds a layer of detail that photos alone can’t capture.
12. Daily Life Moments Scrapbook
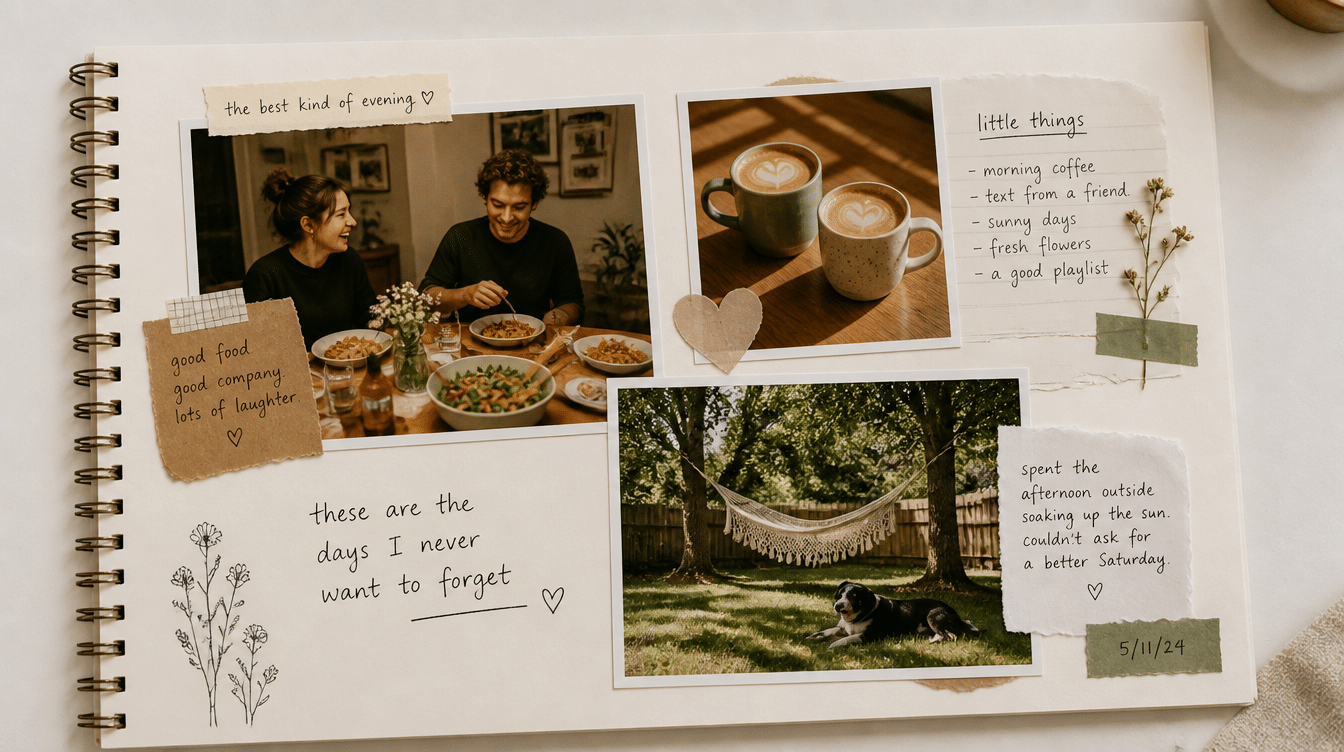
Tuesday night dinners. A Saturday morning routine. The way the kitchen looked during a holiday prep. Everyday moments feel insignificant now – but years later, they’re often the ones people wish they’d documented more.
Set a reminder once a month to photograph something completely unremarkable, future you will be glad you did.
Design-Based Scrapbook Ideas
The layout you choose shapes how a memory reads, before anyone looks at a single photo.
13. Photo Grid Layout
Grids work well for multiple images because they create instant visual order without requiring much decision-making. Each photo gets equal space, which makes this layout ideal for events where no single shot stands out above the rest.
Use a consistent gap between photos to keep the page from feeling cluttered.
14. Single-Photo Feature Page
When one photo is strong enough to carry a page, let it. A single-photo layout creates a clear focal point – everything else on the page, journaling, embellishments, color, exists only to support that image.
Resist the urge to fill empty space. White space here is doing a job.
15. Mixed-Size Collage Design
The key to balancing large and small photos is contrast – one anchor image surrounded by smaller supporting shots. Without a size hierarchy, a collage page quickly turns into visual noise.
Start with your largest photo, place it first, then build around it.
16. Filmstrip-Inspired Layout
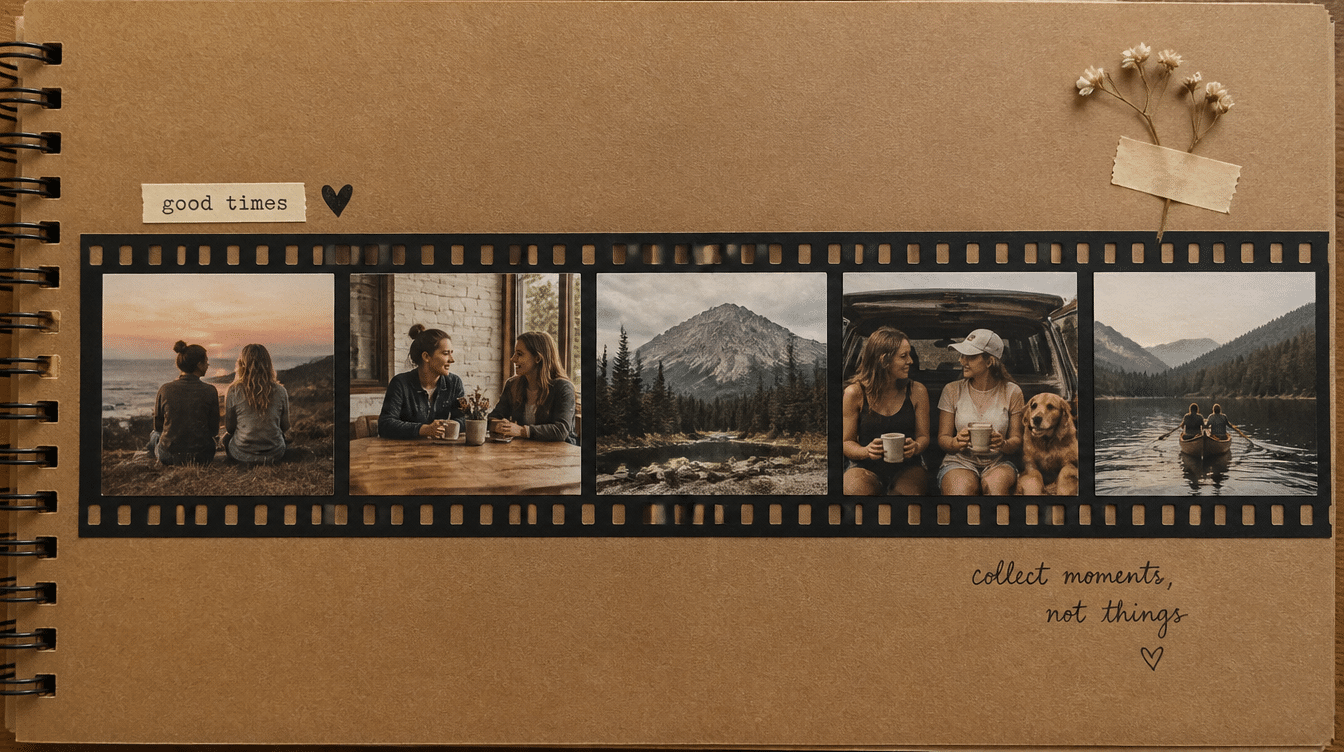
A filmstrip layout lines photos up in sequence, which makes it a natural fit for events with a clear beginning, middle, and end.
Birthday candles being blown out. A graduation walk across the stage. A hike from trailhead to summit. The format does the storytelling work for you.
17. Side-by-Side Story Page
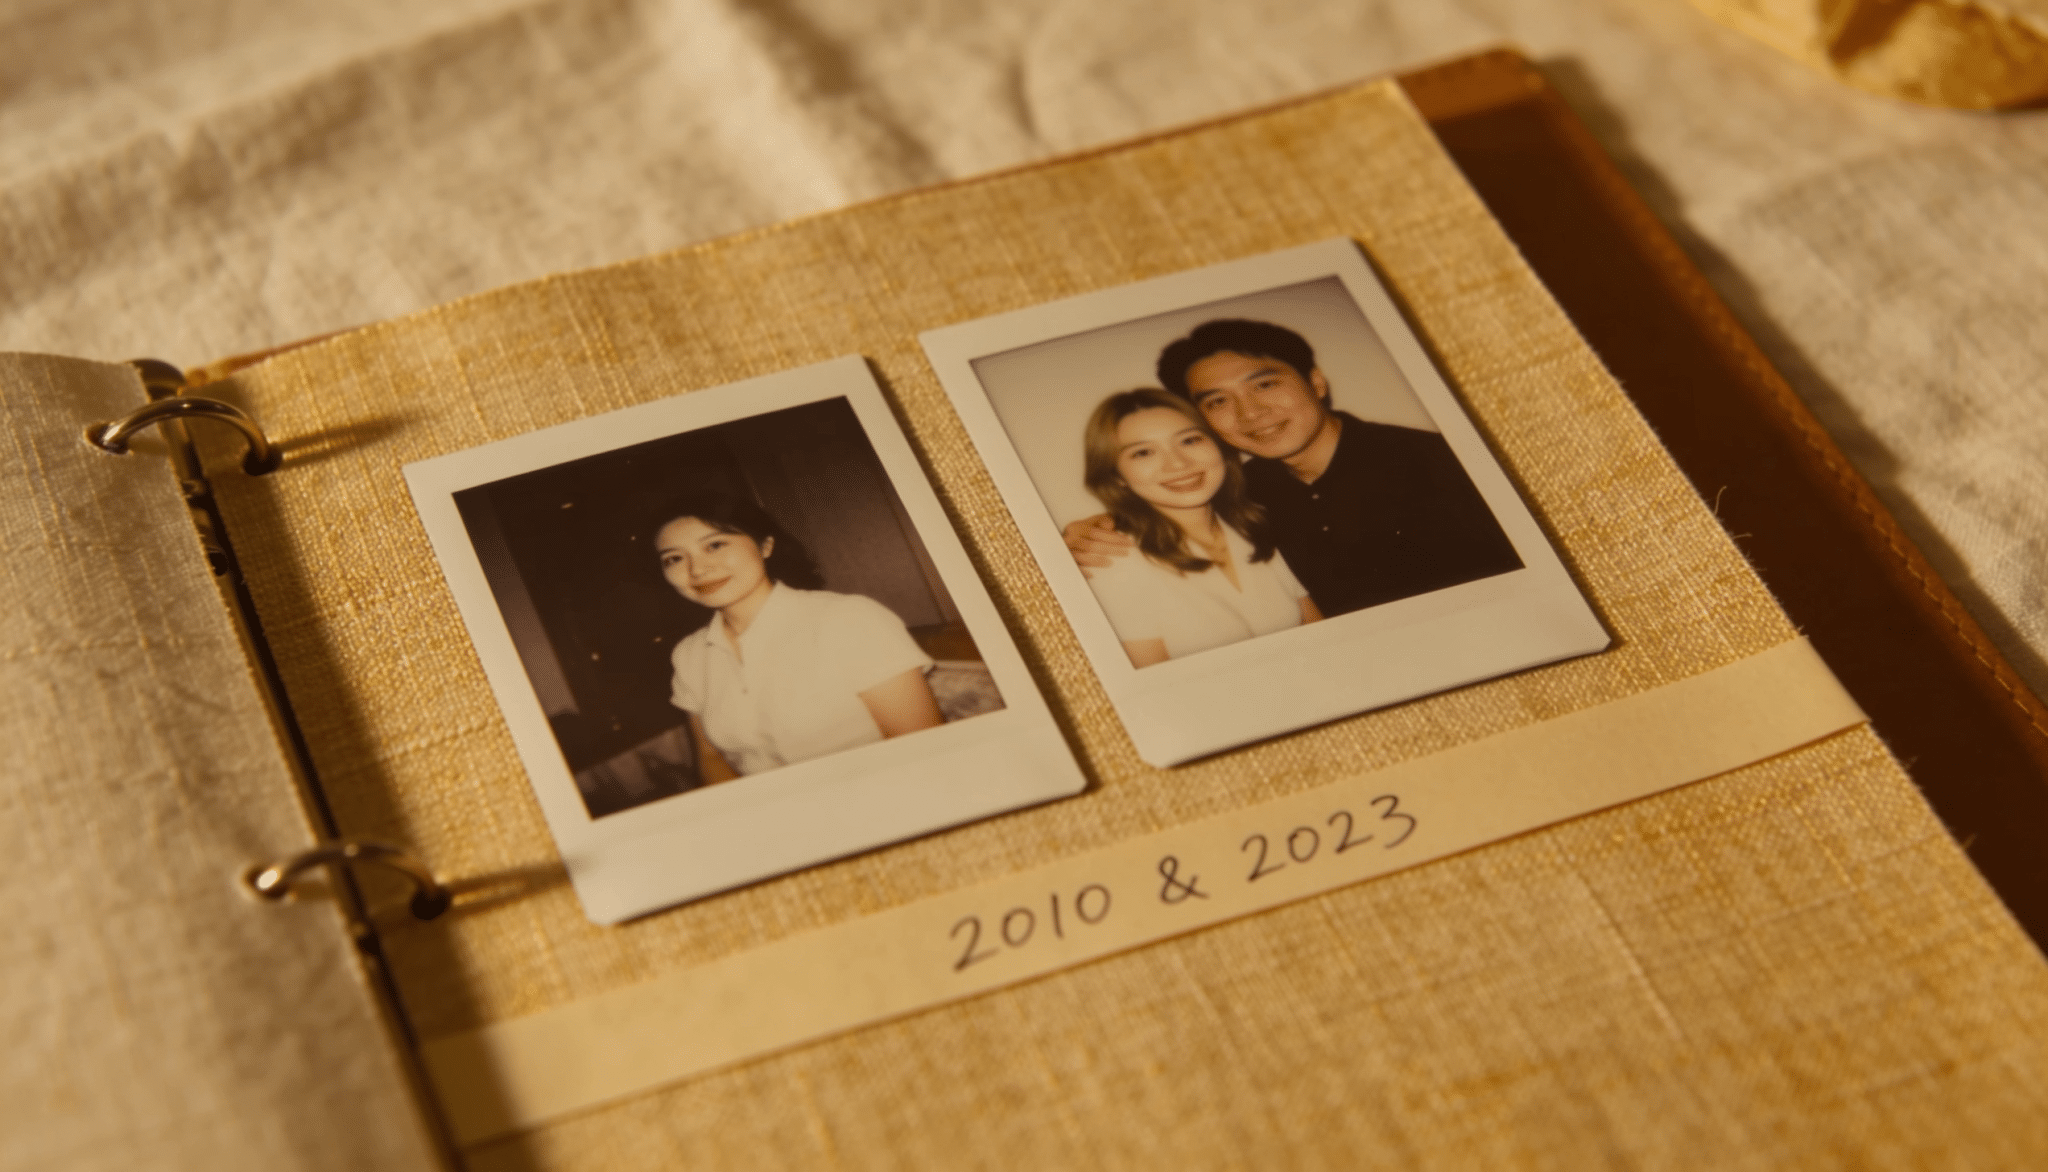
Placing a past photo next to a present one on the same page creates a comparison that needs no caption. This layout works especially well for birthday pages, sibling portraits, or any memory with a clear before-and-after angle.
Leave a narrow strip between the two images for a date or a single line of text.
18. Timeline Memory Layout
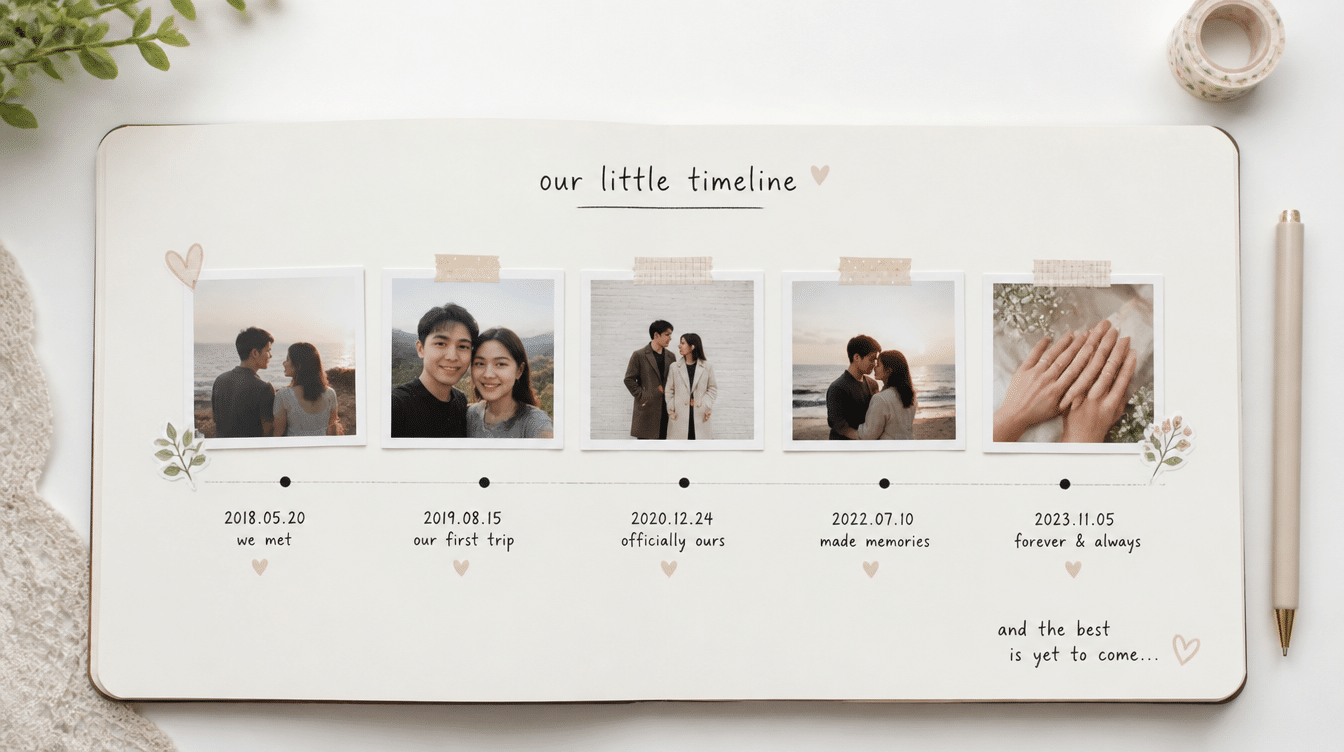
A timeline layout organizes events in chronological order across a single page or double spread. It works particularly well for long projects – a full pregnancy, a home renovation, a year of monthly photos.
Label each point simply. Dates or short phrases are enough.
19. Heart-Shaped Photo Display
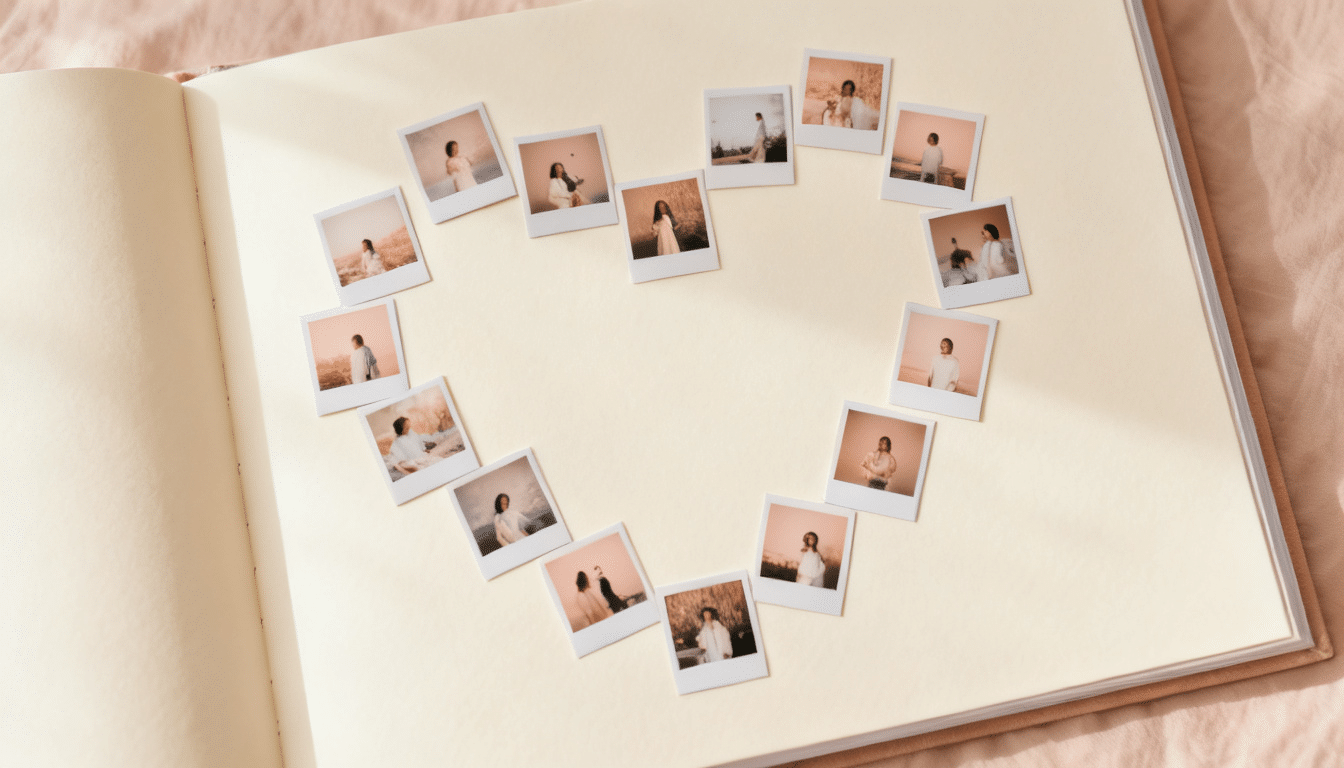
Arranging photos in a heart shape is one of the more recognizable display formats and it holds up because it works. It fits naturally into family albums, friendship pages, and wedding spreads without feeling forced.
Keep the photos small and consistent in size so the shape reads clearly.
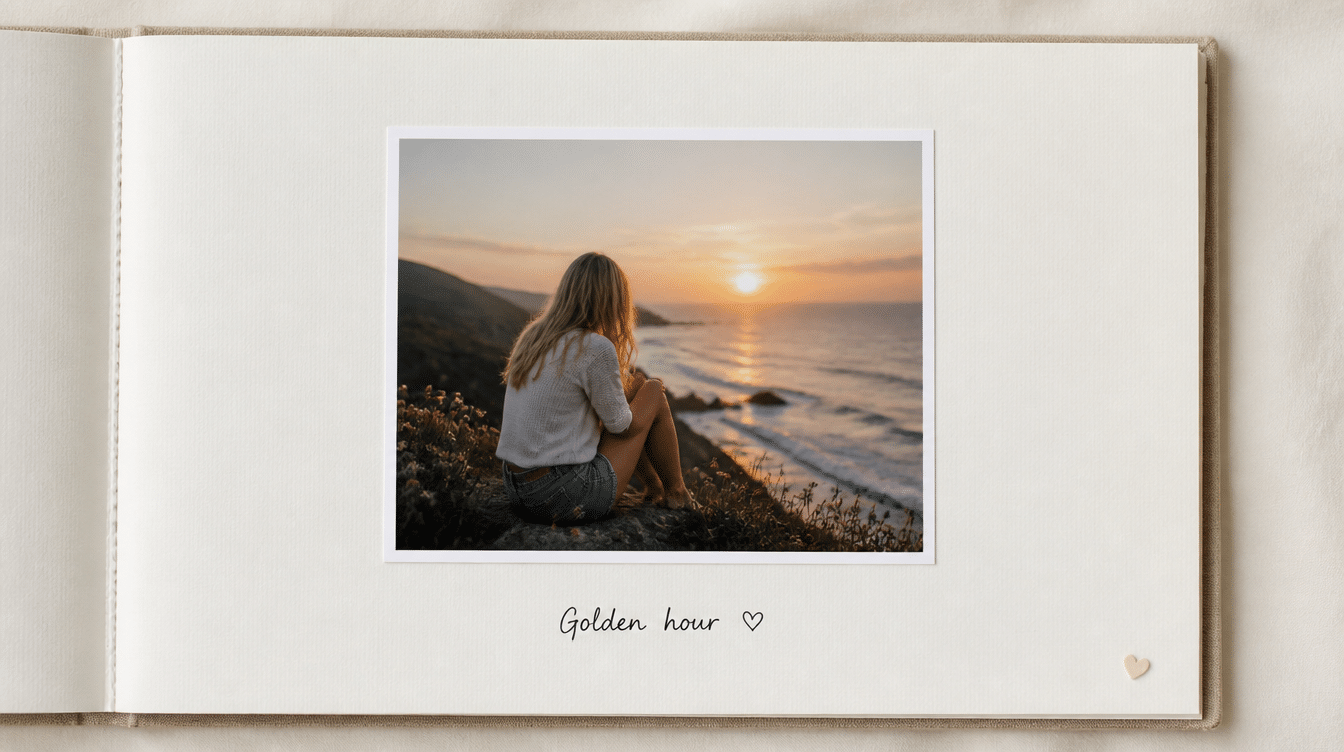
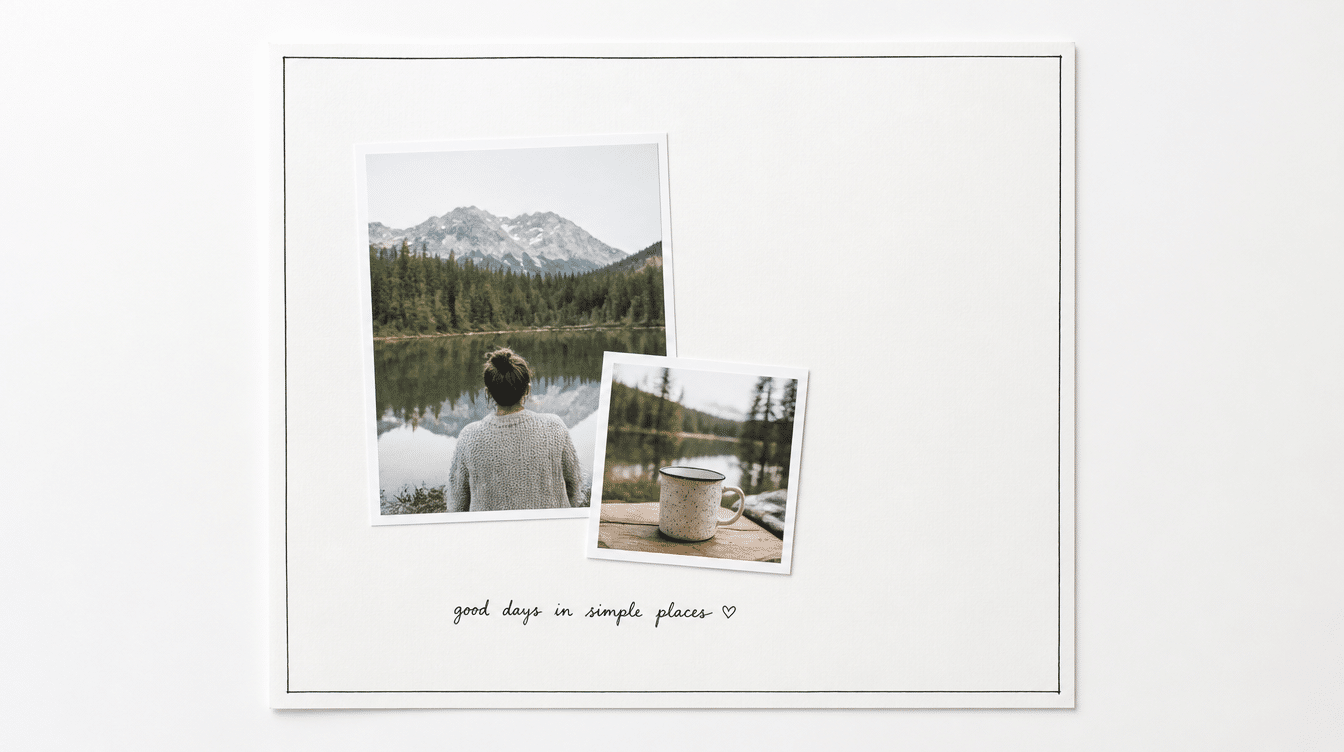
20. Instant-Camera Style Design
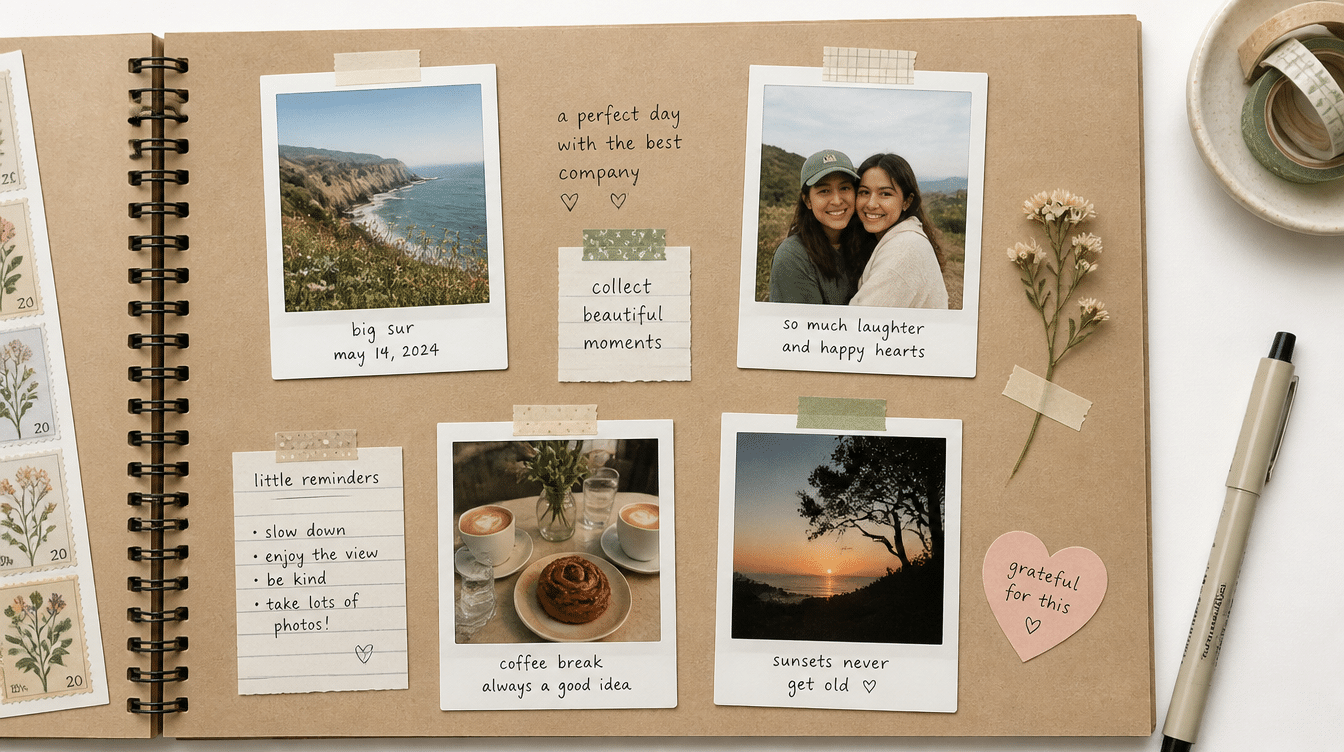
Mimicking the look of instant film prints – white border, square crop, handwritten caption below gives a page a relaxed, personal feel. The handwritten note beneath each image is what makes this layout work. It turns a photo into a small story.
Even one or two words per image is enough.
21. Minimalist Scrapbook Layout
Fewer decorative elements don’t mean less effort, they mean more focus on the photos themselves. A minimalist layout strips the page back to what matters: image, a little white space, and maybe one line of text.
This approach works especially well when the photos are strong and don’t need much support.
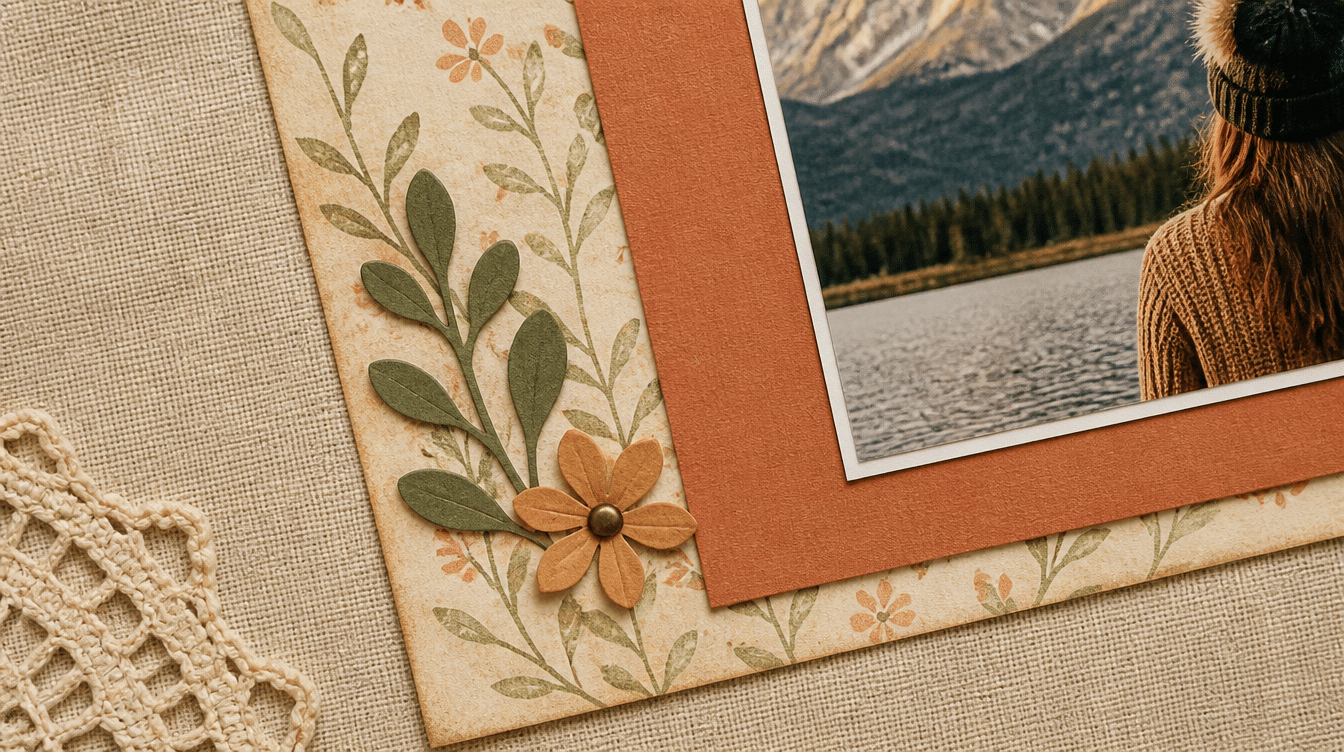
22. Vintage-Inspired Page Design
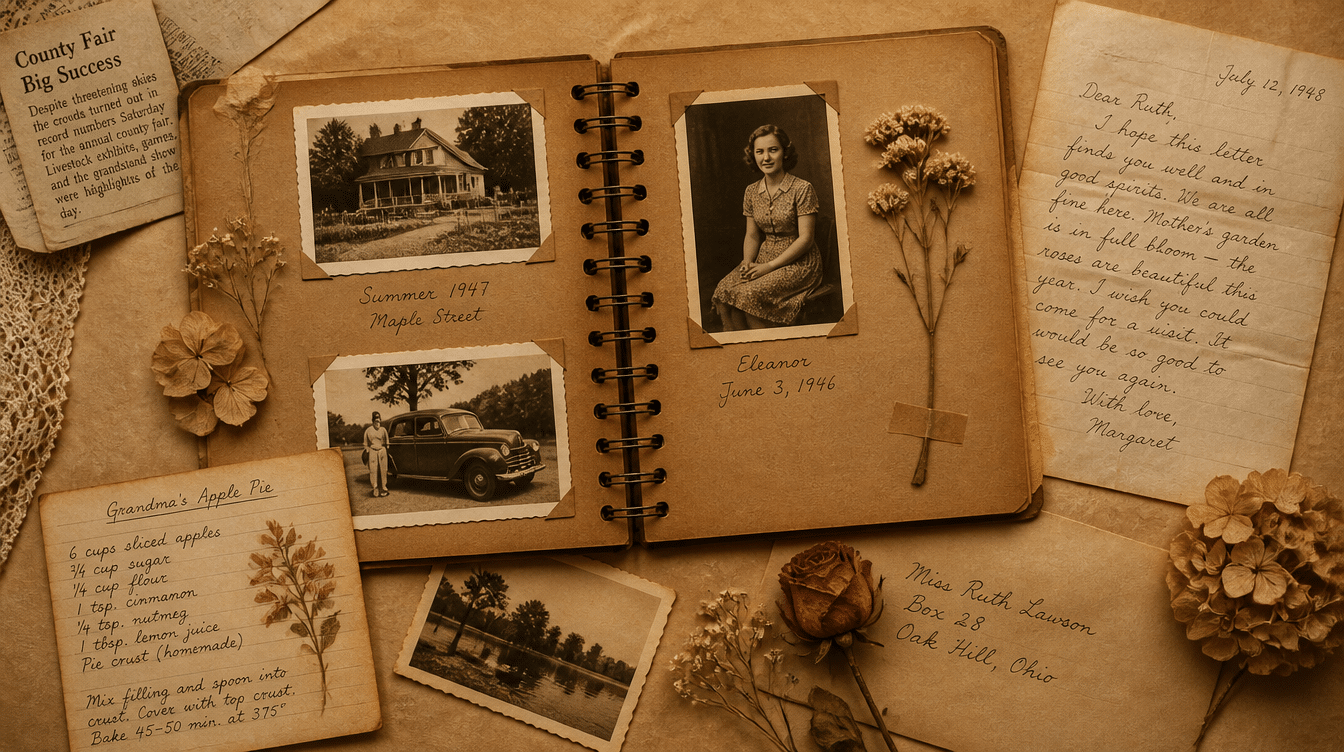
Old photographs, faded edges, and heirloom keepsakes all feel at home on a vintage-style page.
Sepia tones, kraft paper backgrounds, and aged-looking fonts help newer photos blend with older ones across the same layout. This is also a natural place to include physical items – a folded letter, a clipped newspaper announcement, a worn-edged recipe card.
23. Monochromatic Layout
Working within one color family pulls a page together without requiring a lot of planning. The variation in shade and texture within that single color range creates enough visual interest to keep the page from feeling flat.
It’s one of the more reliable approaches when you’re working with photos that don’t share a natural color story.
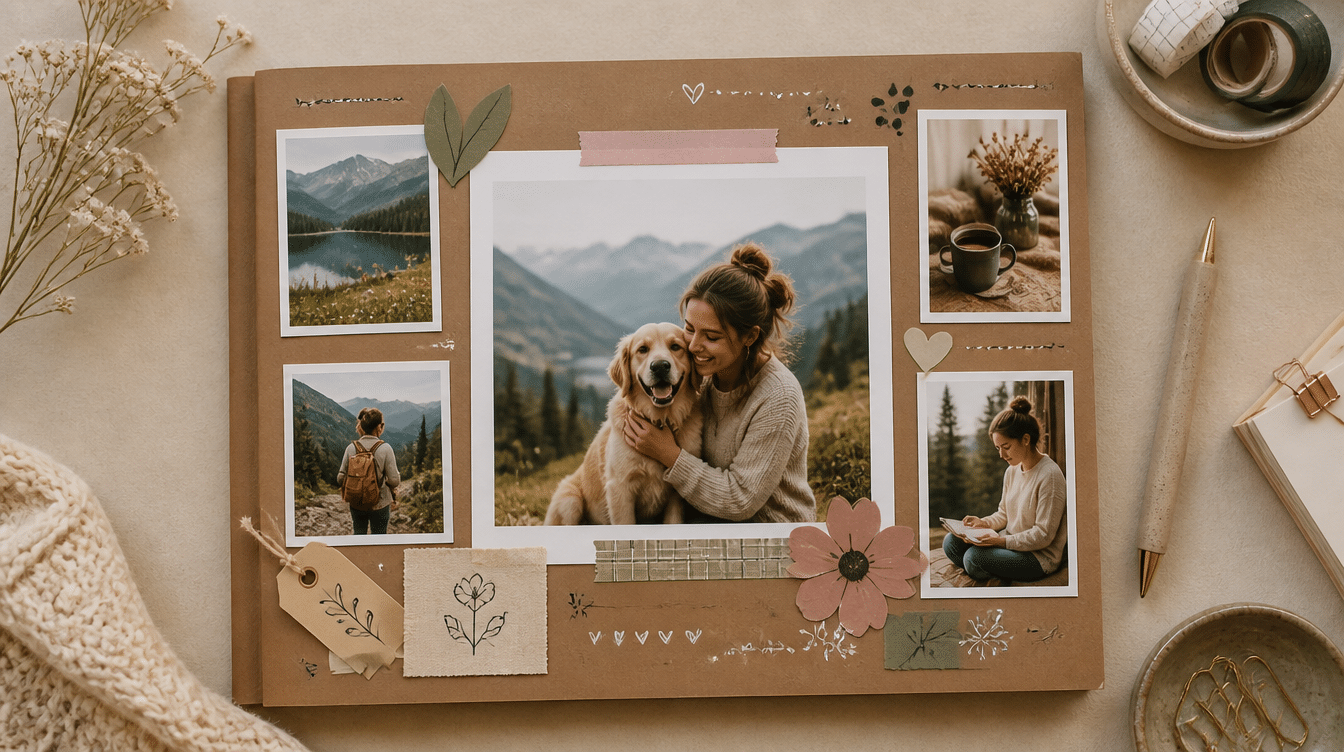
24. Memory Board Arrangement

A memory board layout mimics the look of a physical bulletin board – photos pinned at angles, notes layered on top, small mementos tucked in between. It’s one of the more flexible formats because it doesn’t require straight lines or even spacing.
Overlap elements slightly to make the arrangement feel lived-in rather than staged.
Technique-Based Scrapbook Ideas
A good technique can make even a simple layout feel considered and complete.
25. Layered Paper and Photo Design
Layering works the same way in scrapbooking as it does in textiles – each layer adds depth without hiding what’s underneath.
Drawing from years of working with fabric and mixed materials, Violet Gordon often starts with a base layer of patterned paper, adds a solid mat, then places the photo on top with enough of each layer visible to create dimension.
The trick is keeping the layers intentional, each one should add something, not just fill space.
26. Pull-Out Journaling Cards
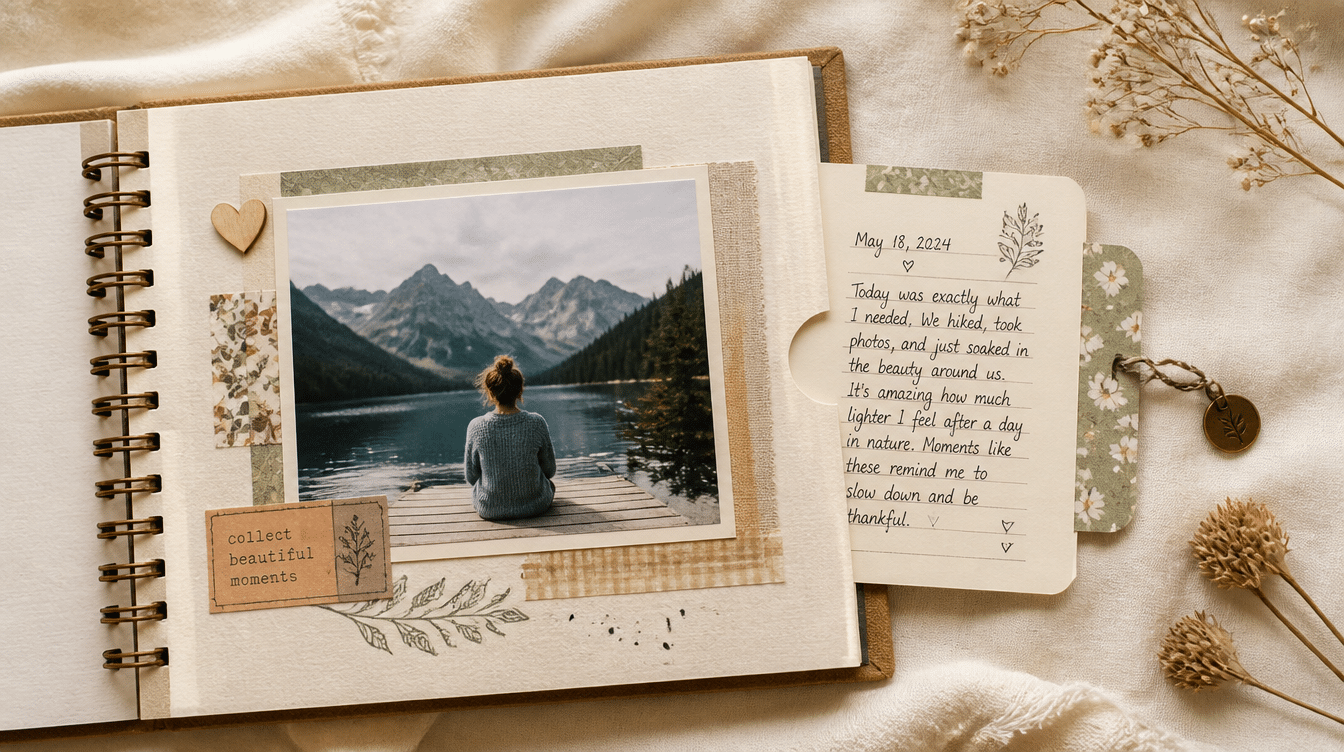
A pull-out card tucks behind a photo or under a flap, giving you space for a longer story without crowding the visible page.
This works well for memories that need more context than a caption can hold – a full account of what happened that day, a letter written to someone in the photo, or a list of things you want to remember.
The page stays clean. The story stays complete.
27. Interactive Fold-Out Elements

Fold-out panels are useful when you have more photos than a single page can hold. A simple accordion fold attached to the side of a page can expand to show four or five additional images without disrupting the main layout.
It keeps the album from feeling overloaded while making sure nothing gets left out.
28. Keepsake Pocket Sections
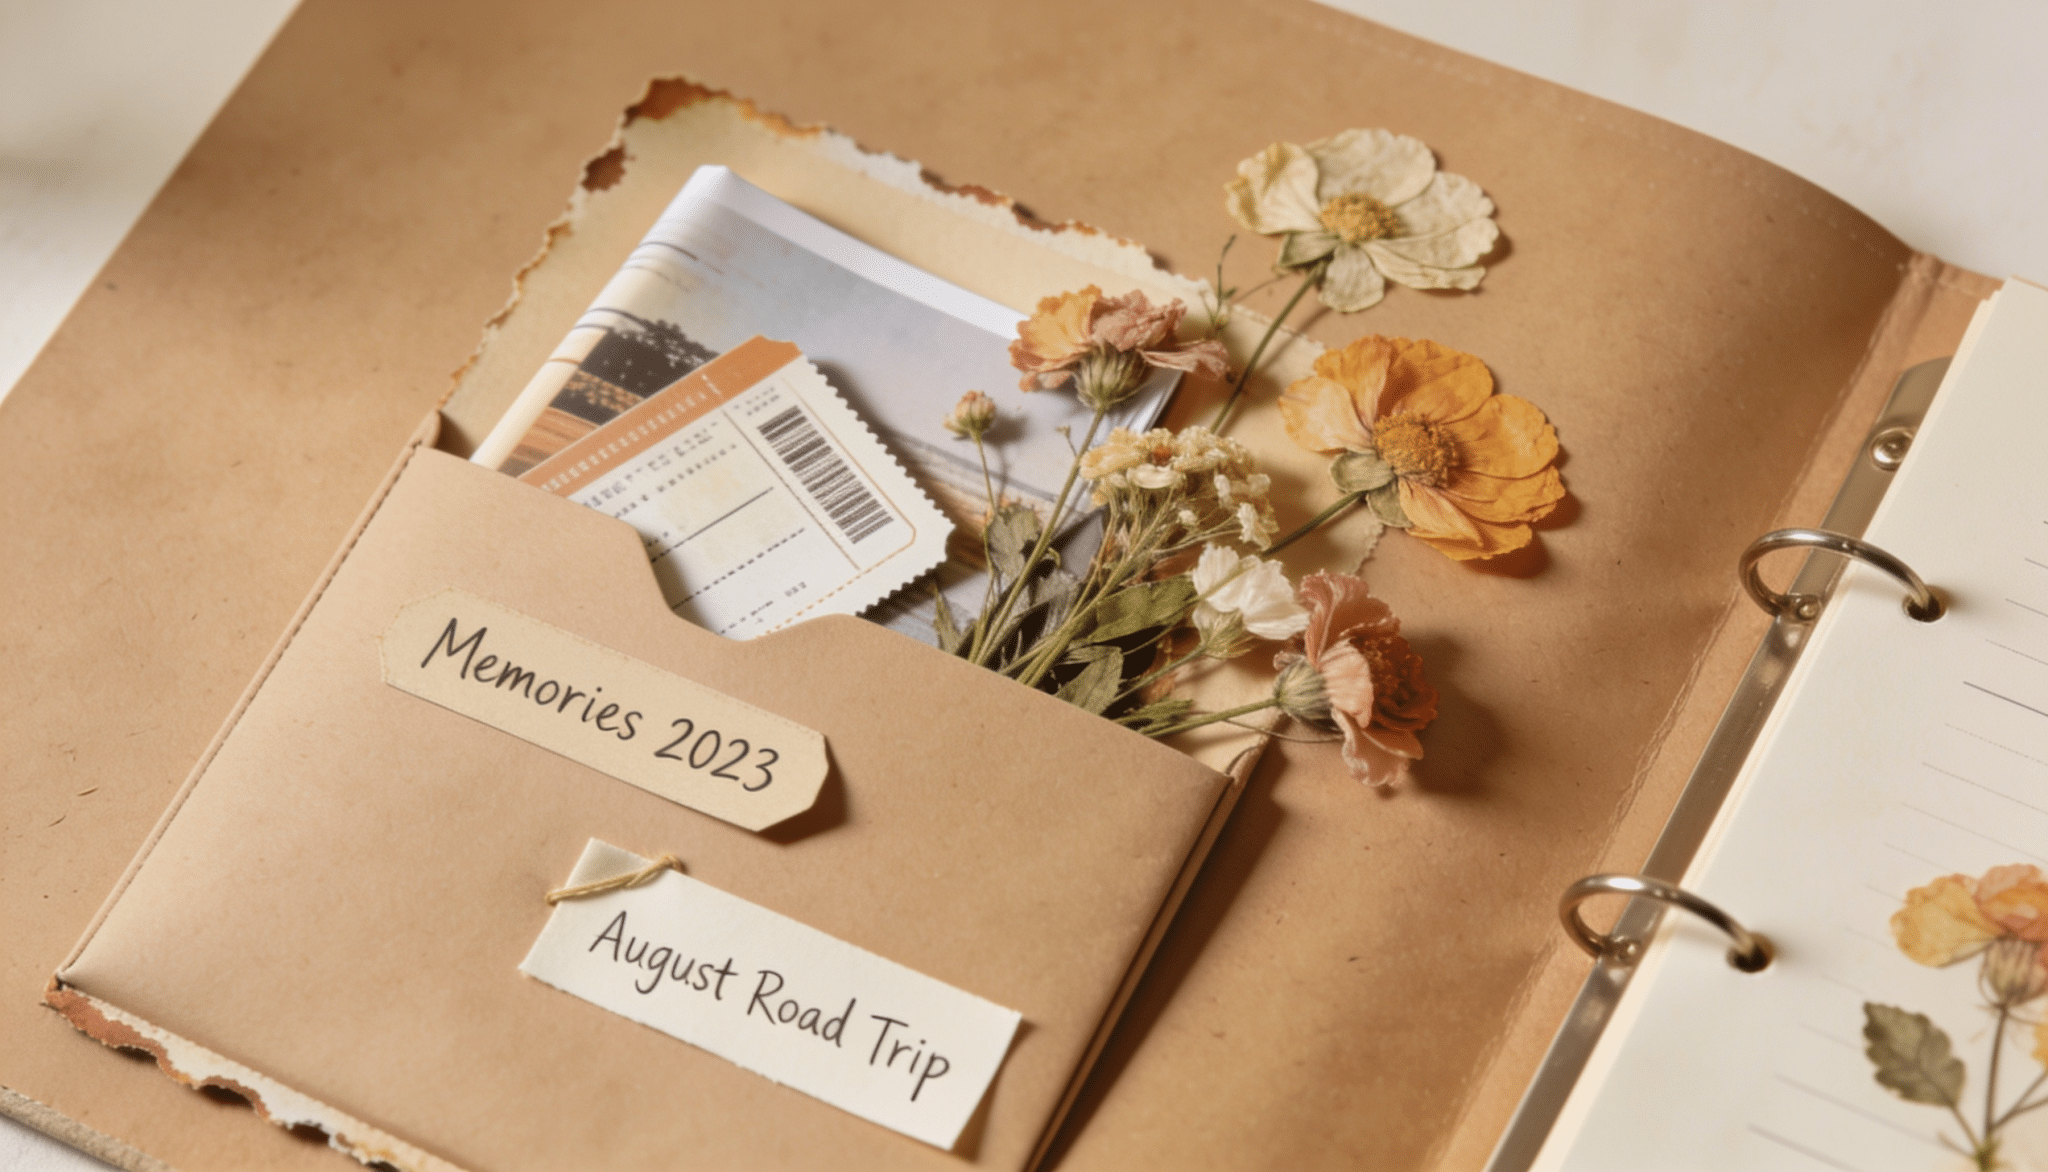
A small pocket – made from folded cardstock or a readymade pocket page holds the physical items that don’t glue flat.
Ticket stubs, folded postcards, a pressed flower, a small note passed in class – these are often the most handled pieces in an album. Build at least one pocket section into any album where you’re working with mementos.
29. Fabric and Ribbon Accents
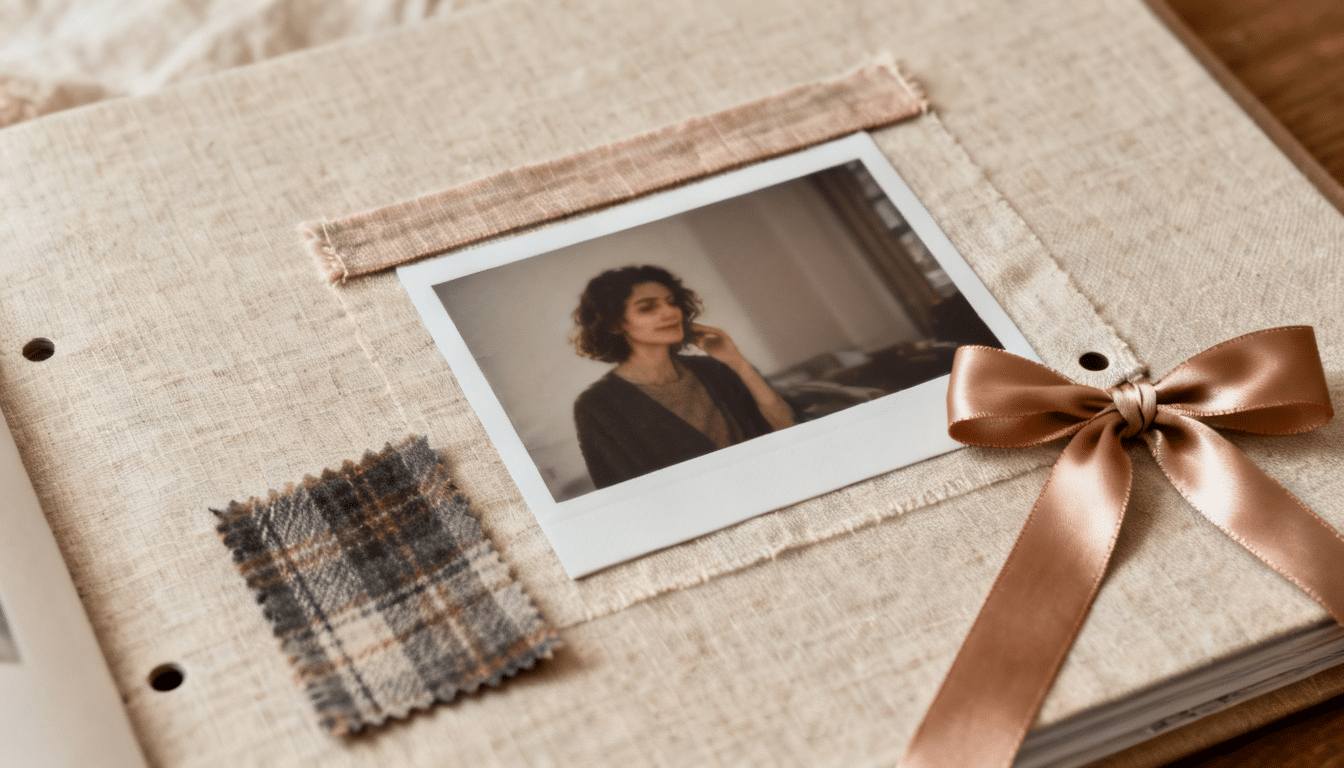
Fabric has a warmth that paper can’t fully replicate and it doesn’t take much to feel the difference.
Violet Gordon’s background in sewing and textile crafts showed her early that even a small strip of fabric along a page border, or a ribbon tied through a punched hole, adds a tactile quality that makes a page worth touching, not just looking at.
Scraps from a meaningful piece of clothing – a baby onesie, a wedding sash, a worn flannel shirt, carry that memory in a way no printed element can.
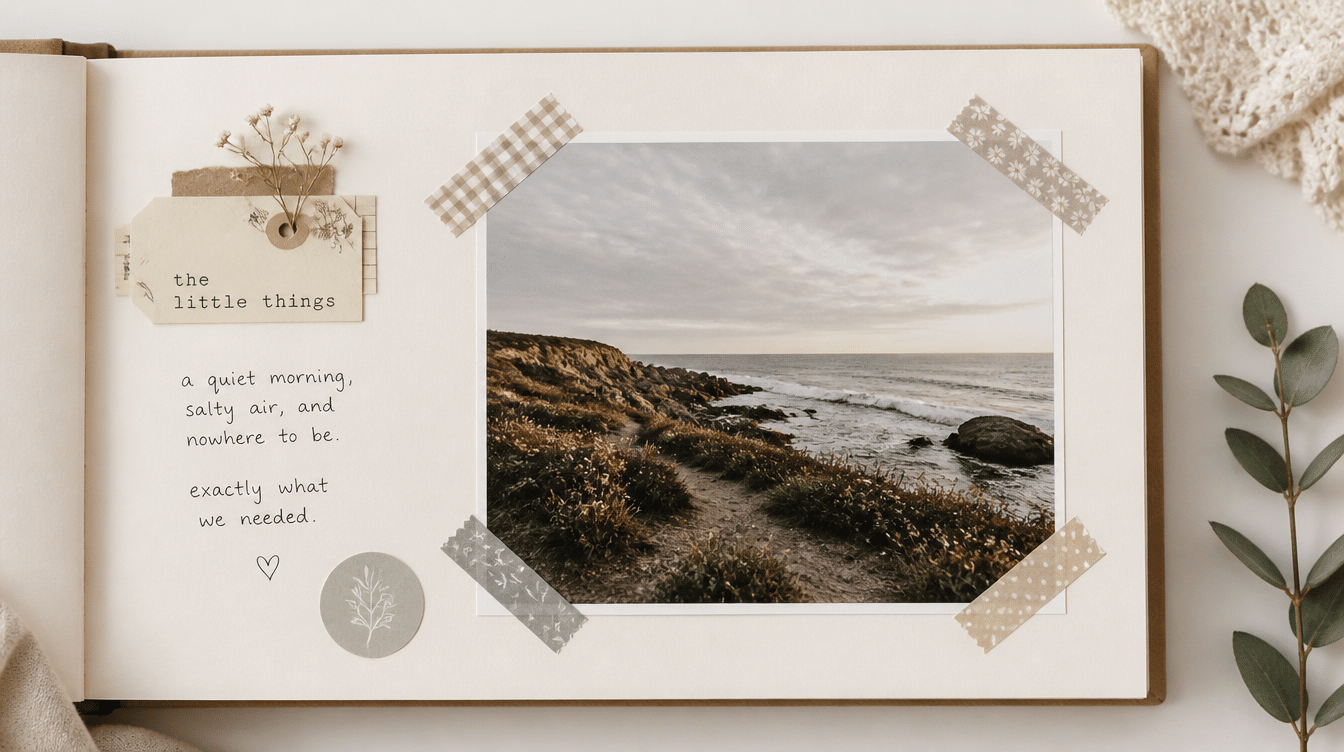
30. Handwritten Memory Notes

A printed caption and a handwritten one are not the same thing.
Handwriting carries personality – the pressure of the pen, the way letters slant, the crossed-out word replaced by a better one. Those details tell their own quiet story alongside the photo.
Write the way you talk, not the way you think you should write. Generic captions fade. Personal ones stay with you.
31. Decorative Tape, Stamps, and Die Cuts
Washi tape, rubber stamps, and die cuts are finishing tools, not starting points. Used with restraint, they add detail and personality to a layout without pulling attention away from the photos or journaling.
A single stamped border, a few die-cut shapes echoing the theme, or strips of tape holding down a photo corner is usually all a page needs.
What Paper is Best for Scrapbooking?
You do not need a fully stocked craft room to start scrapbooking, but paper quality matters if you want your pages to last. Acid-free paper helps protect photos from yellowing, fading, and damage over time.
| Term | What It Means | Why It Matters |
|---|---|---|
| Acid-Free | Paper with a neutral or alkaline pH | Helps prevent paper from yellowing and becoming brittle over time |
| Lignin-Free | Paper made without lignin, a wood compound | Lignin can break down into acid over time, so removing it helps pages last longer |
| Archival Quality | Paper made for long-term preservation | Safe for direct contact with photographs and printed materials |
| Buffered Paper | Paper with an alkaline reserve | Adds extra protection against acids from nearby materials |
| Photo-Safe | Paper tested to avoid chemical reactions with photos | Helps prevent color fading and surface damage on printed images |
For an album you want to keep for 20, 30, or even 50 years, acid-free cardstock is the one supply worth spending more on.
Common Scrapbook Layout Mistakes and How to Fix Them
Small layout mistakes can make a scrapbook page feel crowded or flat. These quick fixes help your photos, journaling, and details work better together.
|
Problem: Trying to fit every photo from an event onto one page. |
| Problem: Choosing embellishments before placing photos. Fix: Place photos first, then build the rest of the layout around them. |
| Problem: Making every element coordinate too perfectly. Fix: Add one small contrast, such as a different texture, unexpected color, or slightly oversized detail. |
| Problem: Using too many fonts on one page. Fix: Stick to two fonts so the page stays easy to read and visually balanced |
Final Thoughts
The best scrapbook pages are the ones that reflect the moments, people, and stories that matter most to you. A thoughtful mix of themes, layouts, and creative details can help turn everyday memories into something worth revisiting.
Start with the ideas that fit your photos and build from there. Small personal touches often have the biggest impact, making each page feel uniquely yours.
As you work on future albums, don’t be afraid to try a new approach or combine ideas from different sections.
Scrapbooking is a creative process, and the layouts that feel most meaningful are often the ones that reflect your own style and memories.
Frequently Asked Questions
What Size Album Should a Beginner Start With?
A 12×12 album is the most common starting point. Smaller 8×8 albums work well for single-event projects.
Can I Mix Digital and Physical Elements on The Same Page?
Yes – printing digital backgrounds or journaling cards and combining them with physical embellishments is a widely used approach.
How Do I Keep My Pages from Looking Dated in a Few Years?
Avoid trend-heavy design choices and lean toward simple layouts. The photos and handwriting will always feel personal.
Is It Necessary to Follow a Specific Page Order in An Album?
Not at all, some albums work better organized by theme or person rather than strict chronology.
How Do I Scrapbook if I Don’t Consider Myself Creative?
Start by copying a layout you like and swapping in your own photos and colors. Most scrapbookers built their style by working from references first.