Running out of gift bags always seems to happen when the last gift is the hardest one to wrap. Round, soft, stacked, or oddly shaped presents can make a regular sheet of wrapping paper surprisingly frustrating.
I’ve made these quick paper bags more than once when the gift-bag stash was empty, and I’ve learned that the measuring and bottom folds matter far more than making every crease look perfect.
With wrapping paper, tape, scissors, and a few careful folds, you can turn this simple paper craft into a useful gift bag without a pattern or another trip to the craft store.
Here’s how to size, fold, reinforce, and finish it.
Before You Start: Choosing and Measuring Your Paper
A little prep before the first fold saves a lot of frustration later, especially when it comes to picking the right paper and knowing how much to cut. I used to cut the paper by eye, and more than one bag ended up too narrow at the sides or without enough paper left to form a sturdy base.
|
Wrapping Paper Type |
How It Folds |
Best Use |
|---|---|---|
|
Matte paper |
Usually creases easily and holds folds well |
Bags with crisp sides and structured bases |
|
Glossy paper |
Can spring back at folds or crack if heavily coated |
Simple lightweight gift bags |
|
Foil paper |
Can crease sharply but may tear around tape or punched holes |
Decorative bags for lightweight gifts |
|
Kraft or heavy specialty paper |
Holds its shape better than thinner wrapping paper |
Larger bags or moderately heavier gifts |
The amount of wrapping paper depends on the size of your gift. Measure the width, depth, and height of the item before cutting.
For width: add the gift’s width and depth together, then include 2 to 3 extra inches for overlapping the side seam.
For height: take the gift’s height and add 4 to 5 inches. This extra paper is needed to fold the bottom of the bag and create a neat top edge.
As a general rule, a standard 30-inch-wide roll of wrapping paper is enough to make 3 to 5 small or medium gift bags, though larger bags or thicker paper will reduce that number.
Simple Steps to Make a Bag Out of Wrapping Paper
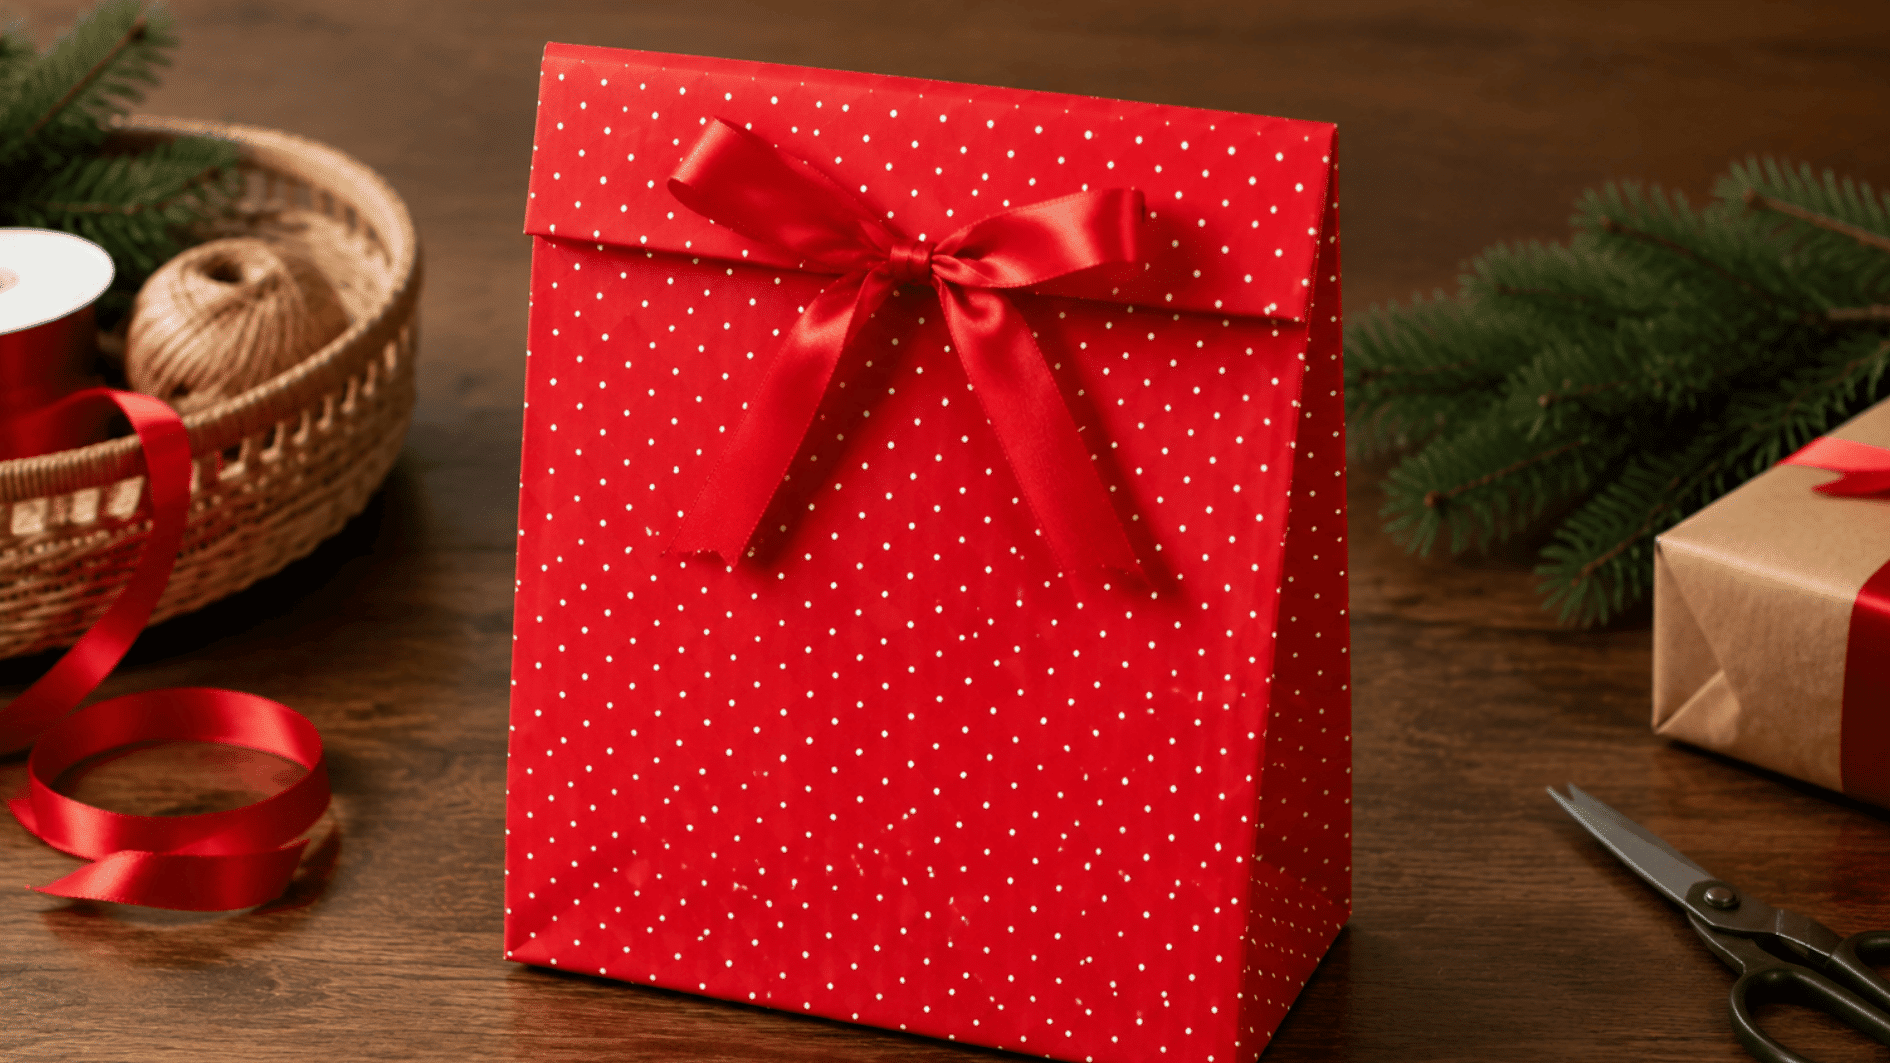
Let’s walk through it step by step, from cutting the paper to sealing the finished bag with a ribbon. Each step builds directly on the one before it, so it’s worth following them in order rather than skipping ahead.
Supplies You’ll Need First
These five items are all you need to build and close the bag:
- A sheet of wrapping paper
- Scissors
- Tape (regular or double-sided)
- A ribbon or piece of string
- A hole punch
Step 1: Decide the Size of Your Bag
Grab the gift you’re planning to tuck into this bag and take a rough look at how wide, tall, and deep it is.
You’re sizing up the bag itself here, not wrapping the gift directly.
Give yourself a bit of breathing room on each measurement, since a tight fit now just means fighting with the paper later.
About an inch of extra slack on the width and depth, and two to three inches on the height, is usually plenty, enough for a comfortable fit without the bag ending up looking baggy.
Step 2: Cut a Rectangle to Those Measurements
Now cut one rectangle of paper large enough to wrap around that width and depth, leaving a few extra inches of height for the top flap. Try to keep the edges straight as you cut.
Try to keep the edges straight as you cut. My sewing and quilting projects taught me early that a crooked first cut tends to show up again in every fold that follows.
Step 3: Fold the Side Edges Toward the Center
Take the left and right edges of the paper and fold them in toward the middle, letting them overlap by two or three inches.
If your paper has a one-direction pattern, take a second to check it’s facing the right way before you crease anything.
It’s worth setting the gift back on top briefly here too, just to double-check the tube will actually be wide enough once both edges meet.
Step 4: Tape Down the Overlapping Seam
Run a strip of tape down the middle where the edges overlap, and press it in firmly so it actually sticks rather than just resting on the surface.
You now have a paper tube, open at both ends. That’s the starting point for every gift bag out there, and it’s worth taking a second to confirm the seam feels secure before moving to the base, since a loose seam here tends to work itself open once the base is added and the bag takes on some weight.
Step 5: Fold and Shape the Bottom Into a Diamond
Fold the bottom of the tube up about two or three inches, then open that folded section back up and press it flat until it settles into a diamond shape.
This is the step that gives the bag its base, so take a moment to smooth out the edges and press firmly so it actually stays flat.
I usually run a fingernail or the flat edge of a ruler along these creases. As with other paper-folding projects, firm folds make it much easier to keep the finished shape neat.
Step 6: Fold the Points In and Tape the Base
Fold the top and bottom points of the diamond in toward the center and tape them down to seal the base. Stand the bag up and give it a check. It should hold its shape on its own before you move on.
If the base still feels a little wobbly, one more strip of tape across the center seam gives it extra support without changing how the bottom looks from the outside.
Step 7: Fold the Top Flap Down
Once the gift is inside, closing the bag properly is what makes it look finished instead of just folded shut. Fold the top edge of the bag down toward the front.
One fold is enough for a simple, clean close, and there’s no need to crease it too sharply if you’re planning to punch holes through it next.
A fold of about two inches usually gives enough flap width to punch holes into without them sitting too close to the edge.
Step 8: Punch Holes and Tie a Ribbon
Punch two holes through the folded flap, a few inches apart and close enough to the fold that the paper won’t tear.
Punching them slightly farther from the flap’s edge, rather than right at it, also helps the holes hold up once the ribbon is pulled tight. Thread a ribbon through and tie a bow at the front.
For a carry handle instead, use a longer ribbon and knot each end, best for lighter gifts since heavier ones can tear through the punch holes.
A double knot on each side holds up better than a single one if the bag will be carried any distance.
Bags for Different Gift Shapes and Sizes
Different gift shapes need slightly different folds, so one bag size will not work for everything. A few small adjustments can help the paper sit better and keep the finished bag looking neat.
|
Gift Shape or Size |
Best Adjustment |
Why It Helps |
|---|---|---|
|
Round or oddly shaped |
Add a little extra width |
Gives mugs, small plants, and curved items more breathing room |
|
Flat gifts |
Make the bag narrower from front to back |
Prevents books and frames from sitting inside an oversized, baggy shape |
|
Tall and narrow gifts |
Add height, reduce width, and keep the base fold smaller |
Suits wine bottles and vases without making the bottom look bulky |
|
Stacked or multiple gifts |
Use a wider base and more overall space |
Gives several small items enough room to sit together securely |
|
Larger or heavier gifts |
Reinforce the paper and base seam |
Helps the bag support more weight without tearing or splitting |
Ways to Decorate a Wrapping Paper Gift Bag
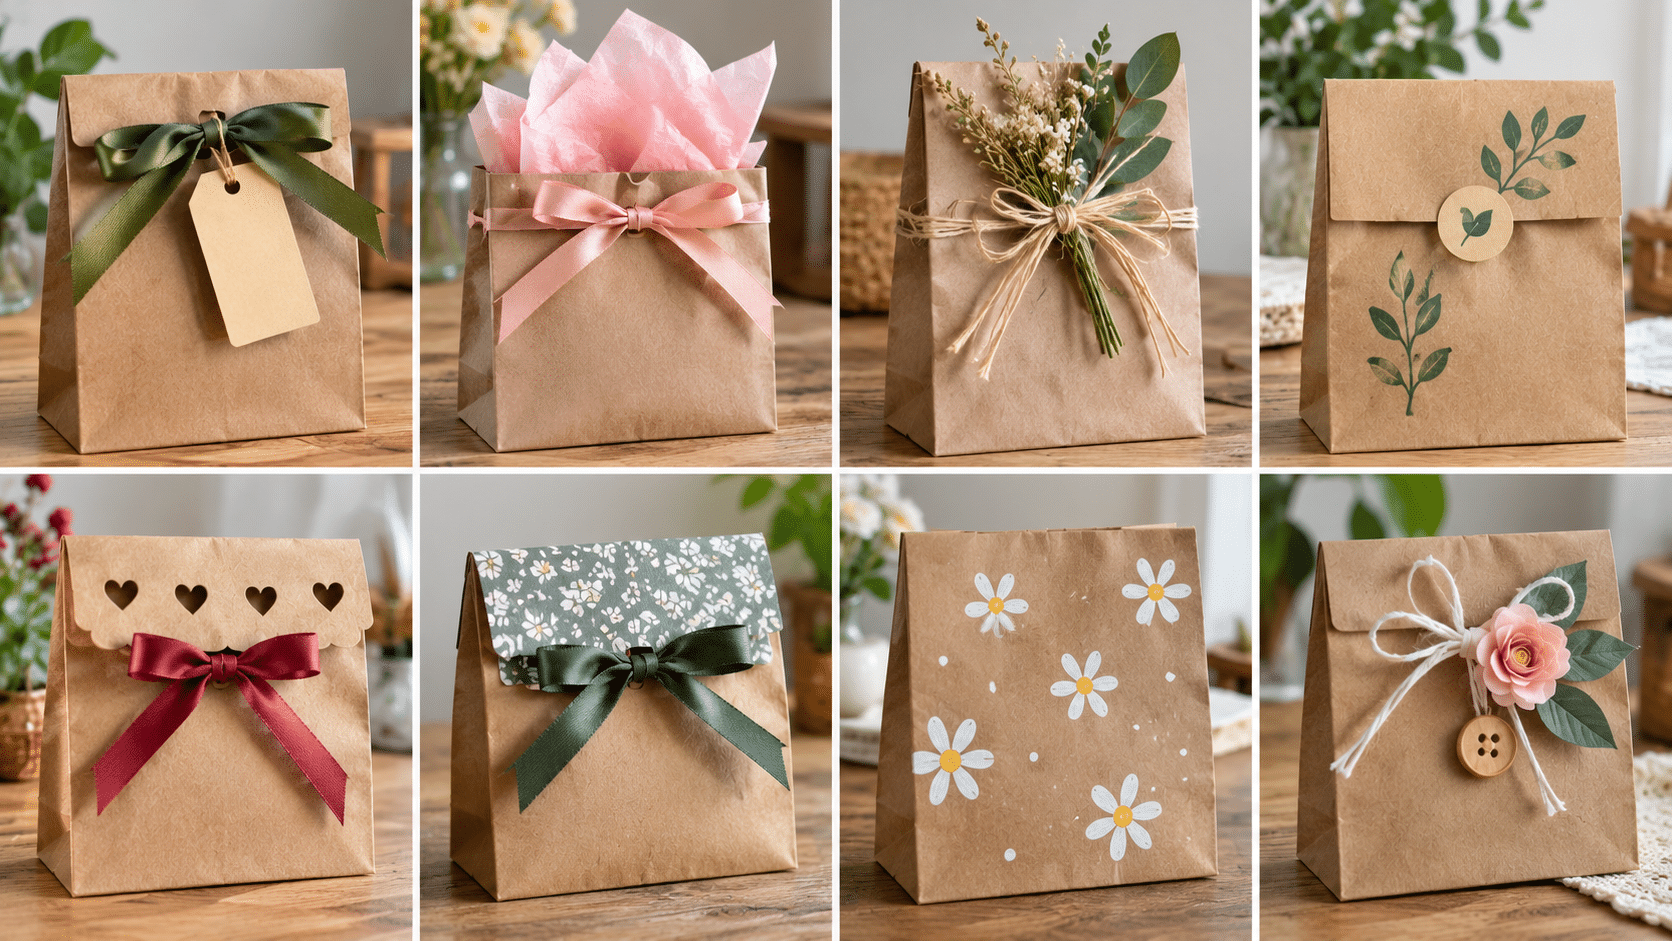
Once the bag is built, a few finishing touches can take it from simple to intentionally made. This is usually the part I enjoy most because leftover ribbon, buttons, paper scraps, and small craft supplies that are too good to throw away finally have somewhere to go.
- Add a handwritten tag: Tie a small kraft-paper or cardstock tag into the ribbon and write the recipient’s name or a short message by hand. You can also coordinate the tag with a handmade greeting card for a more personal gift presentation.
- Layer tissue paper inside: Place one or two sheets of tissue paper around the gift before closing the bag. Let a little tissue peek above the opening to add volume and hide the contents without overfilling the bag.
- Swap ribbon for twine or raffia: Natural twine, jute, or raffia can give the bag a more relaxed, handmade look. Pair it with a small sprig of dried flowers, eucalyptus, rosemary, or another lightweight decoration.
- Use a rubber stamp or sticker: Add a small stamped design, seal, or decorative sticker to the front flap. Choose a motif that matches the occasion, such as stars for birthdays, leaves for fall gifts, or snowflakes for holiday wrapping.
- Try decorative punched holes: Instead of making simple round holes for the ribbon, use a small craft punch in a heart, star, flower, or other shape. The cutout becomes part of the design even after you thread the ribbon through.
- Add a contrasting paper flap: Glue or tape a small piece of patterned or colored paper over the closing flap. This works well when the main bag is made from plain kraft paper or a simple solid color.
- Decorate with simple drawings: Use a paint pen, marker, or colored pencil to add dots, stripes, leaves, initials, or small illustrations. Keeping the design simple helps the bag feel handmade without looking overly busy.
- Finish with a small embellishment: A paper flower, miniature bow, wooden button, or lightweight charm can add one final detail near the ribbon or tag. Keep decorations small so they do not weigh down or tear the paper
Common Wrapping Paper Bag Problems and How to Fix Them
Even careful folds can go slightly wrong, especially when the paper is thin or the gift has an awkward shape. Most issues are easy to fix before the bag is finished
Even careful folds can go slightly wrong, especially with thin paper or awkwardly shaped gifts. Most problems are easy to correct before the bag is fully finished.
Problem: Bag will not stand upright
Fix: Reopen the bottom and flatten the diamond folds evenly.
Problem: Side seam keeps opening
Fix: Add another strip of tape along the full overlapping seam.
Problem: Paper tears near ribbon holes
Fix: Reinforce the inside with clear tape before punching new holes.
Problem: Gift feels too tight
Fix: Remake the bag with a little more width and depth.
Problem: Base starts separating
Fix: Add extra tape and a small cardstock insert for support.
Problem: Top looks bulky
Fix: Trim excess paper before folding and closing the top flap.
Conclusion
Making a gift bag from wrapping paper gets much easier once you’ve made one or two. The part I’d pay the most attention to is the base: neat folds, enough overlap, and an extra strip of tape can make the difference between a bag that stands properly and one that opens underneath.
Keep thinner paper for lightweight gifts and bring out kraft or heavier paper when you need more structure.
The next time you’re short a gift bag, save the craft-store trip and give this folding method a try with the wrapping paper you already have.