Paper lanterns are a fun craft project that can add color and interest to parties, holidays, and everyday spaces. They are easy to make and require only a few basic supplies.
Many people enjoy making DIY paper lanterns because the process is simple enough for beginners yet offers plenty of room for experimentation.
From folded paper designs to sturdy paper mache lanterns, there are many ways to create lanterns that suit different occasions and skill levels.
In this post, I’ll share practical ideas, step-by-step instructions, and useful tips to help you start making paper lantern DIY projects at home with confidence.
What is a Paper Lantern?
A paper lantern is a decorative item made from paper that is shaped, folded, or attached to a frame. It is often used for festivals, parties, and special occasions.
Many people make diy paper lanterns using basic supplies such as paper, scissors, and glue. The projects are suitable for a wide range of skill levels.
Paper lanterns can be customized with different colors, patterns, and decorative elements. This flexibility makes them suitable for a variety of celebrations and craft projects.
Types of DIY Paper Lanterns You Can Make
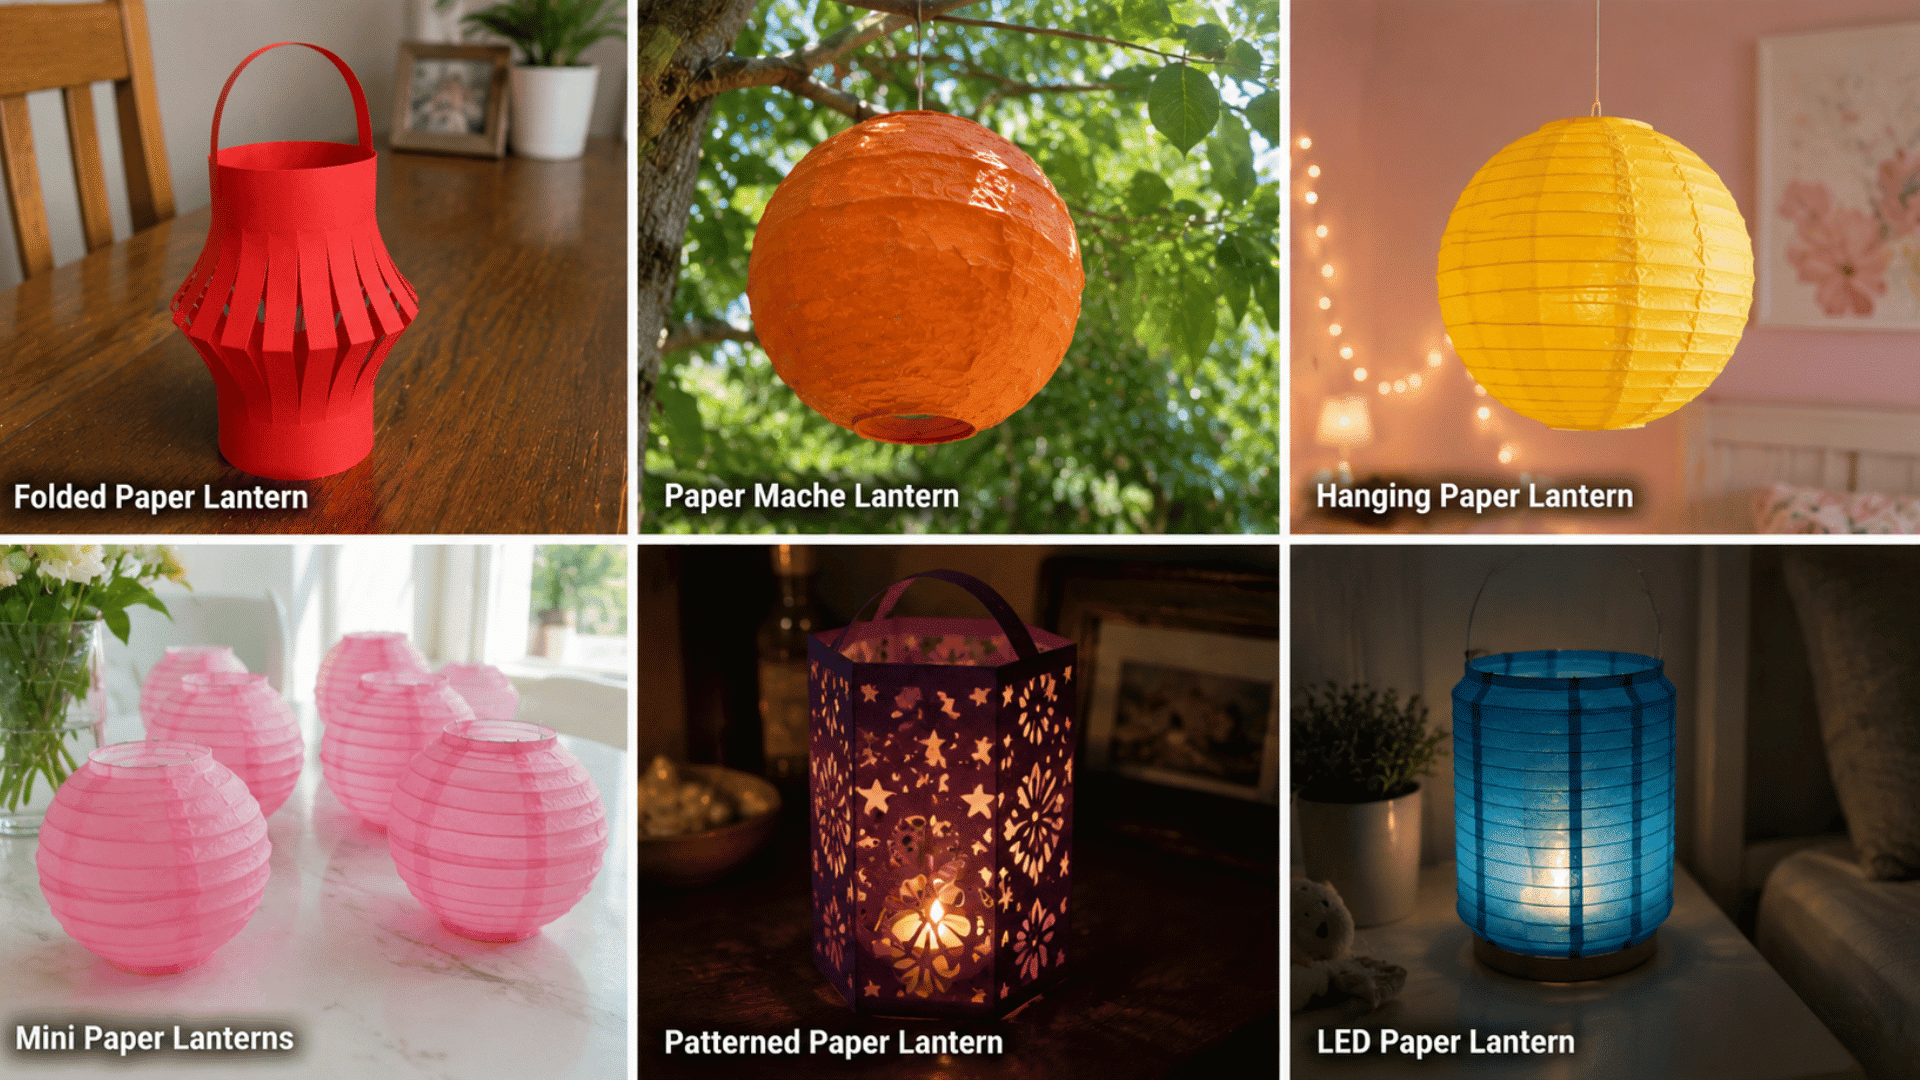
Paper lanterns come in a variety of styles, from simple folded designs to more detailed handmade creations.
| Type of Lantern | Description | Best For |
|---|---|---|
| Folded Paper Lanterns | Made by folding and cutting paper. | Beginners |
| Paper Mache Lanterns | Built with paper strips and paste. | Festivals |
| Hanging Paper Lanterns | Designed to hang from strings. | Parties |
| Mini Paper Lanterns | Small and easy to make. | Table décor |
| Patterned Paper Lanterns | Feature cut-out or printed designs. | Themed events |
| LED Paper Lanterns | Used with battery-operated lights. | Indoor displays |
Choosing the right lantern style is the first step. The next section explains how to turn simple materials into a finished paper lantern.
How to Make DIY Paper Lanterns: Step-by-Step Guide
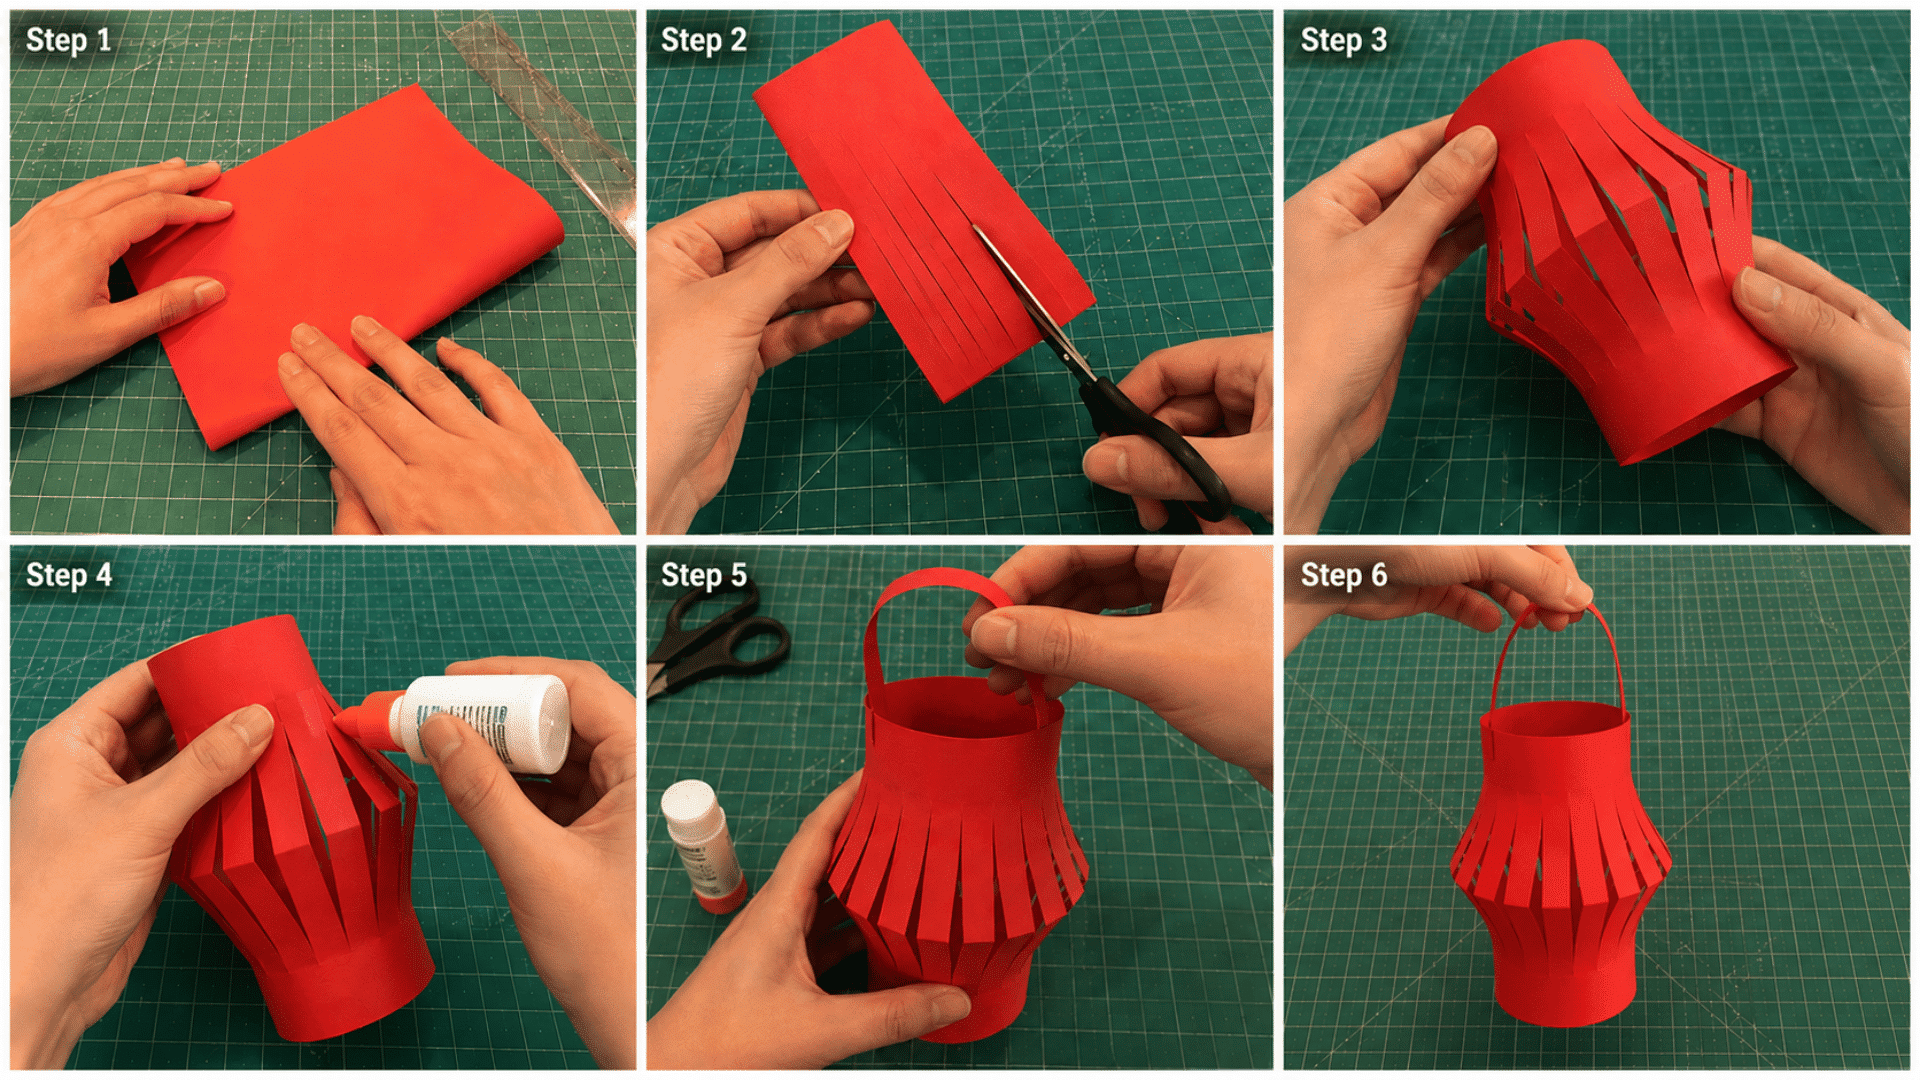
Making paper lanterns requires only a few basic supplies and a little time. Follow the steps below to create a simple paper lantern that you can customize for different occasions.
Step 1: Fold the Paper
Fold a sheet of colored paper in half lengthwise. This creates the base structure for your lantern.
- Place the paper on a flat surface.
- Fold it evenly from one long side to the other.
- Press along the fold to create a sharp crease.
My Tip: I like to run a ruler along the fold line for a cleaner crease and more even cuts later.
Step 2: Mark and Cut the Slits
The slits create the lantern’s signature shape when the paper is opened and rolled.
- Draw evenly spaced lines from the folded edge.
- Leave about an inch uncut at the top.
- Cut along each marked line carefully.
My Tip: Keep the spacing between slits consistent to help the lantern expand evenly.
Step 3: Form the Lantern Shape
Once the cuts are complete, the paper can be shaped into a lantern.
- Open the folded paper.
- Curl it into a cylinder.
- Align the short edges together.
My Tip: Test the shape before securing it to make sure the slits spread evenly.
Step 4: Secure the Edges
Joining the edges holds the lantern together and gives it structure.
- Apply glue or tape along one edge.
- Press the opposite edge firmly into place.
- Allow the adhesive to set.
My Tip: A small amount of glue is usually enough and helps prevent wrinkling.
Step 5: Add a Handle
A handle makes the lantern easier to carry or hang.
- Cut a thin strip of paper.
- Attach each end inside the lantern.
- Check that it is securely fastened.
My Tip: Use the same paper color for a uniform look or a contrasting color for extra detail.
Step 6: Display Your Lantern
Your paper lantern is now ready to use for decorations or celebrations.
- Place it on a table display.
- Hang it using string or ribbon.
- Pair it with other lanterns for a grouped display.
My Tip: Battery-operated LED lights are a safer option if you want to add light inside the lantern.
DIY Paper Lantern Design Ideas
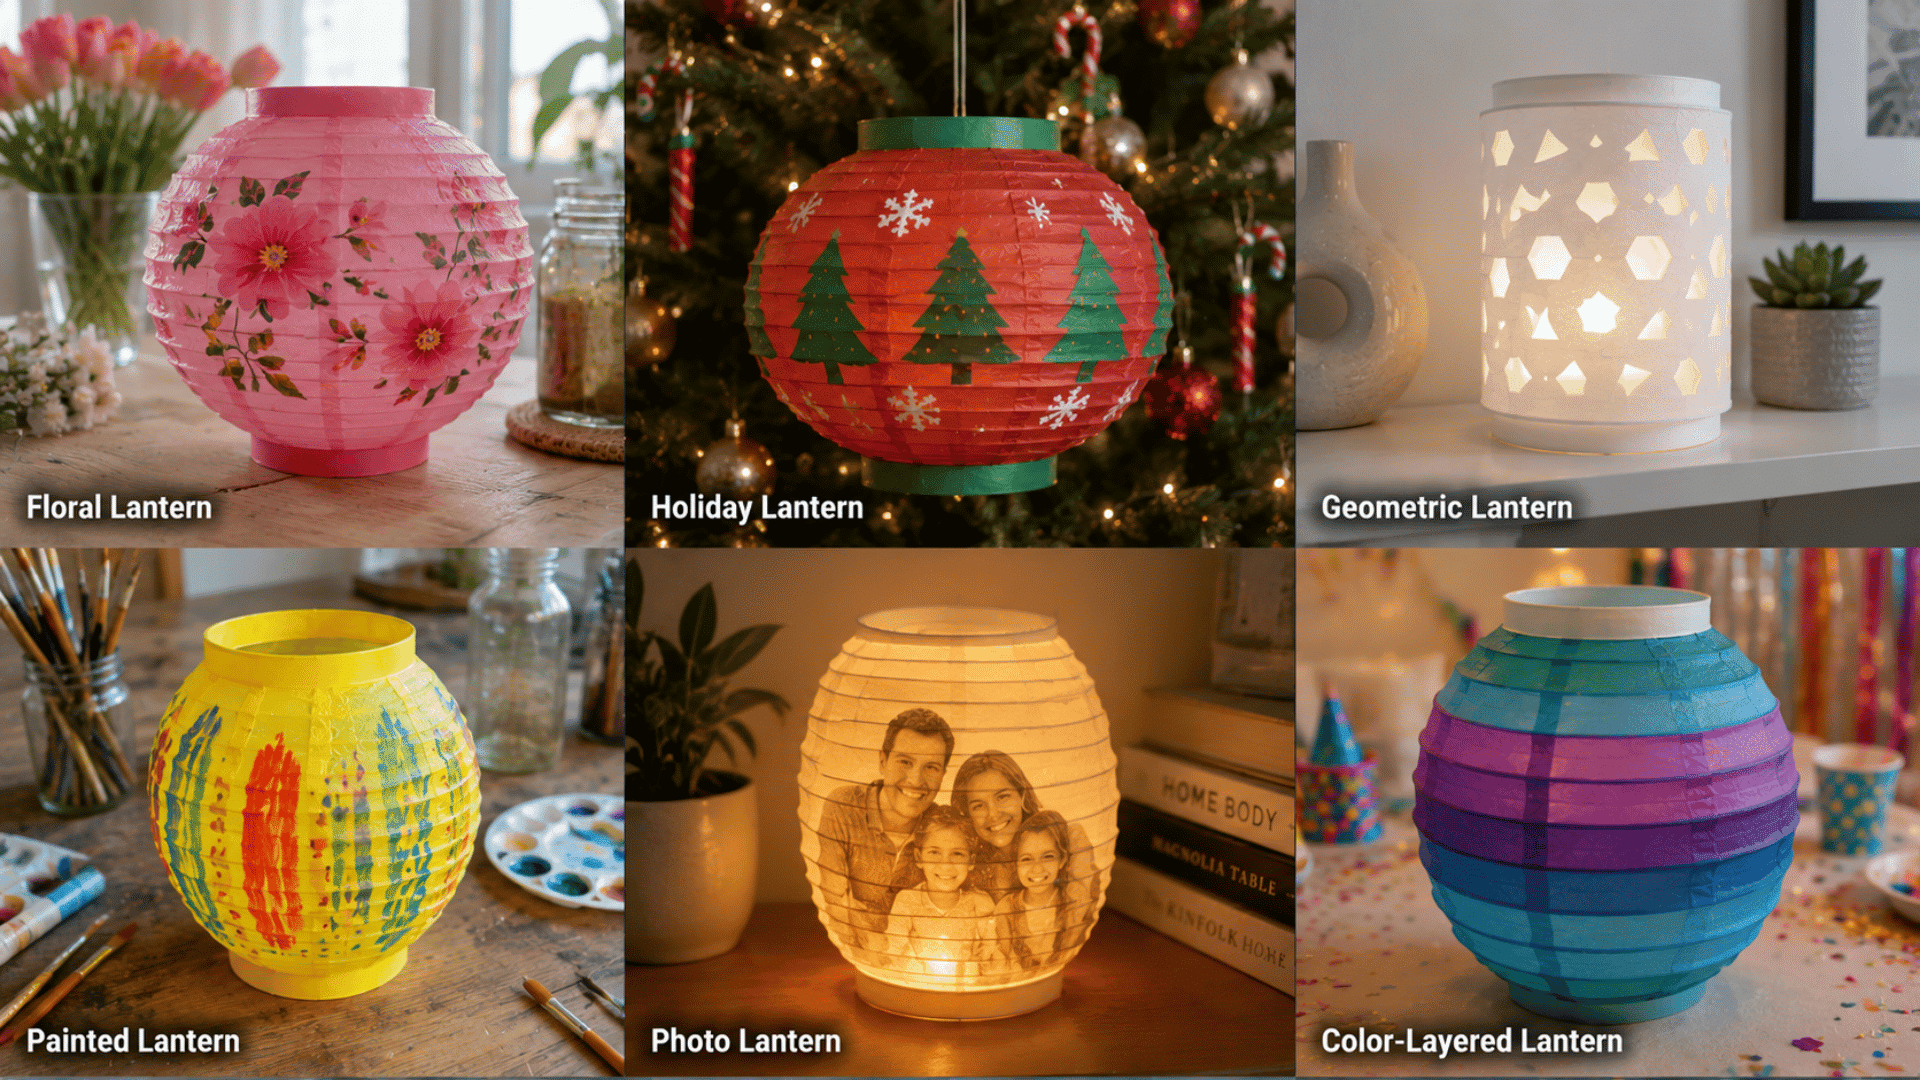
A few design changes can give a paper lantern a completely different look. Here are some ideas to consider for your next project.
| Design Idea | Description | Suitable For |
|---|---|---|
| Floral Lanterns | Decorated with flower patterns. | Spring events |
| Holiday Lanterns | Based on seasonal themes. | Festivals |
| Geometric Lanterns | Feature shape cutouts. | Modern spaces |
| Painted Lanterns | Decorated with hand-painted details. | Custom projects |
| Photo Lanterns | Feature printed photos or images. | Gifts and displays |
| Color-Layered Lanterns | Made with multiple paper colors. | Parties |
Another approach involves using layered paper and paste to create a sturdier lantern structure.
How to Make Paper Mache Lanterns?
Papermache lanterns are a sturdier alternative to traditional paper lanterns. They use layers of paper and paste to create a firm structure that can be decorated in many ways.
Materials Required: Balloon, newspaper strips, paper mache paste or glue mixture, paint, and a paintbrush.
- Step 1: Inflate a balloon and secure it on a stable surface before starting the project.
- Step 2: Dip newspaper strips into the paste and place them evenly over the balloon.
- Step 3: Add several overlapping layers of paper while leaving a small opening at the bottom.
- Step 4: Set the balloon aside and allow the paper layers to dry completely.
- Step 5: Pop the balloon carefully and remove any remaining pieces from the lantern.
- Step 6: Paint the surface and add patterns, colors, or other decorative details.
Paper lantern projects offer plenty of opportunities to experiment with different styles, colors, and decorative details.
Conclusion
DIY paper lanterns are a simple craft that can be adapted for many occasions. They require only a few supplies and basic crafting skills.
From simple folded designs to customized decorative projects, there are plenty of ways to experiment with shapes, colors, and patterns.
I find that starting with a basic lantern makes it easier to learn the process before trying more detailed designs.
With a little time and practice, paper lanterns diy projects can become a fun way to create decorations for celebrations, seasonal events, or everyday displays.
Frequently Asked Questions
How Long Does It Take to Make a Paper Lantern?
A simple paper lantern can usually be completed in 15 to 30 minutes, depending on the design and level of detail. More complex projects may require additional time for decorating.
Can DIY Paper Lanterns Be Used Outdoors?
DIY paper lanterns can be displayed outdoors for short periods in dry weather. However, paper can be damaged by moisture, strong winds, and prolonged sun exposure.
Can Paper Lanterns Be Made with Recycled Materials?
Yes, many paper lantern projects can be made using recycled paper, newspapers, paper bags, or leftover craft supplies. This can help reduce waste while keeping project costs low.
Can Paper Lanterns Be Reused?
Yes, paper lanterns can be reused if they are stored carefully after use. Keeping them in a dry location and protecting them from crushing can help maintain their shape.