Finished calligraphy can look so polished that starting it feels harder than it really is. Smooth strokes, balanced letters, and decorative flourishes can make the whole process seem difficult when you are looking at it for the first time.
Like many beginner-friendly crafts, calligraphy becomes much easier when you break it into small, manageable steps. A few basic tools and simple exercises are enough to help you understand how the strokes work.
If you have been wondering how to do calligraphy, this guide will walk you through the basics, from choosing supplies to practicing strokes, forming letters, and building confidence one page at a time.
How Do Calligraphy Strokes Work?
Calligraphy gets much of its look from the contrast between thin and thick strokes. The way you create that contrast depends on the pen and style you are using.
With brush pens and pointed pens, upstrokes are usually light while downstrokes use more pressure. Moving slowly helps you control the change in line width without making the stroke feel stiff.
Broad-edge styles work differently. They rely more on the angle of the nib than pressure, so keeping that angle steady becomes important.
These repeated movements are what give calligraphy its controlled look. Once you can recognize them, the practice exercises ahead become much easier to follow.
Calligraphy Styles for Beginners
Each calligraphy style creates its look differently. Comparing a few beginner options can help you find the technique and finished look that suit you best.
|
Style |
How It Creates Thick and Thin Lines |
Beginner Fit |
|---|---|---|
|
Modern or Brush Calligraphy |
Uses changes in pressure |
Easy to start and widely practiced |
|
Italic Calligraphy |
Uses a broad nib at a steady angle |
Structured and good for learning control |
|
Copperplate |
Uses a flexible pointed nib and pressure |
Needs more control and patience |
|
Blackletter |
Uses a broad nib and fixed angles |
More focused on shape and precision |
How to Learn Calligraphy As a Beginner: Step-by-Step
Learning calligraphy becomes much easier when each skill builds on the one before it. Start with your setup, then work on basic movements before forming letters and words.
Before you begin: The steps below focus mainly on modern brush and pointed-pen calligraphy, where pressure creates thin and thick strokes. If you choose Italic or Blackletter with a broad-edge nib, you will work more with nib angle than pressure.
Basic Supplies You Need
- Calligraphy pen: Match the pen type to the style you want to practice.
- Smooth paper: Choose paper that lets the nib or brush move without catching.
- Ink: Use bottled ink if you are working with a dip pen.
- Pencil: Draw guidelines or practice movements before using ink.
- Ruler: Keep baselines and letter heights straight and even.
- Practice sheets: Use them for slant, spacing, height, and stroke control.
Step 1: Set Up Your Paper and Pen
A comfortable setup gives your hand more room to move and helps you avoid unnecessary tension. Small changes in paper angle or grip can make practice feel much easier.
What to do:
- Turn the paper slightly so your hand can move naturally.
- Leave enough space for your writing arm to move freely.
- Hold the pen with a light and relaxed grip.
- Keep your guidelines visible while you practice.
- Test the pen with a few marks before you begin.
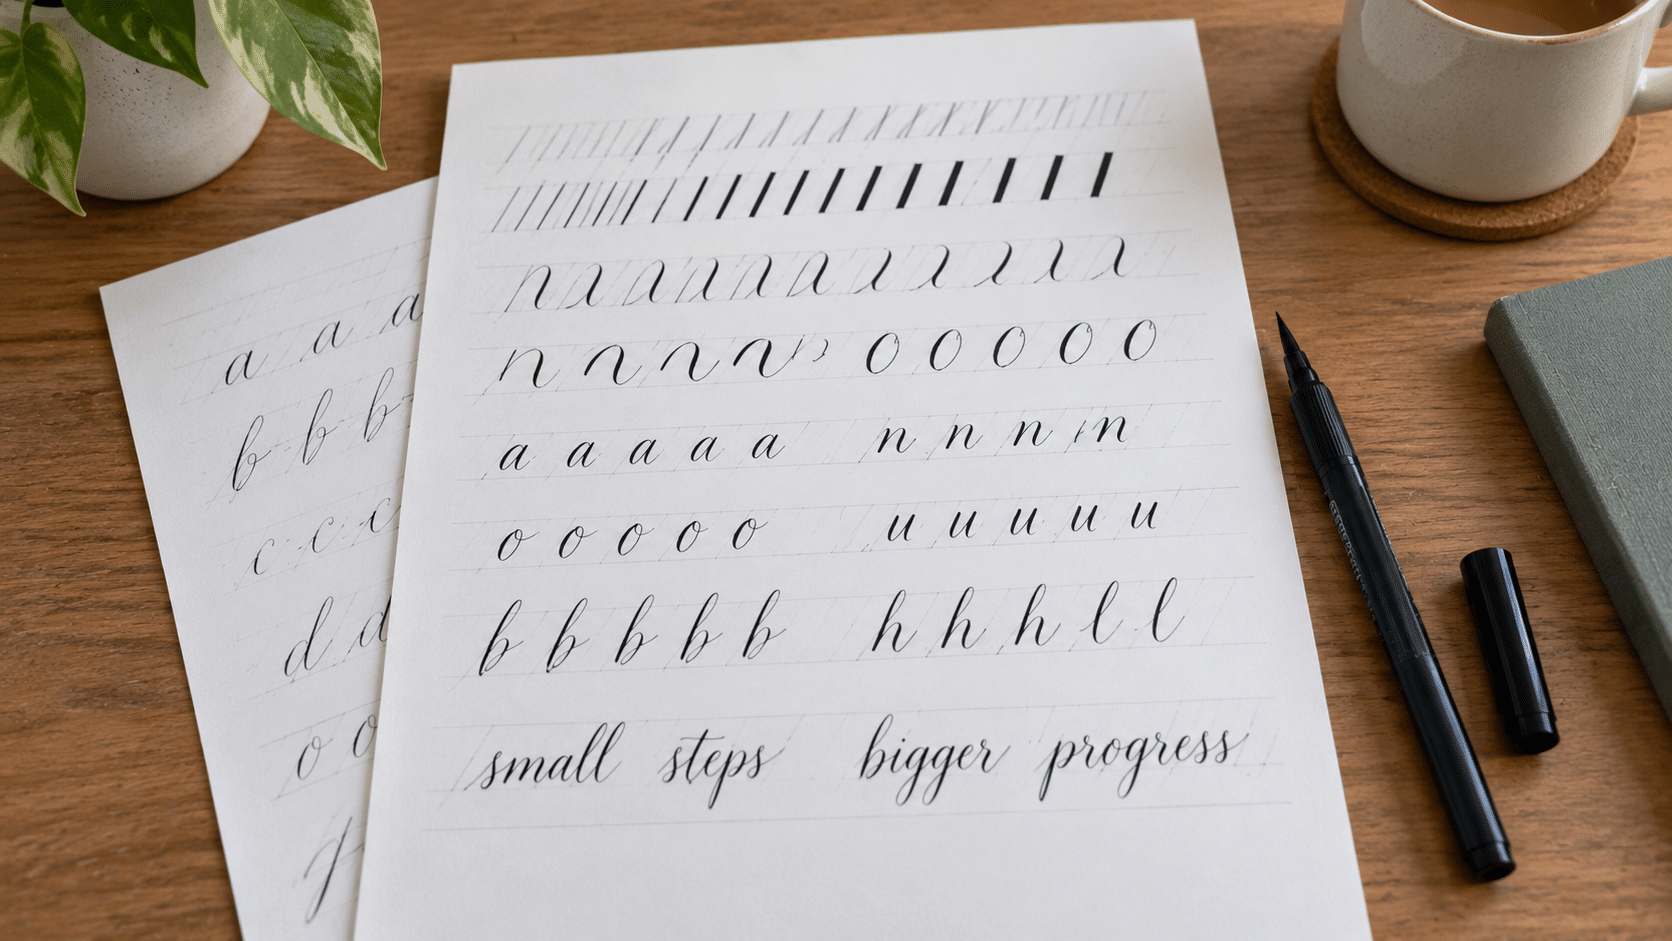
Step 2: Practice Light Upstrokes and Heavy Downstrokes
Now put that pressure control into practice. The goal is to repeat the movement until your thin and thick lines become easier to produce on purpose.
What to practice:
- Fill one row with light upward strokes.
- Fill the next row with heavier downward strokes.
- Keep the length and angle similar each time.
- Pause when your grip starts to tighten.
Tip: I would rather practice a few slow rows well than rush through a full page.
Step 3: Learn the Basic Calligraphy Strokes
Modern lowercase calligraphy is commonly taught through a small set of foundational movements. Practice each one separately so you can recognize its shape and direction before combining anything.
Common strokes include:
- Entrance stroke
- Full-pressure downstroke
- Underturn
- Overturn
- Compound curve
- Oval
- Ascending loop
- Descending loop
Tip: The names and groupings can vary between teaching methods, so focus more on the movement than memorizing every term.
Step 4: Practice the Strokes On Guidelines
Guidelines help keep your strokes at a similar height, angle, and position. They also make mistakes easier to spot while you are still learning.
Main guidelines to use:
- The baseline shows where most lowercase letters sit.
- The x-height marks the main height of shorter lowercase letters.
- The ascender line guides tall parts of letters such as b and h.
- The descender line gives room for letters such as g and y.
- Slant guides help strokes lean in the same direction.
Step 5: Build Lowercase Letters From Strokes
Once the basic movements feel familiar, start combining them into simple lowercase letters. You are using shapes your hand has already practiced rather than learning every letter from scratch.
Try these first:
- Start with letters that use familiar oval and curve shapes.
- Practice a by building from an oval shape.
- Work on n using overturn and compound movements.
- Keep each stroke separate instead of rushing through the whole letter.
Tip: Do not try to finish the full alphabet in one sitting. A few controlled letters are more useful than many rushed ones.
Step 6: Practice Letters In Groups
Grouping similar letters together makes practice more focused. It also helps you repeat the same movement several times without constantly changing technique.
Useful letter groups:
- Practice a, d, g, and o for oval shapes.
- Work on m, n, and r for overturn movements.
- Group i, t, and u for underturn strokes.
- Practice b, f, h, l, and y when working on loops.
Tip: This method can make learning calligraphy feel less overwhelming because each group builds on a movement you already know.
Step 7: Write Words and Short Phrases
Once your individual letters feel steadier, begin joining them into short words. Practicing a name is especially useful because you can later use the same lettering skills for decorative name art, tags, signs, and other personalized projects.
What to focus on:
- Keep the spaces between letters balanced.
- Try to keep each word on the same baseline.
- Lift the pen whenever a stroke ends.
- Leave decorative flourishes until later.
- Finish with a name, gift tag, handmade greeting card, or short phrase so you can practice using your letters in a simple finished project.
How to Practice Calligraphy As a Beginner
A good practice session does not need to be long. Start with 2–3 minutes of light and heavy lines, then repeat one basic stroke and a few letters you are learning. Finish with a simple phrase that uses those letters. Dating each practice page can also help you notice progress over time.
Short, focused sessions usually make learning calligraphy feel easier and more manageable than trying to practice too much at once.
Calligraphy Learning Resources for Beginners:
Loveleigh Loops offers free modern calligraphy worksheets for basic strokes, lowercase letters, spacing, and other beginner exercises. Their beginner guide also explains the eight common basic strokes.
Lettering Daily has free basic stroke worksheets, alphabet practice, and step-by-step modern calligraphy guides. It is especially useful once you are ready to move from strokes into letters and words.
The Postman’s Knock provides free brush pen worksheets and a separate beginner worksheet that pairs with a video lesson. These are useful if you like practicing while following a demonstration.
Signs You are Ready to Learn More
You do not need perfect pages before moving forward. Look for signs that your hand control is becoming steadier and that familiar movements take less effort.
For me, handmade skills start to feel more manageable once the basic movements stop requiring so much thought. Calligraphy practice can reach that same point as your strokes become steadier.
- Steady strokes: Width and shape stay more consistent across a row.
- Even slant: Letters lean in the same direction more often.
- Better pressure: Thick and thin lines feel easier to control.
- Cleaner spacing: Words look more balanced and less crowded.
- Self-correction: You can tell which stroke or movement needs work.
Final Thoughts
Calligraphy has a way of slowing things down. That may be one reason it feels so satisfying to return to, especially when so much of the day moves quickly.
There is something special about crafts that leave a small record of where you were at that moment. A page of lettering can do the same, even if it never becomes anything more than practice.
As you keep learning how to do calligraphy, let your own preferences show up in the work. The most rewarding part may be when the letters stop feeling copied and start feeling like yours.
Frequently Asked Questions
Is Calligraphy the Same As Cursive Handwriting?
No. Cursive is written more continuously, while calligraphy uses controlled strokes and spacing.
Do You Need to be Good at Art to Learn Calligraphy?
No. Calligraphy depends more on practice, hand control, and repetition than drawing skills.
Can Left-Handed People Learn Calligraphy?
Yes. They may just need to adjust the paper angle and hand position.
Why Does Calligraphy Ink Smudge After Writing?
Ink can smudge if it has not dried fully or your hand moves across it too soon.