No two snowflakes are alike, and neither are yours. If you’re decorating for winter, keeping the kids busy on a rainy afternoon, or just feeling crafty, paper snowflakes are one of those simple joys that never seem to get old.
The best part? You don’t need any special tools, expensive materials, or artistic talent to make them look absolutely beautiful.
All it takes is a single sheet of paper, a pair of scissors, and a little patience. A few careful folds, a few creative snips, and suddenly you’ve got something that looks like it took real skill.
Here you will find exactly how to make a paper snowflake, the classic, six-pointed kind, step by step, so every fold and every cut counts.
The Simple Art of Paper Snowflakes
Paper snowflakes have been around for generations, and honestly, they never get boring. There is something quietly satisfying about folding a plain sheet of paper and watching it open up into something beautiful.
I grew up watching my grandmother turn the simplest materials into something worth keeping, and learning how to make a paper snowflake always reminded me of that same magic.
What makes them so special is that six-pointed shape, when you fold and cut paper the right way, you mirror the same natural symmetry found in real snowflakes.
The best part is that truly anyone can do it. You do not need a craft room, a supply haul, or years of experience. All you need is a sheet of paper and a pair of scissors.
If you are making these with your kids, decorating for the holidays, or just looking for a slow, satisfying afternoon project, knowing how to make a paper snowflake always delivers something worth smiling at.
Things You Need Before Starting
Before you learn how to make a paper snowflake, the good news is that you probably already have everything you need at home.
Tools to Have:
| Tool | Details |
|---|---|
| Paper | Standard A4 or letter-size white paper works perfectly |
| Scissors | A sharp pair gives you cleaner, more precise cuts |
| Ruler | Helps you measure and fold evenly |
| Pencil | For lightly sketching your cut pattern before snipping |
Optional Materials for Extra Detail:
| Material | Why It Helps |
|---|---|
| Glitter or Glitter Glue | Adds sparkle and a festive finish |
| Colored or Patterned Paper | Creates more visually striking snowflakes |
| Craft Hole Puncher | Punches neat circular details without scissors |
| String or Thread | Makes hanging your snowflakes much easier |
| Glue Stick | Useful for layering multiple snowflakes together |
| Craft Knife and Cutting Mat | Gives more precise cuts for intricate patterns |
Step-by-Step: How to Make a Paper Snowflake
This is the part I love most, where the folding begins and the magic starts to happen. Learning how to make a paper snowflake is easier than it looks, and once you do it the first time, your hands remember.
Follow each step carefully, take your time with the folds, and you will have a beautiful six-pointed snowflake before you know it.
Step 1: Start with a Square Sheet
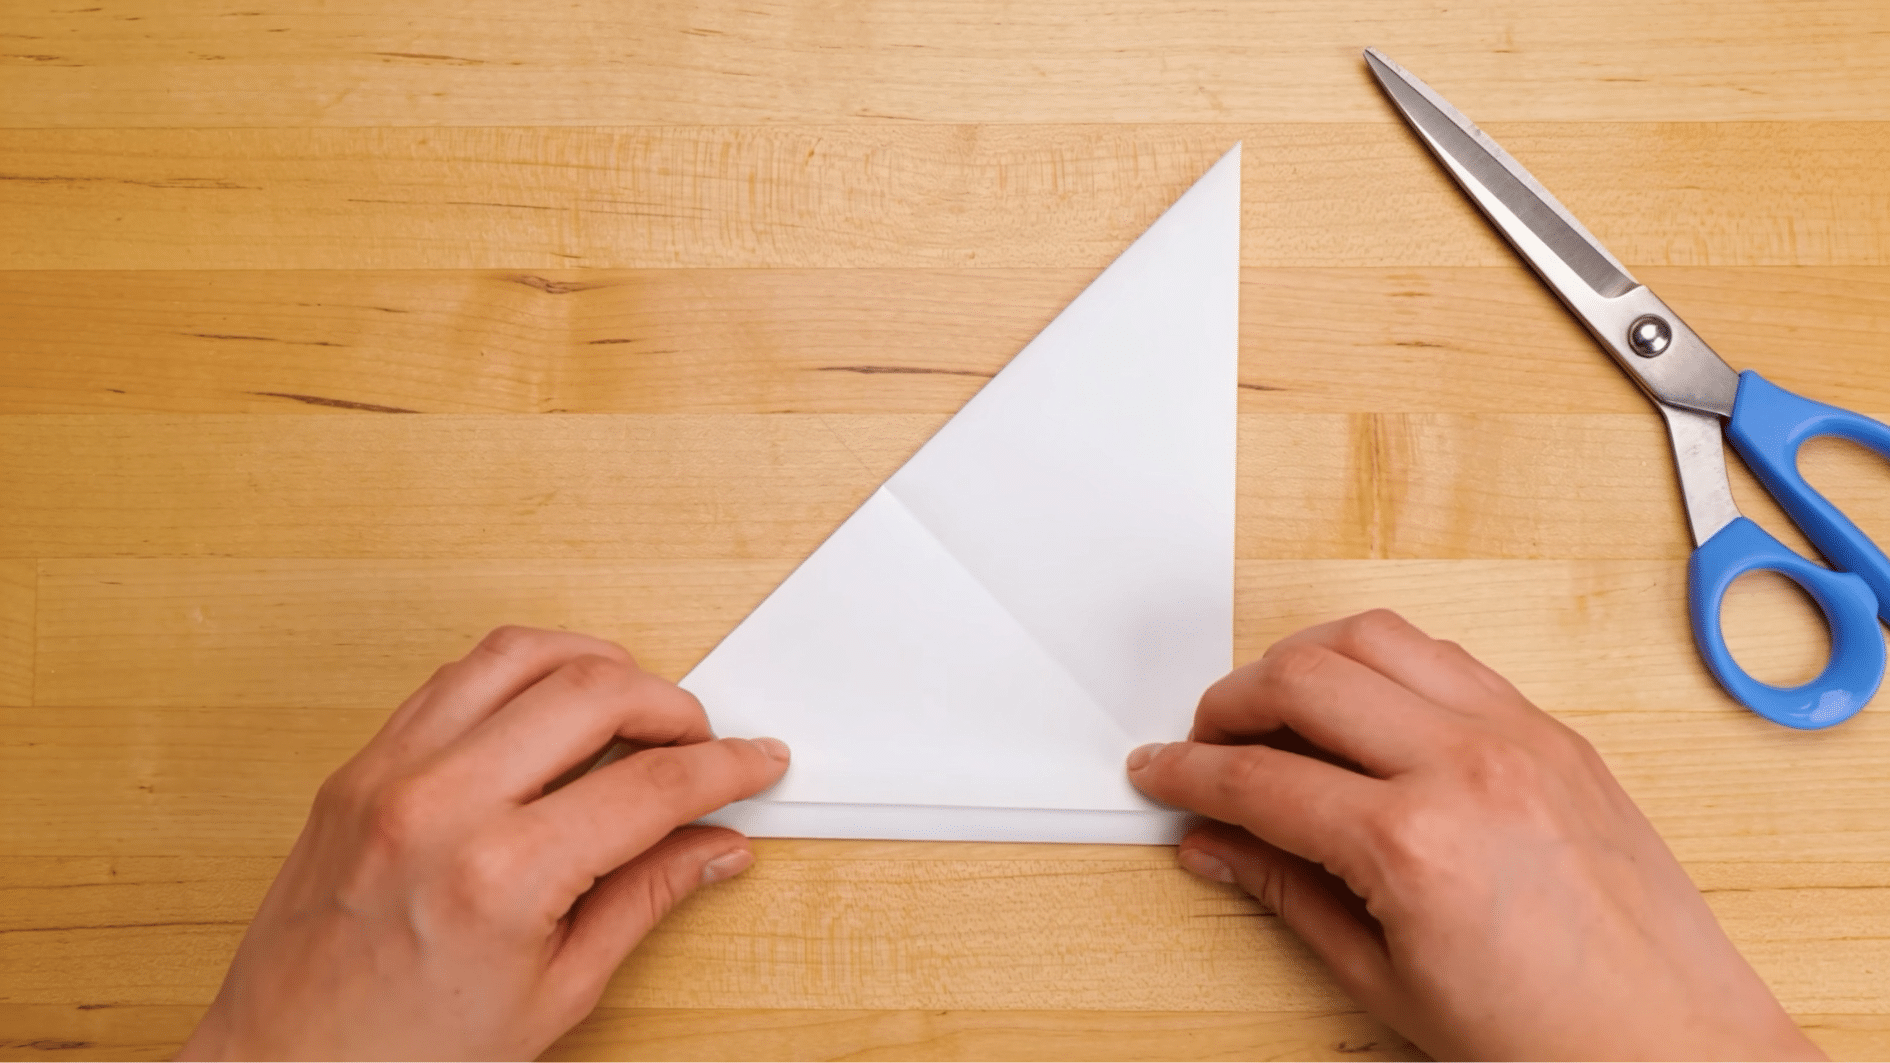
Every paper snowflake starts with a square, so getting this right sets the foundation for everything that follows. If you are using regular A4 or letter-size paper, you will need to trim it into a square before you begin folding.
- Start with a flat, smooth sheet of paper placed on a clean surface.
- Fold one corner of the paper diagonally across to meet the opposite edge, forming a triangle.
- The strip of paper left at the bottom is the excess, crease the fold firmly along that edge.
- Cut or tear along the crease to remove the extra strip.
- Open the fold, and you will have a perfect square ready to work with.
My experience: If you want cleaner edges, use a ruler and pencil to measure equal sides before cutting. A 15 x 15 cm or 6 x 6 inch square is the ideal size for beginners, big enough to cut details into without being too fiddly to fold.
Step 2: Fold the Paper in Half
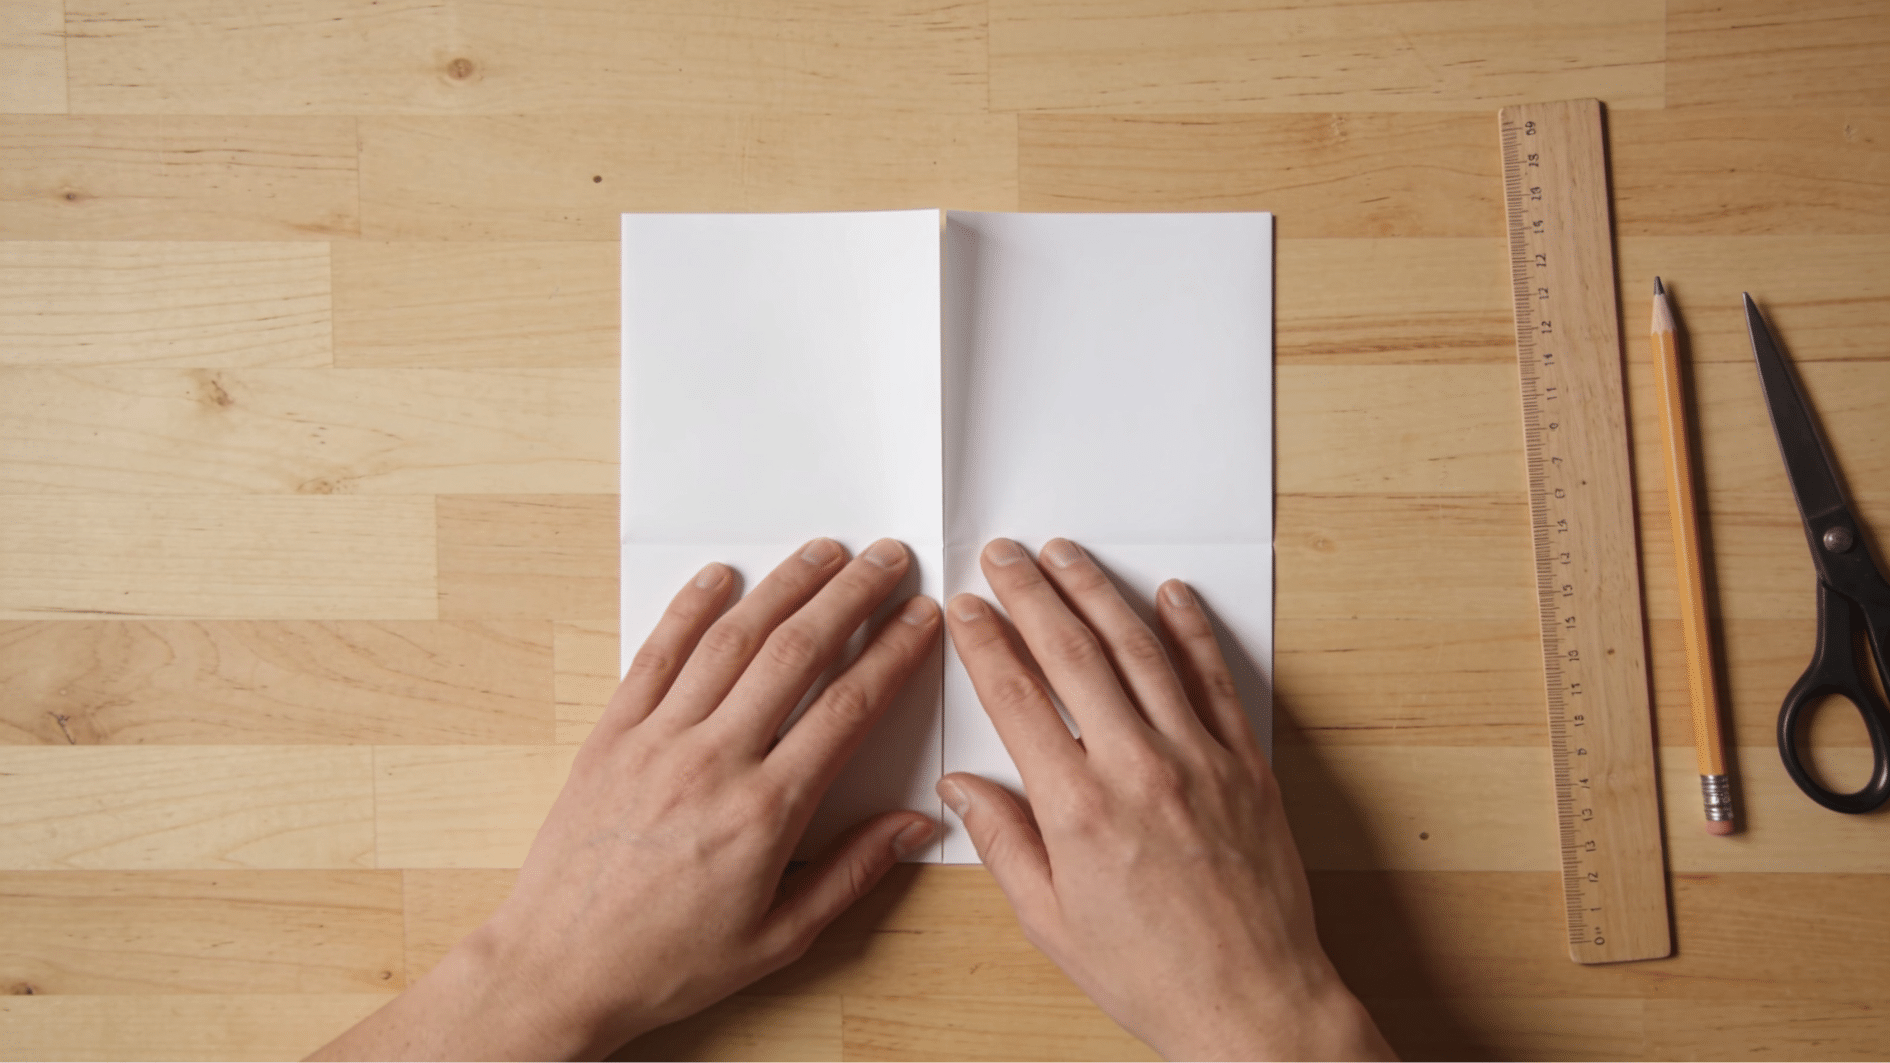
This is your first proper fold, and it shapes the base of your entire snowflake. A clean, even fold here makes every step after this much easier to manage.
- Place your square sheet flat on the table in front of you.
- Bring the bottom edge up to meet the top edge exactly, folding the paper in half horizontally.
- Run your finger firmly along the fold to create a sharp, flat crease.
- Hold the paper up to check that both edges are perfectly aligned before moving on.
- Set it back down flat with the folded edge facing you.
Even a small misalignment at this stage can throw off the symmetry of your finished snowflake. Take an extra second to line up the corners before creasing. It makes a bigger difference than you might expect.
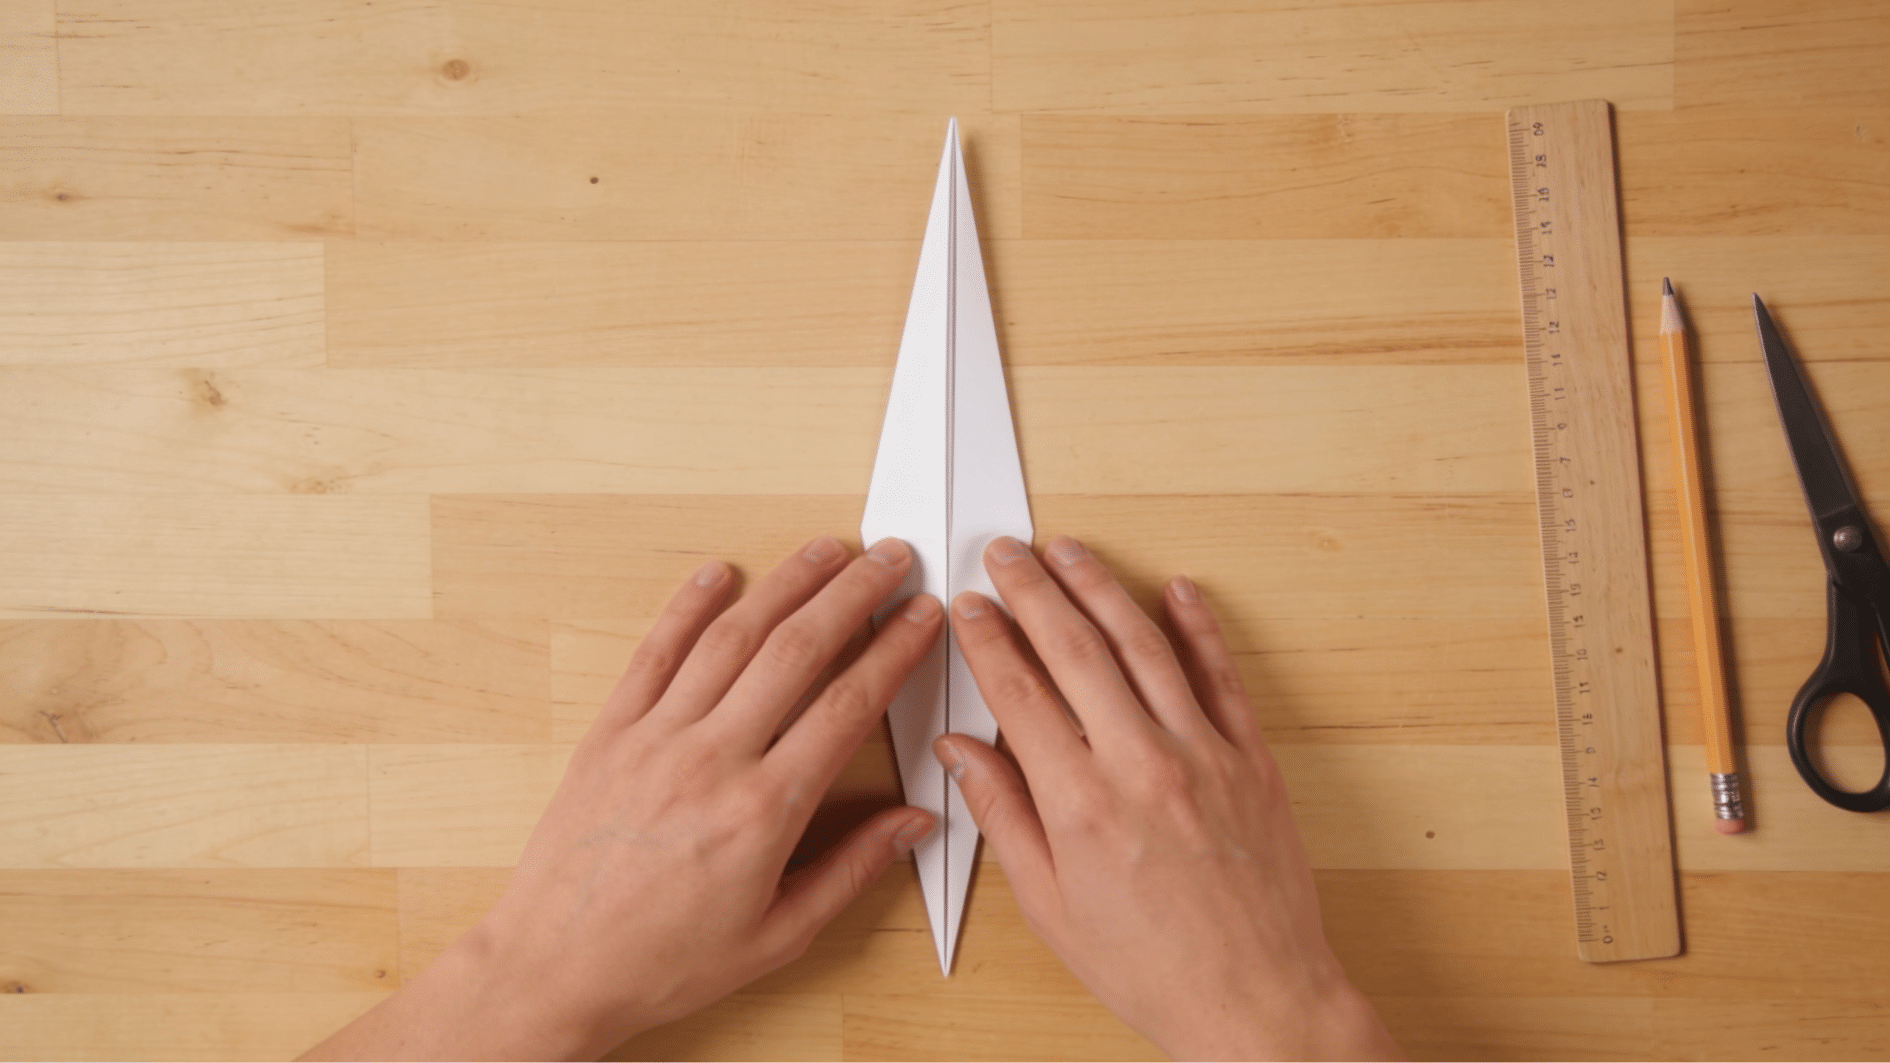
Step 3: Fold Into a Triangle Again
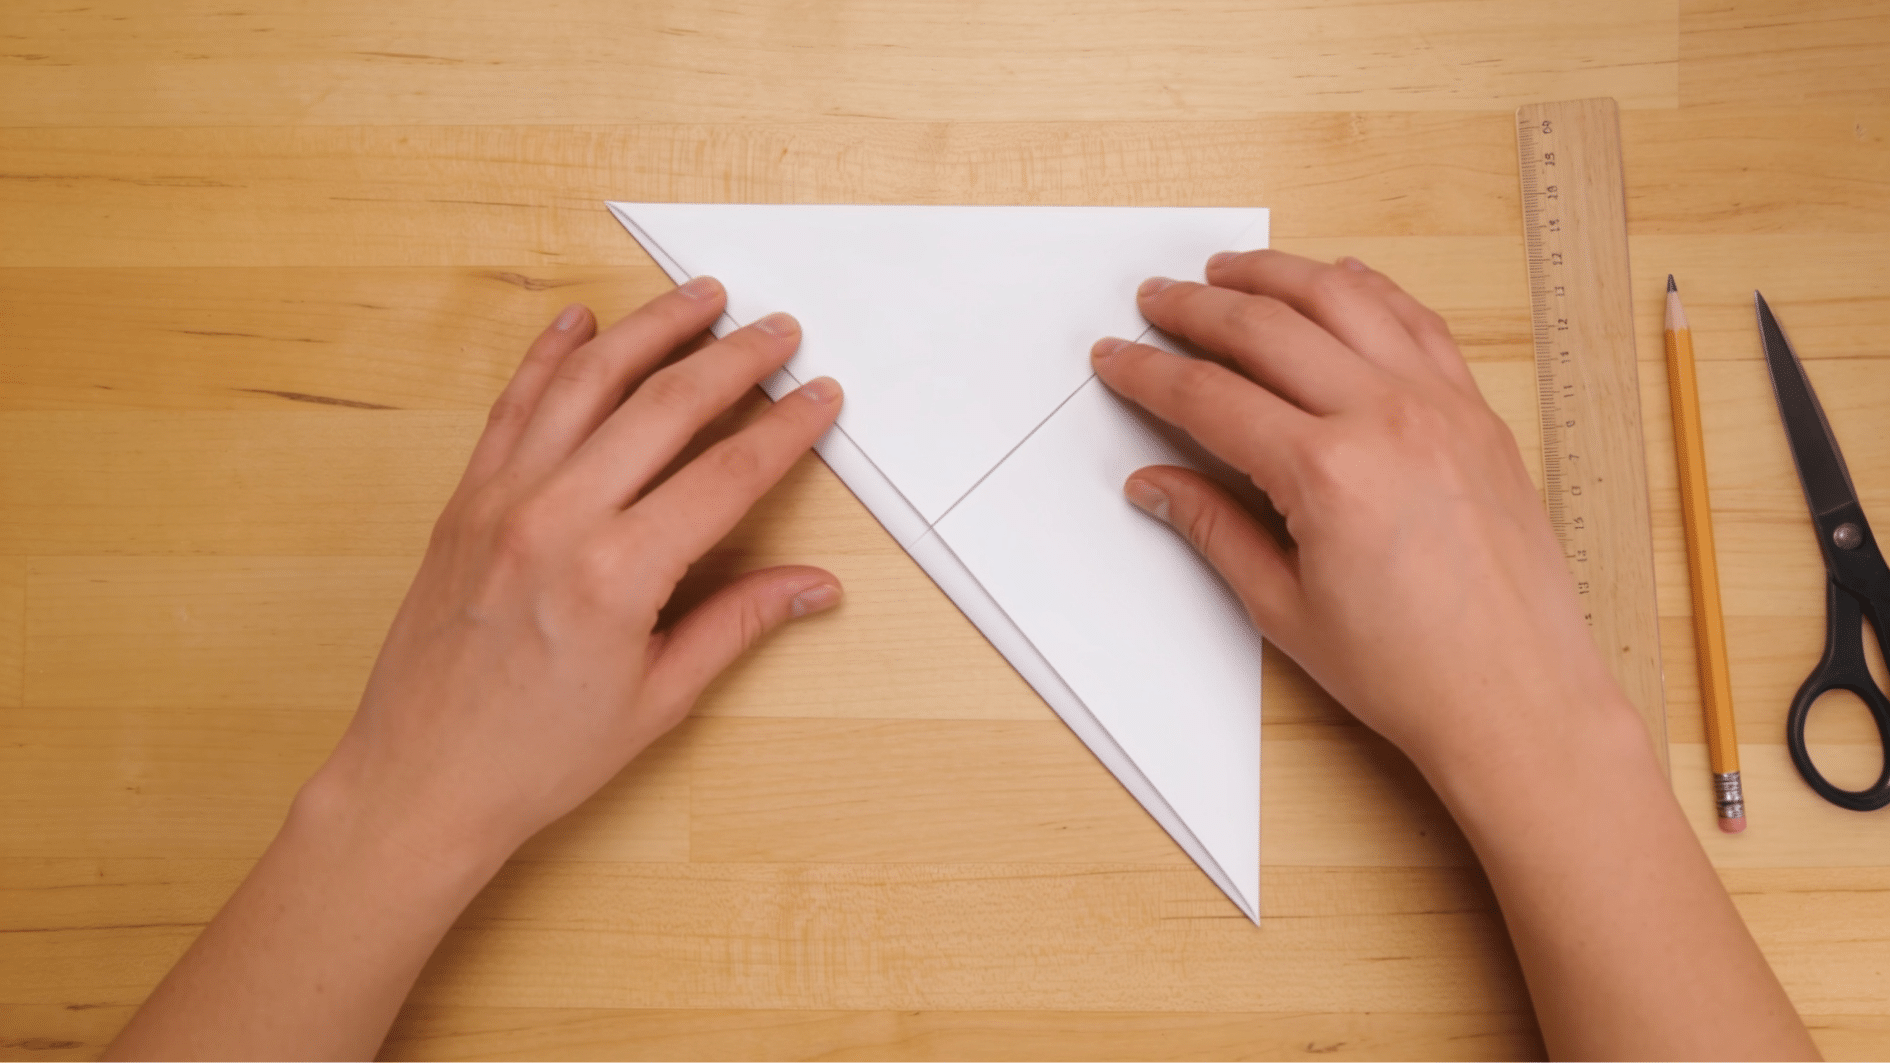
You are now going to fold your rectangle into a triangle. This second diagonal fold is what starts building the six-pointed structure that gives paper snowflakes their signature look.
- Take the rectangle with the folded edge at the bottom.
- Bring the bottom-left corner up to meet the top-right corner diagonally.
- Make sure both corners sit exactly on top of each other before pressing down.
- Crease the fold firmly from the center point outward to both edges.
- You should now have a neat triangle in front of you.
Note: Loose or soft folds make it harder to cut clean shapes later. Use the flat edge of a ruler or your thumbnail to press each fold down as firmly as possible. The crisper your folds, the sharper your snowflake will look once it is opened.
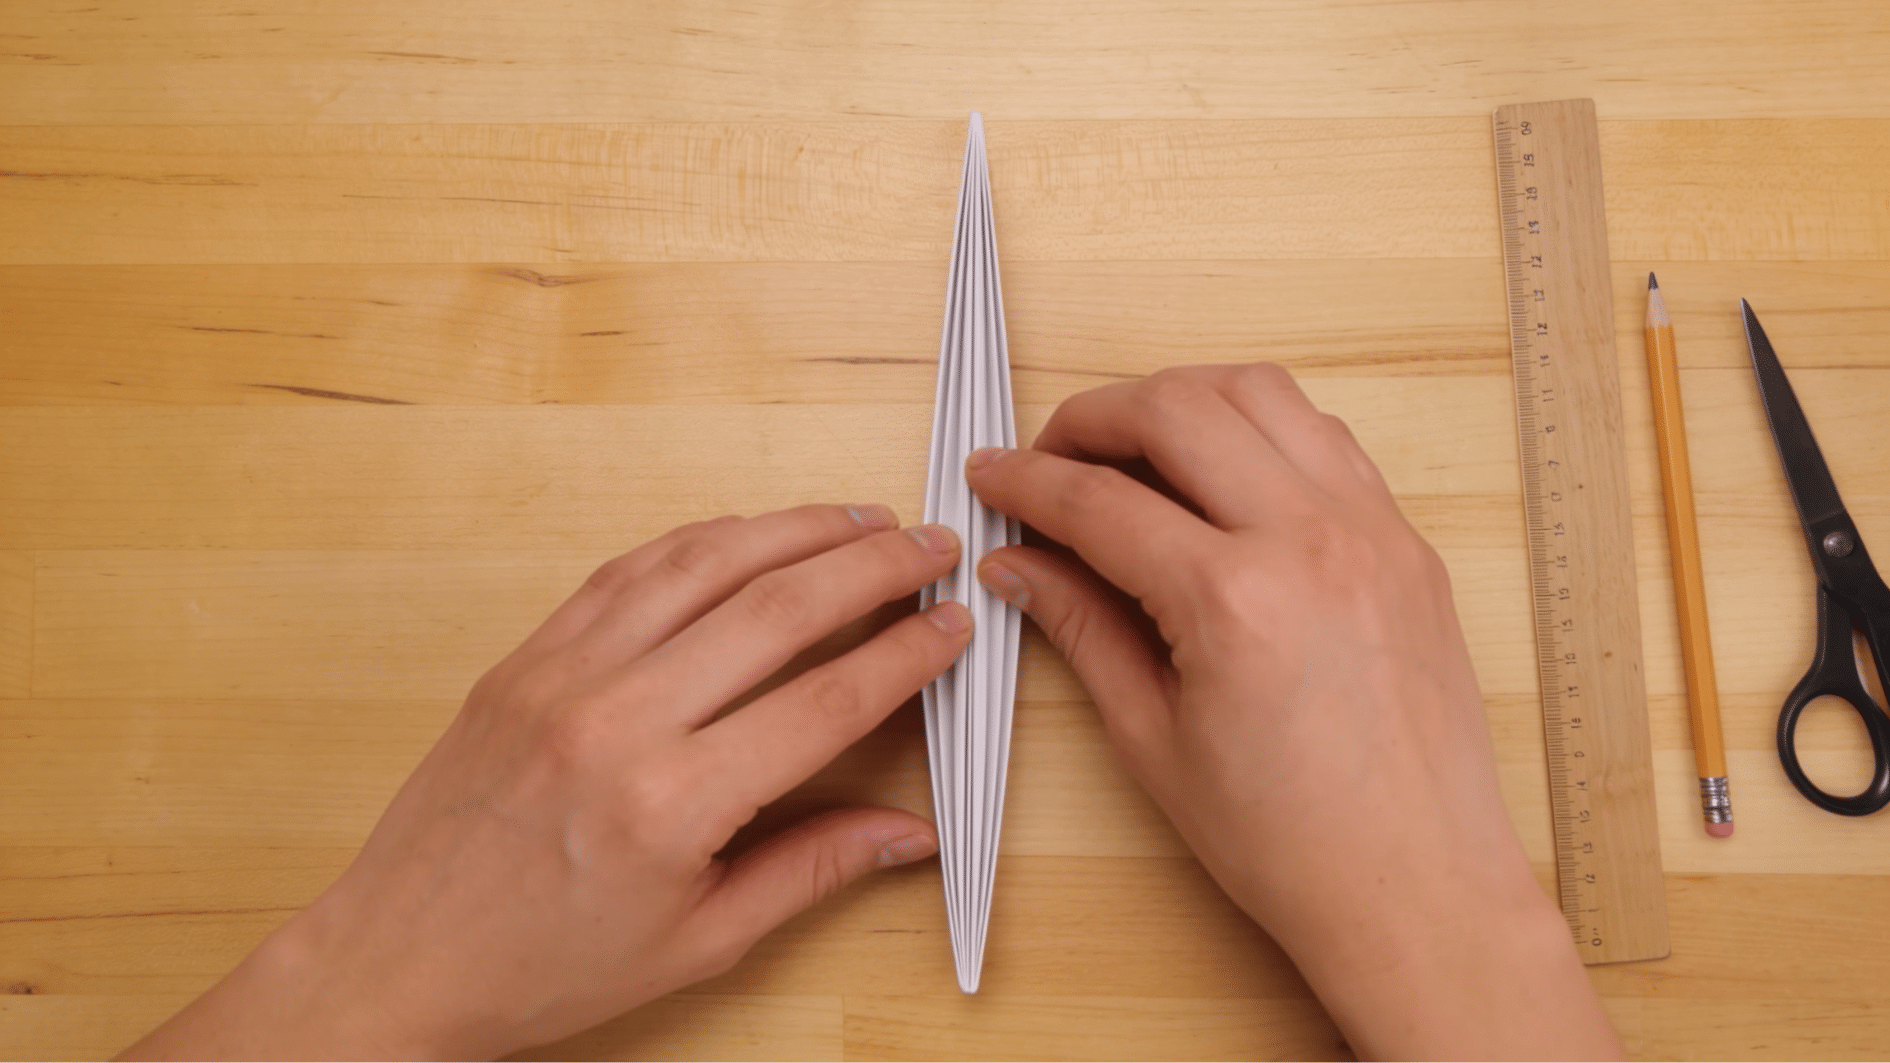
Step 4: Fold Into Thirds
This is the step that most beginners find a little tricky, but it is the most important one. Folding your triangle into thirds is what creates the six equal sections that give your snowflake its perfect symmetry.
- Hold your triangle with the long flat edge at the bottom and the pointed tip facing up.
- Mentally divide the triangle into three equal sections from left to right.
- Fold the left third over the center third, angling it slightly so the edges align with the right side.
- Then fold the right third over the top, matching the edges as closely as possible.
- You should now have a tall, narrow wedge shape.
A simple trick I like to follow is first to fold the triangle loosely to find the midpoint, then adjust each side so it sits one-third of the way across.
You can also use a protractor to measure 60-degree sections if you want to be precise. Do not worry if it is not perfect; small variations make your snowflake more unique.
Step 5: Fold in Half Once More
This final fold brings your paper down to the small wedge shape you will actually be cutting into. It also doubles the layers, so every cut you make will appear on both sides of your snowflake when it opens.
- Hold your narrow wedge shape with the pointed tip facing upward.
- Fold the shape in half lengthways, bringing the right edge over to meet the left edge.
- Press the fold down firmly with your finger from top to bottom.
- Check that all the layers are sitting flat and none are sticking out at the sides.
- Your folded paper should now look like a small, compact wedge.
At this point, your paper will have several layers stacked together. That is completely normal and exactly what you want.
The more evenly your layers are stacked, the more uniform your snowflake will be. If any layers have shifted, gently realign them before moving on to cutting.
Step 6: Draw and Cut Your Pattern
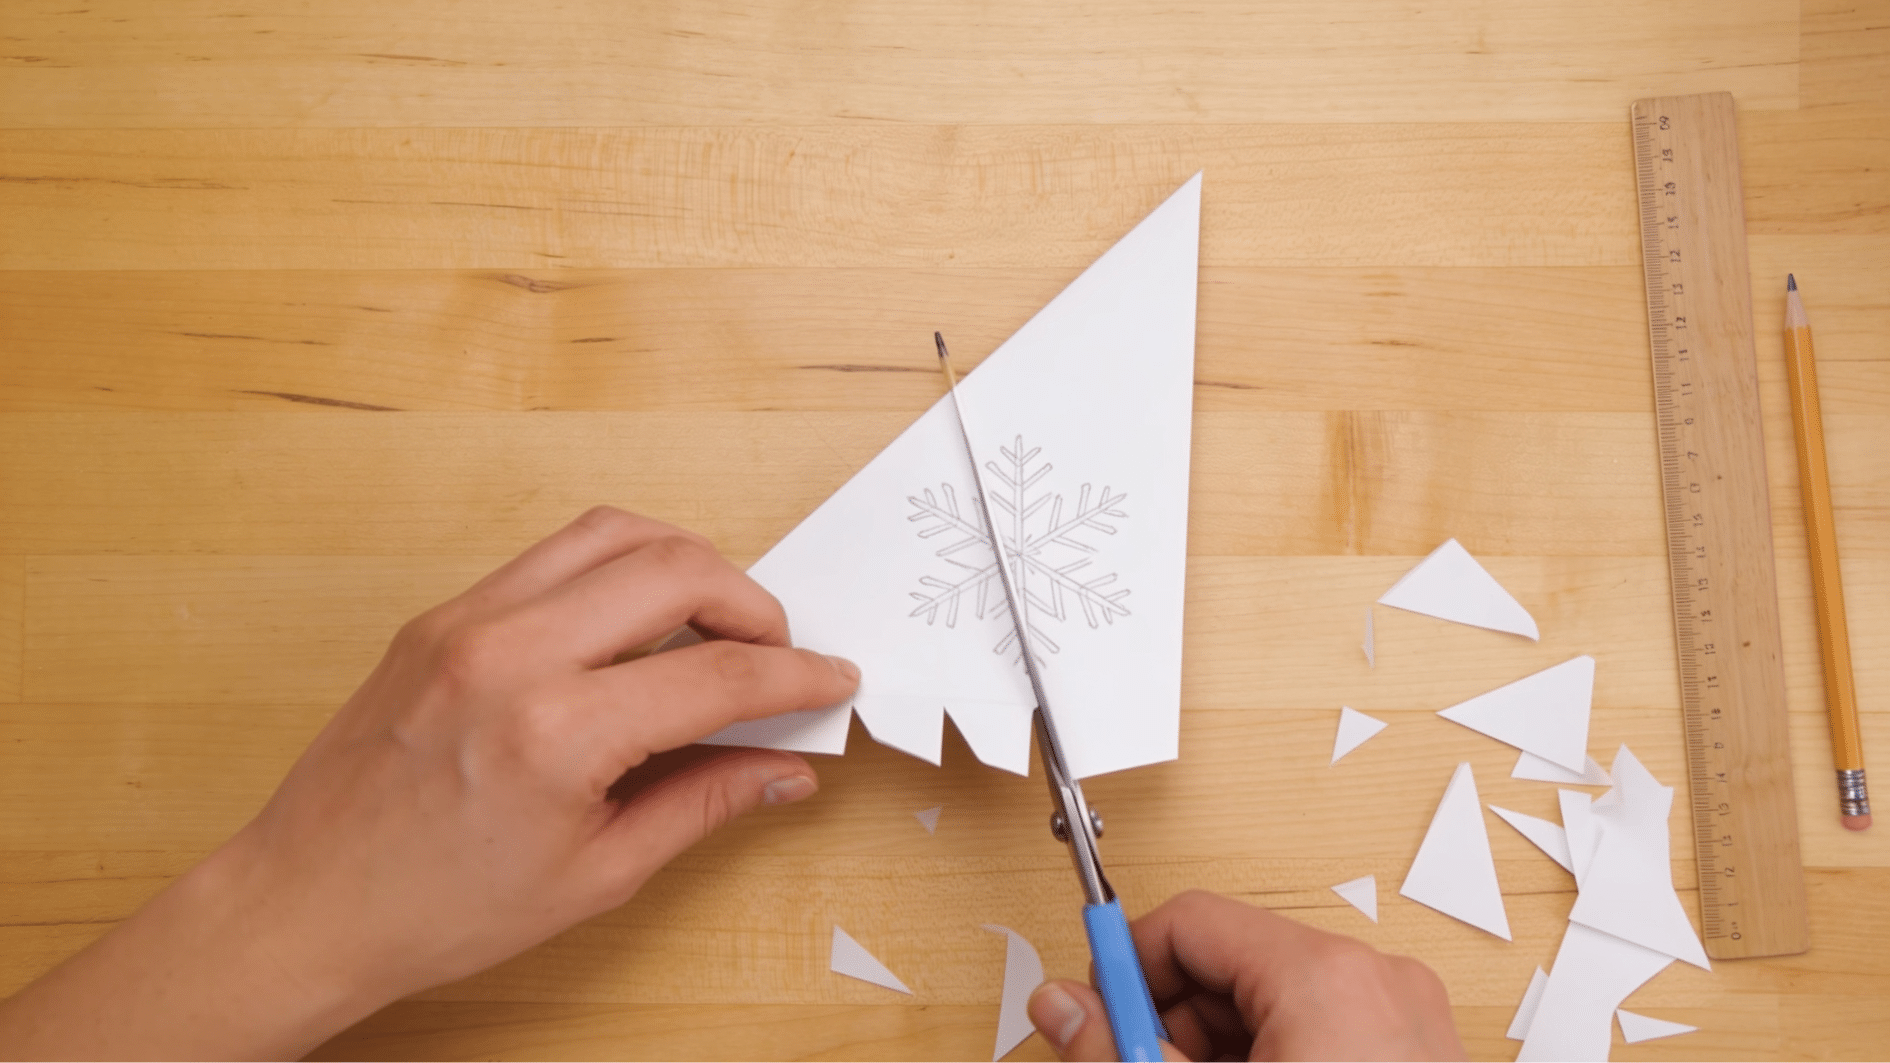
This is where the real fun begins. Cutting your pattern is what transforms a simple folded wedge into a beautiful snowflake, and there is no single right way to do it. The shapes you cut determine the personality of your snowflake.
- Use a pencil to lightly sketch your pattern onto the folded wedge before cutting.
- Cut small triangles, curves, or notches along both side edges of the wedge.
- Cut a shape into the pointed tip as well, this becomes the center of your snowflake.
- Make sure every cut goes through all the layers at the same time for a clean result.
- Shake off any small cut pieces before you unfold.
Start with small triangles along the edges; they are the easiest to cut and always look great. V-shapes, half-circles, and small notches also work beautifully. The more you cut away, the lacier and more fragile your snowflake will look.
Never cut all the way across the wedge from one side to the other. This will separate your snowflake into pieces. Always leave a connected strip of paper along at least one edge.
Step 7: Unfold Your Snowflake Carefully
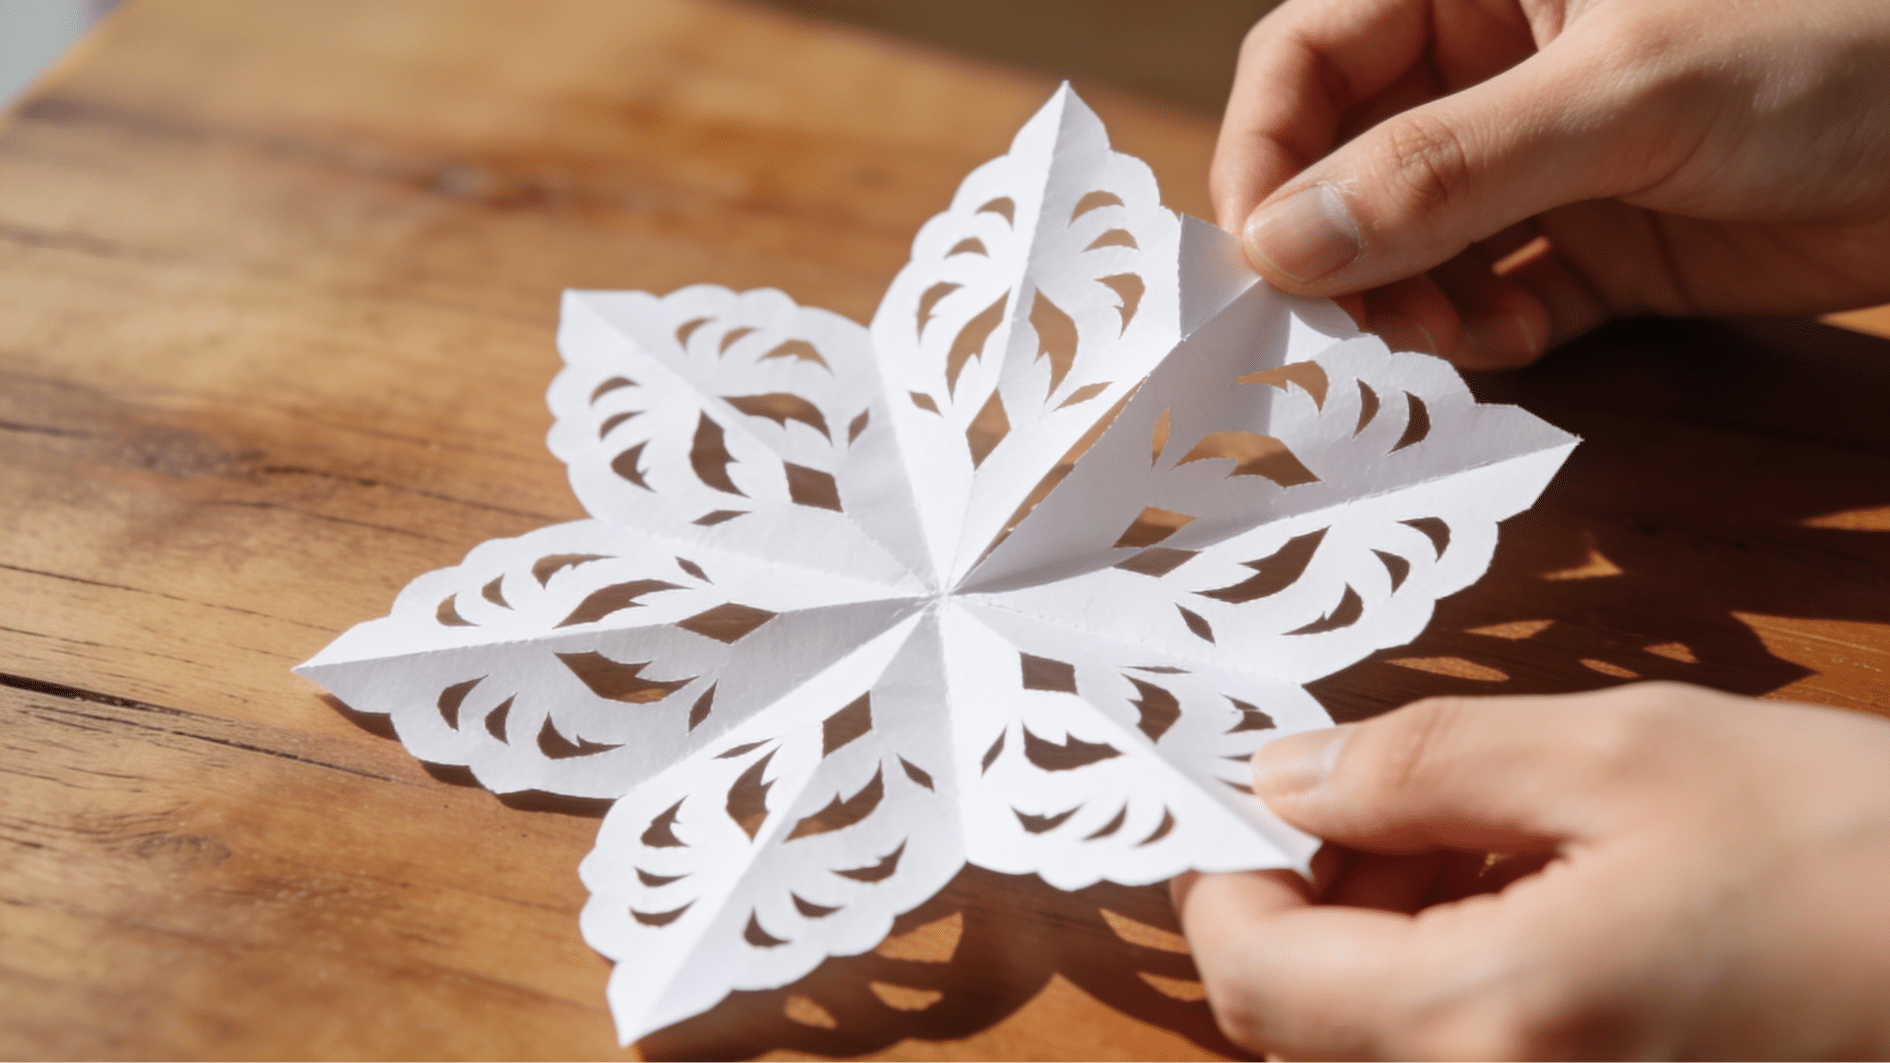
This is the moment everything has been building toward. Unfolding your snowflake for the first time is genuinely one of the most satisfying parts of this whole craft; every cut you made is now multiplied into a full six-pointed design.
- Set your wedge down on a flat surface before you begin unfolding.
- Gently open one fold at a time rather than pulling the whole thing open at once.
- Use both hands and work slowly, especially around any areas where you cut close to the edges.
- If the paper resists, do not force it; ease it open gradually to avoid tearing.
- Once fully open, place it face down and smooth it flat with your palm.
Pro Tip: If your snowflake is curling or will not lie flat, place it between two sheets of plain paper and set a heavy book on top for a few minutes. This gently presses it flat without leaving any marks or creasing the soft cut edges.
What Paper Works Best For Paper Snowflakes?
The best paper for paper snowflakes is thin enough to fold easily but strong enough to hold small cuts. I like using lightweight paper because it gives cleaner folds and makes detailed designs much easier.
| Paper Type | Best For | Why It Works |
|---|---|---|
| Printer Paper | Everyday snowflakes | Easy to fold, cut, and find at home |
| Origami Paper | Neat, colorful snowflakes | Already square and comes in pretty colors |
| Tissue Paper | Soft, layered snowflakes | Very thin, but needs gentle cutting |
| Parchment Paper | Light window decor | Slightly translucent and pretty against light |
| Construction Paper | Simple kid crafts | Sturdier, but harder to cut when folded |
| Coffee Filters | Round snowflakes | Thin, soft, and already close to a circle |
The Takeaway
Making a paper snowflake is one of those crafts that looks impressive but is really just a few simple folds and cuts away. With the right paper, a sharp pair of scissors, and a little patience, anyone can create something genuinely beautiful.
If you are making these for holiday decorations, a classroom project, or just a quiet afternoon activity, knowing how to make a paper snowflake is a skill that always comes in handy.
No two will ever look exactly the same, and that is what makes each one worth making.
Already feeling creative? My guide to makinggreeting cards is a great next step. So go ahead and let a little handmade magic find its way into your day.
Frequently Asked Questions
Can You Make a Paper Snowflake without Scissors?
Yes, you can carefully tear along folded edges to create a snowflake. The shapes will be rougher but still effective for casual crafting or when scissors are not available.
Can You Reuse a Paper Snowflake as a Stencil?
Absolutely. Lay your finished snowflake flat on paper or fabric, then trace around the edges to recreate the pattern multiple times.
What is the Best Way to Store Paper Snowflakes?
Stack them between sheets of plain paper inside a flat folder or box. This keeps them from creasing, tearing, or losing their shape over time.