
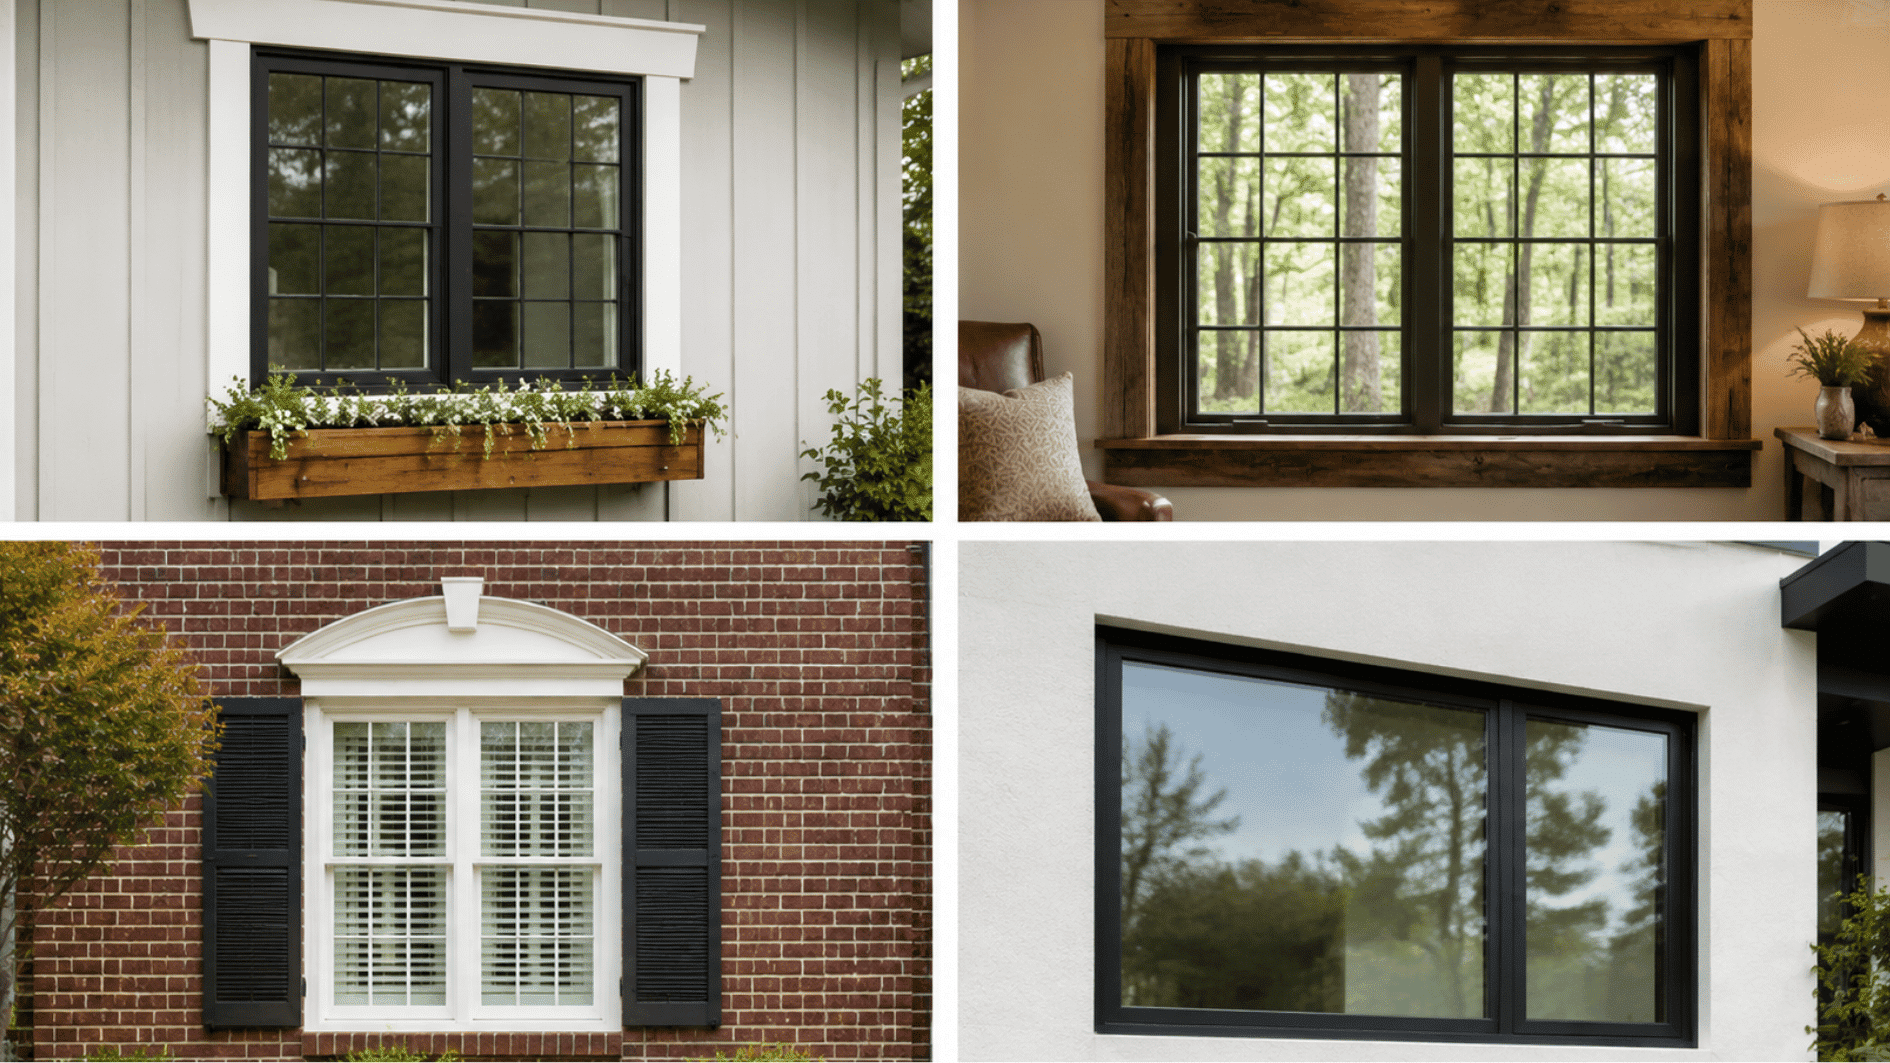
Ever notice how two homes with similar windows can still look completely different? Often, the difference comes down to the trim. Its width, shape, color, and placement can change how a window fits into the rest of the room or exterior.
Some trim styles create a clean, simple frame, while others add more detail and character. The right choice also depends on your architecture, window size, and home’s overall design style.
With so many window trim ideas available, knowing what works best can make the decision easier. This guide covers styles, materials, placement, and practical ways to choose the right trim.
Interior vs. Exterior Window Trim
Interior and exterior window trim may frame the same opening, but they serve very different purposes.
Inside your home, trim helps create a finished look and ties the window into the room’s design, while exterior trim also needs materials and finishes suited to moisture, sunlight, temperature changes, and regular weather exposure.
The materials, profiles, finishes, and maintenance needs can also vary depending on where the trim is installed.
Understanding these differences makes it easier to choose the right option for each side of the window and avoid using materials that may not perform well in the conditions they face.
Window Trim Styles to Inspire Your Home
These styles come up more than any others, across new builds, renovations, and everything in between. Each one carries its own look, cost, and best-fit home type.
1. Flat Stock Window Trim
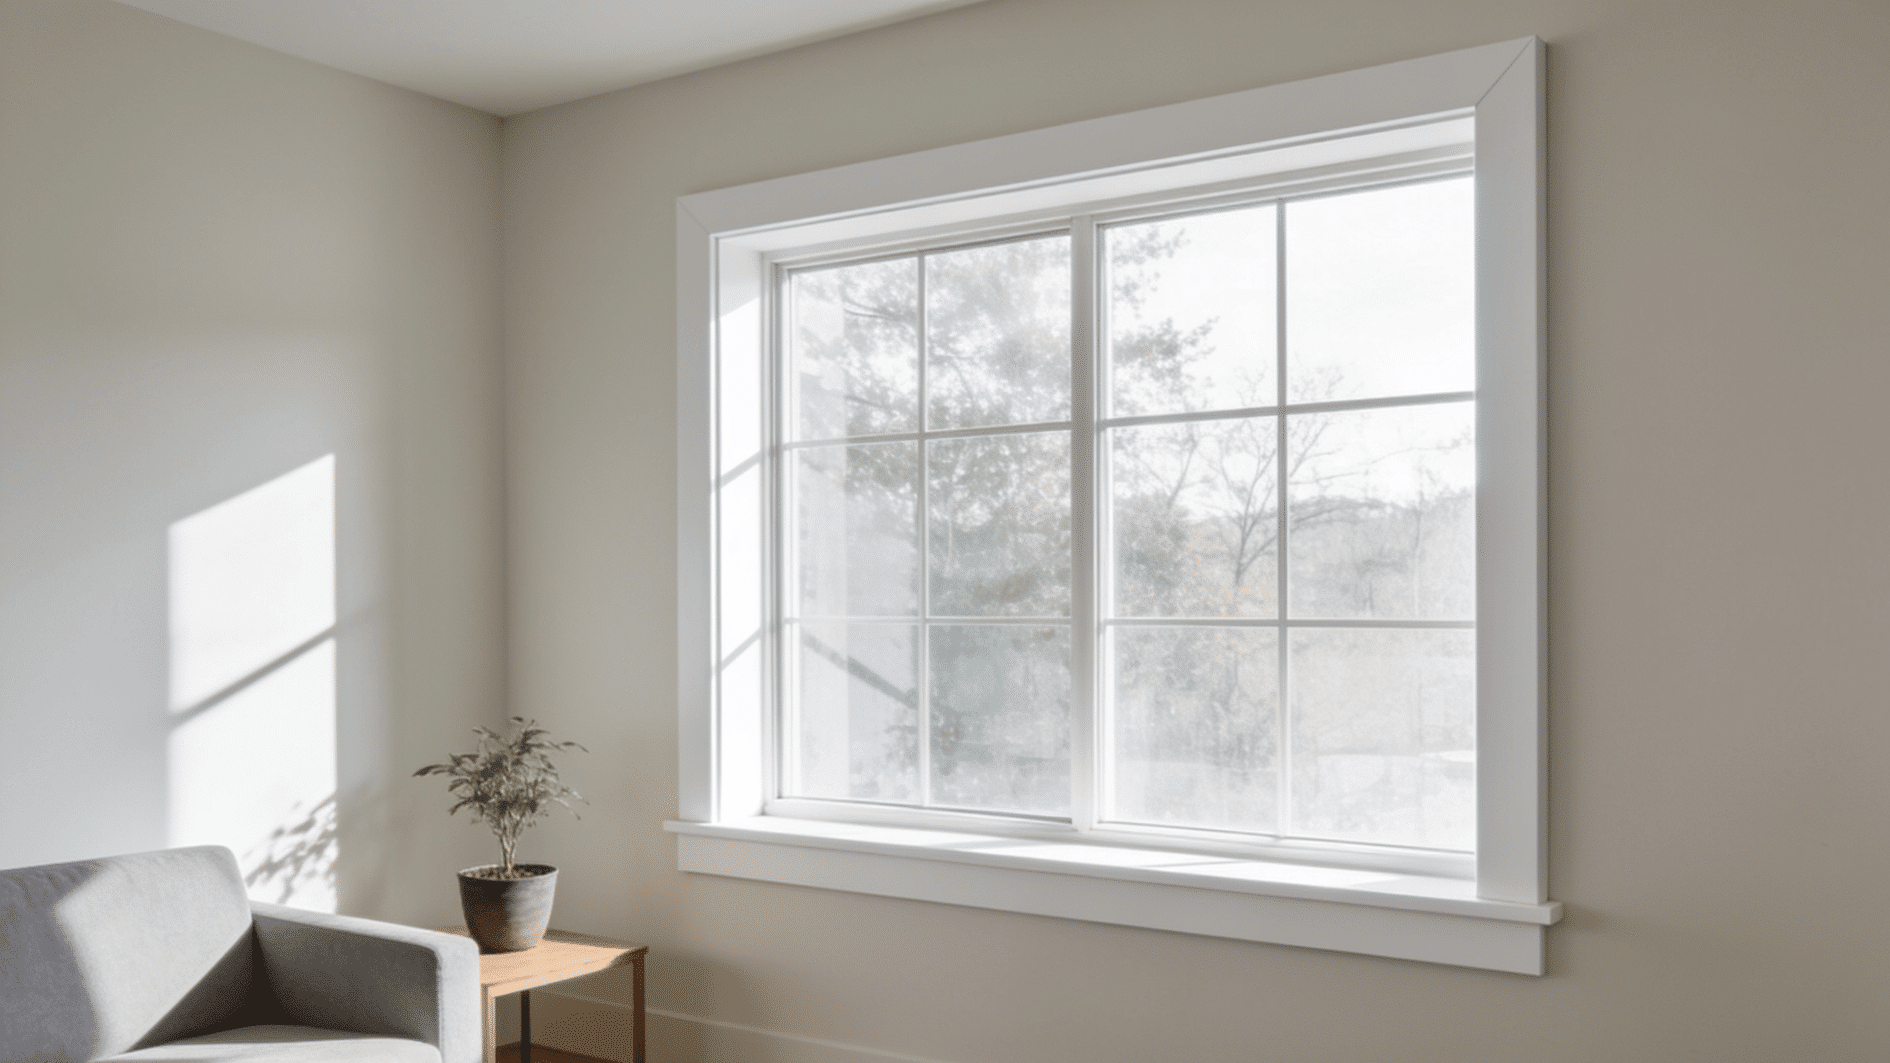
Flat stock window trim uses plain, straight boards with no carving or curves. It works because it doesn’t compete with the room around it.
I tend to favor this profile when a room already has strong furniture, artwork, or architectural details because the window doesn’t need another decorative element competing for attention.
- Straight boards, no molding or decorative curves
- Suits clean walls and simple furniture
- Costs less than detailed trim styles
Tip: Pair it with a matte or eggshell paint finish, so the flat trim doesn’t read glossy.
2. Black Window Trim
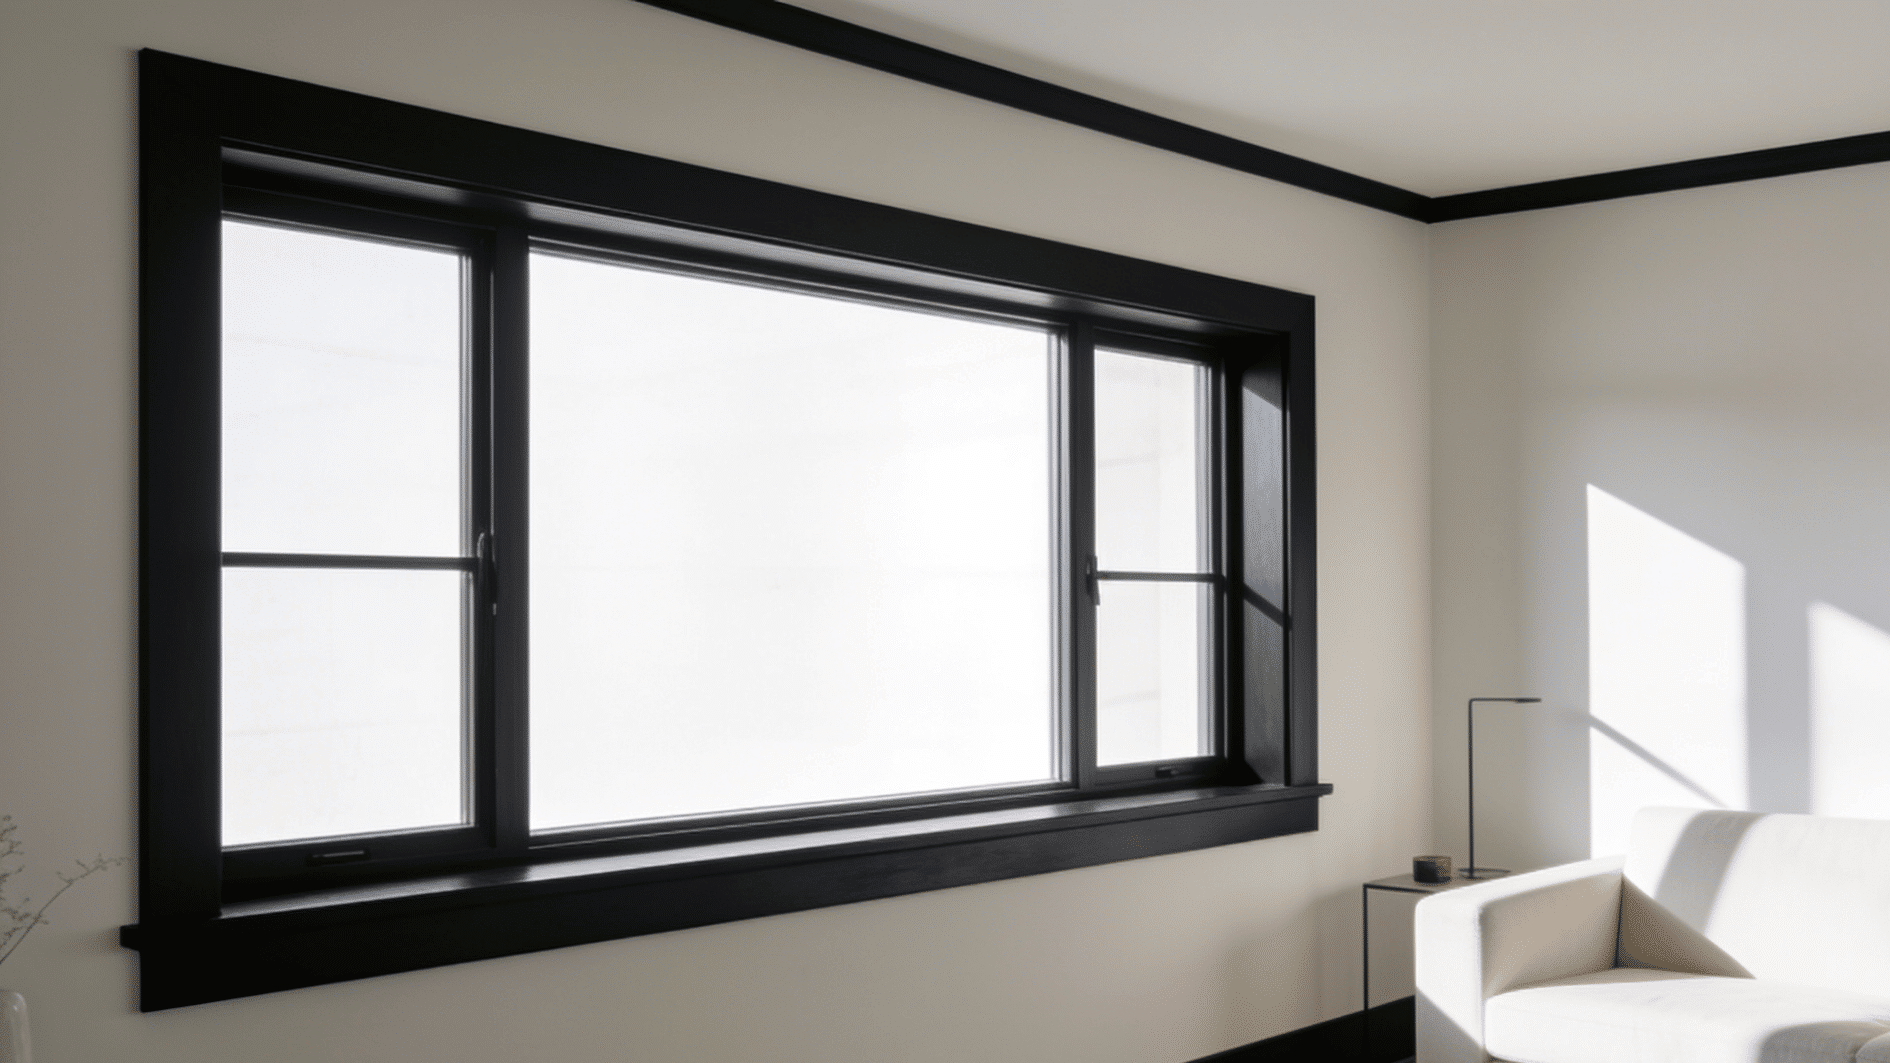
Black window trim paints standard casing in a flat black finish. It creates contrast against white or light-colored walls.
This style became popular alongside black window frames, and the two often pair together.
- Flat black finish on standard casing profiles
- Creates contrast against light walls and frames
- Shows dust and fingerprints faster than white trim
Tip: Stick with a matte or flat sheen, since it hides small marks better than a glossy finish.
3. Shadow Line Window Trim
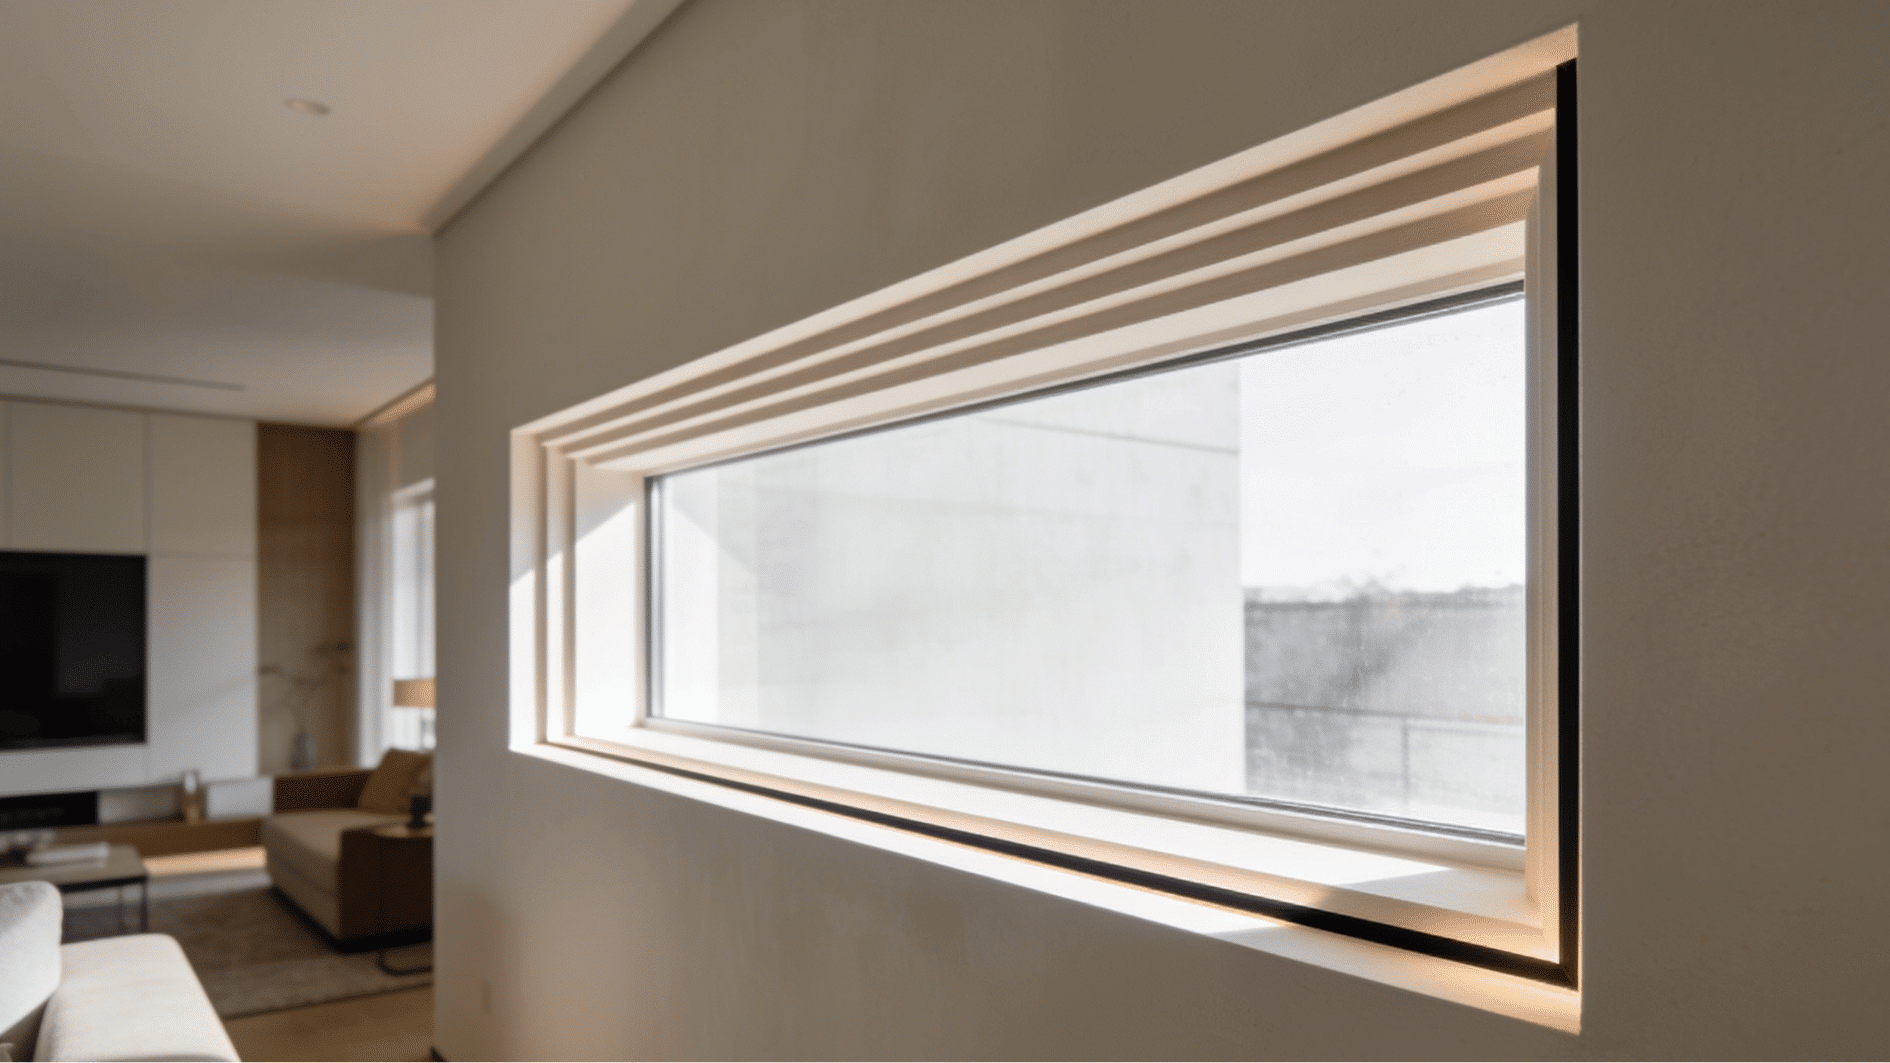
Shadow line window trim uses a recessed groove instead of visible trim boards. Light catches the groove and forms a shadow line around the window.
This style fits homes built with drywall returns instead of traditional casing.
- Recessed groove instead of raised trim boards
- Needs careful drywall work to install correctly
- Costs more upfront than standard casing styles
Tip: Paint the groove the same color as the wall, so it stays the only visible detail.
4. Wide Board Window Trim
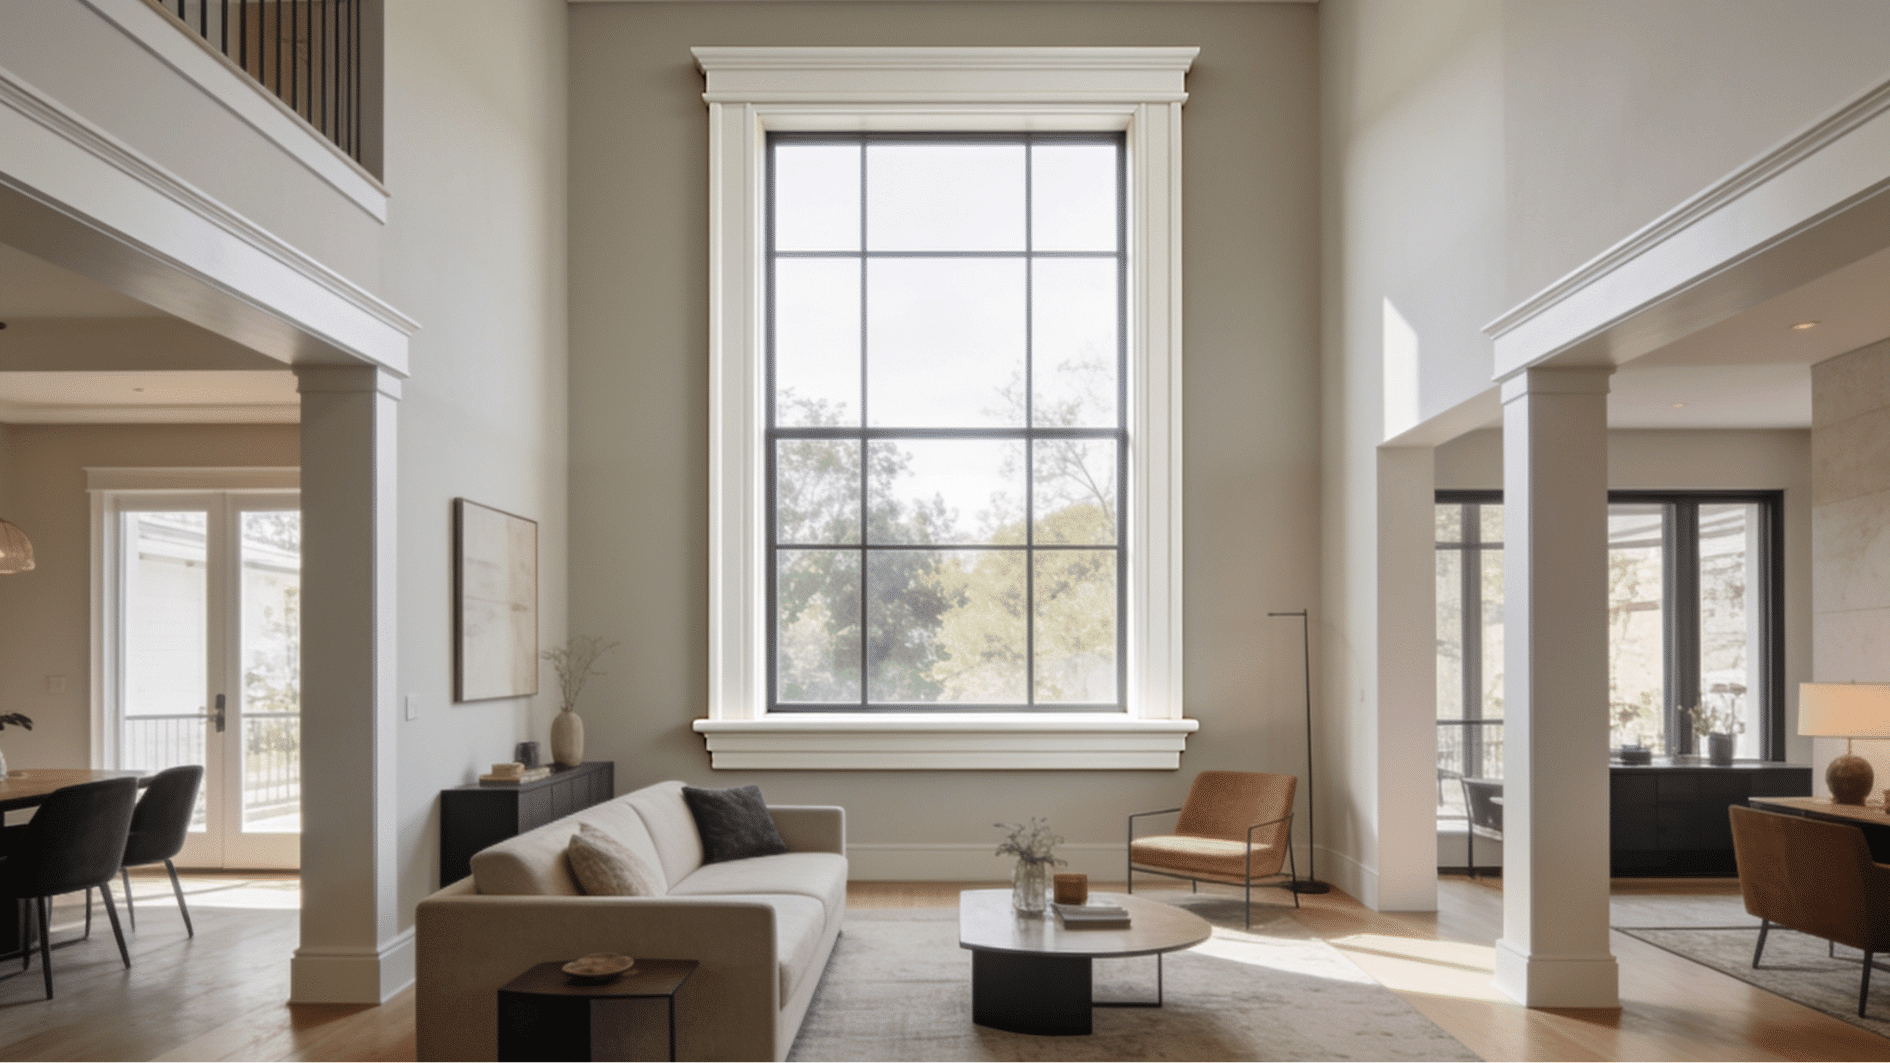
Wide board window Trim uses boards 4 to 6 inches across instead of the standard 2 to 3 inches.
It suits rooms with tall ceilings, where thin trim would look lost.
- Boards run 4 to 6 inches wide
- Hides gaps around older window frames well
- Costs more per foot than standard-width trim
Tip: Reserve wide trim for rooms with at least 9-foot ceilings, so the proportions stay balanced.
5. Colonial Window Trim
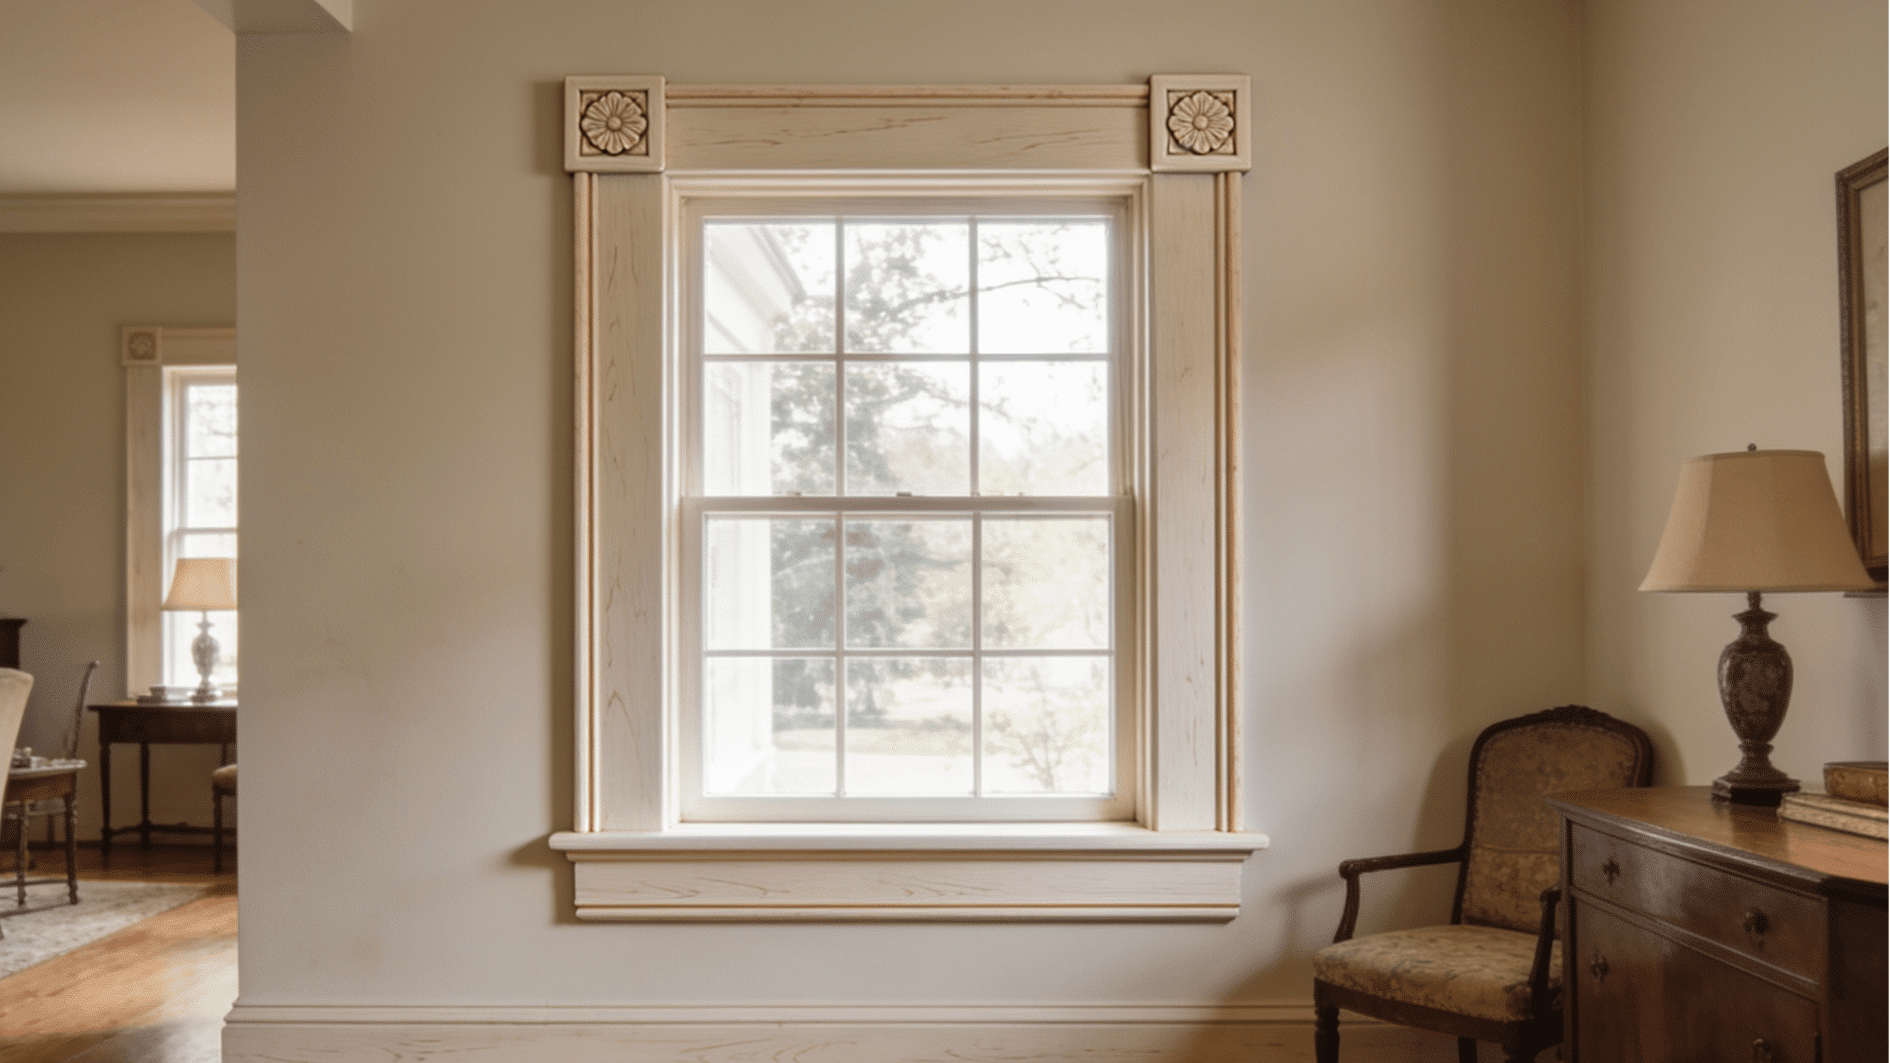
Colonial window trim uses a wider board with a small routed edge along one side. It suits homes built before the 1950s, or homes designed to look that way.
Many versions add a rosette block at each top corner instead of a mitered joint.
- Wider board with a subtle routed edge
- Fits colonial and older-style homes
- Adds an established look to newer builds
Tip: Paint it the same white as the rest of your trim, so the whole home reads as one style.
6. Craftsman Window Trim
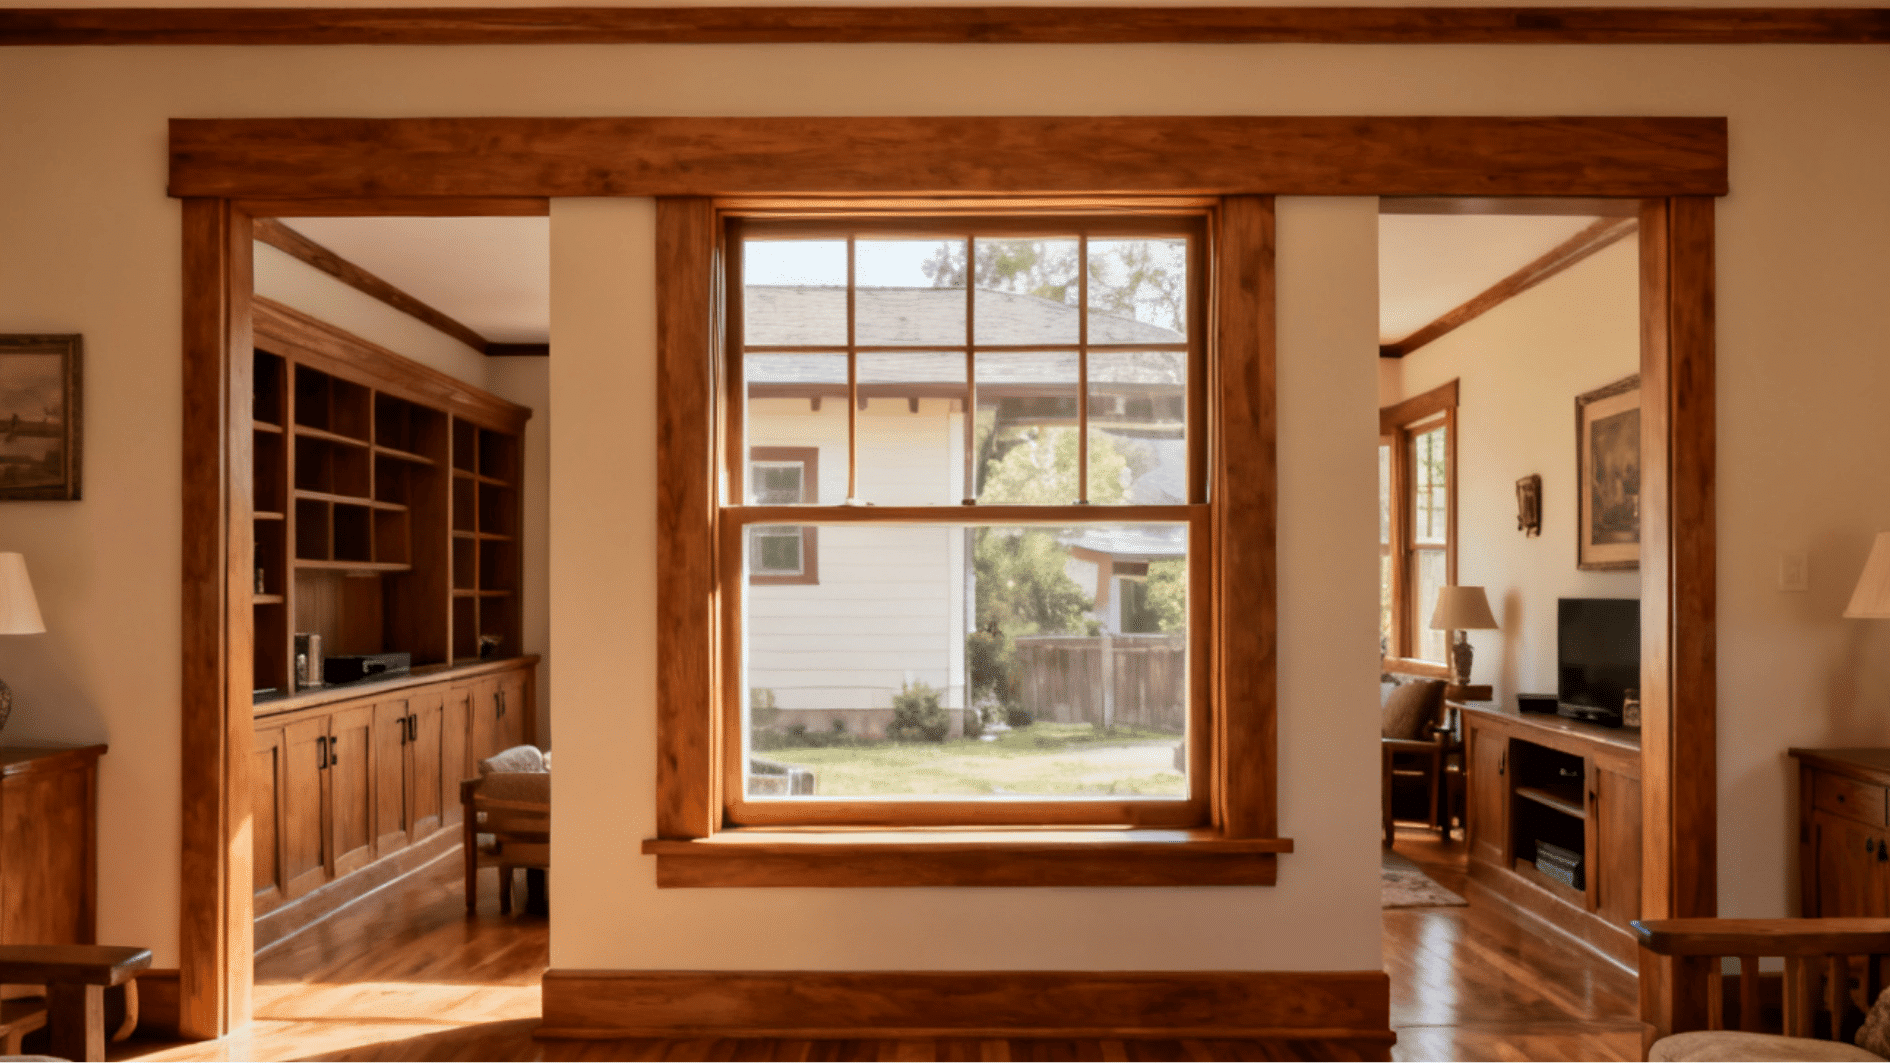
Craftsman window trim uses wide, flat boards topped with a simple horizontal header board. It’s a hallmark of Craftsman bungalows built in the early 1900s.
The look stays plain but adds a strong horizontal line above each window.
- Wide flat boards topped with a horizontal header
- Common on early 1900s Craftsman bungalows
- Works stained or painted, depending on the look
Tip: In a period Craftsman home, look at surviving doors, baseboards, and built-ins before choosing stained or painted trim so new casing stays consistent with the original woodwork.
7. Victorian Layered Window Trim
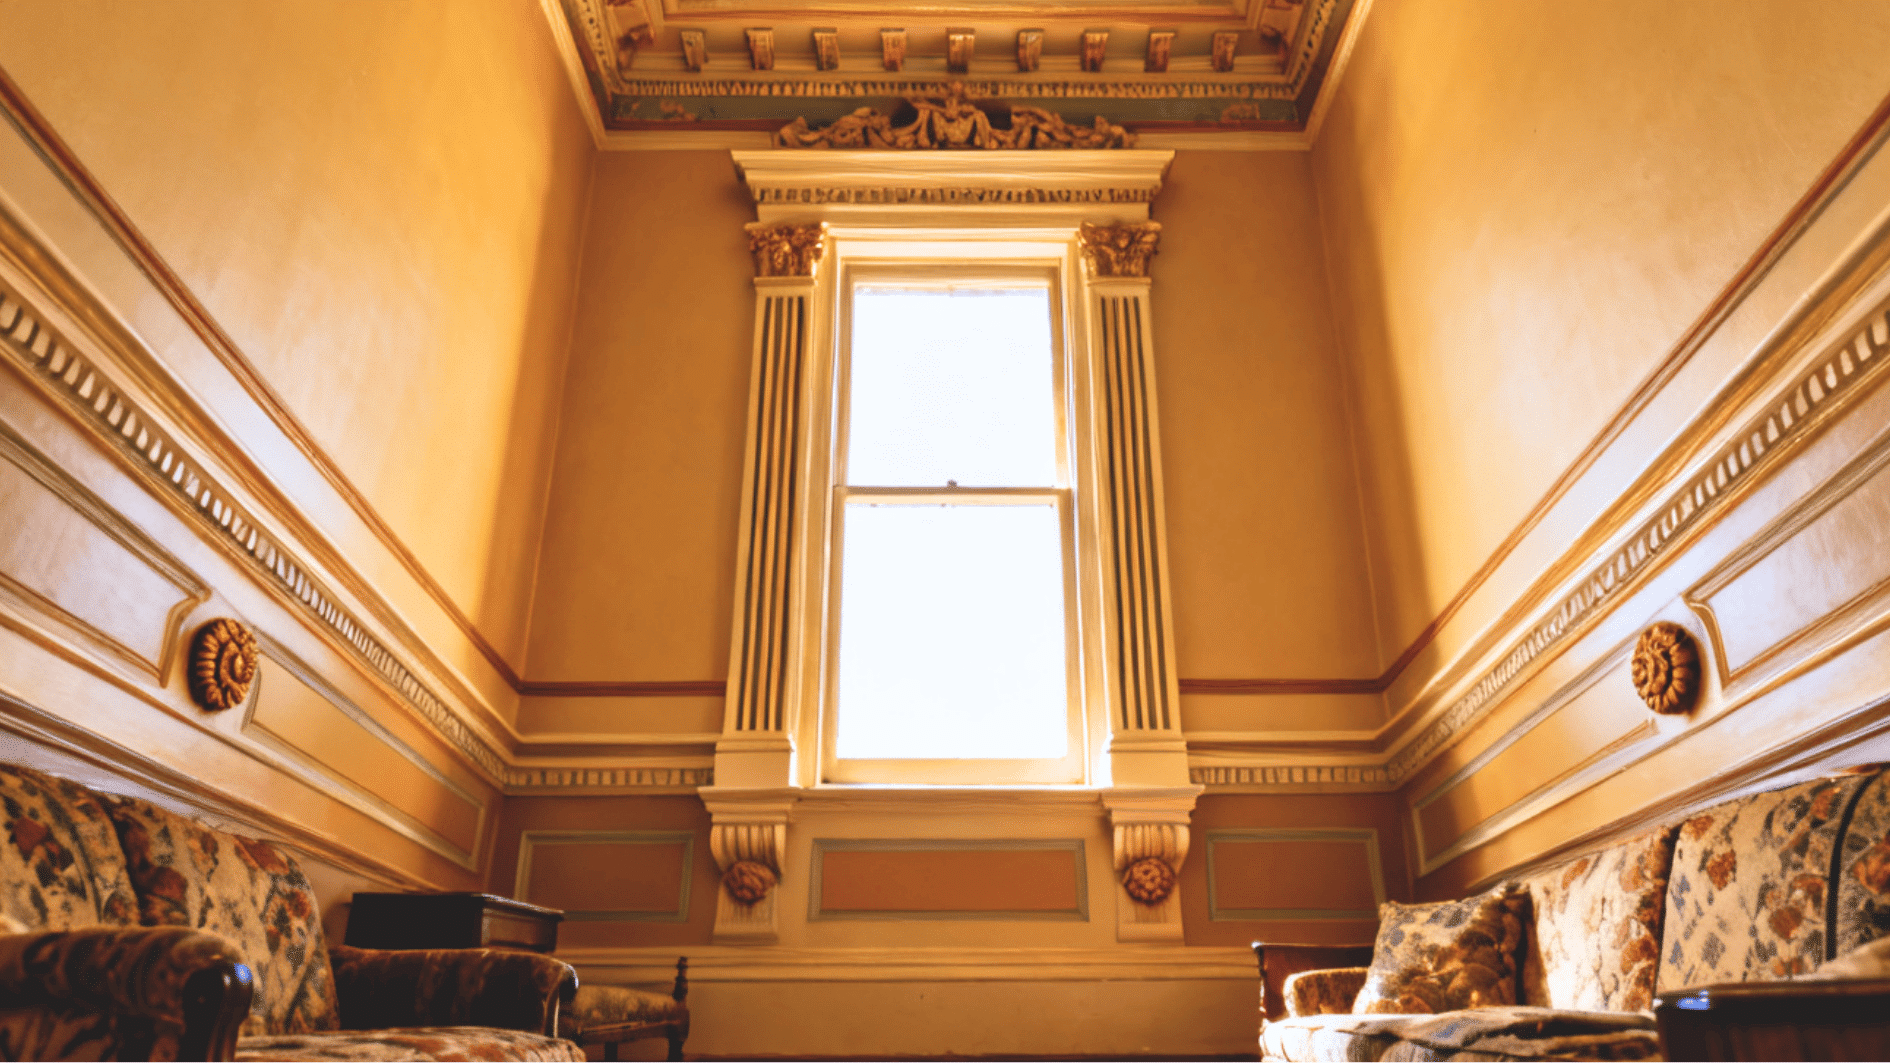
Victorian layered window trim stacks multiple pieces, like a fluted casing, a rosette corner block, and a decorative crown.
It suits Victorian and Queen Anne homes with detailed woodwork elsewhere.
- Layered casing, rosette blocks, and a crown
- Suits Victorian and Queen Anne homes
- Takes the most time and skill to install
Tip: If you’re renovating a historic Victorian home, this trim keeps new work consistent with the rest of the house.
8. Crown Window Trim
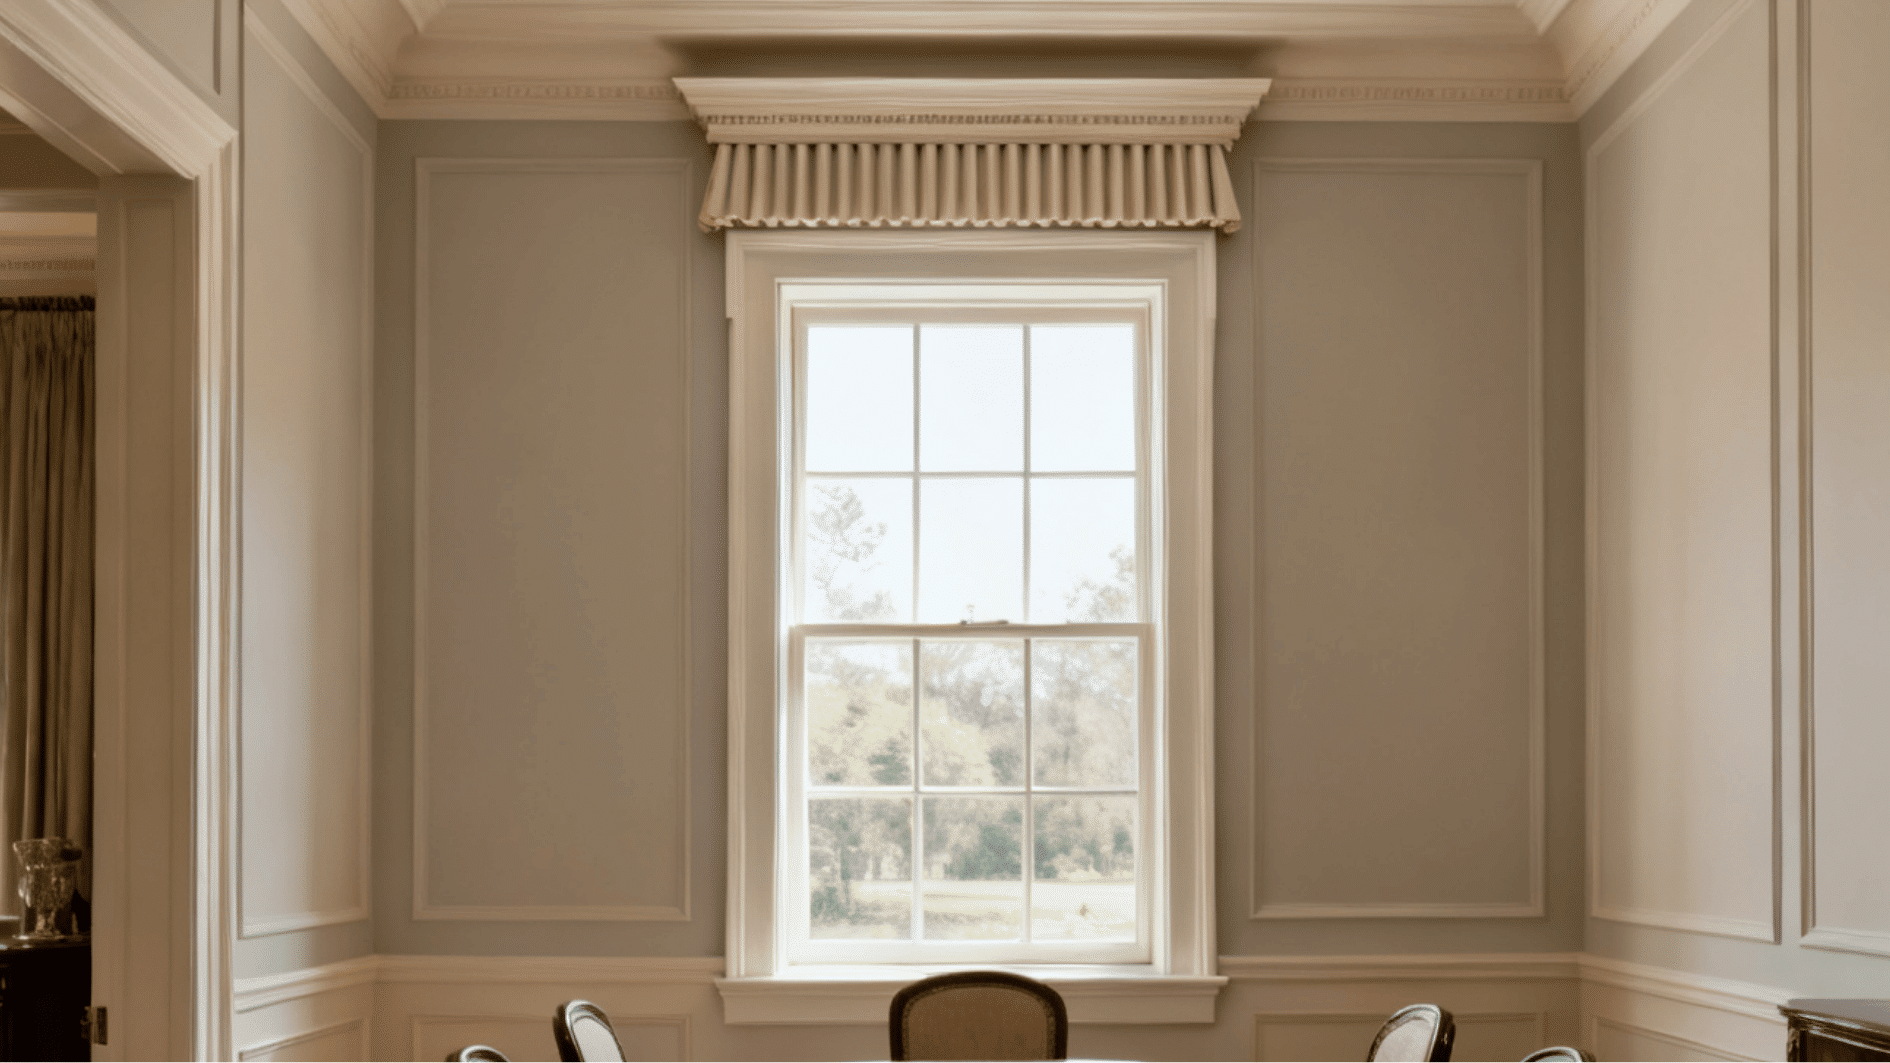
Crown window trim adds crown molding details such as a small pediment or decorative cap above the casing, giving formal rooms more architectural definition.
In smaller rooms, I usually judge crown trim from across the room rather than close up. A detail that looks subtle in your hand can feel much heavier once it surrounds the entire window.
- Pediment or fluted crown above the casing
- Suits formal, higher-detail interior rooms
- Adds visual weight to a plain window
Tip: Keep the crown detail simple in rooms with low ceilings, so it doesn’t feel heavy.
9. Farmhouse Window Trim
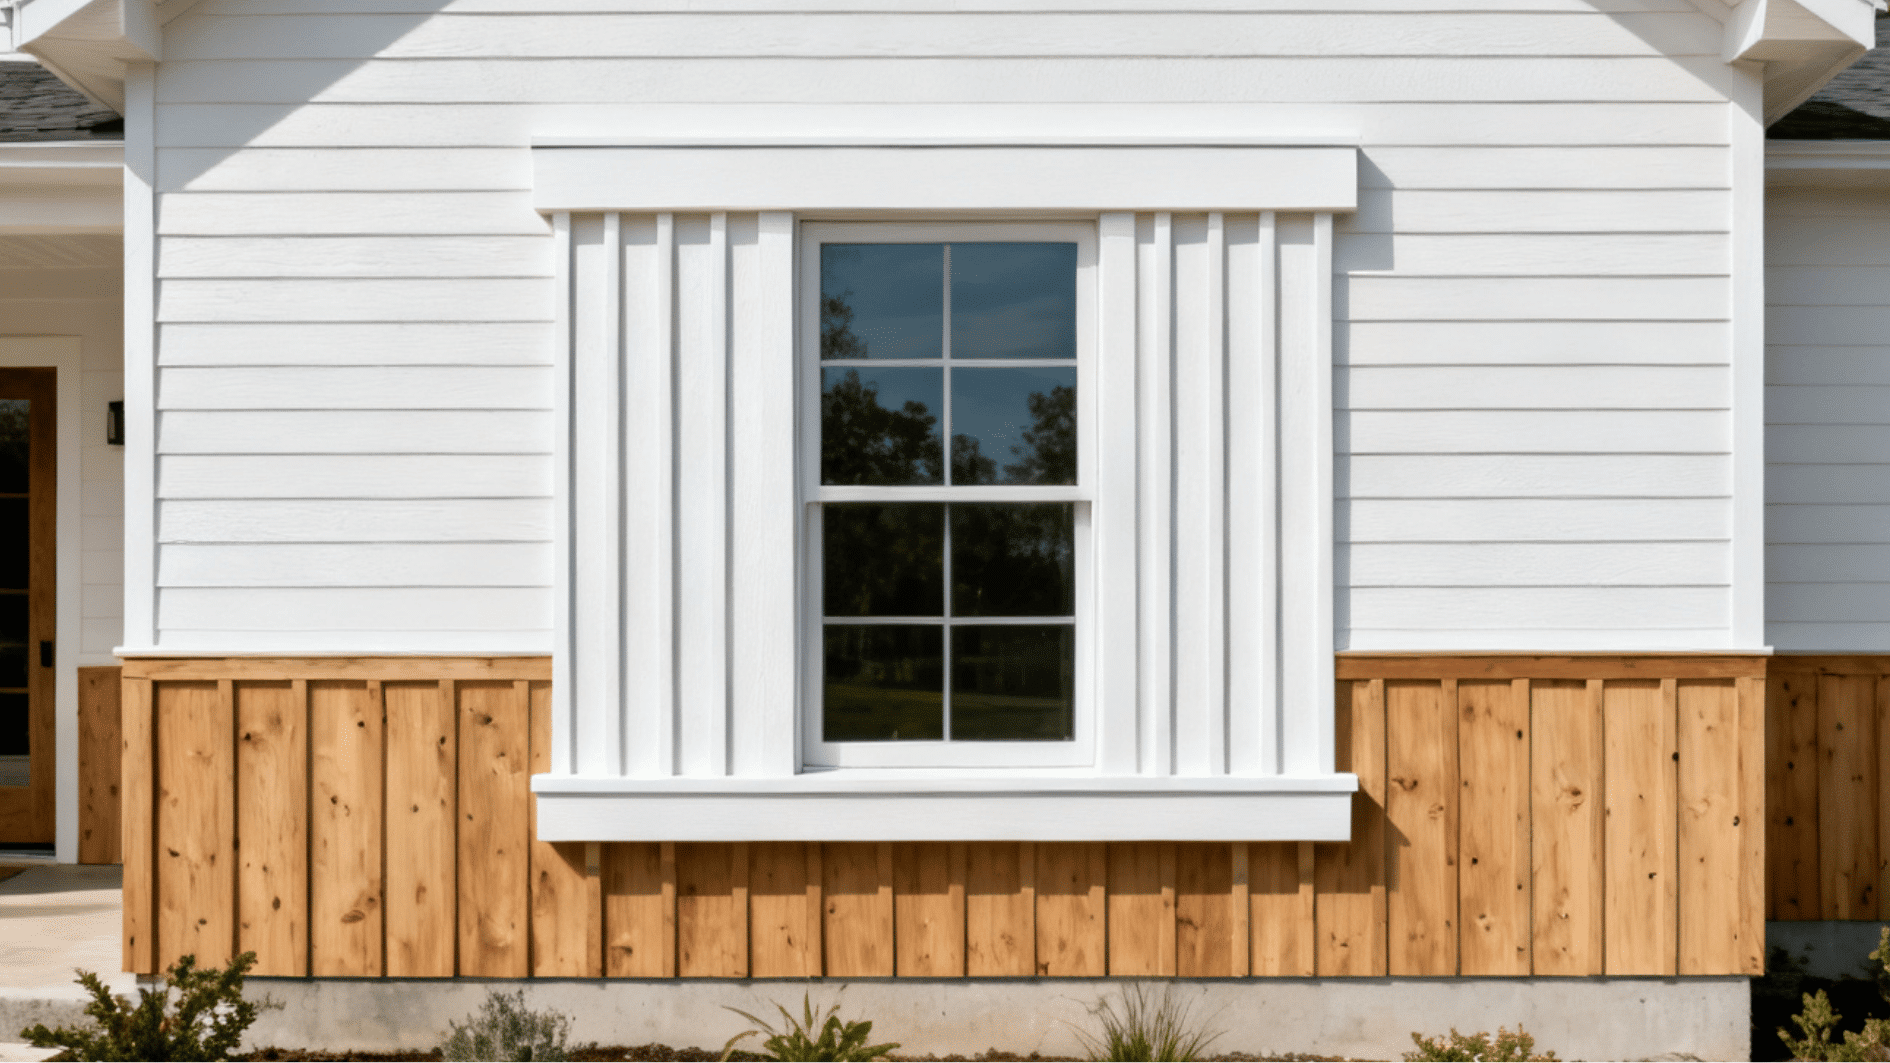
Wide flat casing can also connect naturally with farmhouse-style interiors, especially when nearby rooms use board-and-batten, shiplap, warm wood, or simple painted trim.
- Wide flat board paired with vertical battens
- Matches board-and-batten siding on farmhouse exteriors
- Fiber cement resists warping better than wood
Tip: Match the batten spacing to your siding, so the trim reads as one design instead of two.
10. Rustic Wood Window Trim
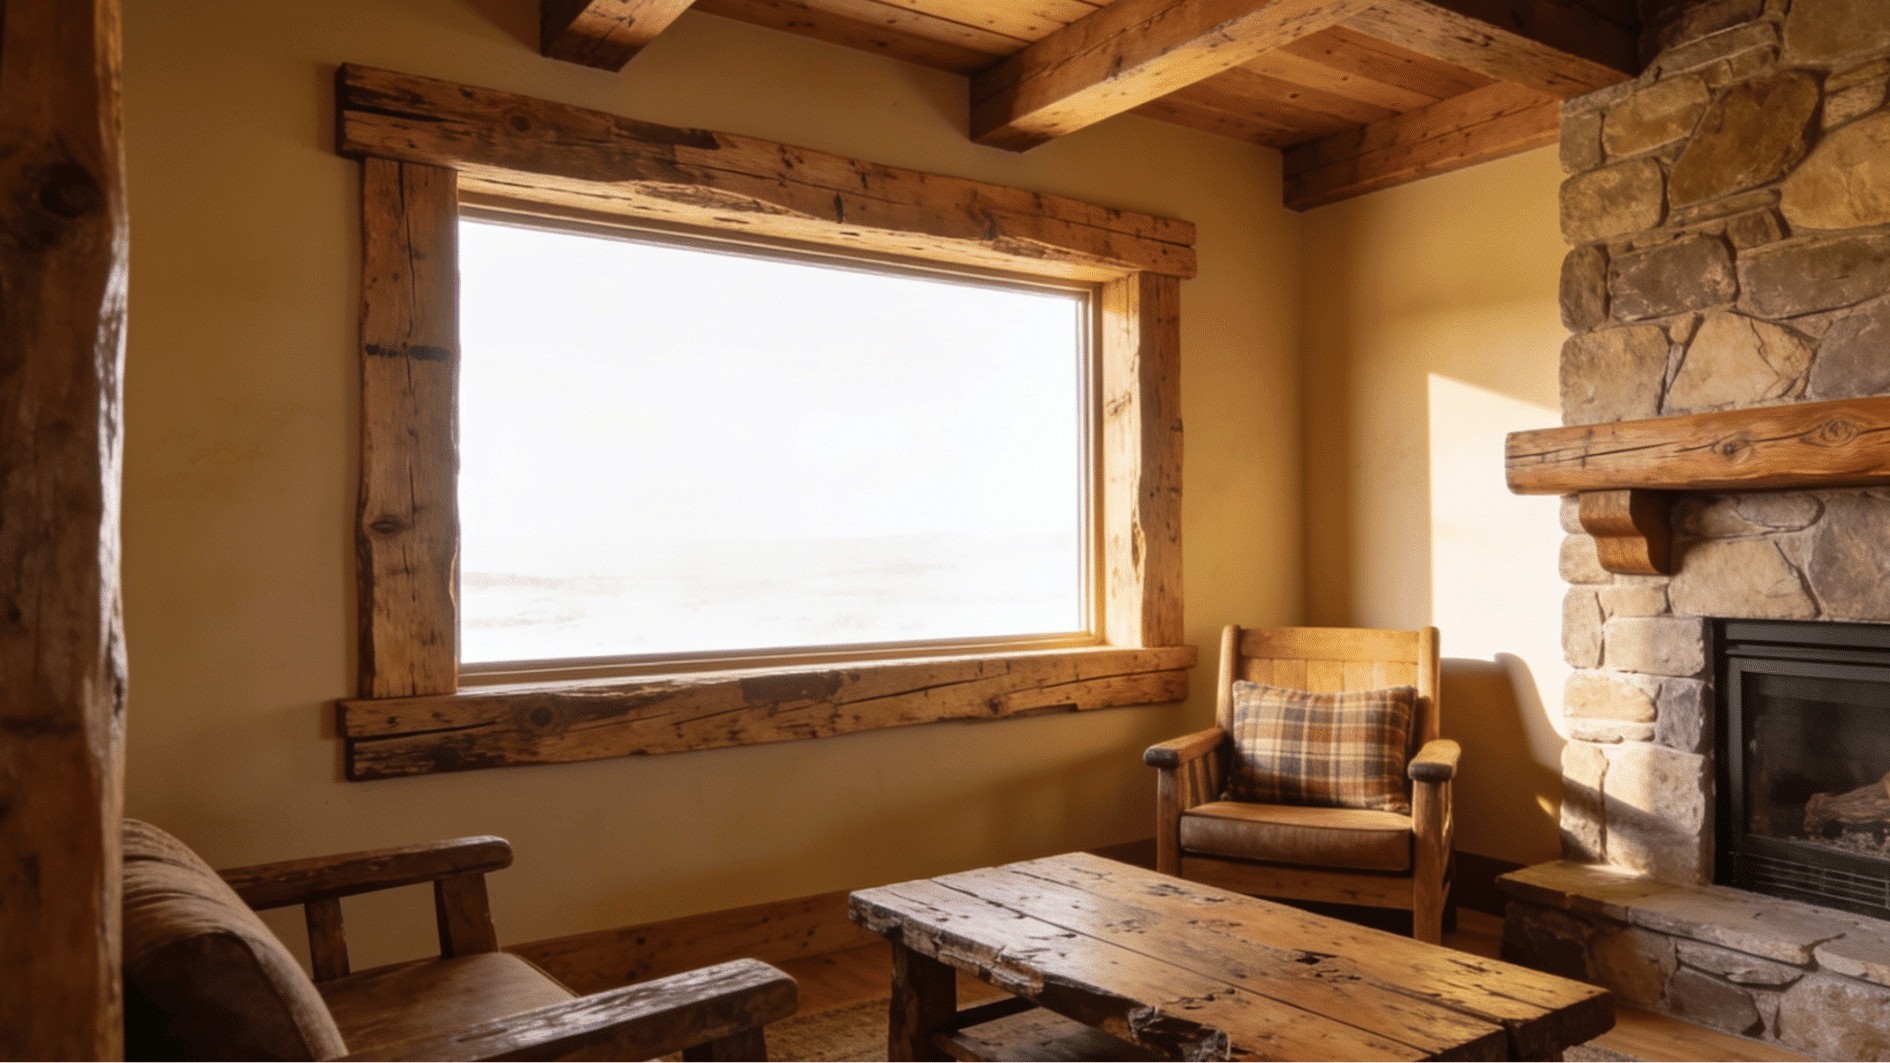
Rustic wood window trim uses thick, unpainted boards left in a stained or natural finish.
Reclaimed wood or rough-cut lumber gives this style its texture, and it suits cabins, lodges, and homes with exposed wood beams elsewhere.
If natural stain feels too dark, a whitewashed wood finish can soften the grain while still keeping some of the texture visible.
- Thick boards left stained or natural
- Often built from reclaimed or rough-cut lumber
- Suits cabins, lodges, and beam-heavy interiors
Tip: Use a clear sealant to protect the wood without hiding the grain underneath.
11. Shiplap Window Trim
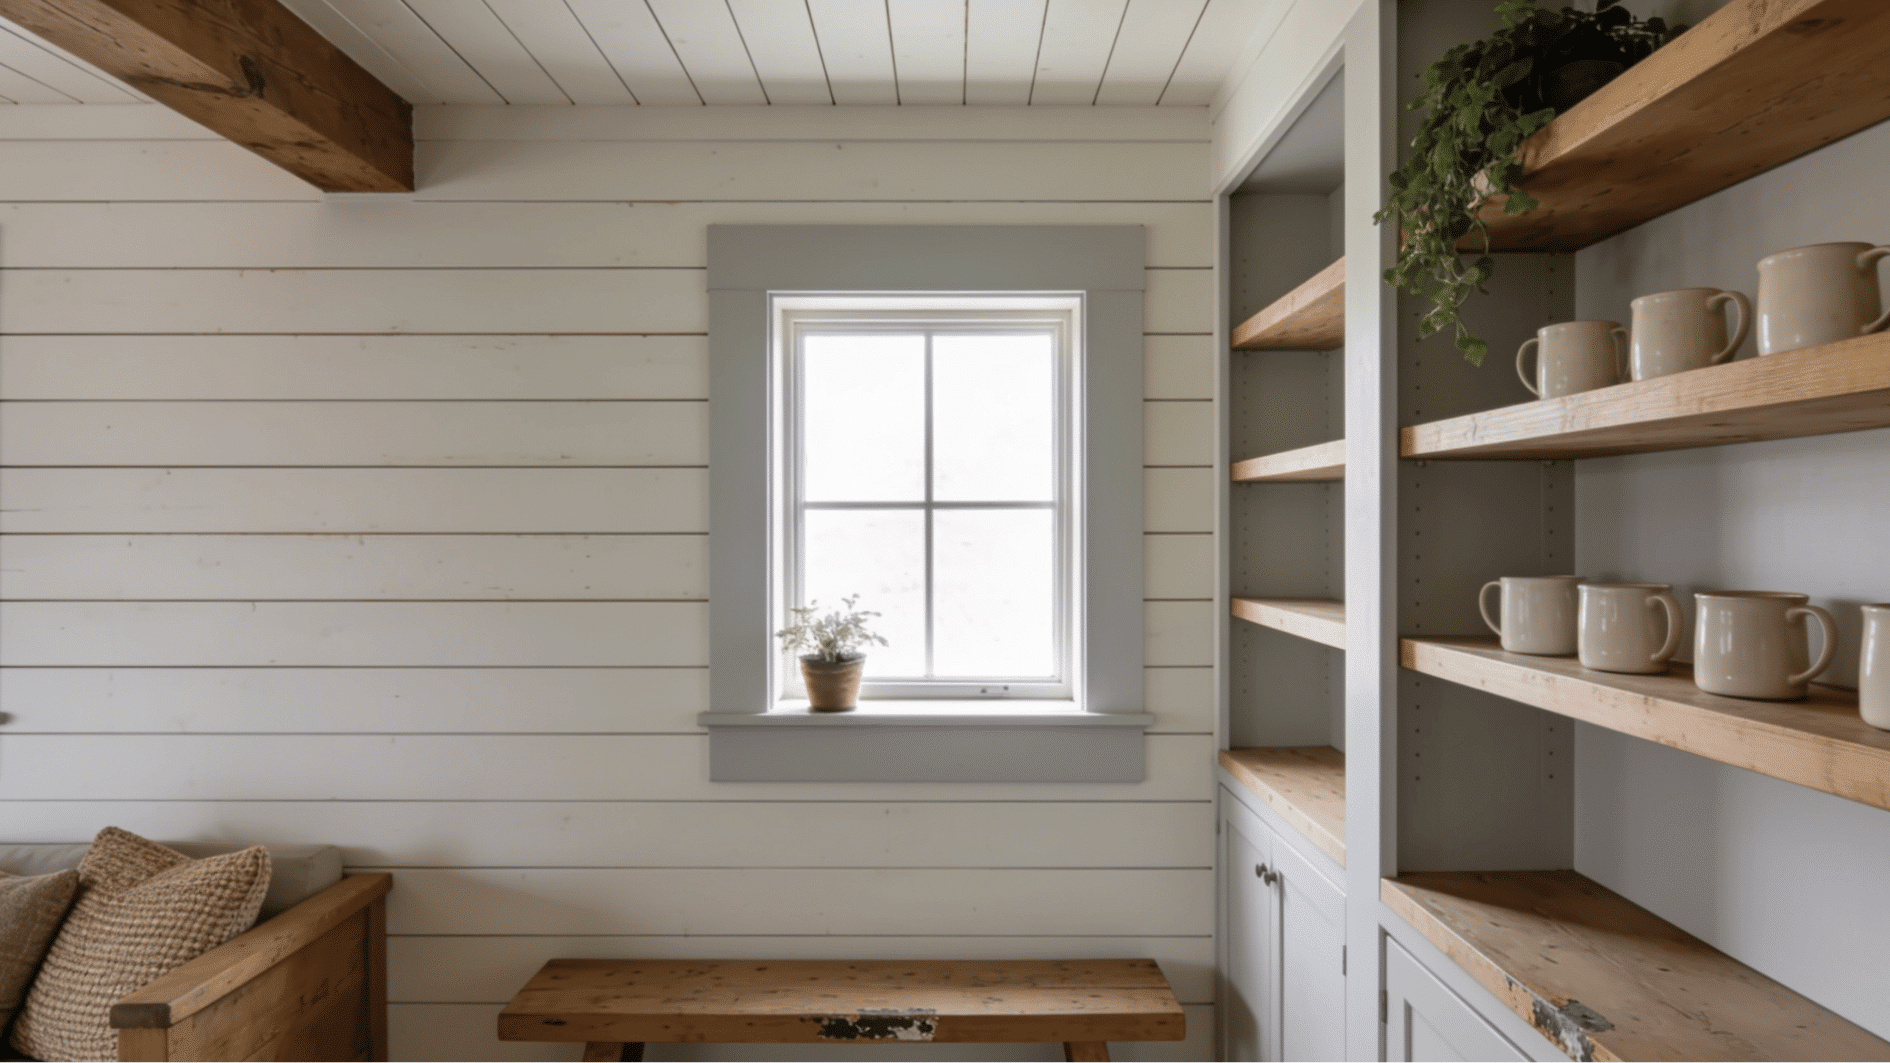
Shiplap window trim surrounds the window with horizontal shiplap boards instead of standard flat casing.
It matches shiplap walls or ceilings inside farmhouse-style homes, and works best in casual rooms.
- Horizontal shiplap boards around the window
- Matches shiplap walls or ceilings nearby
- Best in casual rooms like kitchens or mudrooms
Tip: If your home already has shiplap walls, this trim ties the window into that same look.
12. Simple Butt-Joint Window Trim
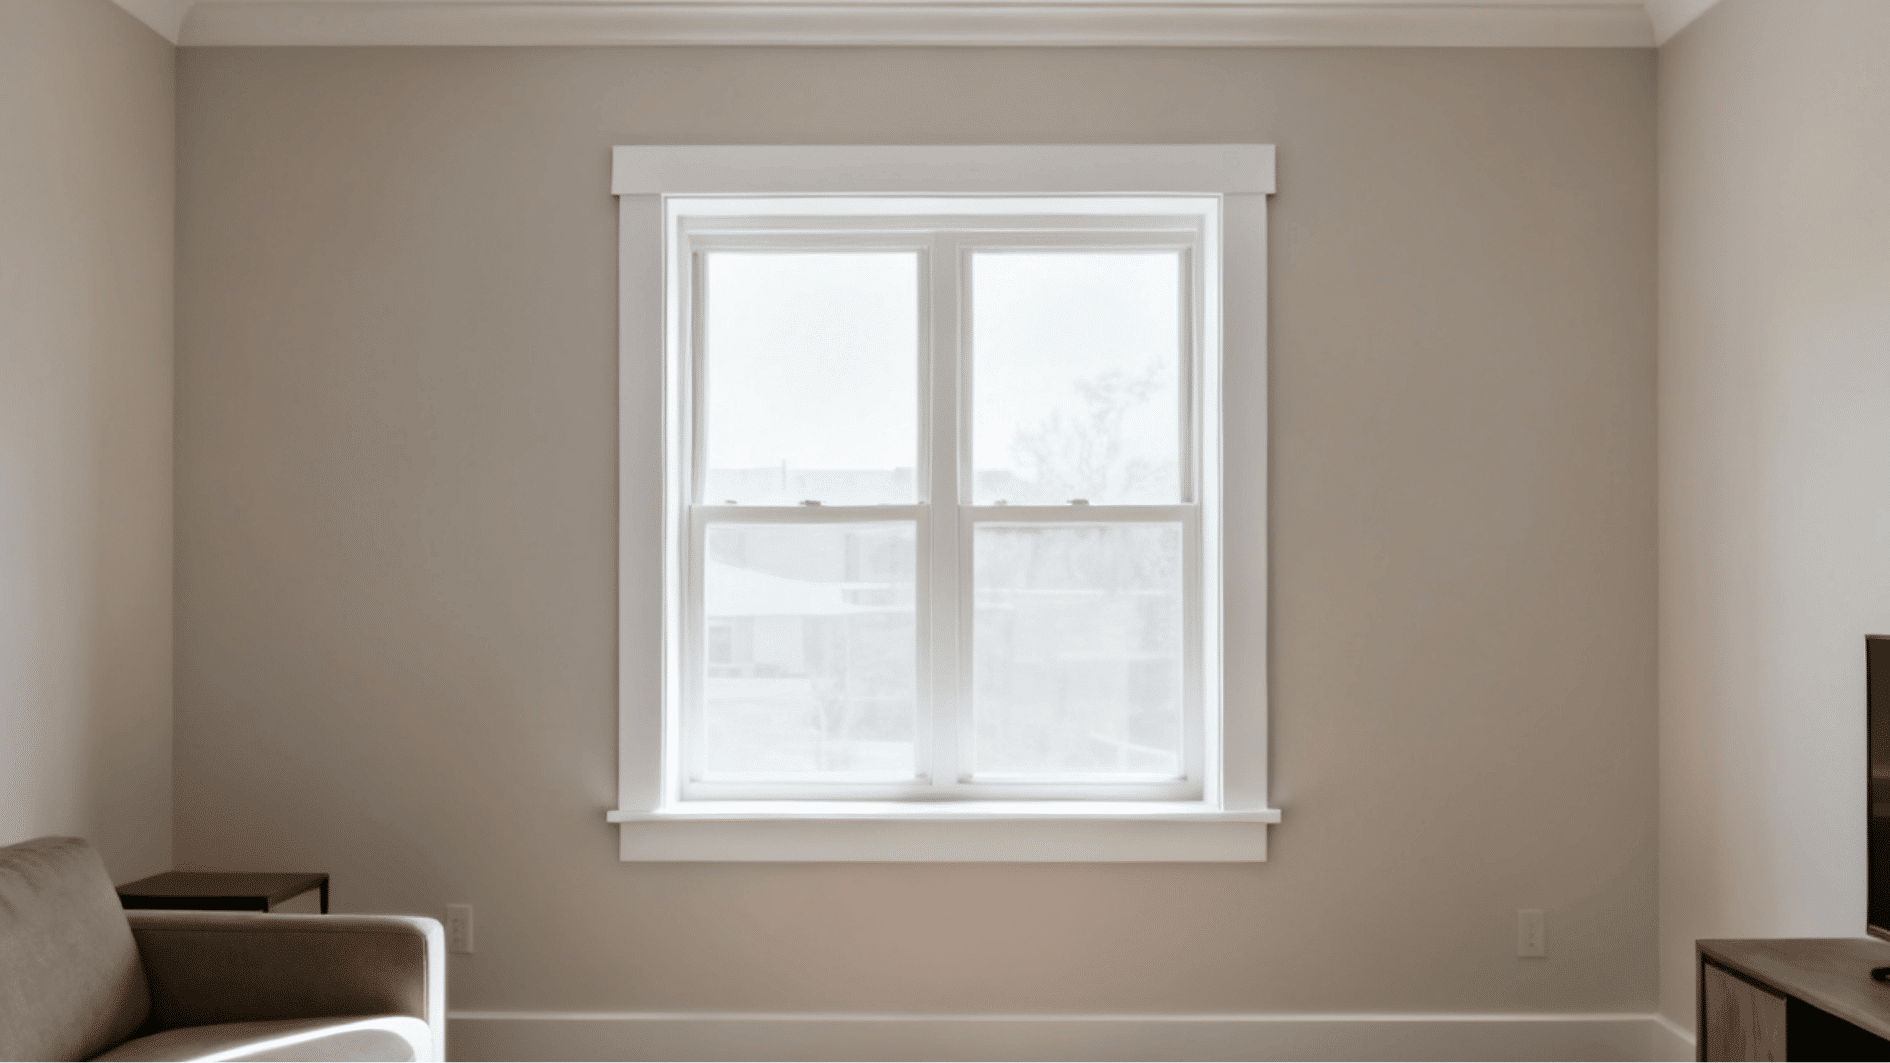
Simple butt-joint window trim skips fancy corners, using plain butt joints where two boards meet at a straight angle.
It’s the fastest and cheapest option on this list, and works well in rentals or quick refreshes.
- Plain butt joints, no mitered corners
- Fastest and cheapest style to install
- Best for rentals or quick refreshes
Tip: Sand the joint lightly before painting, so any small gap stays hidden.
13. Traditional Exterior Window Trim
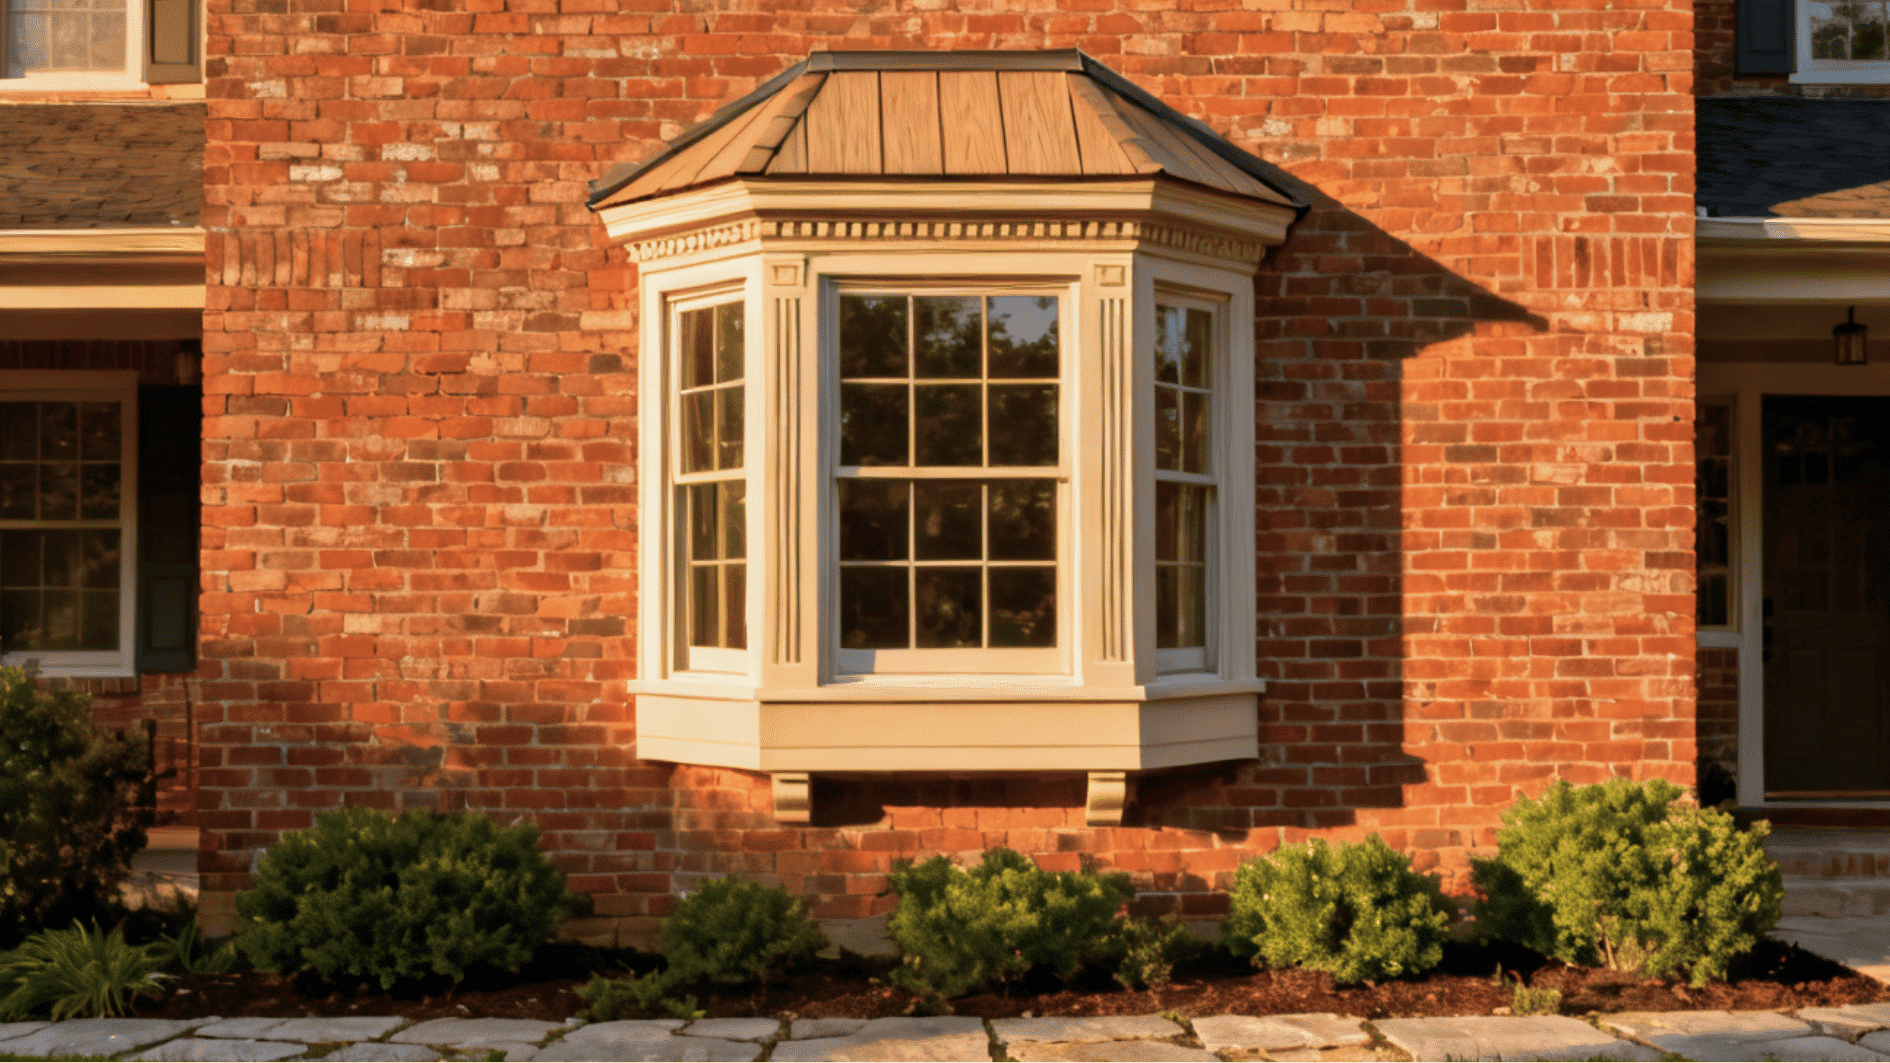
Traditional exterior window trim adds a small peaked or curved crown above the window frame. It suits brick colonial homes and traditional two-story builds.
This style needs painted wood or a wood-look composite to hold its shape over time.
- Peaked or curved crown above the frame
- Suits brick colonial and two-story homes
- Helps shed rainwater away from the window head
Tip: Use painted wood or composite instead of raw wood, so the crown shape holds up through the seasons.
14. Picture Frame Window Trim
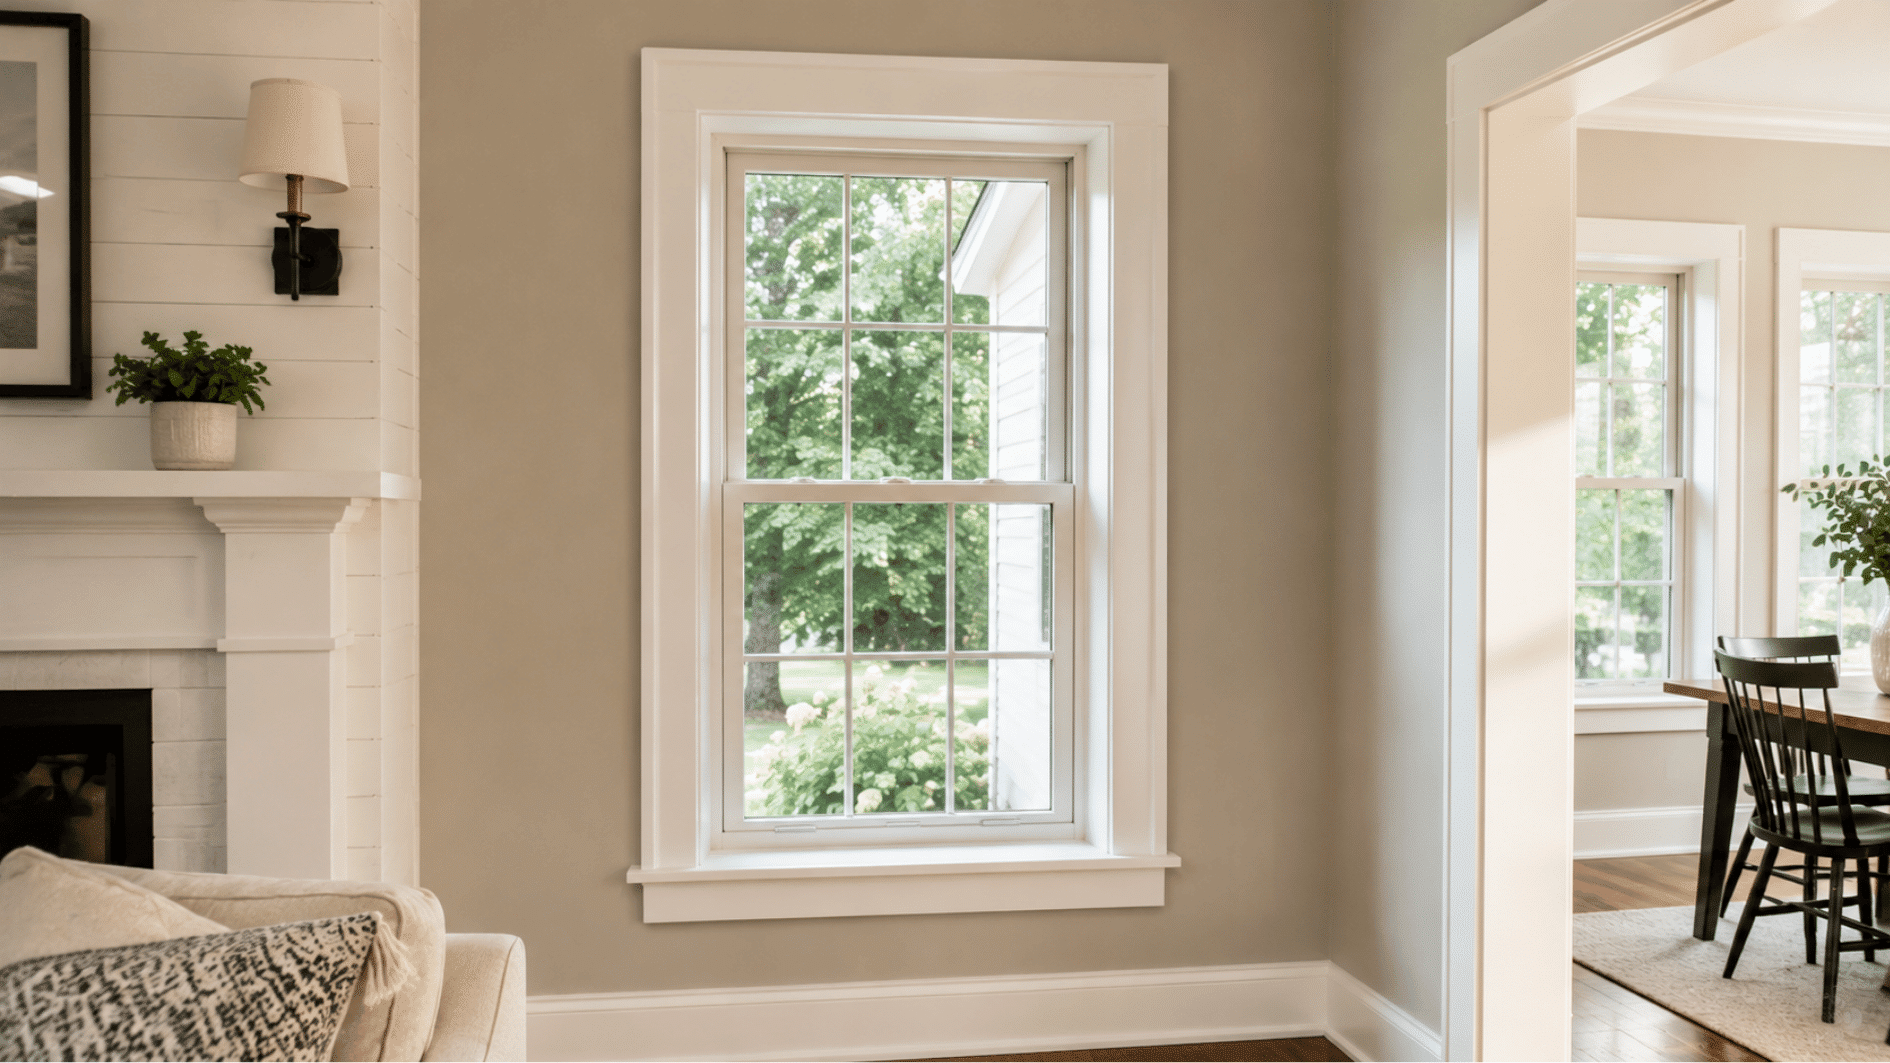
Picture frame window trim uses a mitered casing with clean 45-degree corners and no rosettes or headers. It gives the window a simple, symmetrical frame.
This style suits transitional and modern colonial homes that want detail without extra ornament.
- Mitered corners, no rosettes or blocks
- Suits transitional and modern colonial homes
- Costs more labor than butt-joint corners
Tip: Keep the miter cuts tight and well-sanded, since gaps show up more on a clean mitered frame.
15. Arched Window Trim
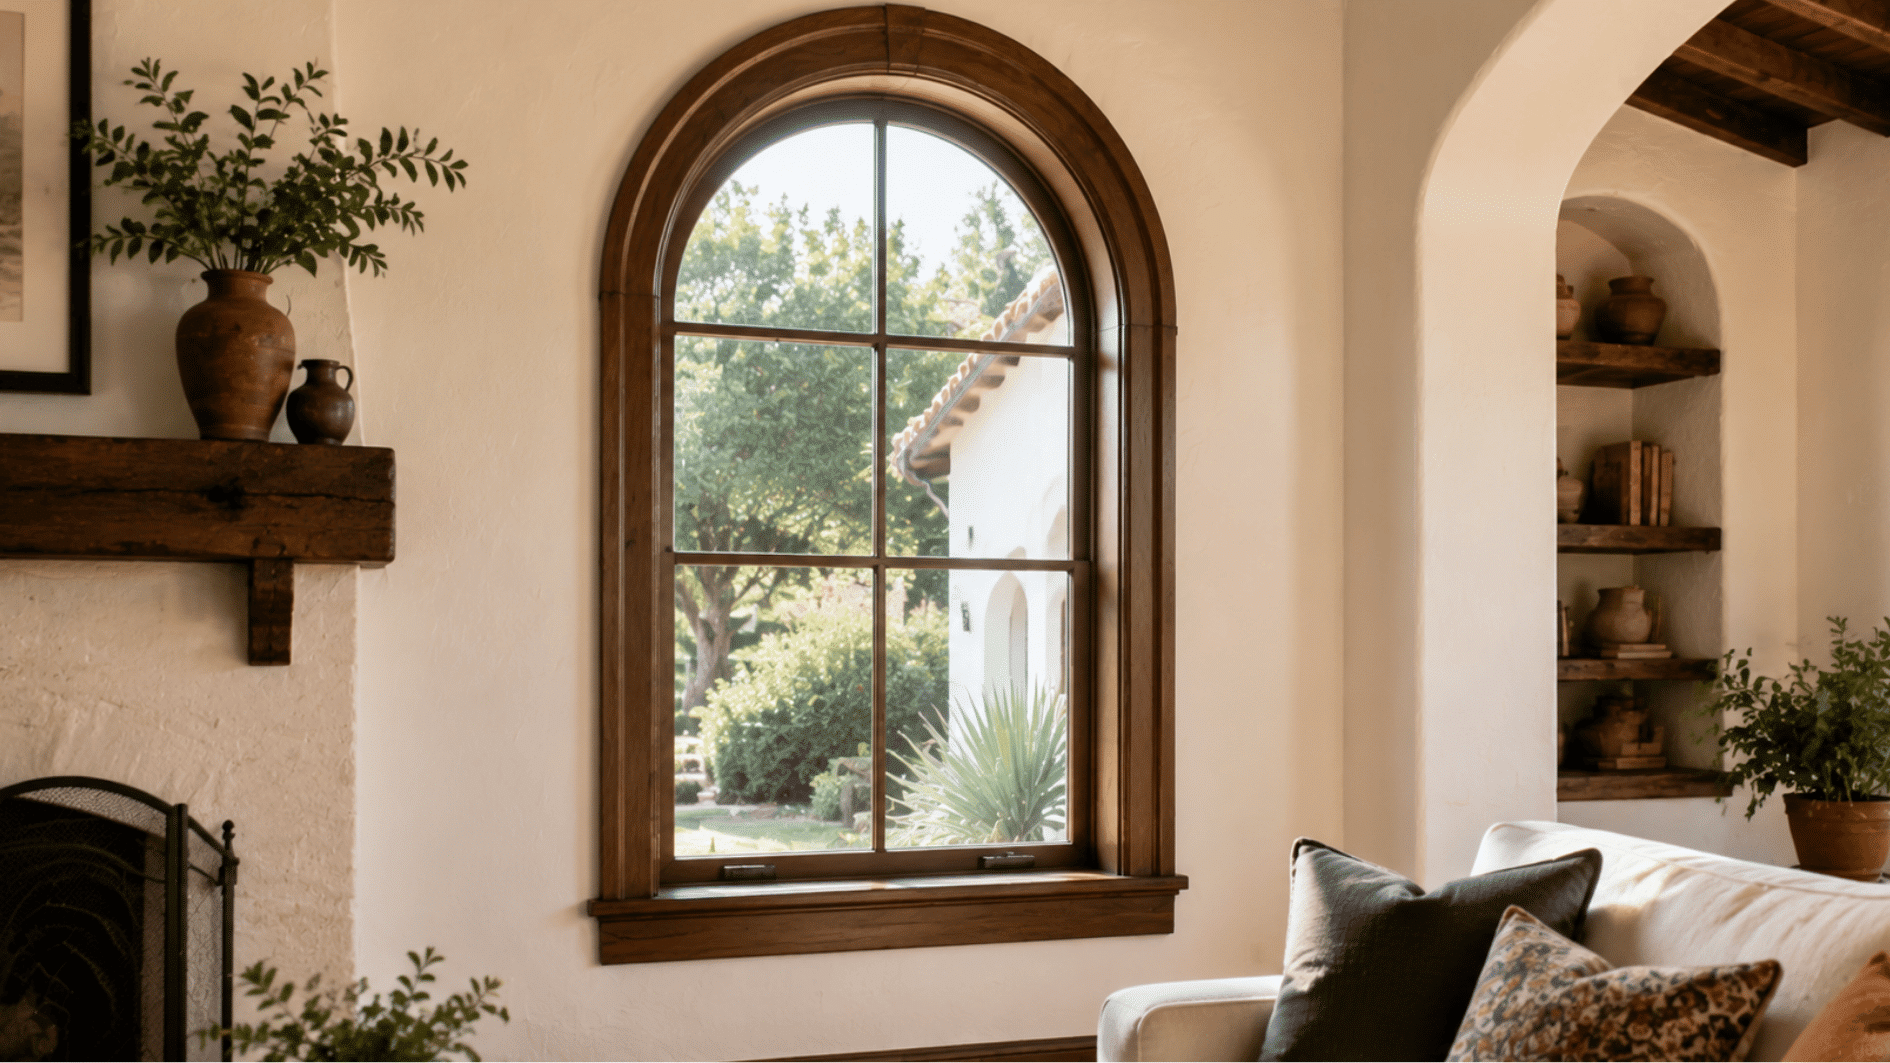
Arched window trim curves to match a radius-top or arched window instead of running in straight lines. It takes flexible or custom-milled material to follow the curve.
This style suits Mediterranean, Spanish, and traditional homes with arched openings.
- Curved trim matches radius-top windows
- Needs flexible or custom-milled material
- Costs more than straight trim due to custom cutting
Tip: Measure the window’s radius carefully before ordering flexible or custom casing, since arched openings can vary even when they look similar.
Matching Window Trim Ideas with Popular Home Designs
Picking one style is only half the job. The bigger win comes from carrying that style consistently across a whole home, inside and out.
|
Home Style |
Interior Trim |
Exterior Trim |
Key Note |
|---|---|---|---|
|
Modern |
Flat Stock or Shadow Line |
Metal-finish or Black Window Trim |
Keep every room in the same flat, low-profile family |
|
Classic |
Colonial |
Crown, in formal rooms |
Trim width stays identical across every window |
|
Farmhouse |
Shiplap, in casual rooms |
Farmhouse Window Trim |
Add Rustic Wood Window Trim anywhere beams show |
|
Traditional |
Crown, in formal rooms |
Traditional Exterior Window Trim |
Crown details echo the exterior peak without matching exactly |
|
Craftsman |
Craftsman Window Trim |
Wide Board Window Trim |
Stick with stained wood and matched width across the facade |
Common Window Trim Mistakes To Avoid
A few mistakes show up again and again, even on otherwise nice homes. Avoid these five to keep trim looking right.
- Choosing trim that is too narrow: Narrow trim on a large window looks thin and unfinished, even in a well-designed room. Most rooms need at least 2.5 inches of width to stay visually balanced.
- Mixing too many design styles: A home with Craftsman trim upstairs and Victorian trim downstairs looks disjointed, even if each style looks good on its own. Pick one style and keep it consistent through the home.
- Ignoring exterior maintenance needs: Wood trim in a rainy or humid climate rots faster without proper sealing and paint. Skipping upkeep turns a small fix into a full replacement.
- Choosing style over function: A trim style that looks great in photos can fail if it blocks proper window operation or weatherproofing. Function has to come before looks.
- Skipping proper caulking and sealing: Unsealed gaps around trim let in drafts and moisture, even with the right style and material. A missed seal undoes an otherwise good installation.
Final Thoughts
Picking window trim comes down to matching style, size, and material to your home. The best choice fits your home’s era, protects against weather, and stays consistent throughout the house.
Start with one room or one window. Live with it for a few weeks, then decide on the rest.
Trim is one of the easier updates to change later, so don’t stress over getting it perfect on the first try. Pick a style, measure your windows, and get started this week.
Frequently Asked Questions
Can I Install Window Trim Myself?
Simple styles, like butt-joint trim, work well for most DIYers with basic tools. More detailed designs usually require professional installation for a cleaner and more precise fit.
Does Window Trim Affect a Home’s Resale Value?
Window trim does not usually increase resale value on its own, but well-fitted and consistent trim can improve how a home looks in photos and during walkthroughs.
How Do I Remove Old Window Trim Without Damaging the Wall?
Score along the paint line with a utility knife first, then carefully use a pry bar in small sections to remove the trim without pulling away wall material.
How Long Does It Take to Install New Window Trim?
A single window with a simple trim style can take less than an hour, while a whole-house window trim project may take several days depending on the design and number of windows.






One Response