Learning how to make beaded bracelets is a simple craft that comes from real hands-on experience – no fancy tools or expert setup needed.
This guide is based on practical steps that actually work for beginners, especially for stretch elastic and no-clasp styles.
You’ll move through each stage slowly, from choosing the right materials to finishing a bracelet that fits well and feels comfortable to wear.
Along the way, you’ll also learn common mistakes to avoid and easy fixes that come from real crafting experience, not theory.
The goal is to keep everything clear, practical, and beginner-friendly so you can confidently create bracelets at home.
Why Beaded Bracelets are Easy DIY Crafts
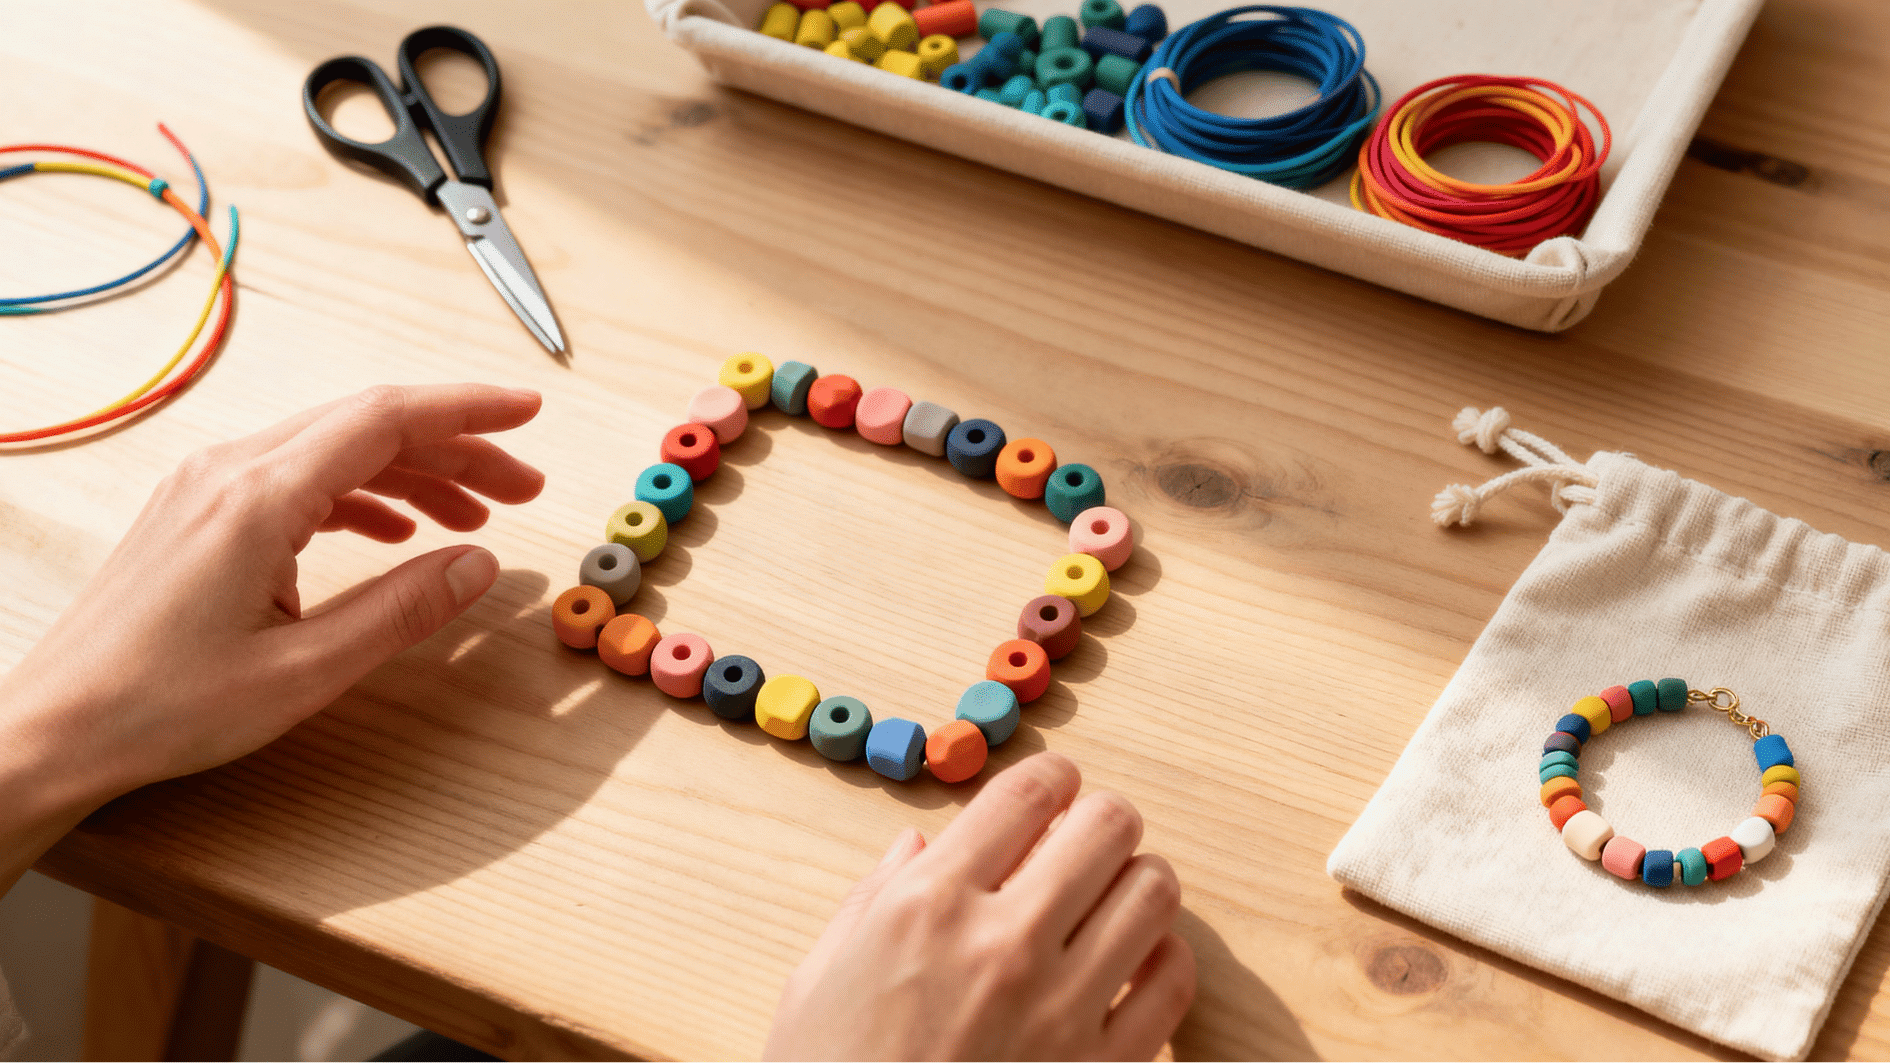
A beaded bracelet is one of the simplest DIY crafts you can start at home. You do not need special tools or a full craft setup. A few beads, a piece of cord, and a basic idea are enough to begin.
This is what makes it perfect for beginners who want a quick and creative project.
You can make beaded bracelets for many small moments, such as:
- Gifts for friends or family
- Kids’ craft activities
- Party favors or group crafts
- Relaxing weekend DIY time
Each bracelet can look different depending on your bead choice. Bright colors, letter beads, charms, or soft neutral tones can all change the final look in a simple way.
It often feels like a small creative pause, where random beads turn into something personal you can actually wear or share.
If you enjoy simple handmade projects like this, you might also like other craft ideas for adults that use basic materials and easy techniques.
Beads and Strings for Different Bracelet Styles
This section keeps things simple and practical, helping you pick beads and strings that actually work well together so your bracelet is comfortable to wear and easy to put together, even if it’s your first time trying it.
Beads That Work Well for Beginners
Start with beads that are easy to hold, string, and arrange into simple patterns. These are ideal for learning because they give clean results without much effort.
| Bead Type | Best Use | Why It Works |
|---|---|---|
| Pony Beads | Kids’ crafts, quick bracelets | Easy to handle and beginner-friendly |
| Clay Beads | Colorful stacks | Lightweight and visually fun |
| Glass Beads | Clean, polished designs | Smooth finish and slightly glossy look |
| Letter Beads | Names and words | Adds personal touch easily |
| Spacer Beads | Pattern control | Keeps designs balanced |
| Charm Beads | Center detail | Adds a focal point |
Best Strings for Each Bracelet Style
The string you choose affects stretch, durability, and how the bracelet closes. Picking the right one makes the process smoother and helps the bracelet last longer.
| Bracelet Style | Best String | Why It Works |
|---|---|---|
| Stretch Bracelet | Stretch Elastic Cord | Easy slip-on design, no clasp needed |
| Sliding Knot Bracelet | Nylon Or Cotton Cord | Adjustable and beginner-friendly |
| Loop-And-Bead Bracelet | Thin Cord or Leather Cord | Simple handmade closure |
| Charm Bracelet | Elastic or Beading Wire | Holds focal charm securely |
| Seed Bead Bracelet | Thin Elastic Thread | Works best with tiny beads |
Tip: For beginners, stretch elastic cord is usually the easiest starting point since it keeps the process simple and quick. Nylon or cotton cord is better when you want adjustable sizing or a more handmade look.
How to Make Beaded Bracelets with Simple Steps
Once your beads and string are ready, it is time to start building your bracelet. This part is simple, but a little planning makes the final piece look cleaner, fit better, and feel more fun to wear.
Step 1: Measure the Wrist First
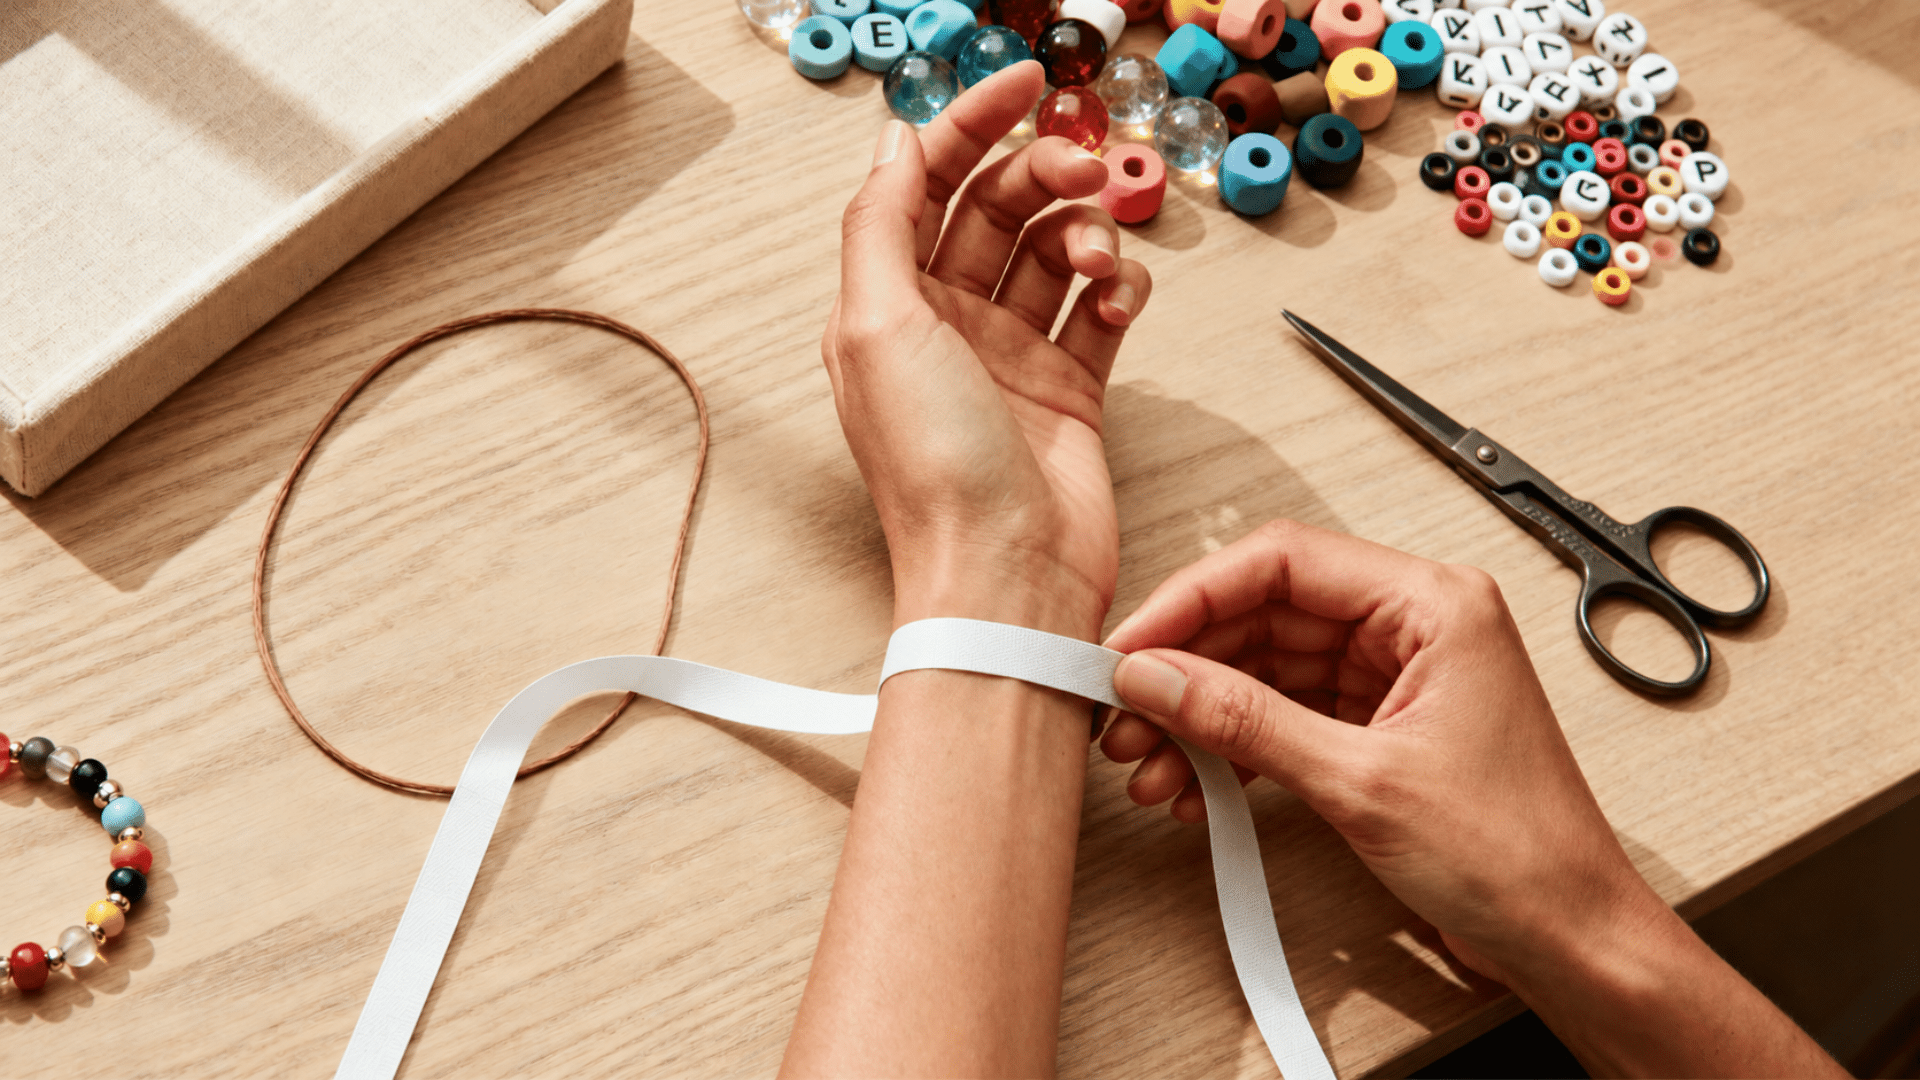
A good bracelet starts with the right size. This helps the bracelet sit well without feeling too tight or too loose.
- Wrap a measuring tape around the wrist.
- Add about ½ inch for a comfy fit.
- Add a little extra space for chunky beads.
- Cut the extra cord so you have enough room for tying.
Tip: Do not cut the cord too short at the start. A little extra cord is much easier to trim later than a bracelet that is hard to tie.
Step 2: Plan the Bead Pattern
Before stringing, lay your beads out in the order you want. This lets you fix the design before the beads go on the cord.
- Try color blocks for a bold look.
- Use repeating colors for a neat pattern.
- Add letter beads for names or short words.
- Place one charm in the center if you want a main detail.
- Use spacer beads when the design feels too busy.
Tip: Take a quick photo of your bead layout before stringing. It helps you remember the order if the beads get bumped.
Step 3: String the Beads in Order
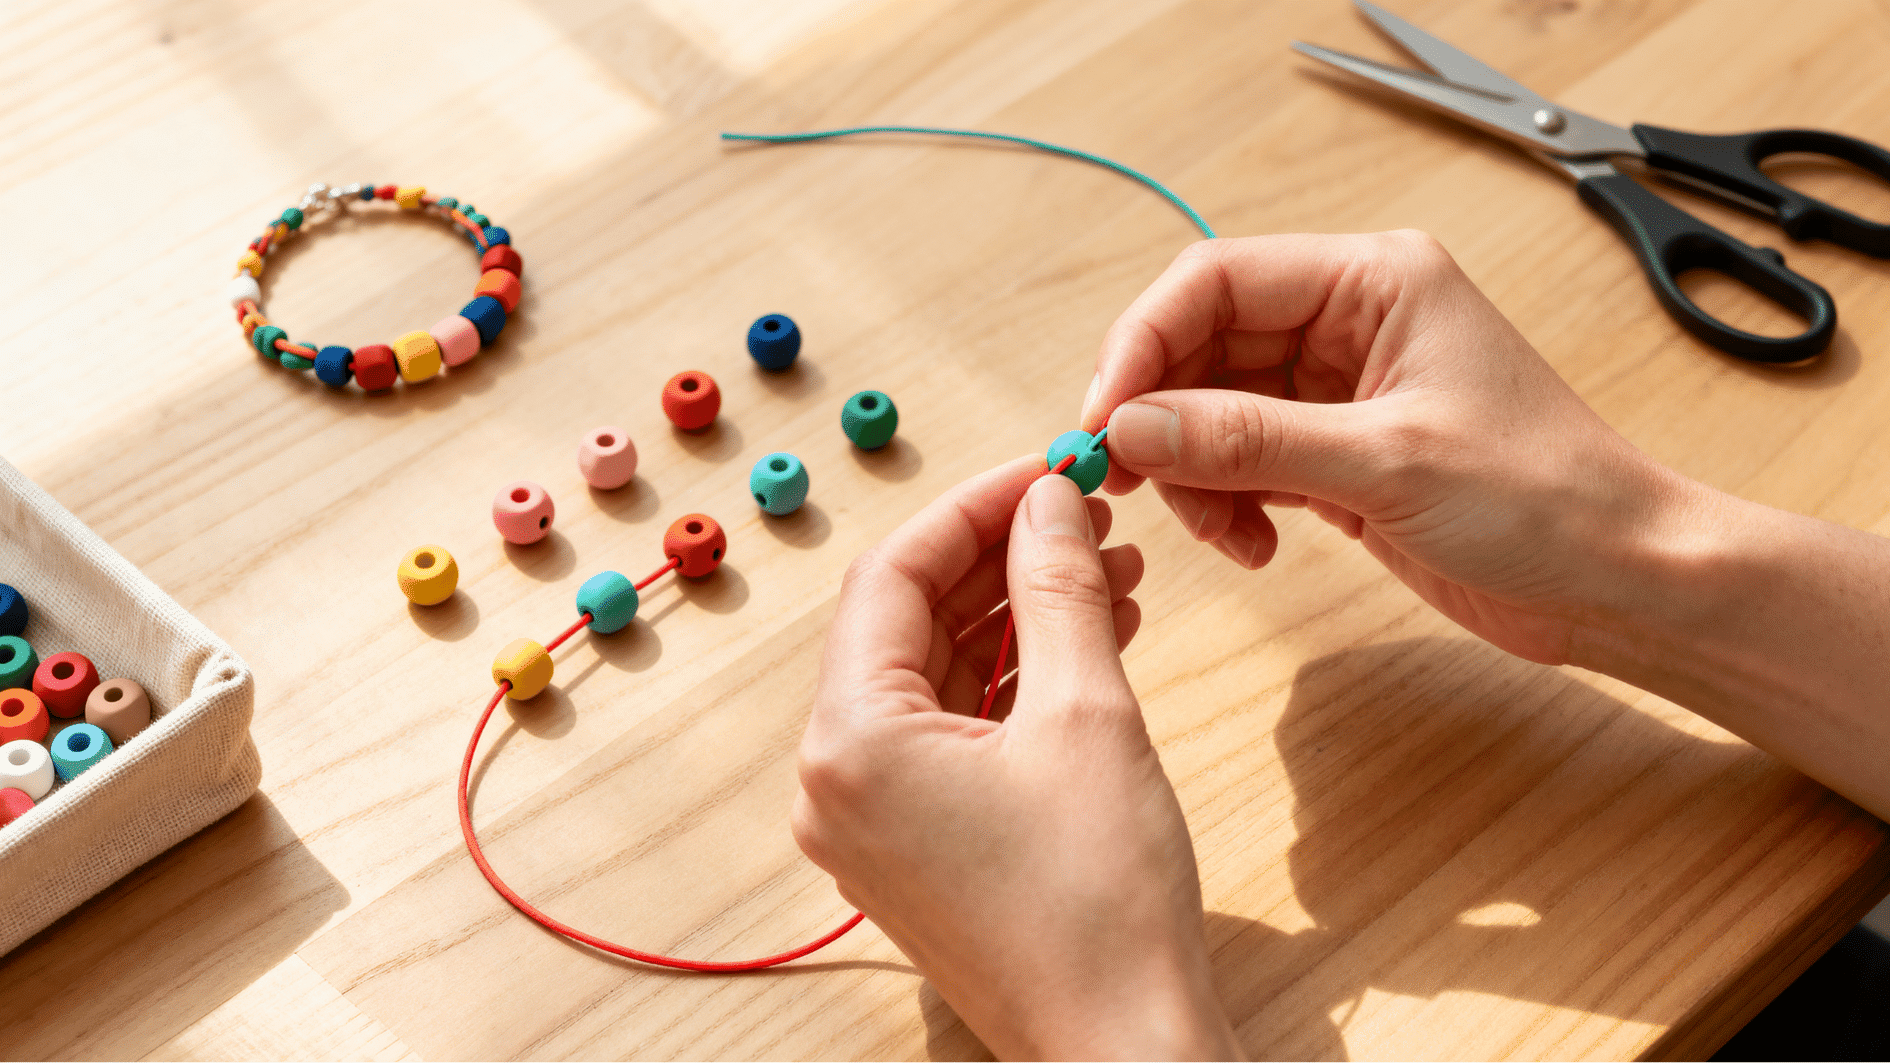
Now add the beads one by one. Go slowly so the pattern stays in place and the beads do not slip off.
- Tape one end of the cord to the table.
- Add beads in the same order you planned.
- Keep the bracelet flat while working.
- Check the length before you tie the knot.
- Wrap it around the wrist to test the fit.
Tip: Work over a towel or small tray. Beads are tiny, quick, and very good at rolling away.
Step 4: Tie and Finish the Bracelet
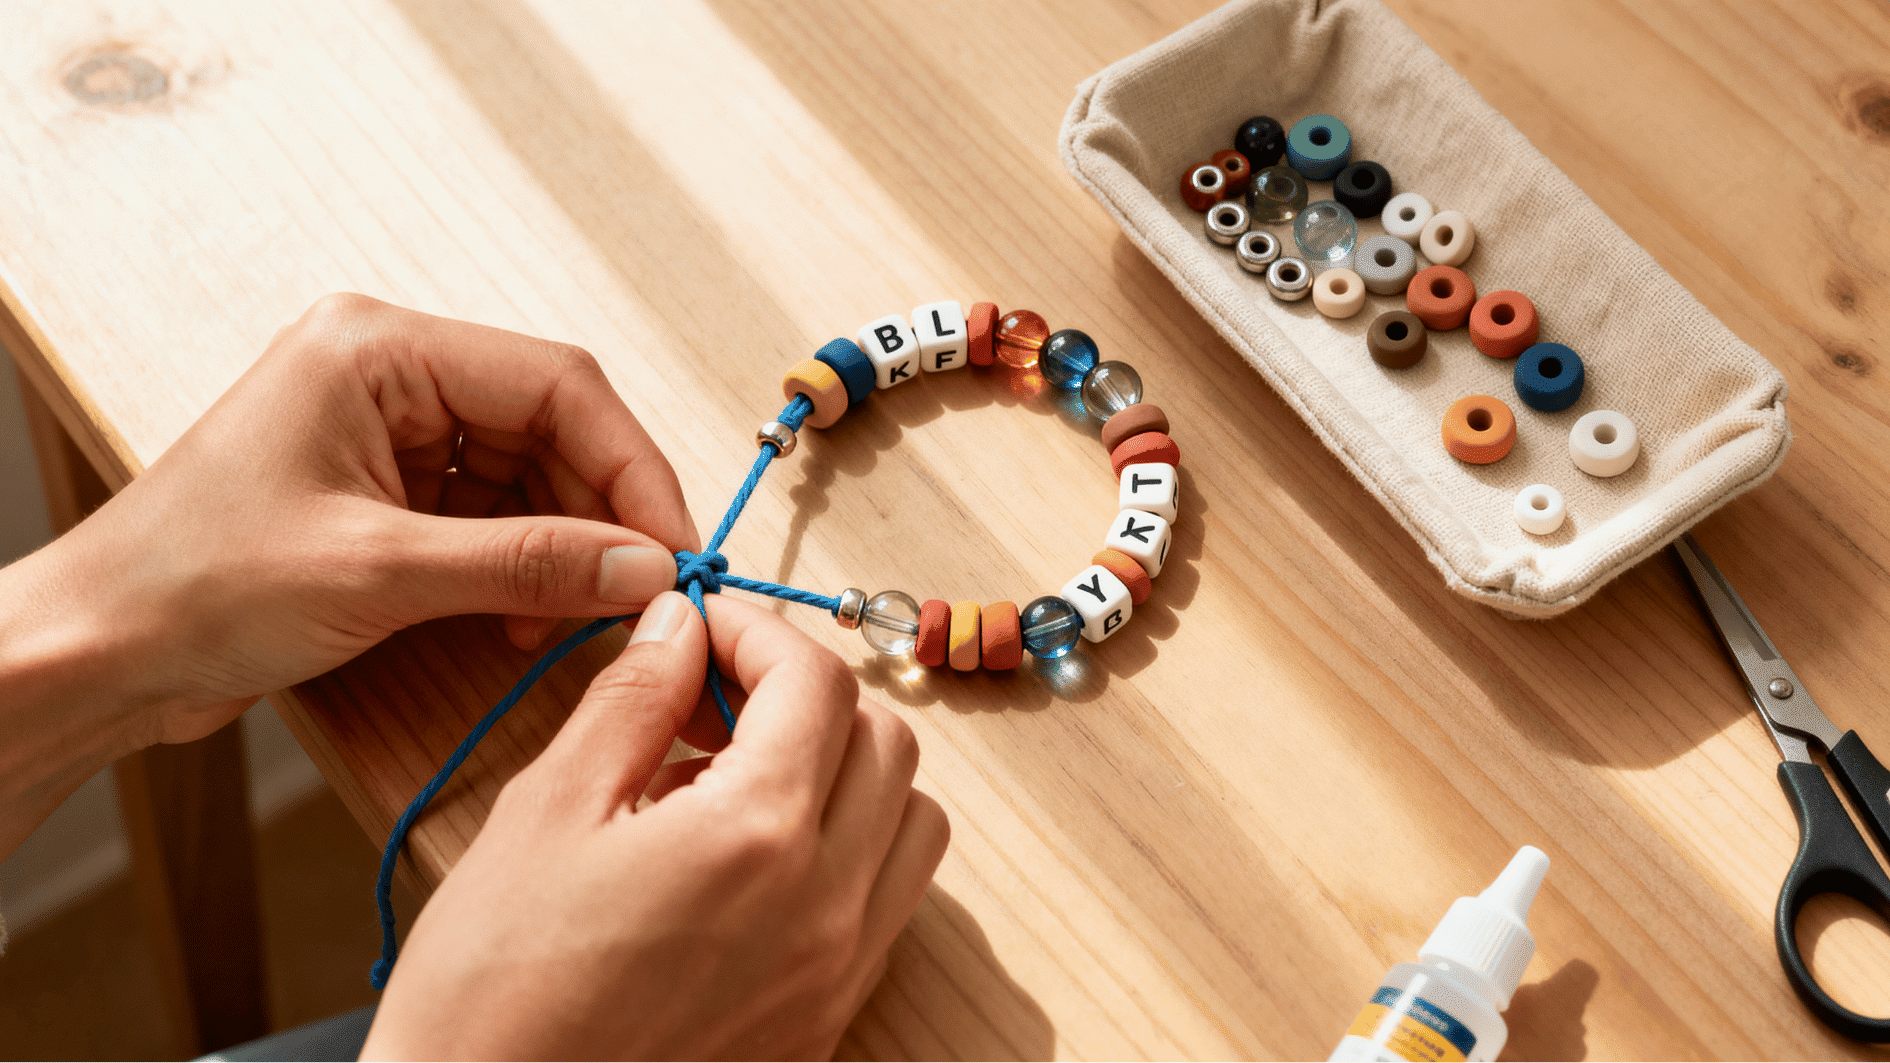
The finish matters because it keeps the bracelet together. A strong knot helps your bracelet last longer.
- Tie a secure knot that works for your bracelet style.
- Add a tiny dot of jewelry glue if needed.
- Let the glue dry fully before wearing.
- Trim the extra cord only after the knot feels firm.
- Try hiding the knot inside a nearby bead for a cleaner look.
Tip: Give the knot a gentle pull before trimming the cord. If it slips, tighten it again before adding glue.
Easy Beaded Bracelet Design Ideas
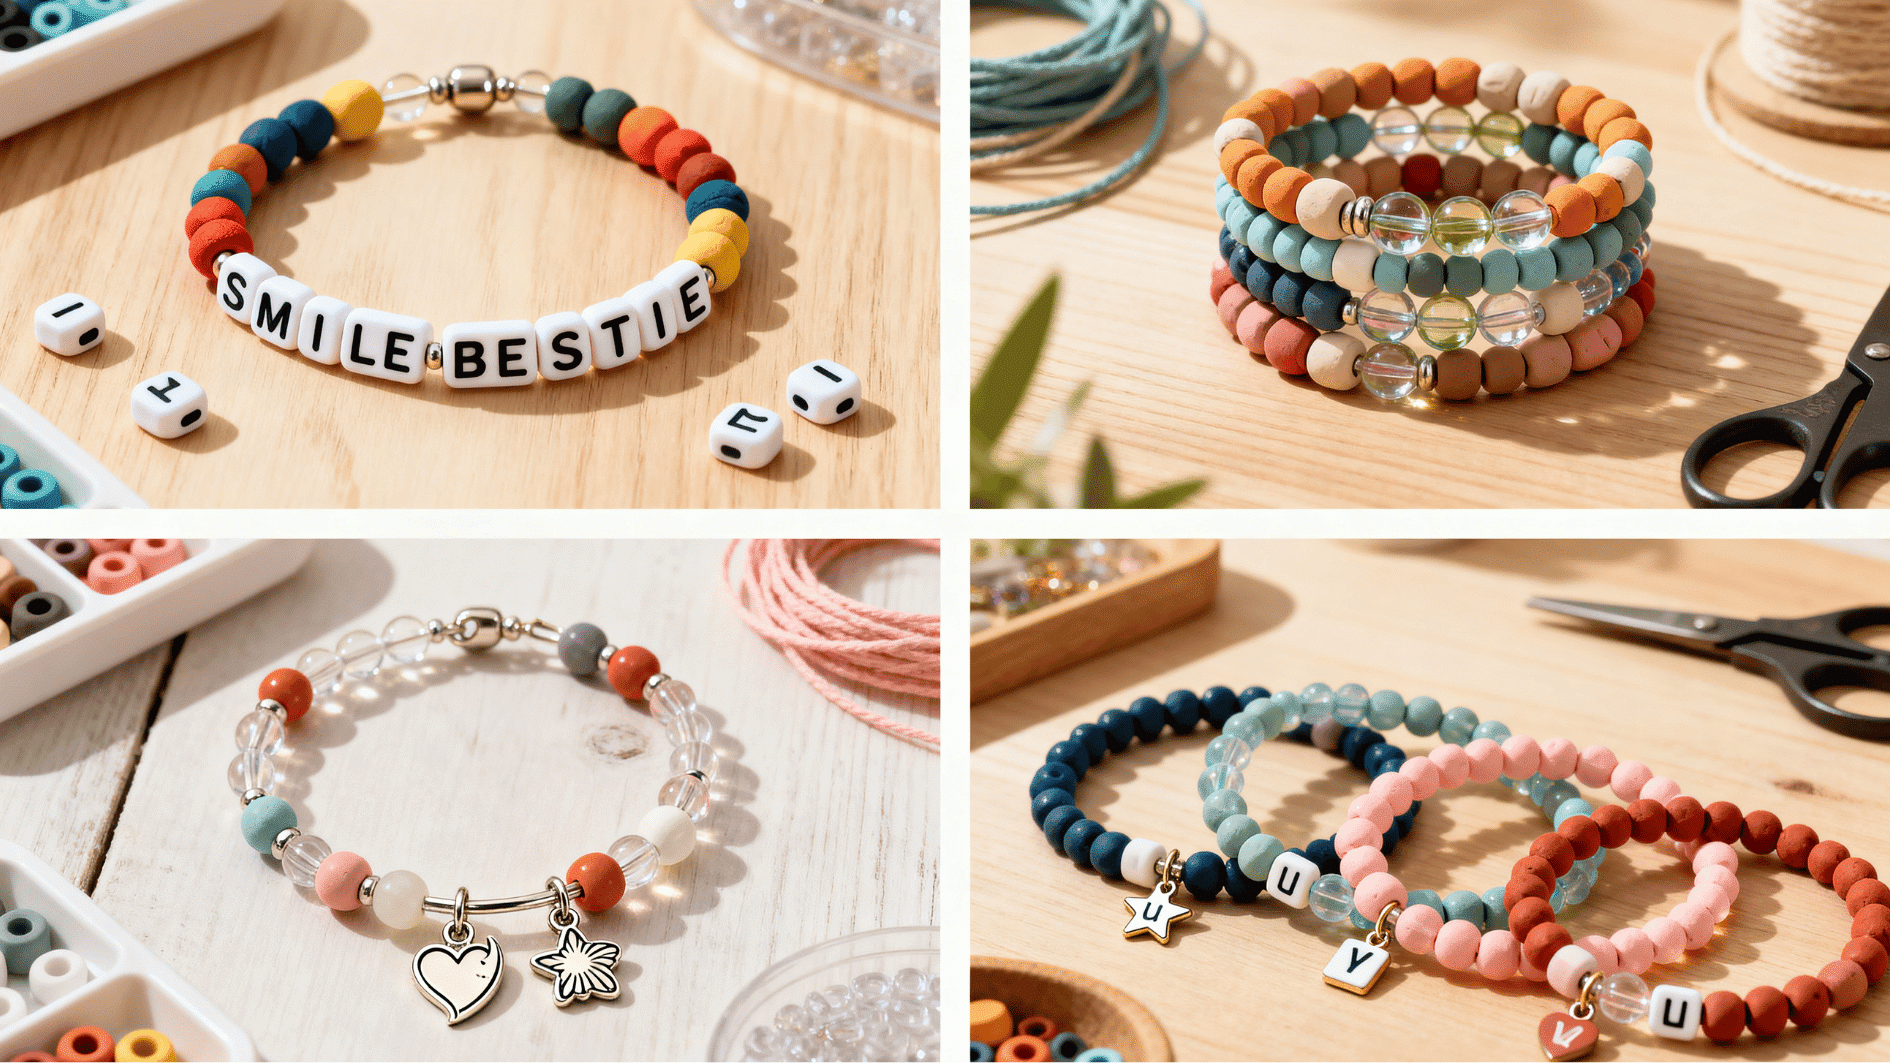
Once you know the basic method, you can start playing with colors, words, charms, and bead sizes. These ideas are simple, but they still make each bracelet feel special.
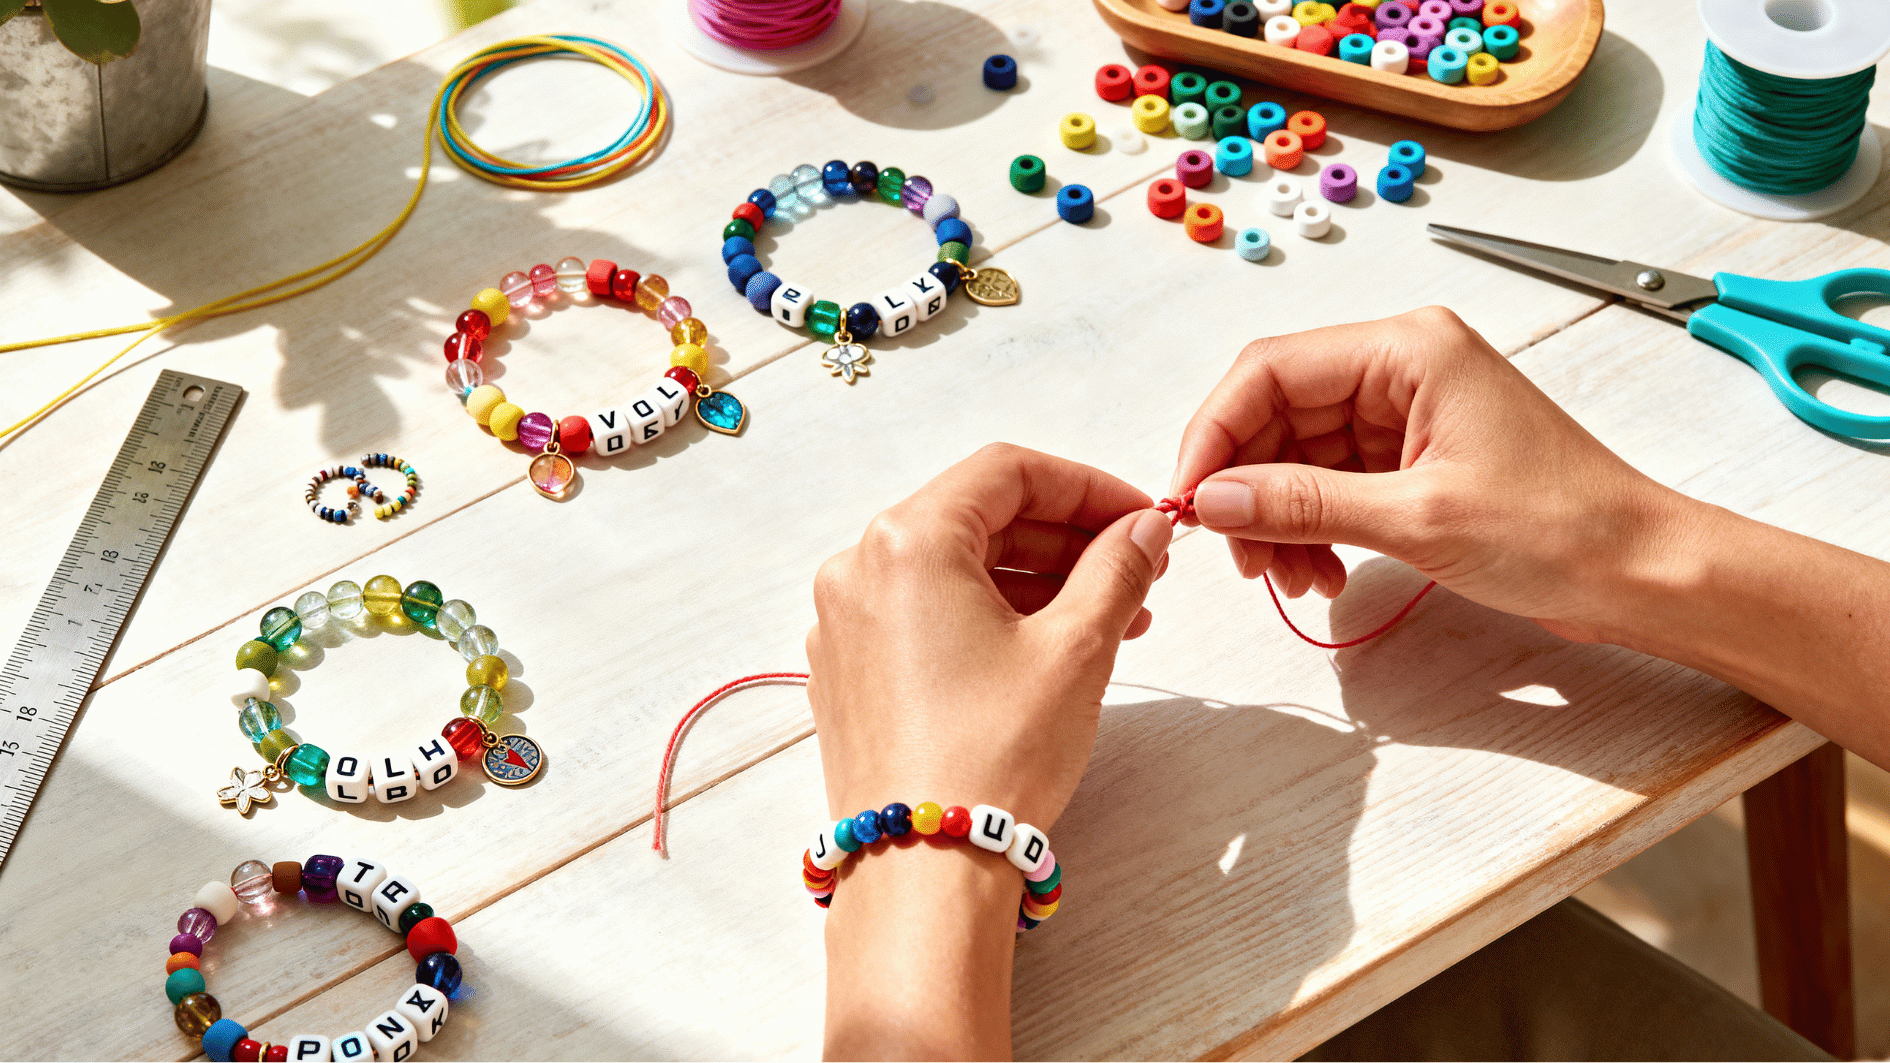
1. Name or Word Bracelet
This bracelet is simple, personal, and fun to make with letter beads. It works well when you want the design to say something sweet without adding too many details.
Best For: Gifts, friendship bracelets, kids’ crafts, and personal stacks.
How to Make It:
- Pick letter beads for a name, initials, or a short word.
- Add spacer beads between letters so the word is easy to read.
- Place colorful beads on both sides to frame the word.
- Keep the word in the center so it sits nicely on the wrist.
Fun Idea: Try words like “smile,” “joy,” “mama,” “bestie,” or a favorite nickname.
2. Color Stack Bracelet
This idea is great when you want a set of bracelets that look good together. It lets you mix colors and bead types without making the design feel too busy.
Best For: Layered bracelets and matching outfits.
How to Make It:
- Choose 3–5 colors that look good together.
- Make each bracelet with the same color family.
- Mix clay beads, glass beads, and spacer beads.
- Change one small detail on each bracelet so the stack does not look too plain.
Fun Idea: Make one bracelet with all clay beads, one with glass beads, and one with a tiny charm.
3. Charm Center Bracelet
A charm center bracelet gives one bead or charm the main spotlight. It is a nice choice when you want a clean bracelet with one cute detail.
Best For: A bracelet with one main detail.
How to Make It:
- Choose one charm for the middle of the bracelet.
- Add smaller beads on both sides of the charm.
- Repeat the same bead pattern on the left and right.
- Keep heavy charms balanced with stronger cord or elastic.
Fun Idea: Try a heart, star, flower, shell, moon, or birthstone-style charm.
4. Friendship Bracelet Set
This one is perfect when you want to make more than one bracelet at a time. Each bracelet can match the group while still having one personal touch.
Best For: Matching gifts, group crafts, and party activities.
How to Make It:
- Pick one shared color for the whole set.
- Change the second color for each person.
- Add initials, tiny charms, or letter beads.
- Make every bracelet the same style, but with a small personal detail.
Fun Idea: Set out bowls of beads and let each friend choose one charm for their bracelet.
Quick Fixes for DIY Bracelet Problems
Small bracelet problems are easy to fix when you catch them before tying the final knot. Use this table to spot small issues, clean up the design, and make the bracelet more comfortable to wear.
| Problem | What To Do |
|---|---|
| Bracelet twists while wearing | Use beads of similar size on both sides. |
| Pattern looks uneven | Count beads before and after the center bead. |
| Knot looks bulky | Hide it inside a large-hole bead. |
| Glue makes the cord stiff | Use only a tiny dot on the knot. |
| Letter beads face different ways | Lay them out first and string them from left to right. |
| Bracelet feels scratchy | Move rough beads away from the wrist’s inner side. |
How to Care for Handmade Beaded Bracelets?
Handmade bracelets last longer when they are treated gently. These care tips are simple, but they can help keep the beads, cord, and knots in better shape.
- Keep Them Dry: Water can weaken elastic, dull some beads, or loosen glue over time.
- Take Them Off Before Swimming: Pools, soap, and salt water can be rough on handmade bracelets.
- Store Them Flat: Keep bracelets in a small pouch, box, or drawer so they do not stretch out.
- Avoid Hard Pulling: Roll stretch bracelets on and off instead of yanking them over the hand.
- Check the Knot Sometimes: Look at the knot after a few wears, especially on elastic bracelets.
- Use Glue Lightly: Too much glue can make the knot stiff, sharp, or messy.
Conclusion
Once you learn how to make beaded bracelets, starting with a stretch elastic design is a great first project. From there, you can try clasp-free styles like sliding knots or loop-and-bead closures.
The steps feel simple when you pick the right string, measure the wrist, plan the beads, and finish with a strong knot.
Different bead colors, shapes, letters, and charms can make each bracelet feel personal. With a few basic supplies and a little patience, handmade bracelets become fun to wear, gift, stack, or make again in a new design.
Frequently Asked Questions
Can I Use Old Beads to Make New Bracelets?
Yes, old beads from broken jewelry can work well as long as the holes are clean and the beads are not cracked.
How Long Does it Take to Make One Beaded Bracelet?
A simple bracelet usually takes about 10–20 minutes, depending on the pattern and bead size.
Can I Wash a Beaded Bracelet?
It is better to wipe it with a soft dry cloth instead of washing it, especially if it has elastic, glue, or painted beads.
Can I Use Buttons in a Beaded Bracelet?
Yes, small buttons can work as accents if the holes fit your cord and the edges feel smooth.