Adding handmade décor to yourhome does not always require advanced crafting skills.
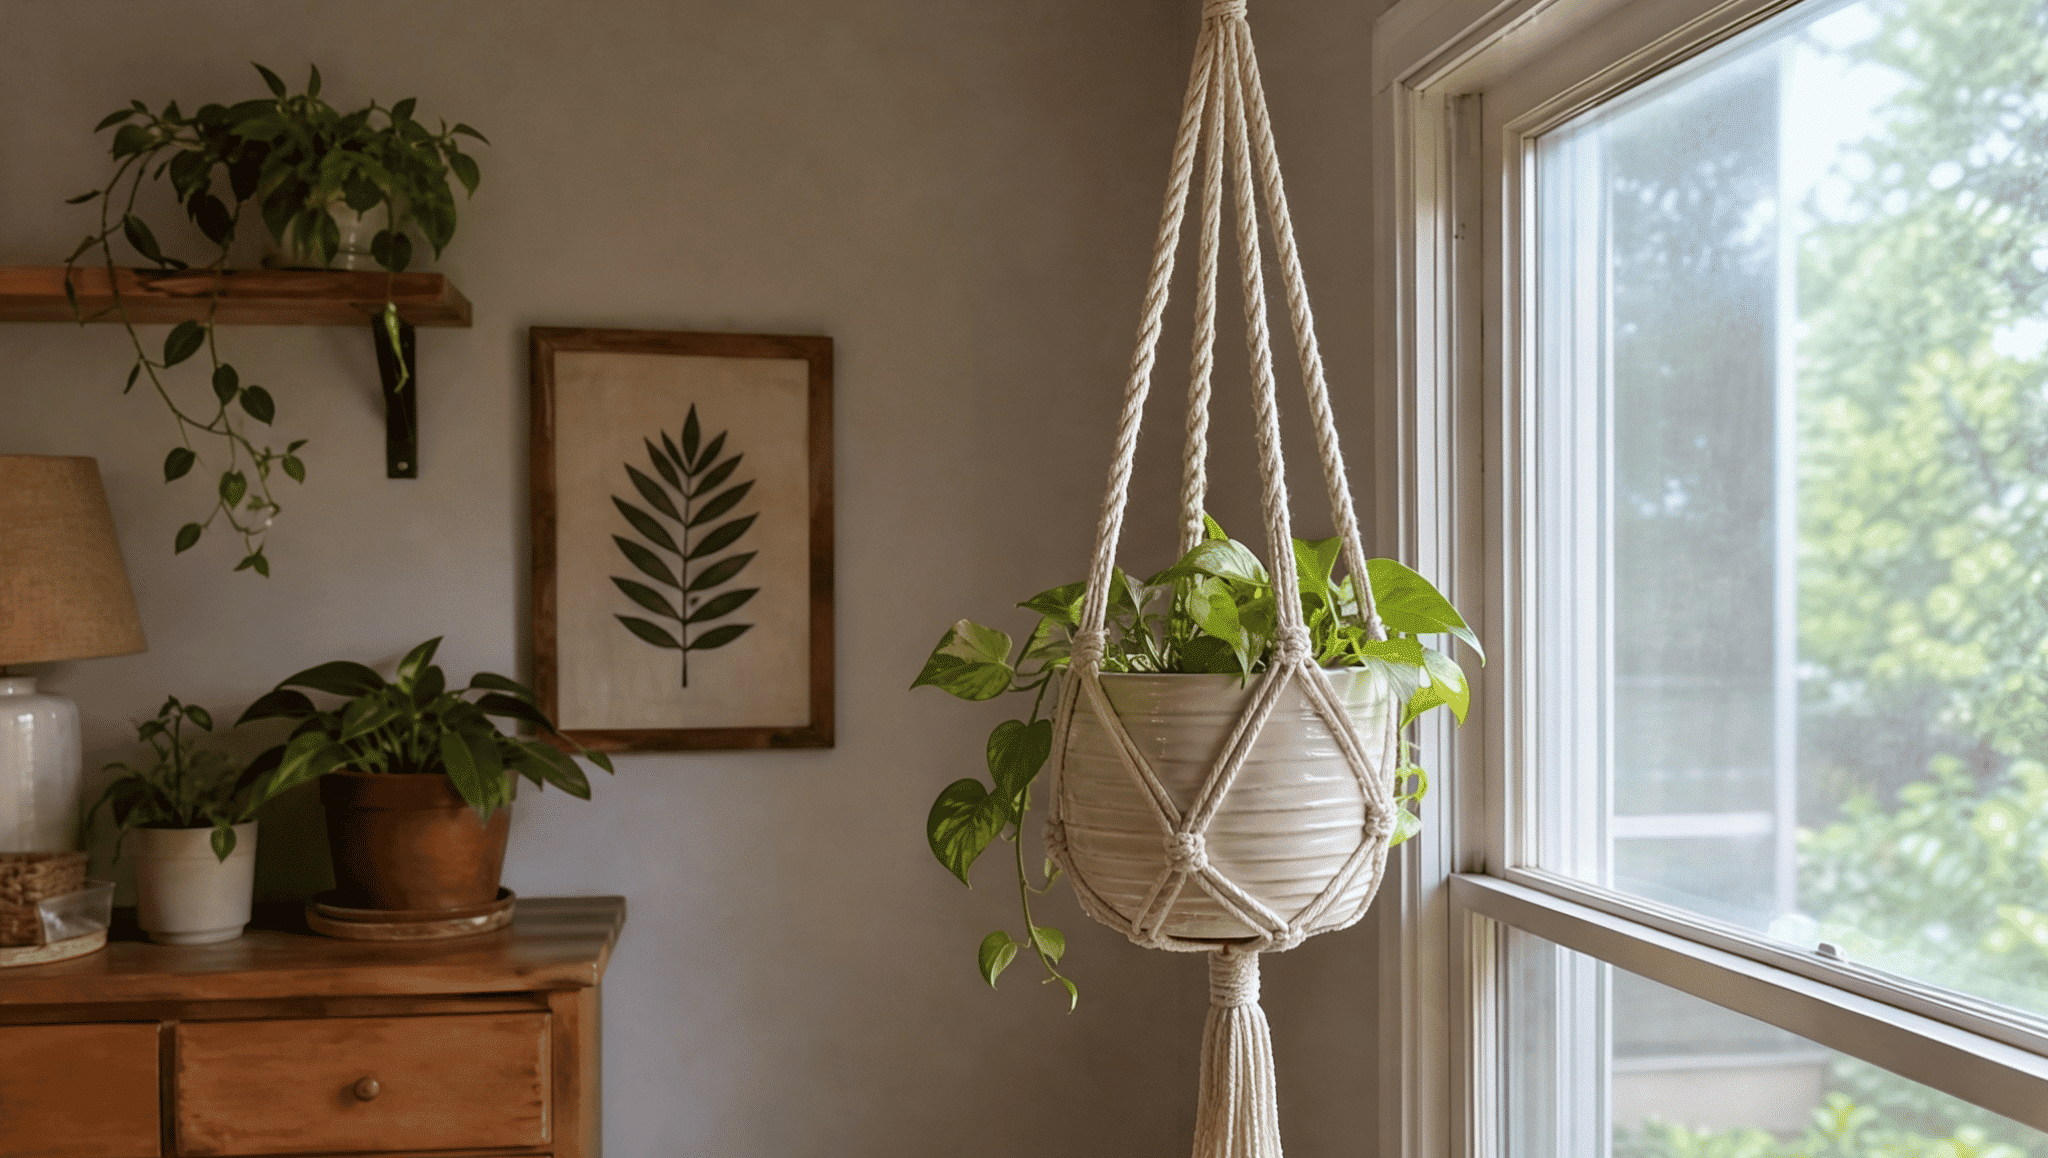
A few basic materials and simple knots can help you create something beautiful and useful, like a diy macrame plant hanger.
An easy macrame plant hanger can be made with simple steps, even if you are trying macrame for the first time.
This blog covers the materials, basic knots, and a step-by-step process to help you make your own plant hanger at home.
What is Macrame?
Macramé is the art of creating patterns and designs by knotting cords or threads together, without using any needles or hooks.
Unlike weaving or knitting, it reliessolely on the interplay of knots, such as the square and spiral knots, to create intricate textures, fringes, and shapes.
Its roots trace back to 13th-century Arabic weavers, who used decorative knots to finish the edges of woven fabric.
Today, macrame has made a stylish comeback. Despite its detailed look, it’s surprisingly beginner-friendly; all you need is a cord, a bit of patience, and a few basic knots.
Supplies You’ll Need
You’ll need just a few basic things to make an easy macrame plant hanger, and most can be found at home or at a craft store.
| Material or Tool | Purpose |
|---|---|
| Cotton cord or rope, about 4 mm thick | Forms the main structure of the plant hanger |
| Scissors | Cuts the cord to the required lengths |
| Measuring tape | Helps measure each cord evenly |
| Plant pot | Determines the size and fit of the hanger |
| Tape or a hook | Holds the cords securely while you tie the knots |
Step-by-Step Tutorial with No Ring
Not every macrame project needs a metal ring to get started, and that’s good news if you don’t have one lying around.
This method is just as sturdy, just as easy to follow, and gives your DIY macrame plant hanger the same polished look in the end.
It’s a great option for beginners who want to start knotting right away without waiting on extra supplies.
Step 1: Cut the Cords and Create the Hanging Loop
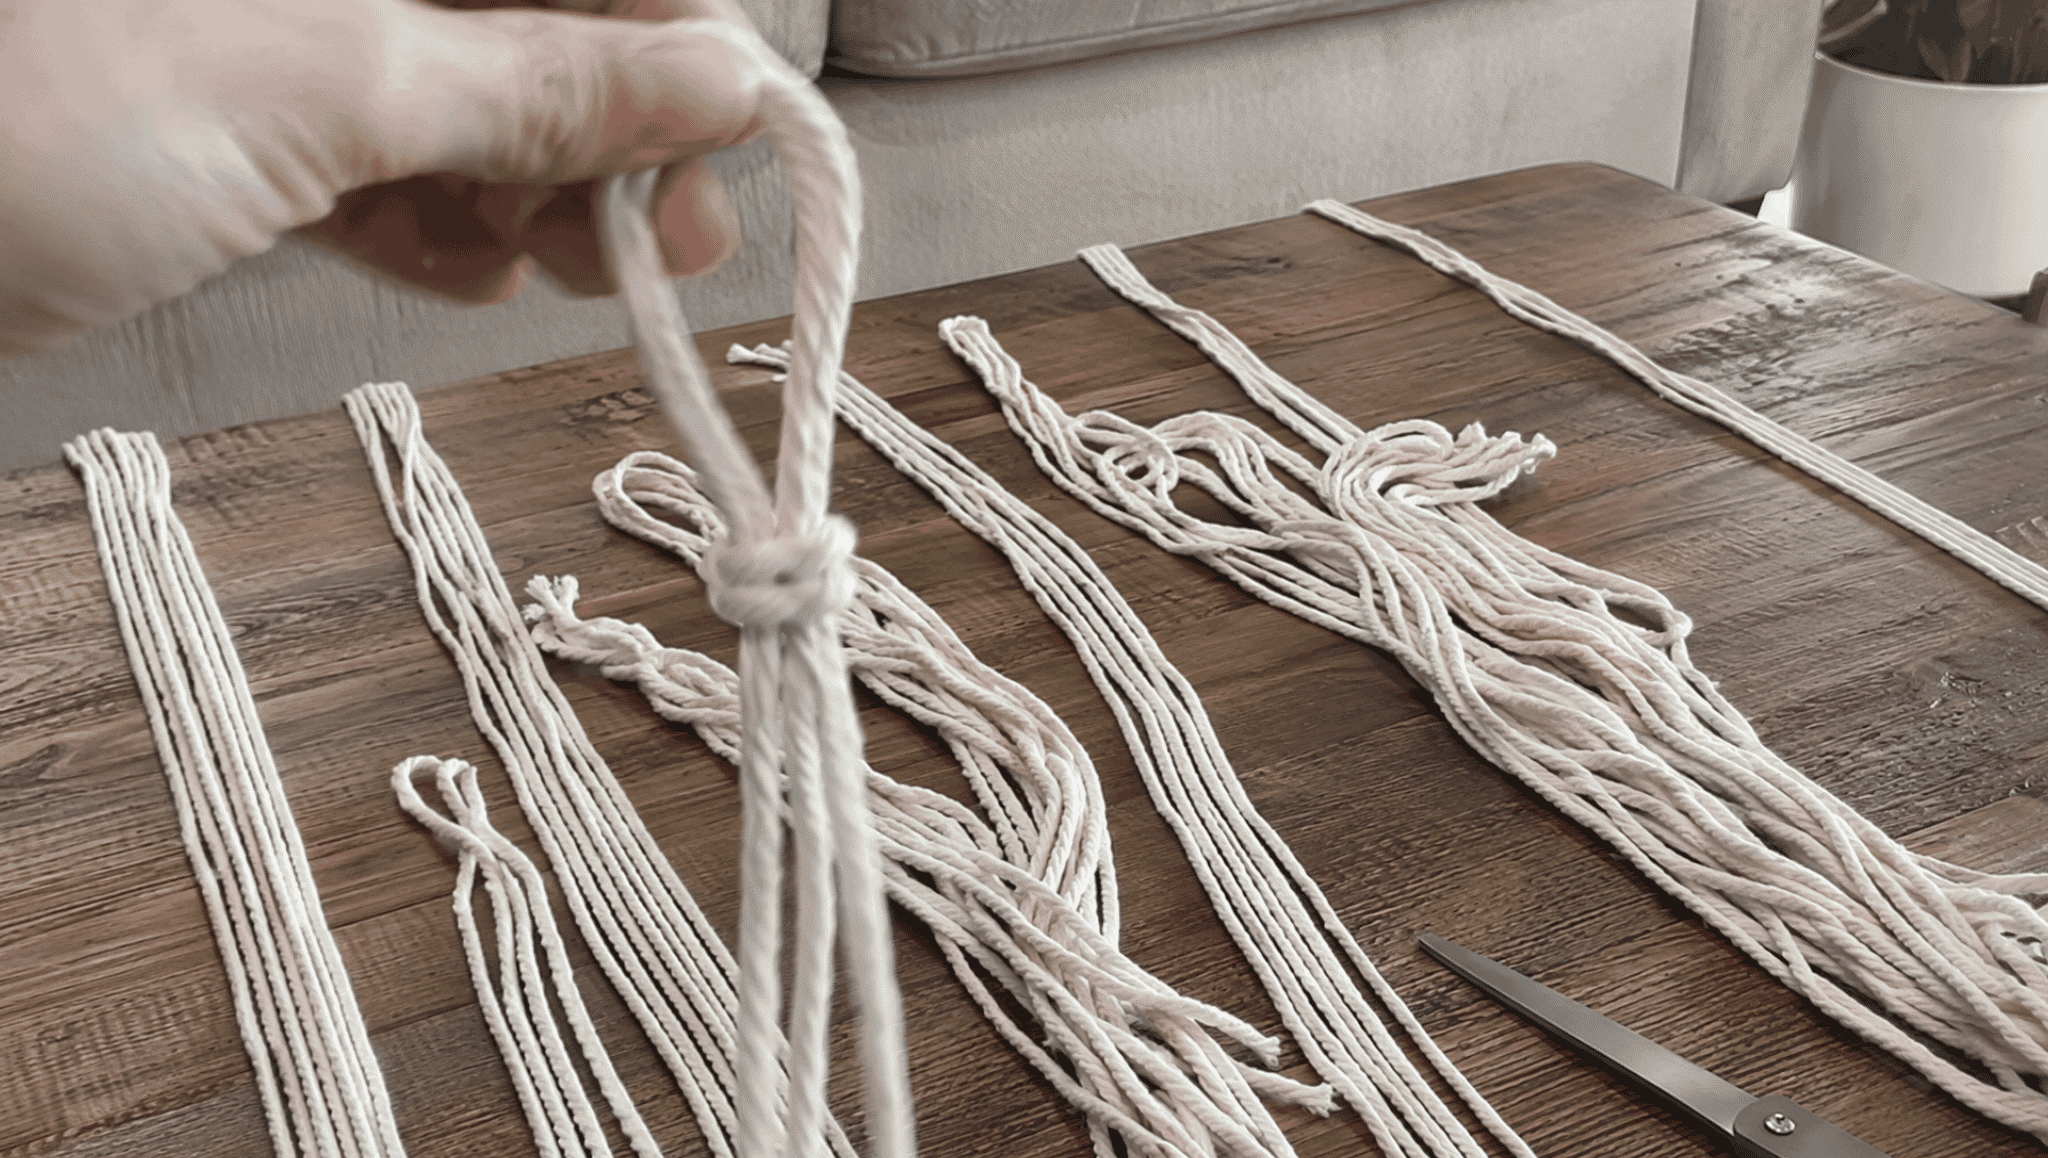
To start your DIY macrame plant hanger, cut eight cords, each about 8 feet long. This gives you enough length for knotting and fringe later.
Next, fold all the cords in half together so they form a loop at the top. Push this loop through a wooden ring or metal ring, then pull the cord ends through the loop and tighten it.
This creates a strong hanging loop that will hold the full weight of your plant hanger.
Take a separate piece of cord and wrap it tightly around the folded cords just below the ring to keep everything neat and secure.
Step 2: Divide the Cords and Tie the First Square Knots
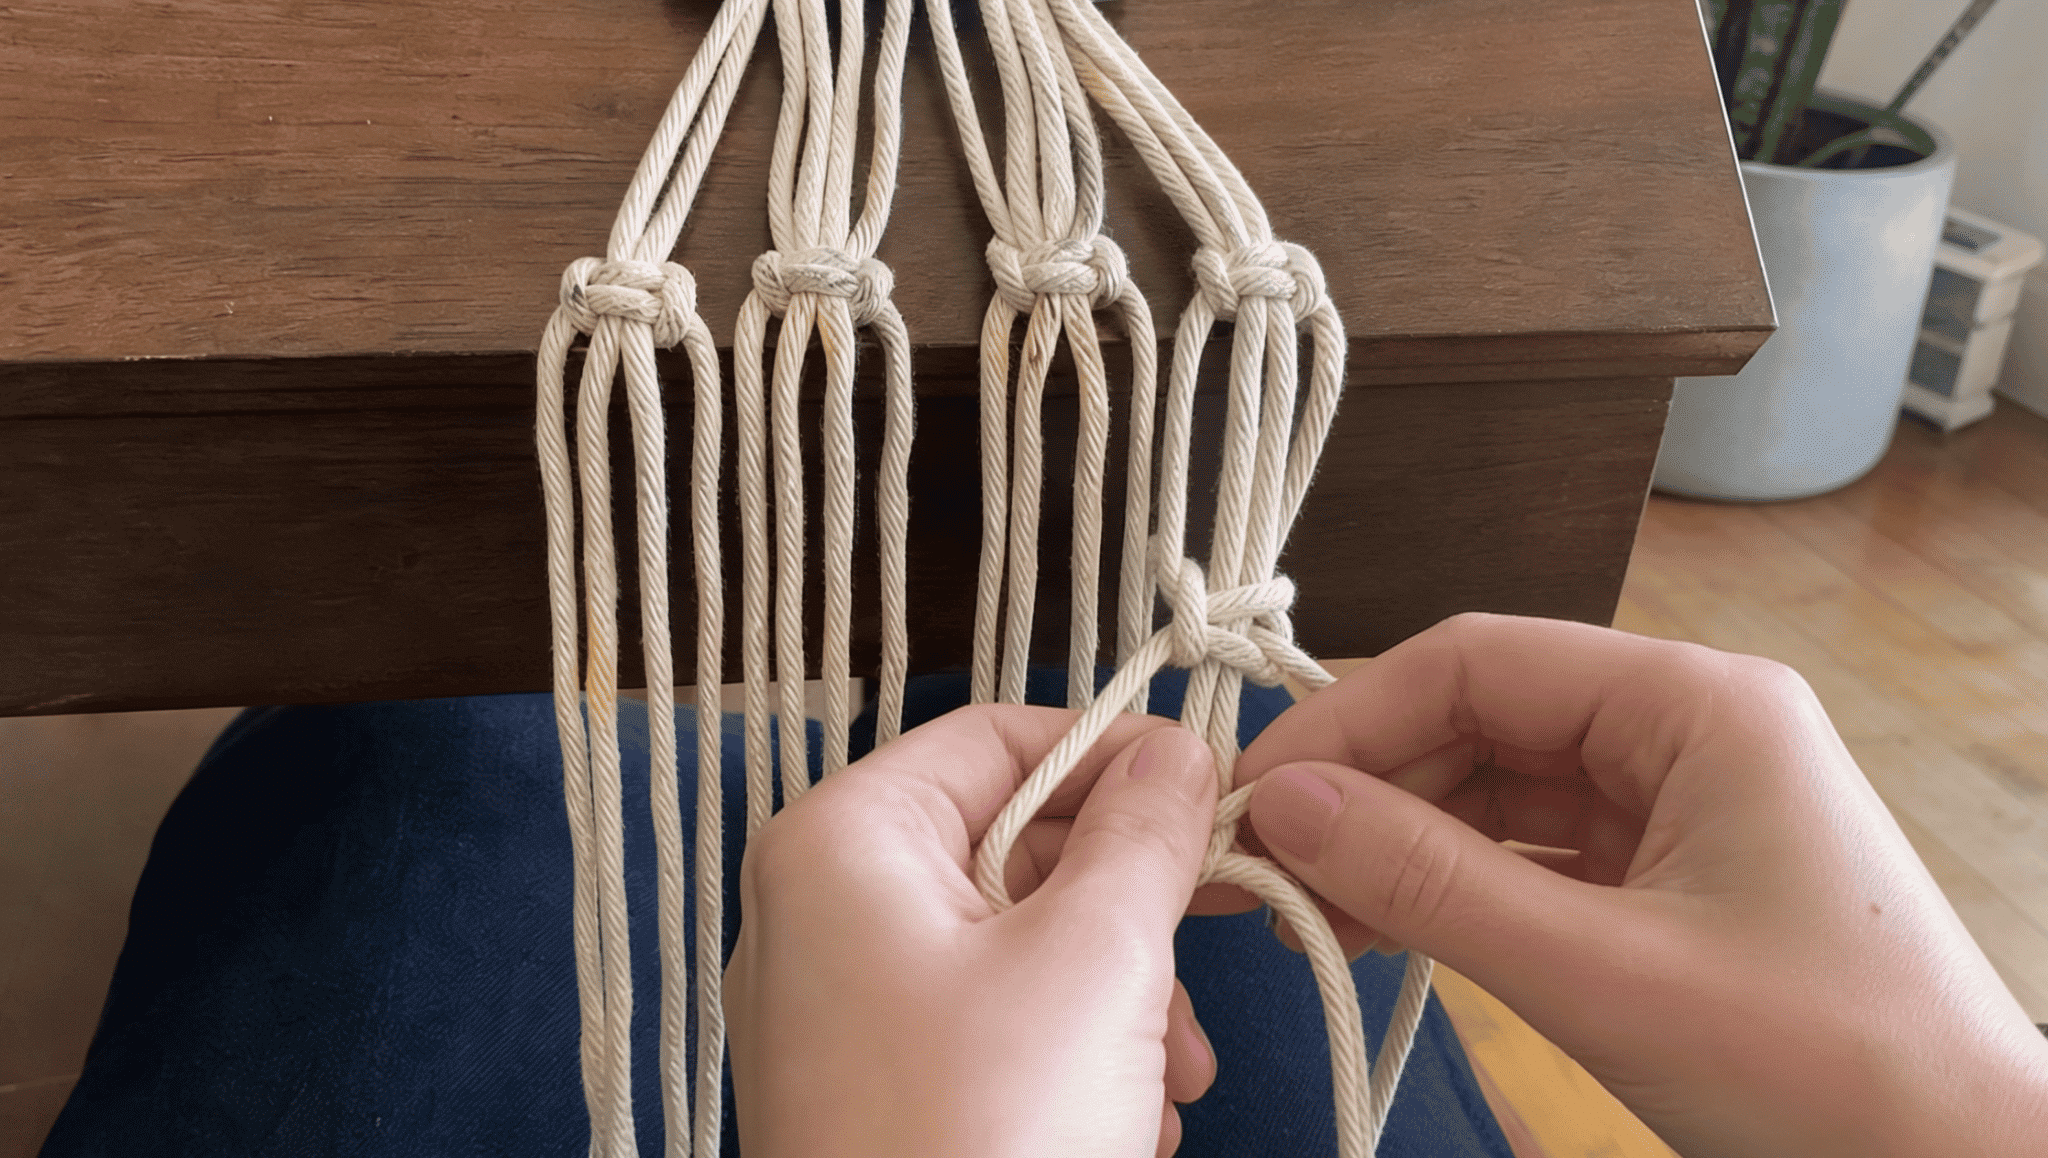
Once your loop is ready, spread the sixteen cord strands evenly and divide them into four equal groups, with four cords in each group.
Each group will form one “leg” of your plant hanger. Take the first group and tie a square knot using the two outer cords while the two middle cords stay still.
Repeat this same square knot a few times to create a short knotted section. Do this for all four groups.
These square knots act as the base pattern and give your DIY macrame plant hanger its classic, sturdy structure.
Step 3: Add Spiral Knots for Extra Design
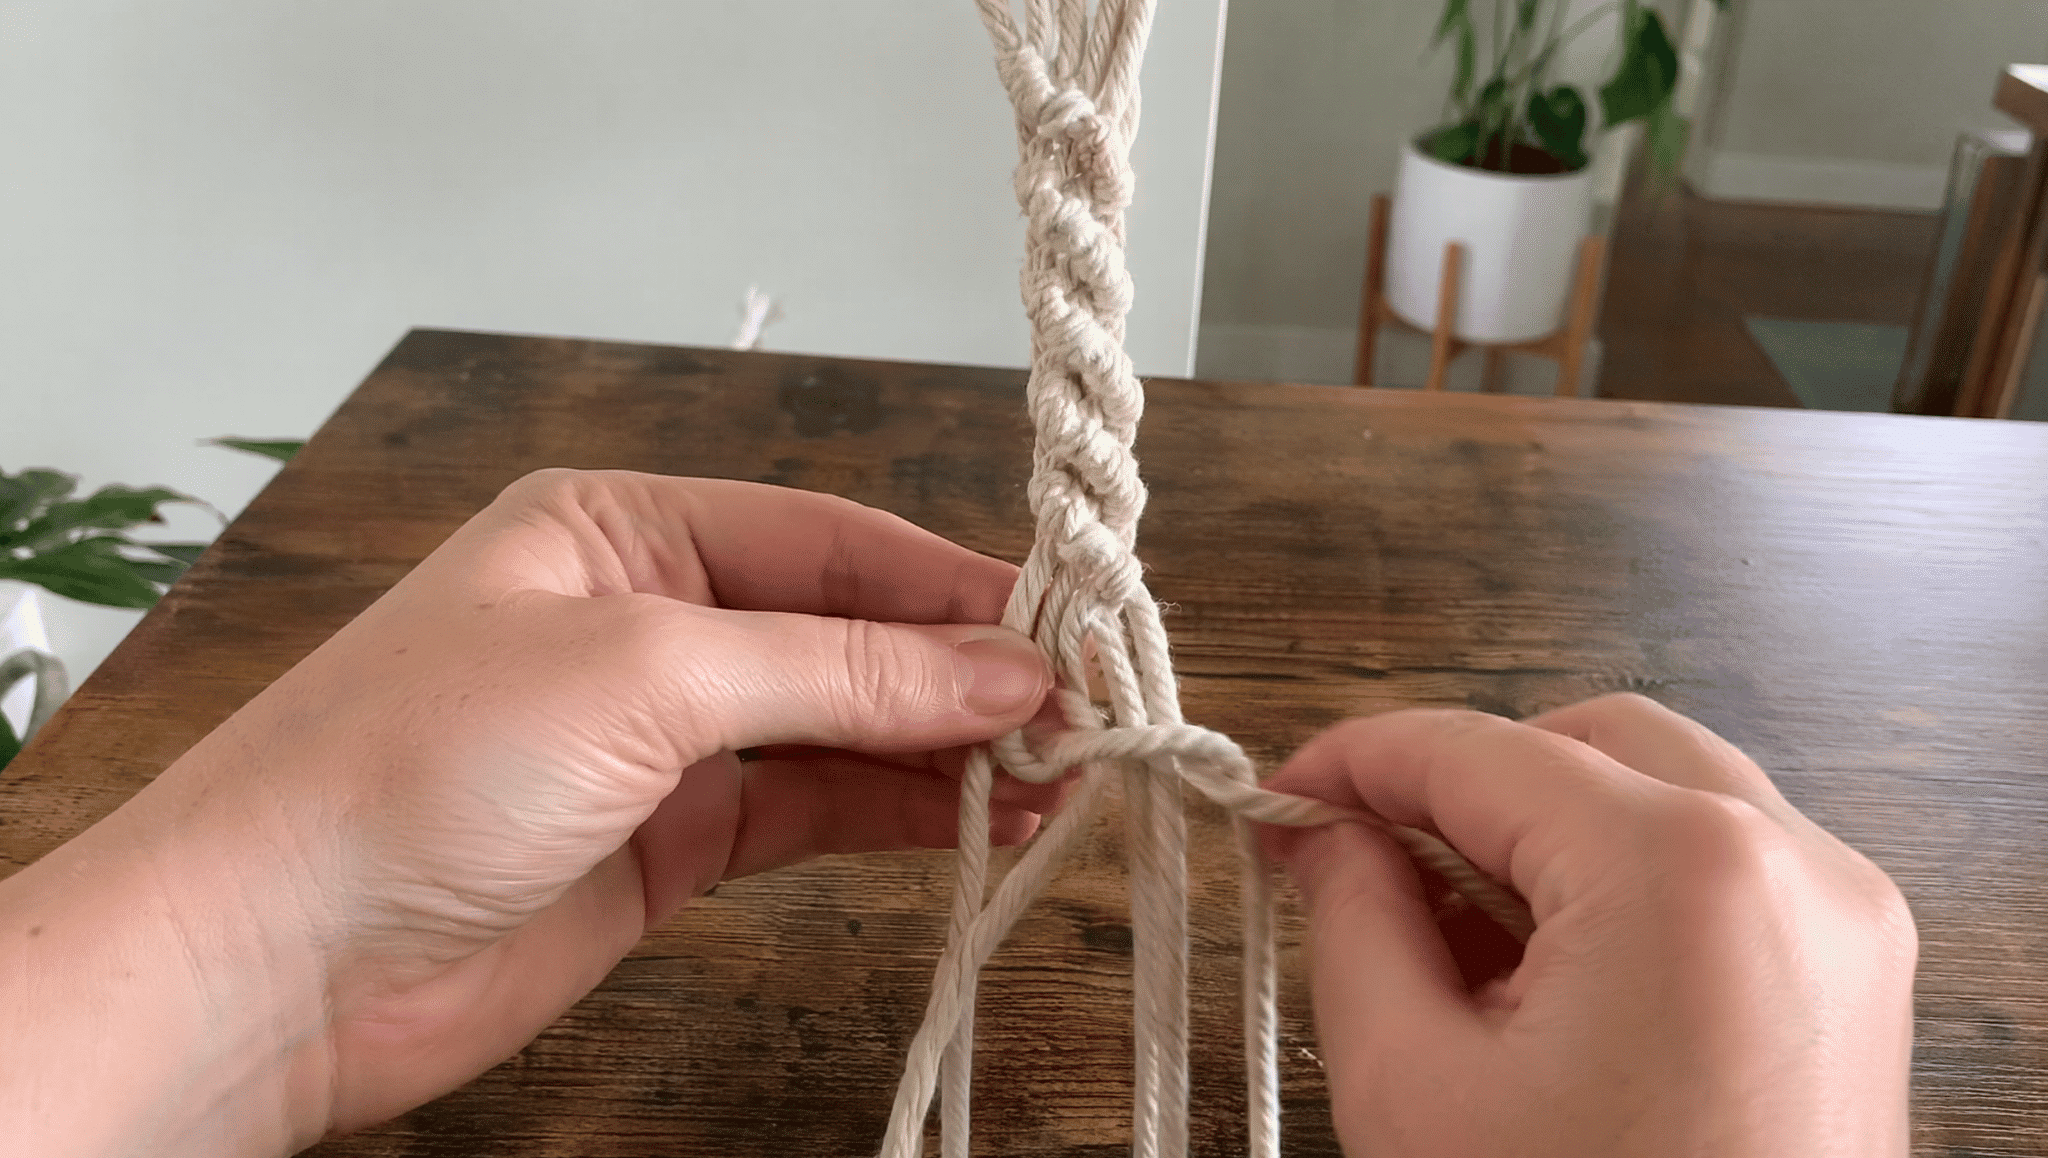
Now it’s time to add some flair. Using the same four-cord groups, tie a series of half knots one after another without alternating sides.
As you repeat this step, the cords will naturally twist and turn, forming a spiral pattern along the length of each leg.
This spiral section adds texture, making your plant hanger look more detailed and professional.
Continue spiraling for a few inches, checking often to make sure all four legs are twisting evenly so your finished hanger looks balanced and symmetrical.
Step 4: Create the Plant Holder Shape
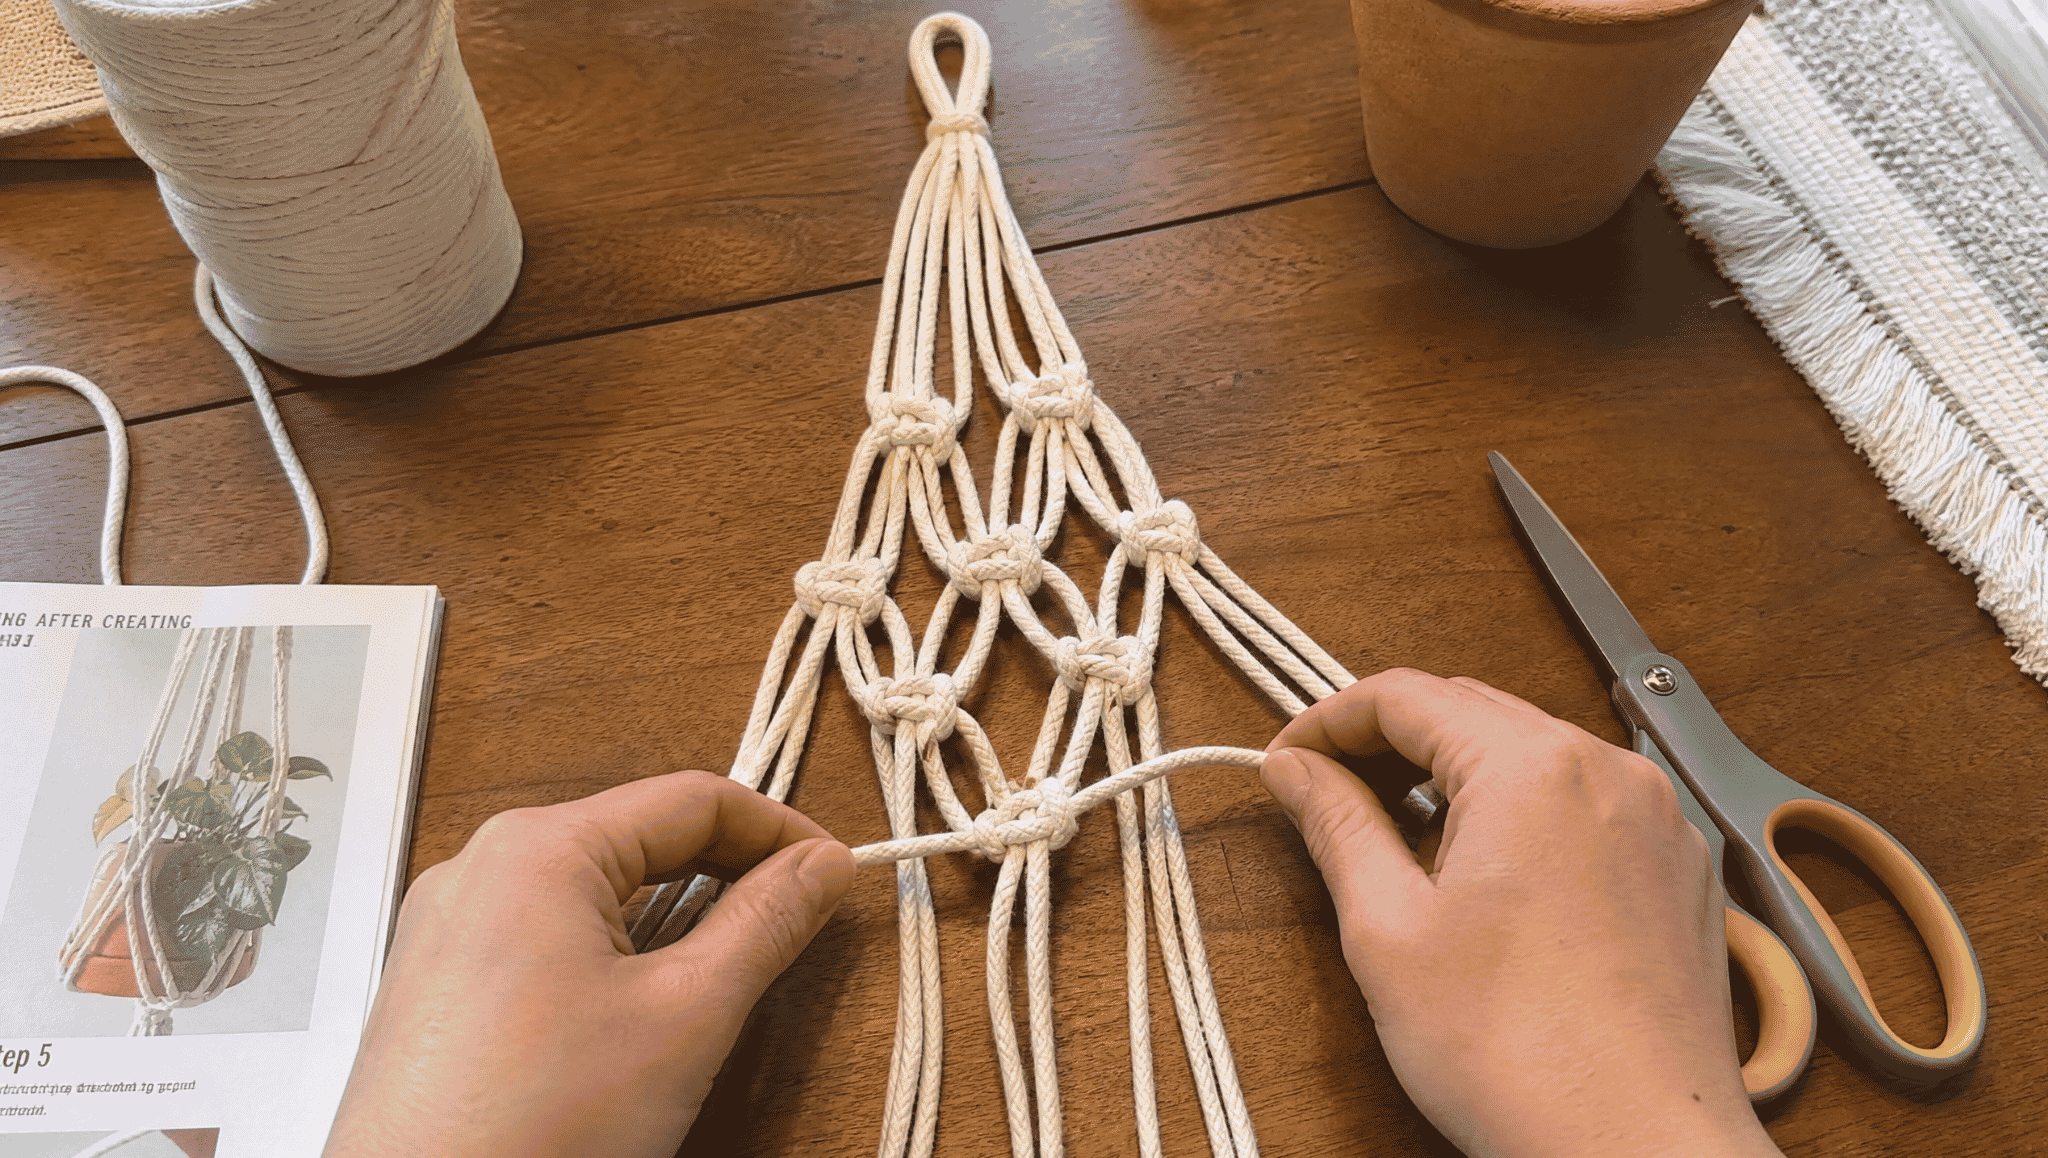
Next, you’ll shape the hanger so it can hold your plant pot properly.
Take two cords from one group and two cords from the group next to it, then tie a new square knot a few inches below the spirals.
Repeat this all the way around, joining each group to its neighbor. This creates a woven, basket-like pattern that curves inward.
Keep checking the size against your pot as you go, so the base fits snugly and holds the plant securely without slipping through the gaps.
Step 5: Finish the Bottom and Hang Your Plant
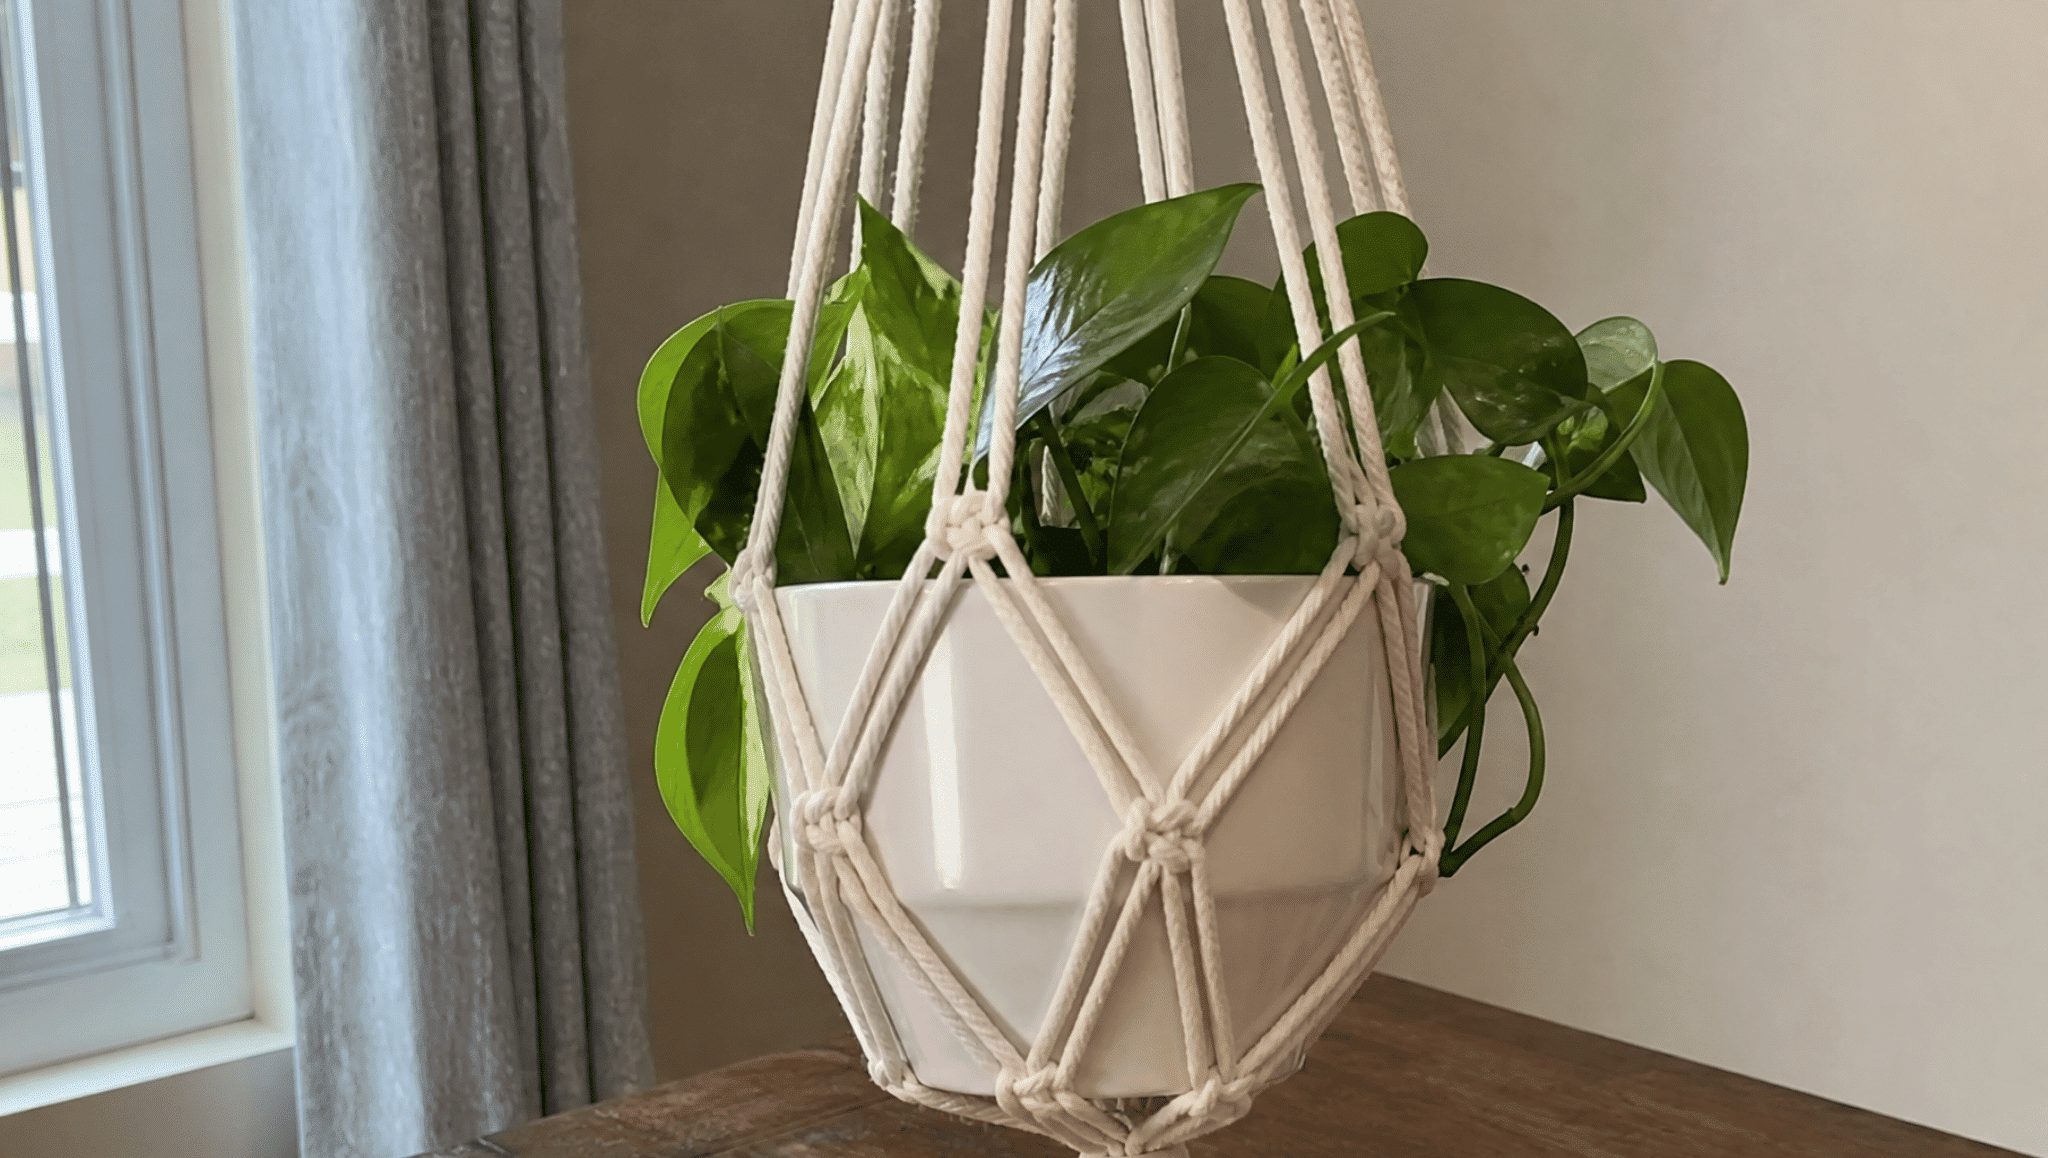
For the final step, gather all the cords together below the woven section and tie one more tight knot to close the bottom.
Trim the leftover cord ends evenly, or leave them longer for a fringe look.
You can add beads for extra style if you like. Once finished, hang your DIY macrame plant hanger on a hook near a window, then place your potted plant inside.
Enjoy your handmade décor piece.
Variations with Small Additions
Once you know how to make a basic macrame plant hanger, you can easily switch things up. Small changes can give your hanger a whole new look without making the project harder.
You don’t need extra skills, just a few extra supplies. These variations are perfect if you want to match your hanger to your home décor or simply try something new.
1. Macrame Plant Hanger with Wooden Stick
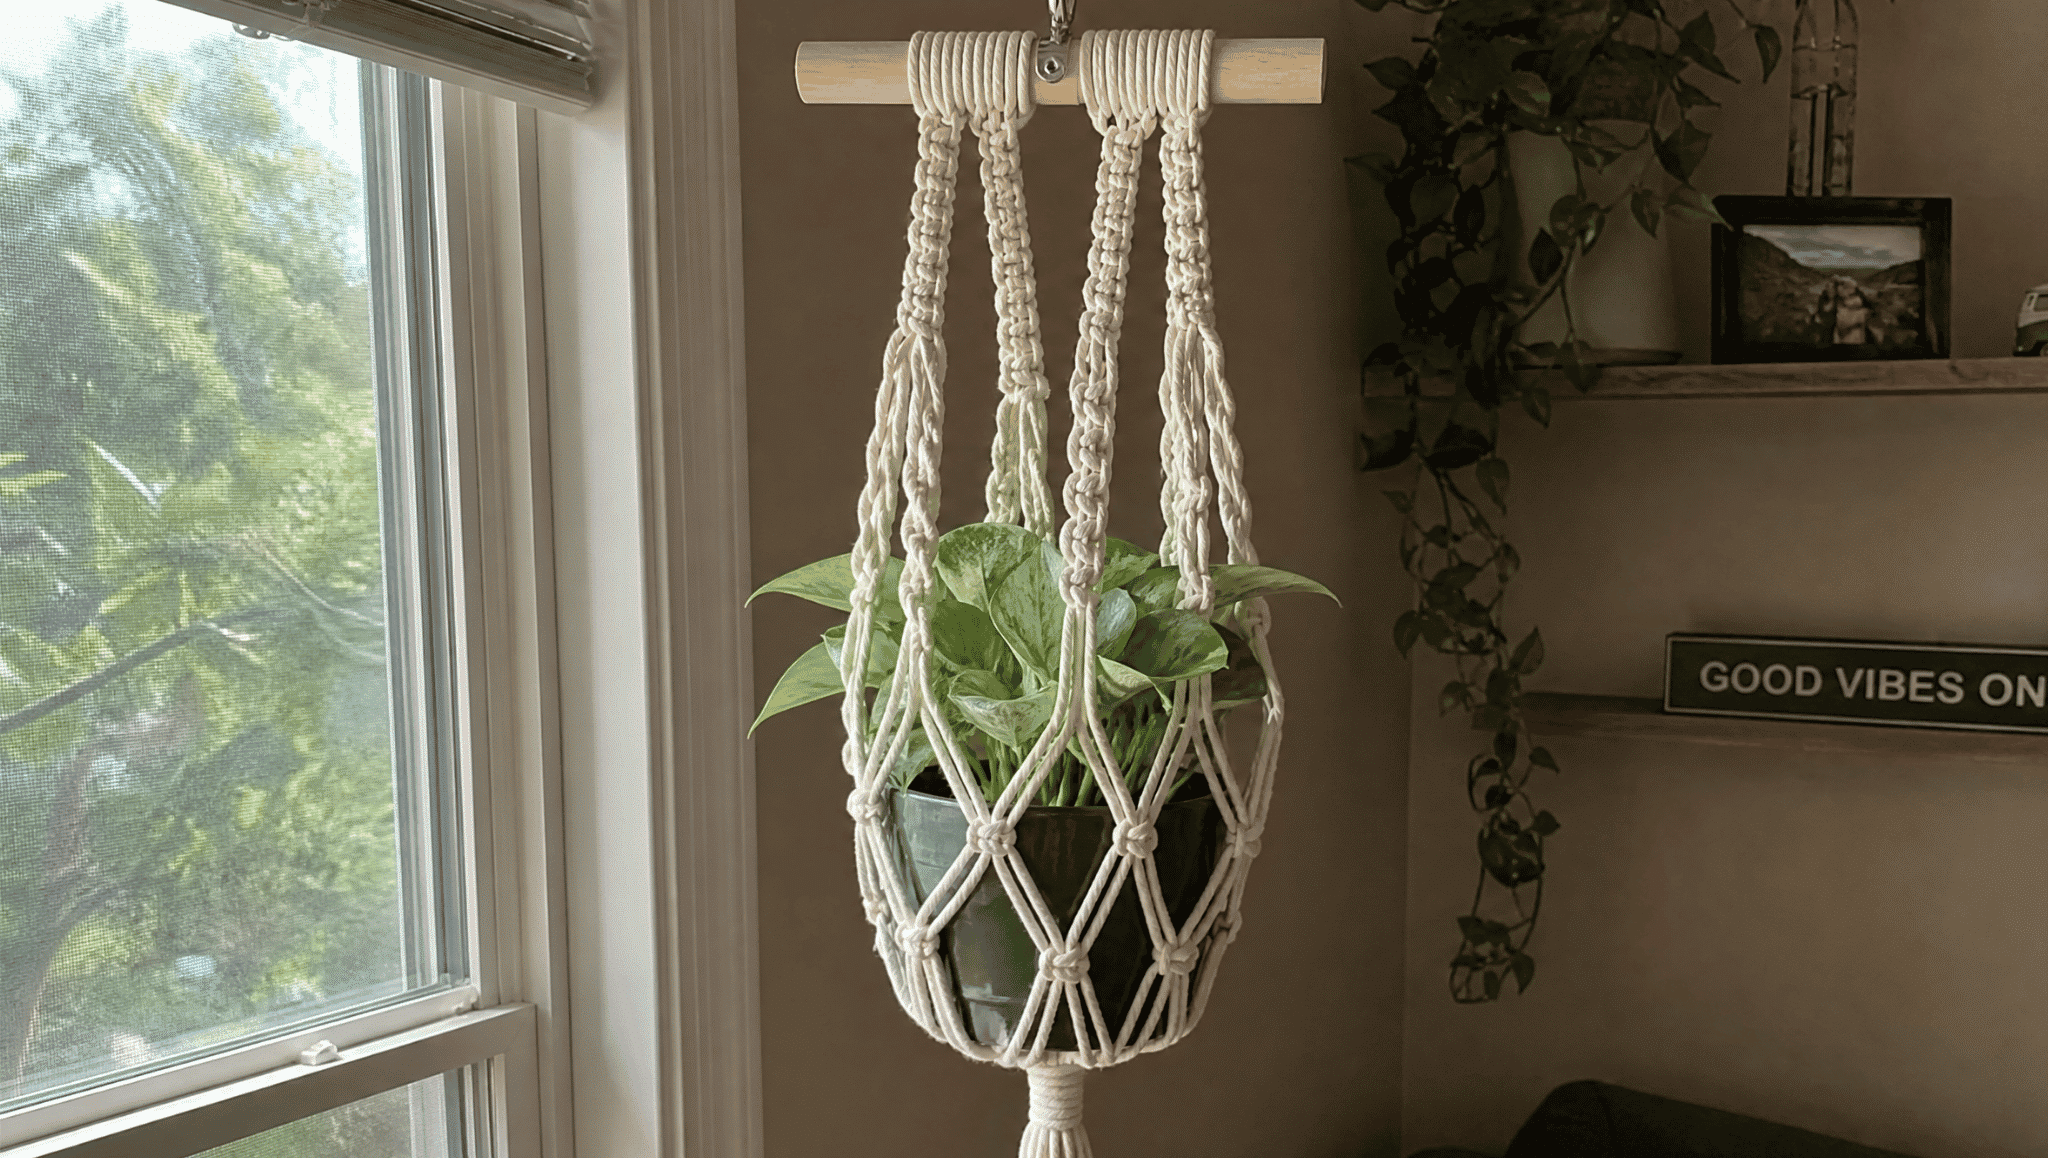
Adding a wooden stick gives your hanger a natural, rustic look. Instead of tying a loop at the top, wrap your cords around a small wooden stick or dowel and knot them in place.
This spreads the cords out evenly and makes the hanger look fuller. It also makes hanging easier since the stick can rest on a hook or nail.
This variation works great if you want a boho, earthy style for your plant hanger without changing any of the knotting steps you already learned.
2. Macrame Plant Hanger with Beads
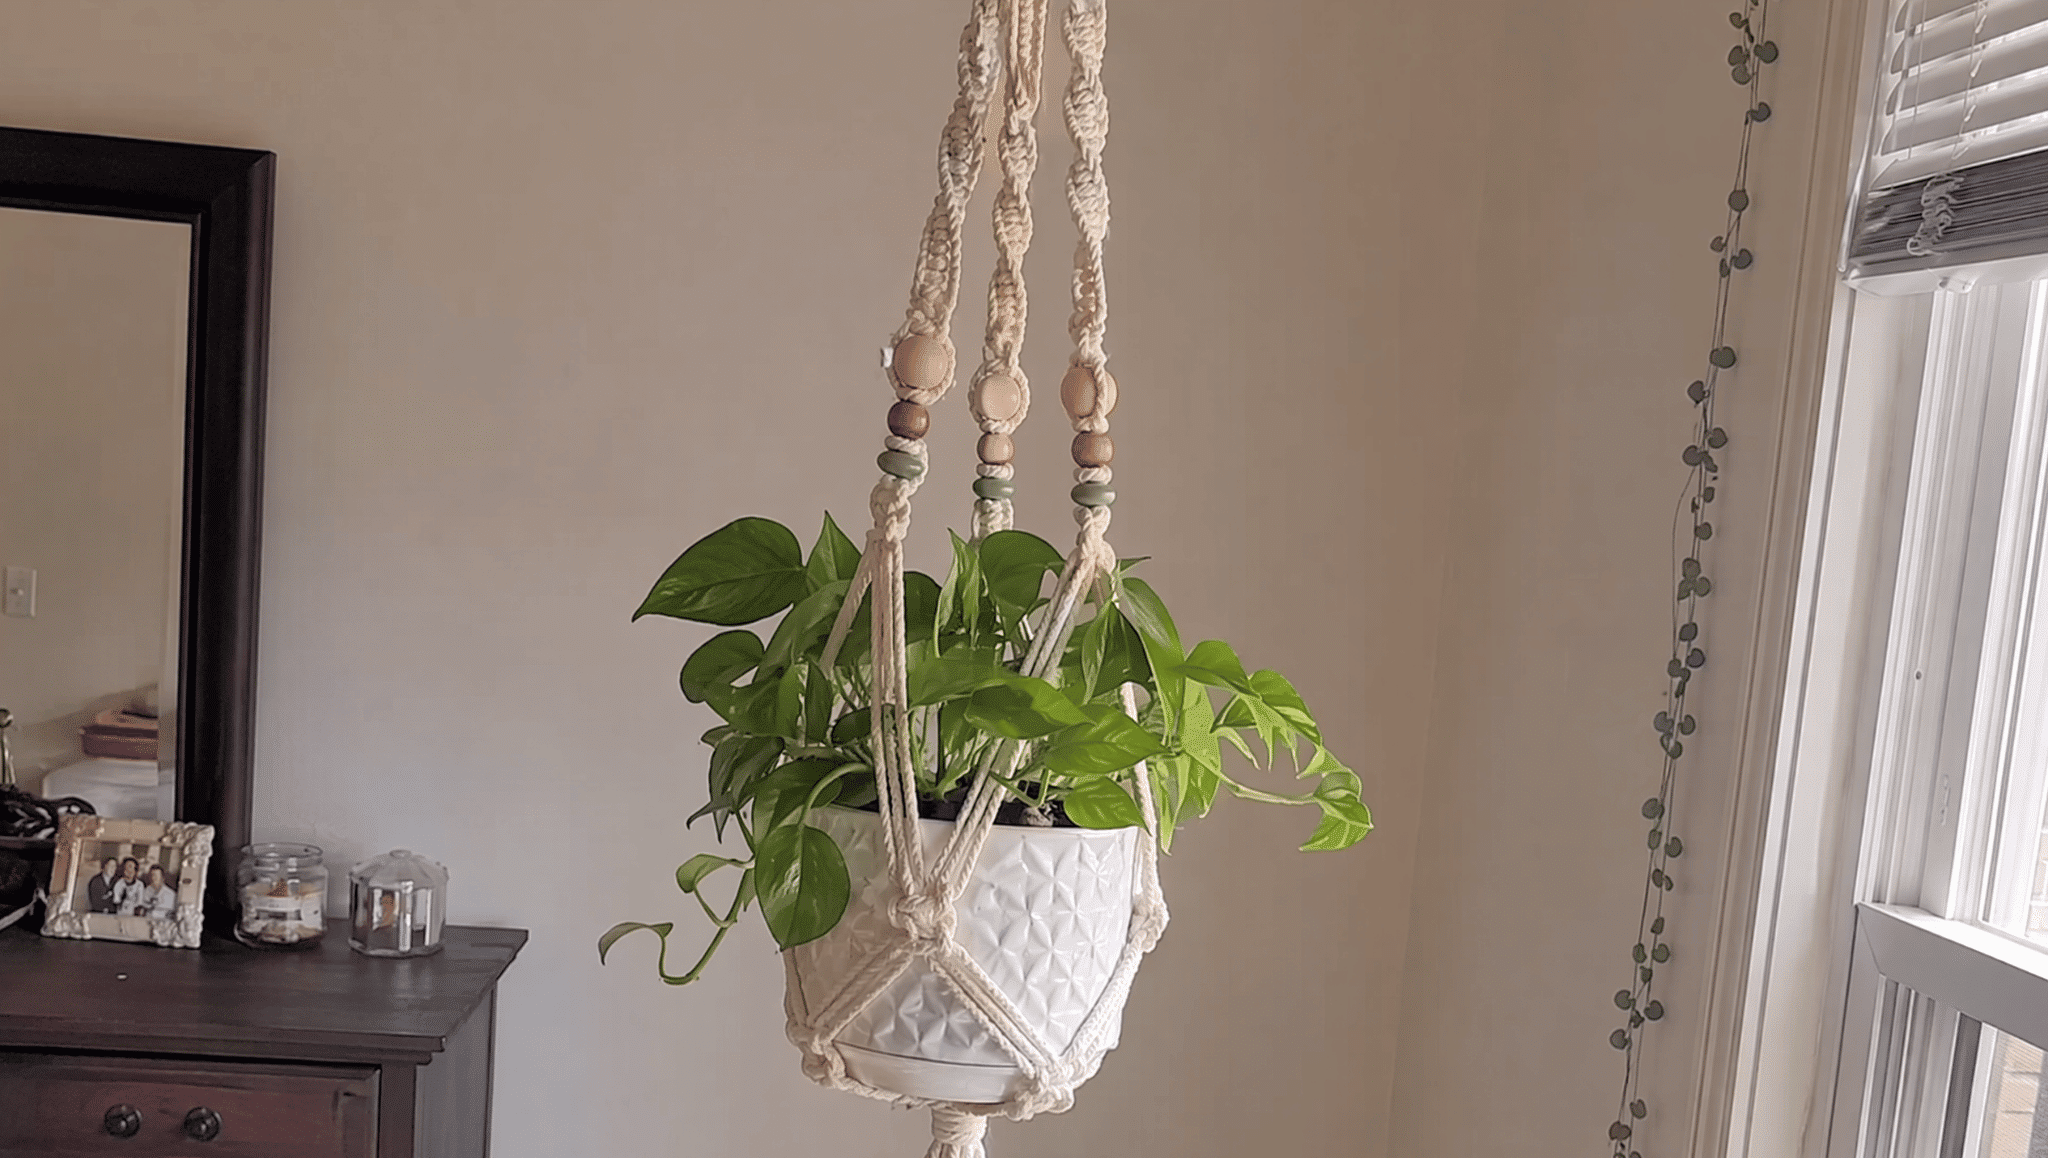
Beads are an easy way to add color and personality to your hanger. Simply slide wooden or clay beads onto your cords before or after tying your knots.
You can add them between spiral knots or right above the plant holder for a decorative touch. Beads come in many colors and sizes, so you can match them to your room’s style.
This small addition makes your hanger look more finished and unique, without adding any extra difficulty to the process.
3. Use Colored Cords for a Unique Style
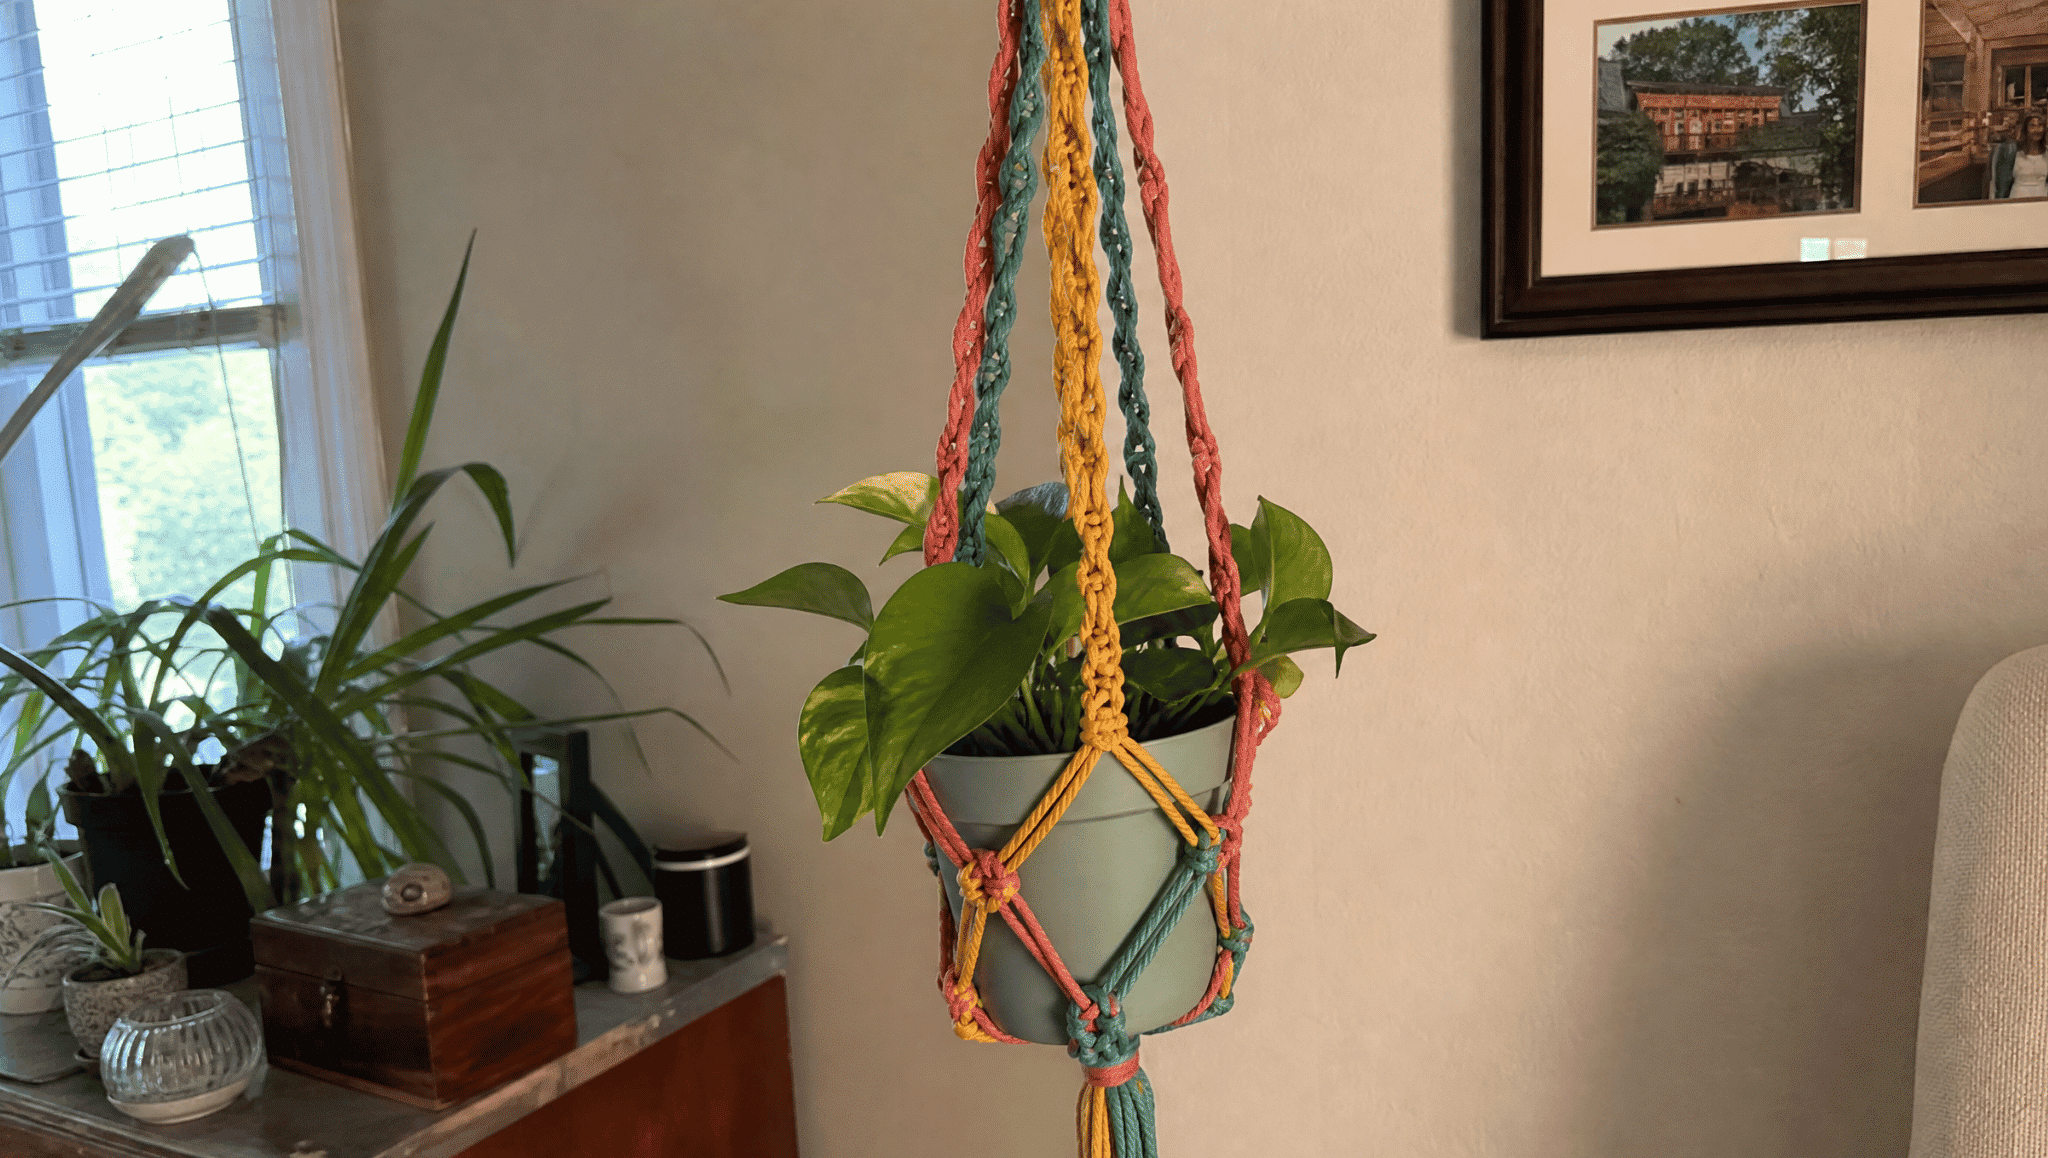
While natural cotton cord gives a classic look, colored cords can completely transform your DIY macrame plant hanger.
Try soft pastels for a calm, boho vibe, or bold shades like mustard, rust, or teal for something more eye-catching.
You can even mix two or three colors together within the same hanger for a fun, layered effect.
Just make sure the cord material is still strong enough to hold the weight of your pot, so style doesn’t come at the cost of durability.
4. Mix Different Knot Patterns Together
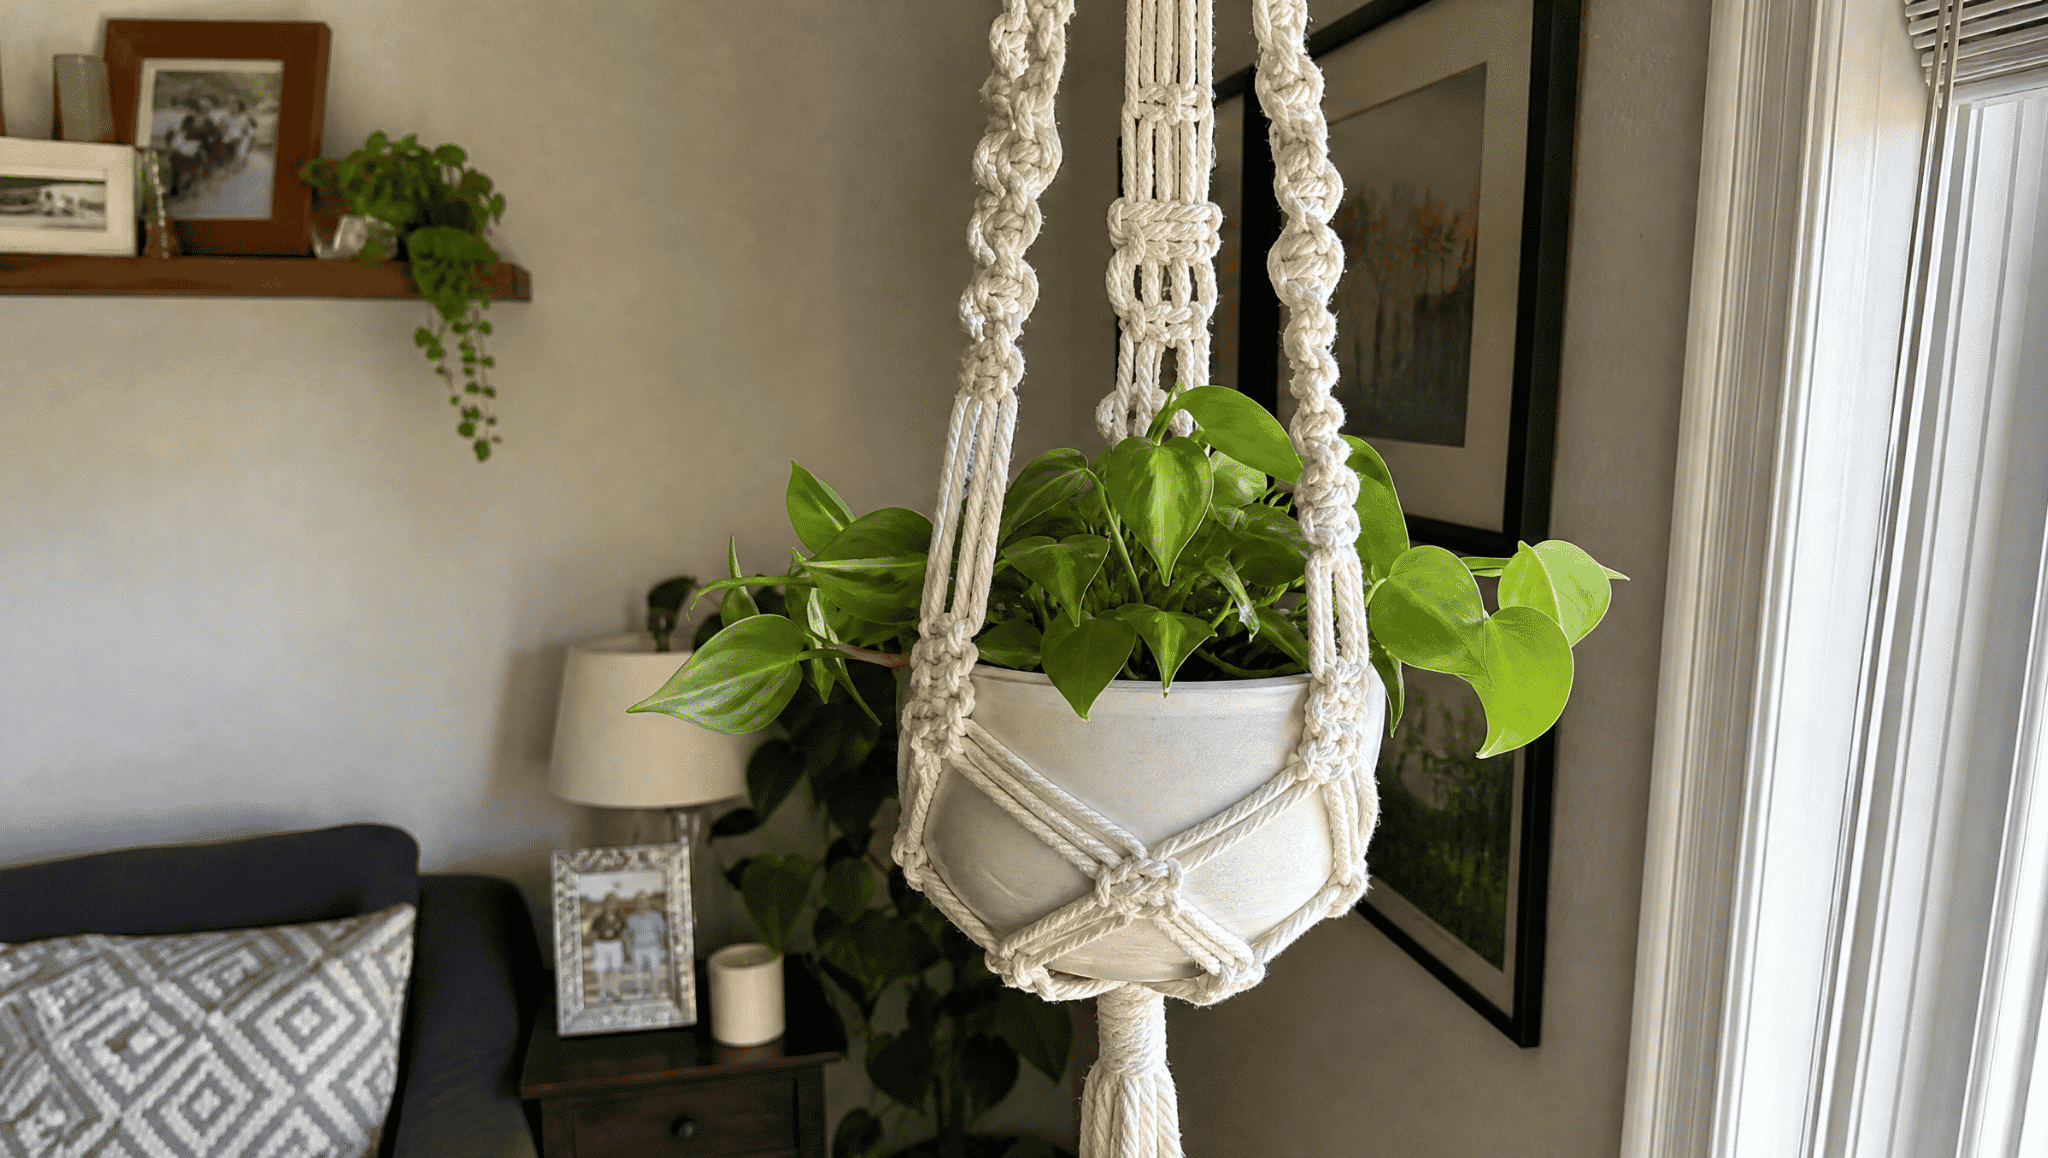
Sticking to just one knot type works fine, but mixing patterns adds more texture and visual interest to your hanger. You can combine square knots with spiral knots, or add in simple twists and gaps between sections.
This gives your DIY macrame plant hanger a more layered, handmade appearance instead of a flat, repetitive look.
Try experimenting on a scrap piece of cord first, so you feel confident before adding new patterns to your actual project.
5. Include a Wooden Base for Support
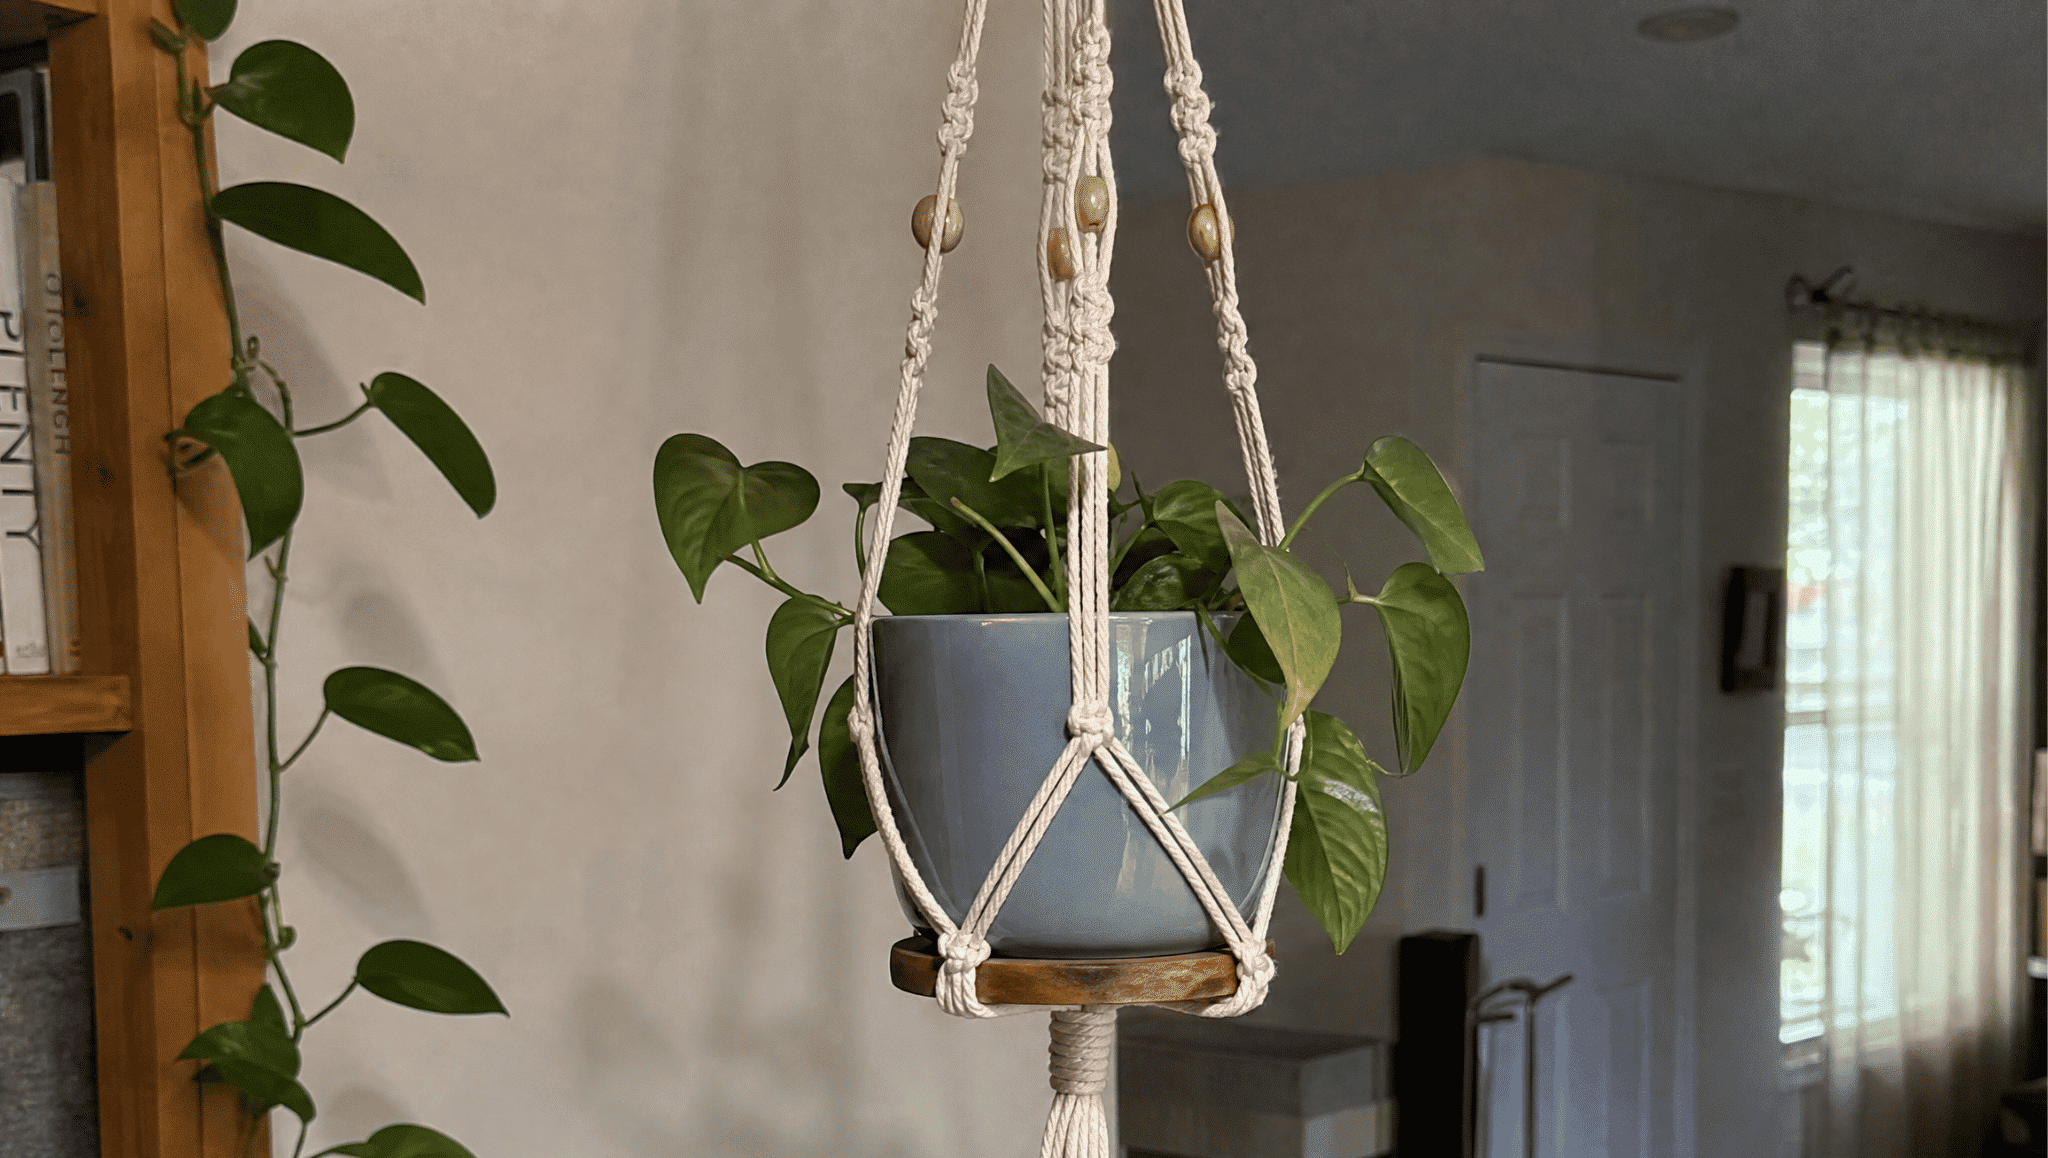
Adding a small wooden ring or disc at the base of your hanger gives your plant pot extra support and stability.
It helps distribute the weight evenly across the knots, especially for larger or heavier pots filled with soil. A wooden base also adds a natural, earthy touch that pairs nicely with macrame’s rustic style.
This small addition can make your diy macrame plant hanger sturdier, longer-lasting, and a little more polished in its final look.
Tips for Making a Strong Plant Hanger
A strong plant hanger keeps your pots safe and holding steady for a long time. Follow these simple tips to make sure your macrame hanger doesn’t loosen or break, even with a heavy plant inside.
- Use thick cotton cord for better strength and grip. A thin cord can stretch or snap under the weight of a heavy pot.
- Pull knots tight so they don’t loosen over time. Loose knots can slip over time, causing your hanger to sag or fall.
- Test the hanger with an empty pot before adding soil. This helps you check the strength before risking a full, heavy plant.
- Hang it from A sturdy hook or ceiling beam. A weak support can break, no matter how strong your knots are.
- Check knots regularly and re-tighten if they feel loose. Cords can loosen with time, so quick checks keep them safe.
Conclusion
Making a diy macrame plant hanger is a simple way to create handmade décor while learning a new craft.
With basic supplies, easy knots, and clear steps, even beginners can make a beautiful plant holder at home.
An easy macrame plant hanger does not require advanced skills, and small changes in knots or designs can create different looks.
By following the right process and keeping the cords organized, you can make a sturdy hanger for your favorite plants.
Start with the basic design, practice the knots, and enjoy creating something useful with your own hands.
Frequently Asked Questions
How much cord do I need for a macrame plant hanger?
The amount depends on the hanger length and pot size; beginners usually need several long pieces of cord to allow room for knots.
Can I make a macrame plant hanger without a ring?
Yes, a hanger can be made without a ring by creating a loop from folded cords and securing it with a knot.
What type of cord is best for a macrame plant hanger?
Cotton macrame cord is a popular choice because it is soft, easy to knot, and creates clean patterns.